Showing posts with label Camping Food. Show all posts

Chewy Fudge Brownies


Life beats a charming rhythm when you uncork it from its mundanes. It sings a different chime when you whisk away from the regular. Our weekend went by, but it was nothing like the usual. Before it flipped over to Saturday, we headed out of city for three solid days of fun and adventure to a place we had little known or expected it to be. Well, two and half, if I have to be precise. North Conway it is known, a lovely little destination for home-lost adventurers like us. There's so much around there for every season that a couple of excuses to go back there again may not seem enough. Tucked in sheer wilderness under the bellies of New Hampshire, here's where every vacation can be an inspiration to another one.

As the roads wind up to the city of North Conway, the scenes change. Its urban at the face of it, yet cleverly rural. There are malls, restaurants and ad banners everywhere. Yet, as you drive up the northern hemisphere, the mountain peaks play a peek a boo at every tide of the road. There's a cast of green spell in all shades, a submission to nature, with breath taking views that make you wanderlust. It makes you twisted in tongue and in loss of words.

Chewy Fudge Brownies Prep


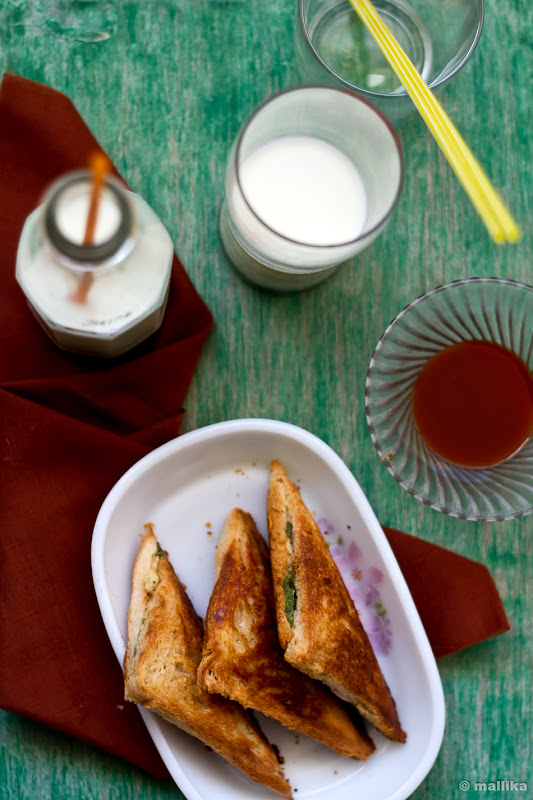
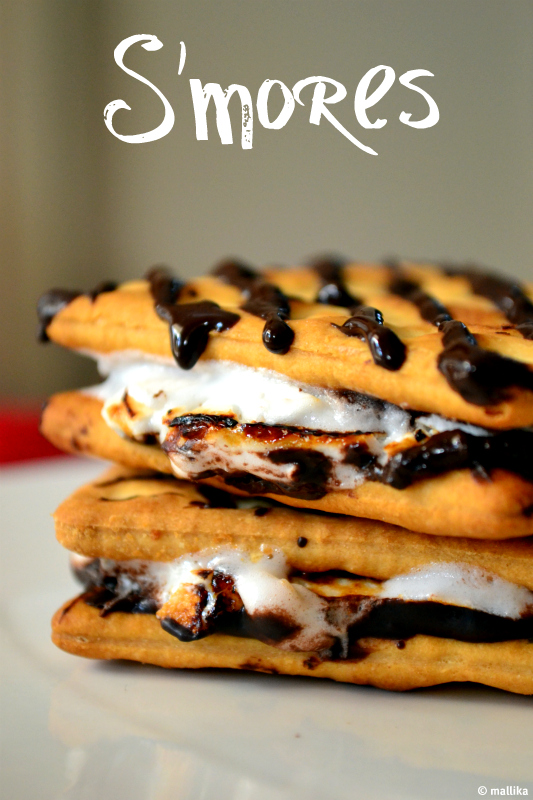
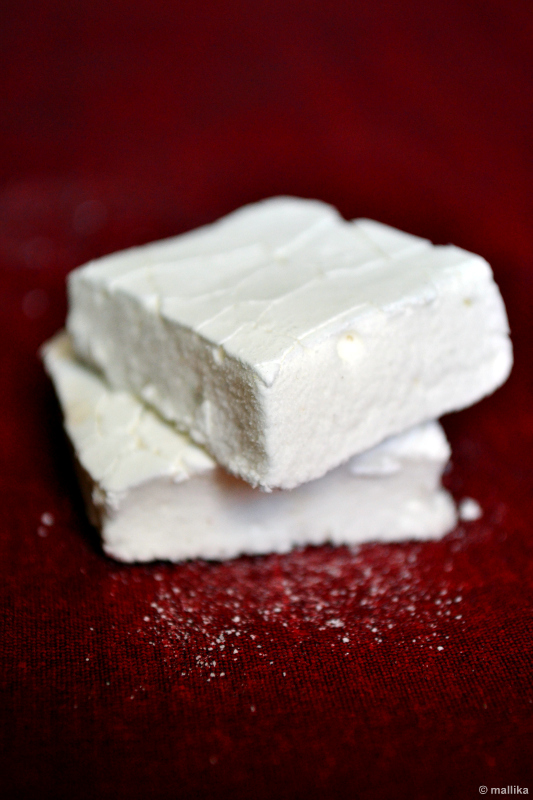
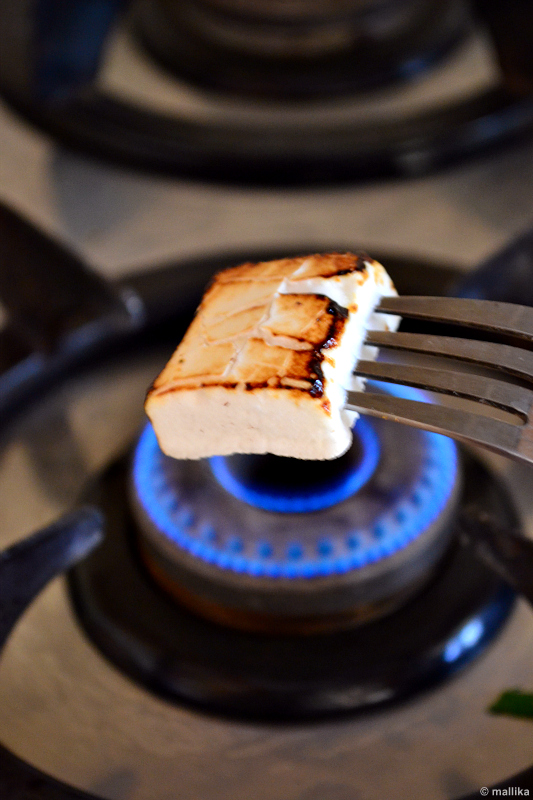
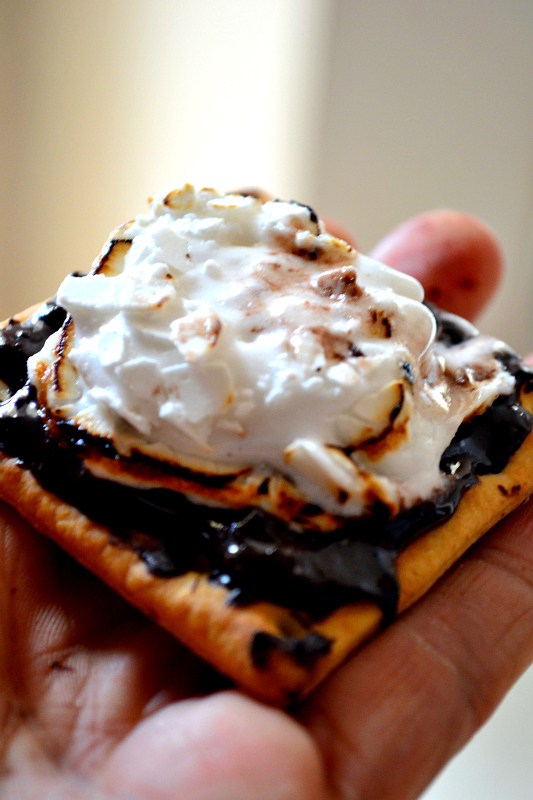
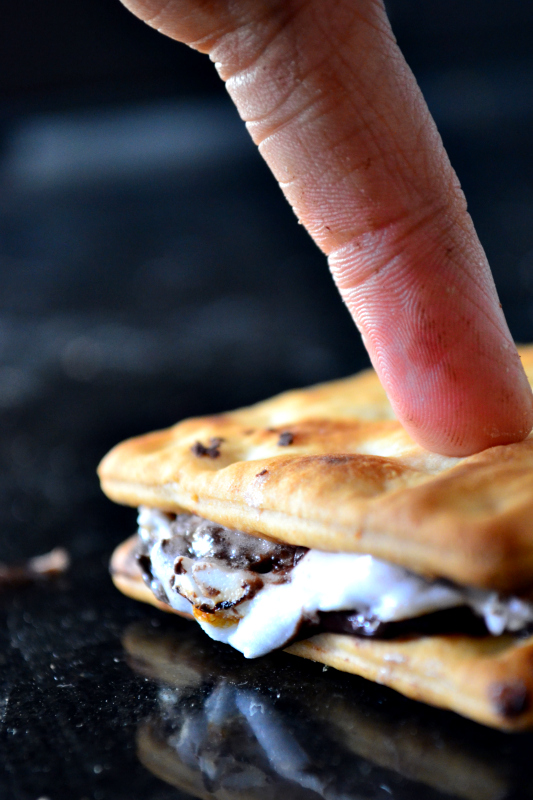
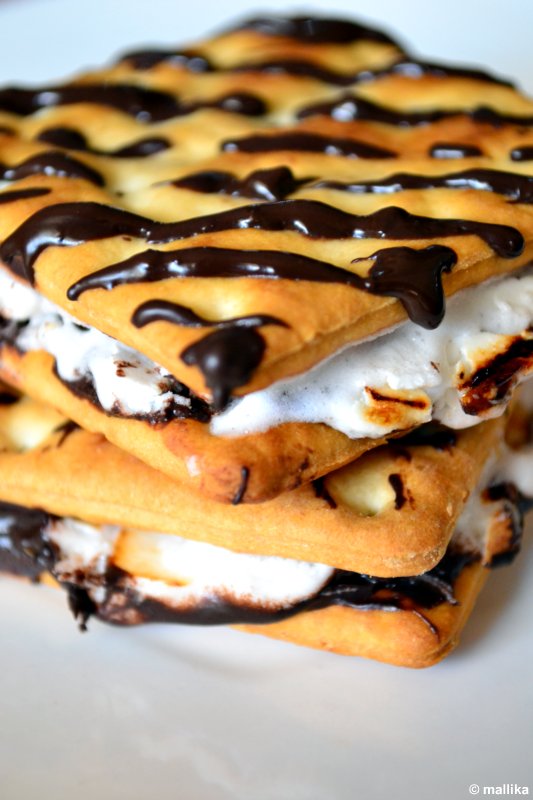
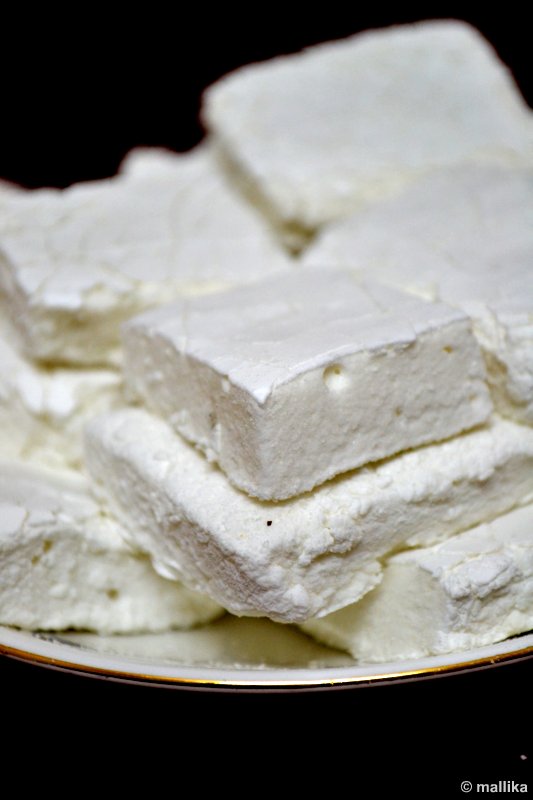
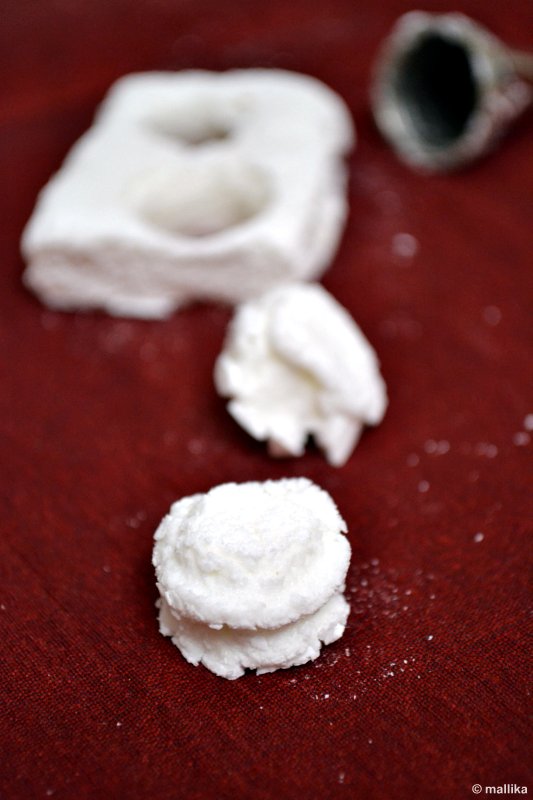
We went camping in a group of ten, living life in tents and sleeping bags, holding lanterns to cook food on the grill, sitting by the fire and toasting up s'mores, curling up the feet to bare the chilly nights and seeing starry constellations in inky-black skies. And that makes you forget the clock and the cameras too! For the first time ever, we took our SLR out on a trip and came home without shooting any on it. Its hard for me to swallow that.

New Hampshire does that to you. You get to live what you don't see everyday. Many choose to stretch their lazy bones on the sand, either batting their eyelids and soaking up some sun or, flipping a book. But, we went tubing along the river shores where the loons nest. We let the sun shine on our backs. We wallowed and waded through knee deep waters, where the sand and stones make you wiggle your toes and the sun seeps skin deep to stimulate melanin. We ventured into woods and echoed tweets of finches too.

Its the kind of place that makes you want to wake up early to chirping birds and stay up late to the sounds of cicadas. It doesn't matter what hour of the day you are stepping into. There always seems a pause. Where the only other sounds are either the ripples of the meandering Saco river, the sway of tall ferns and chirping of finches. That was our home for those two odd days, all well lived.

Chewy Fudge Brownies Cut


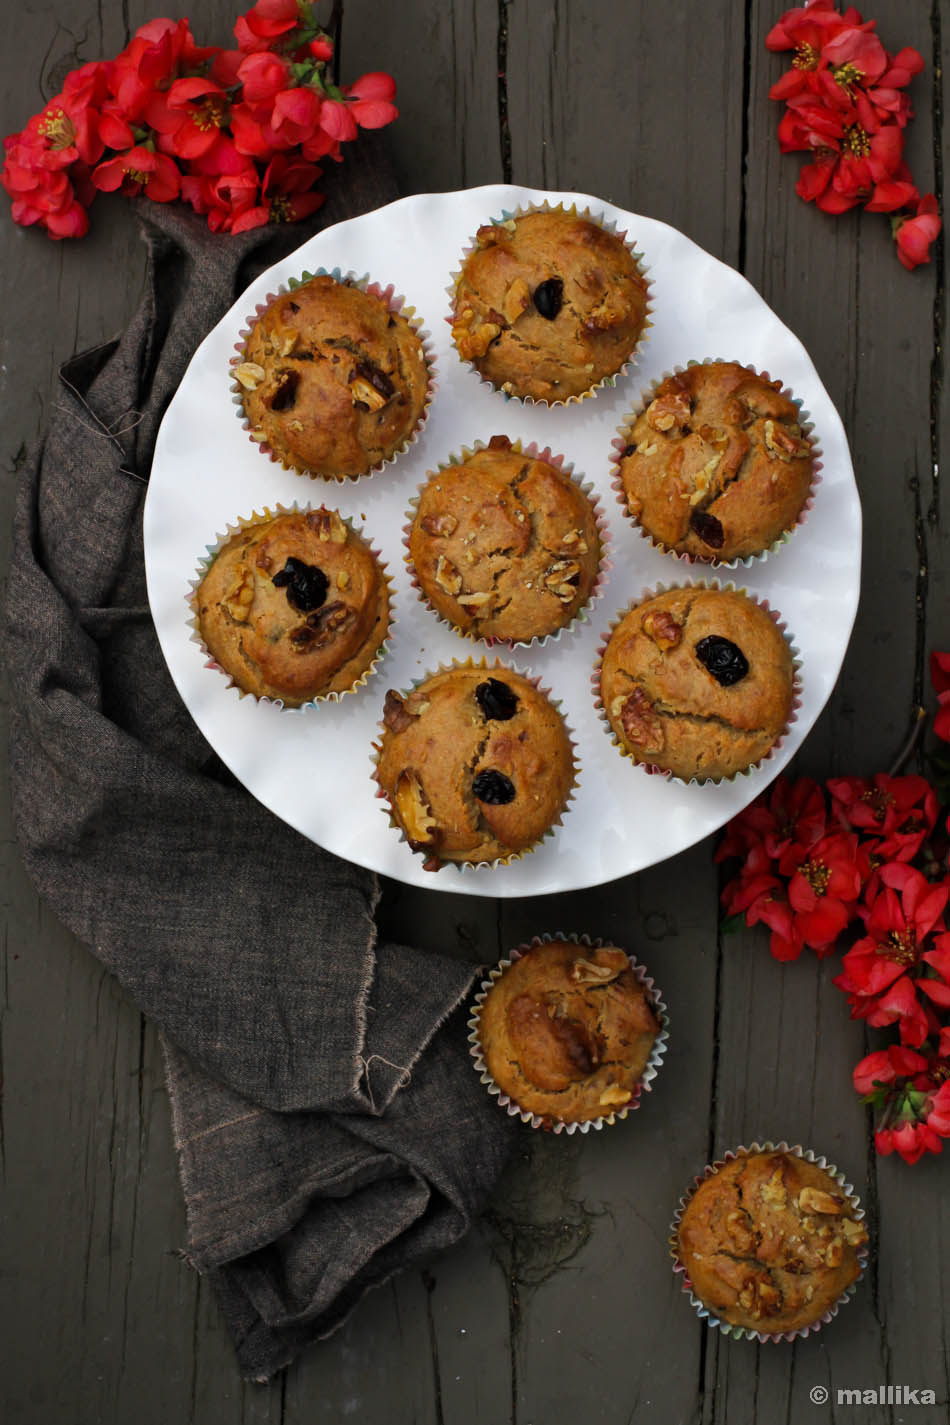
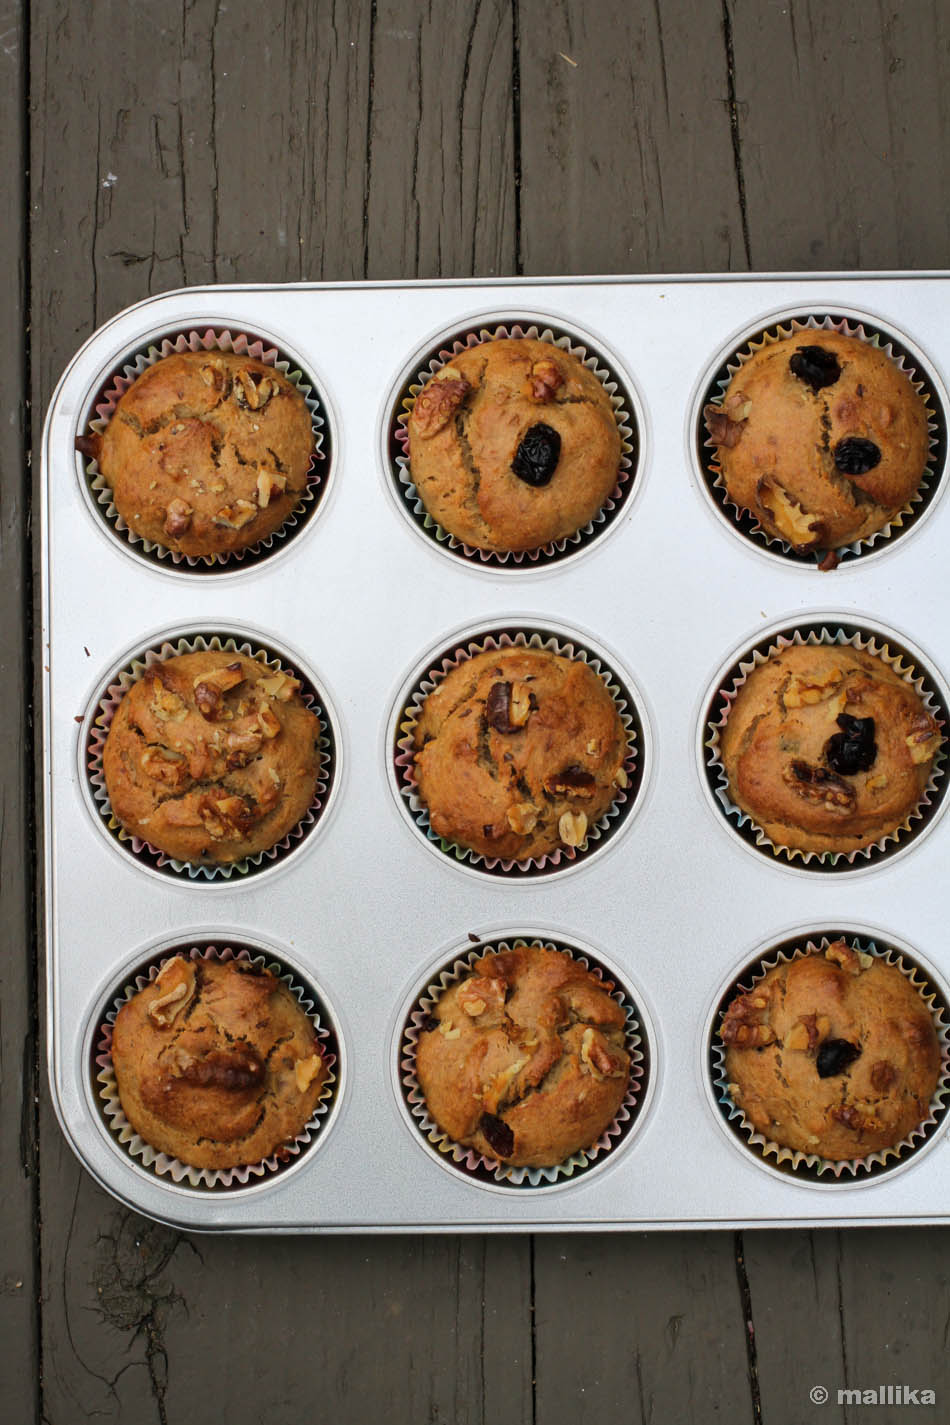
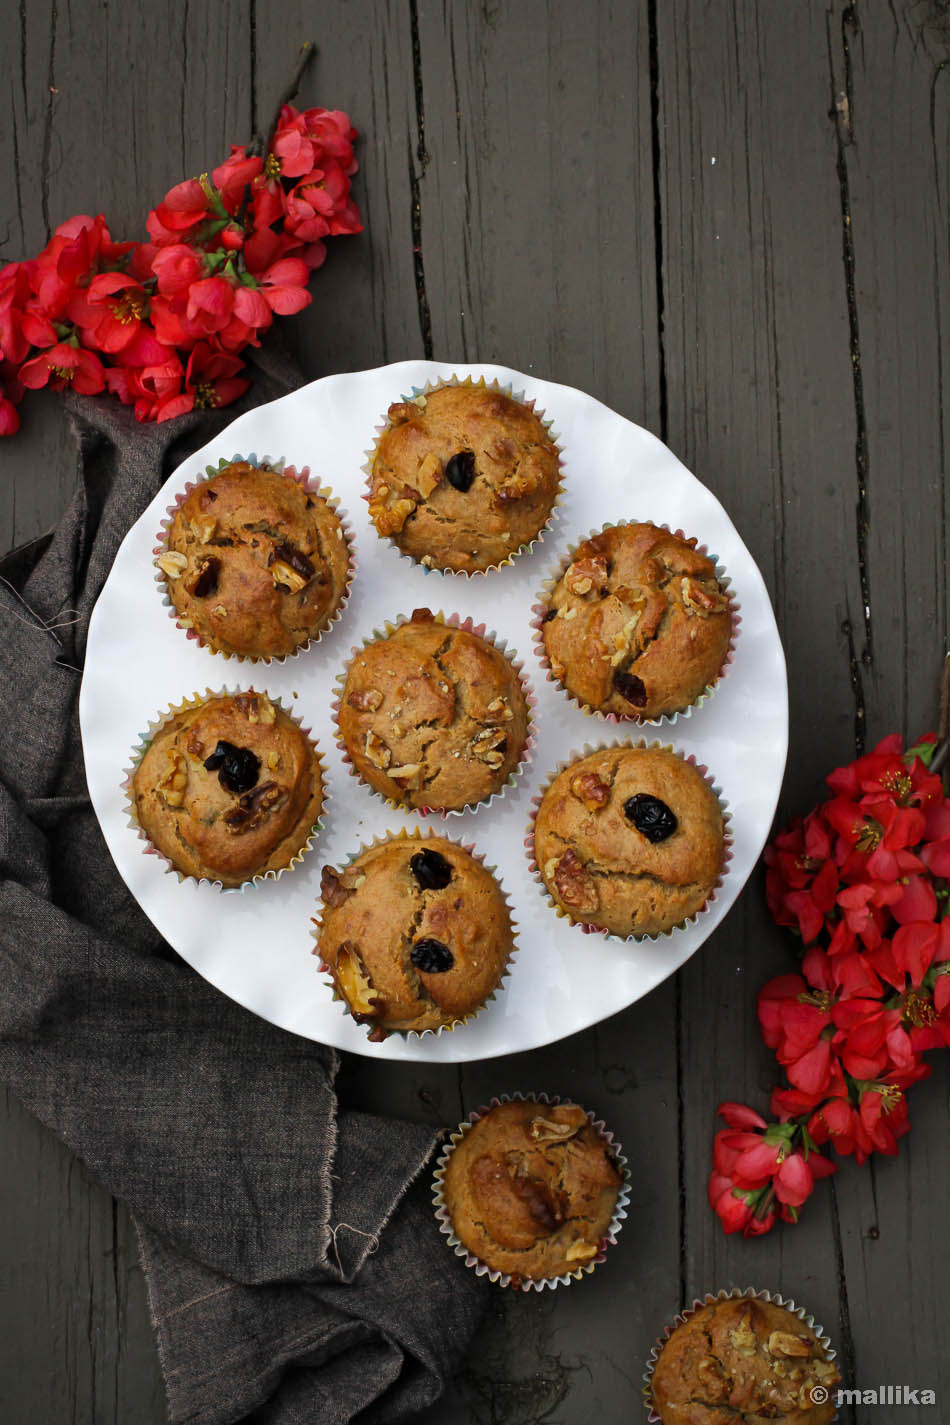
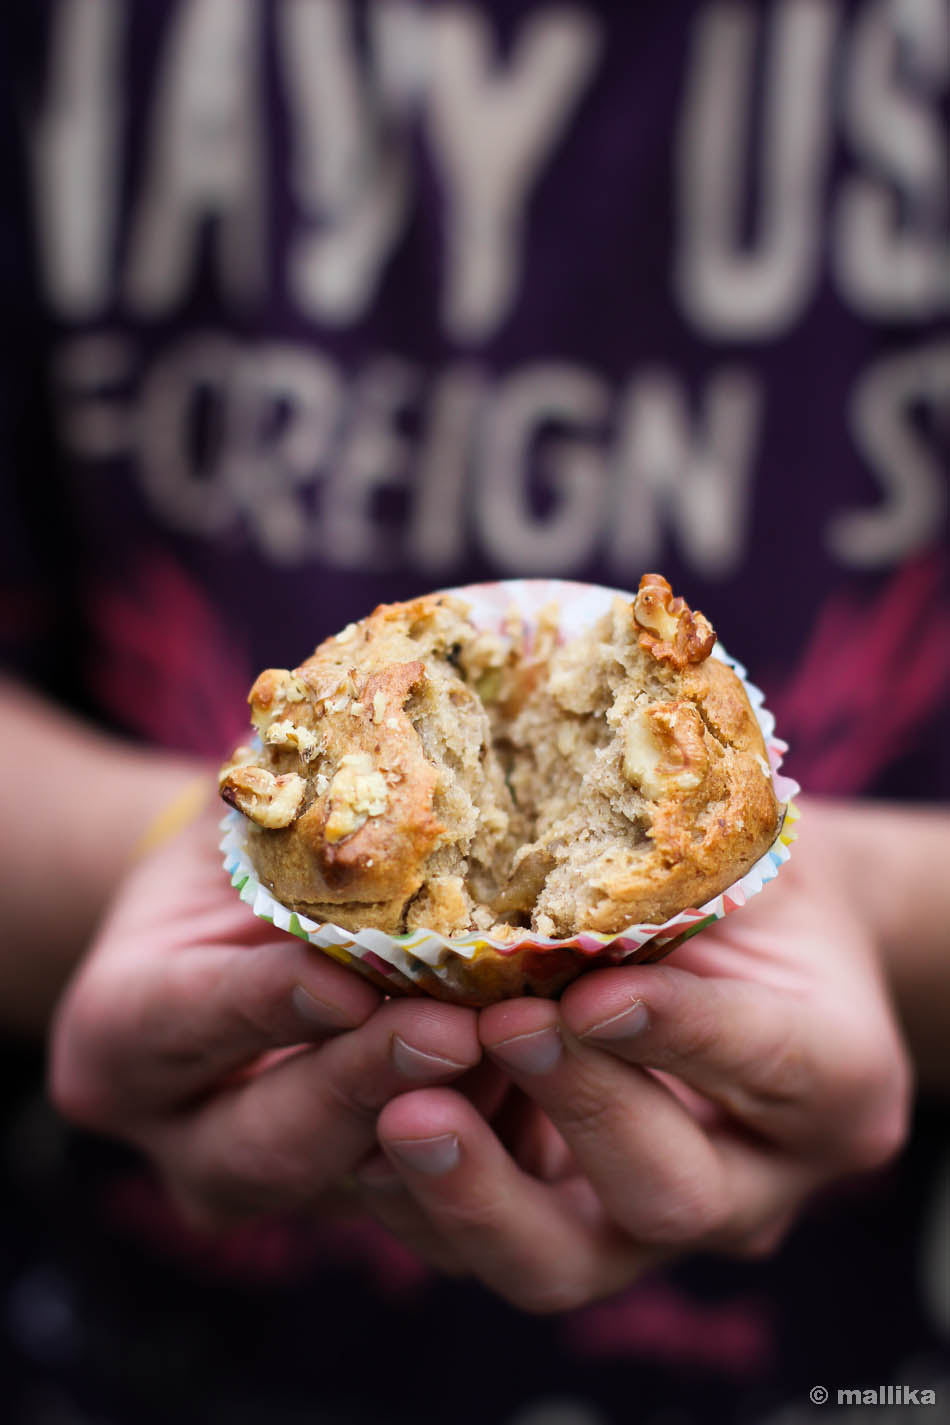
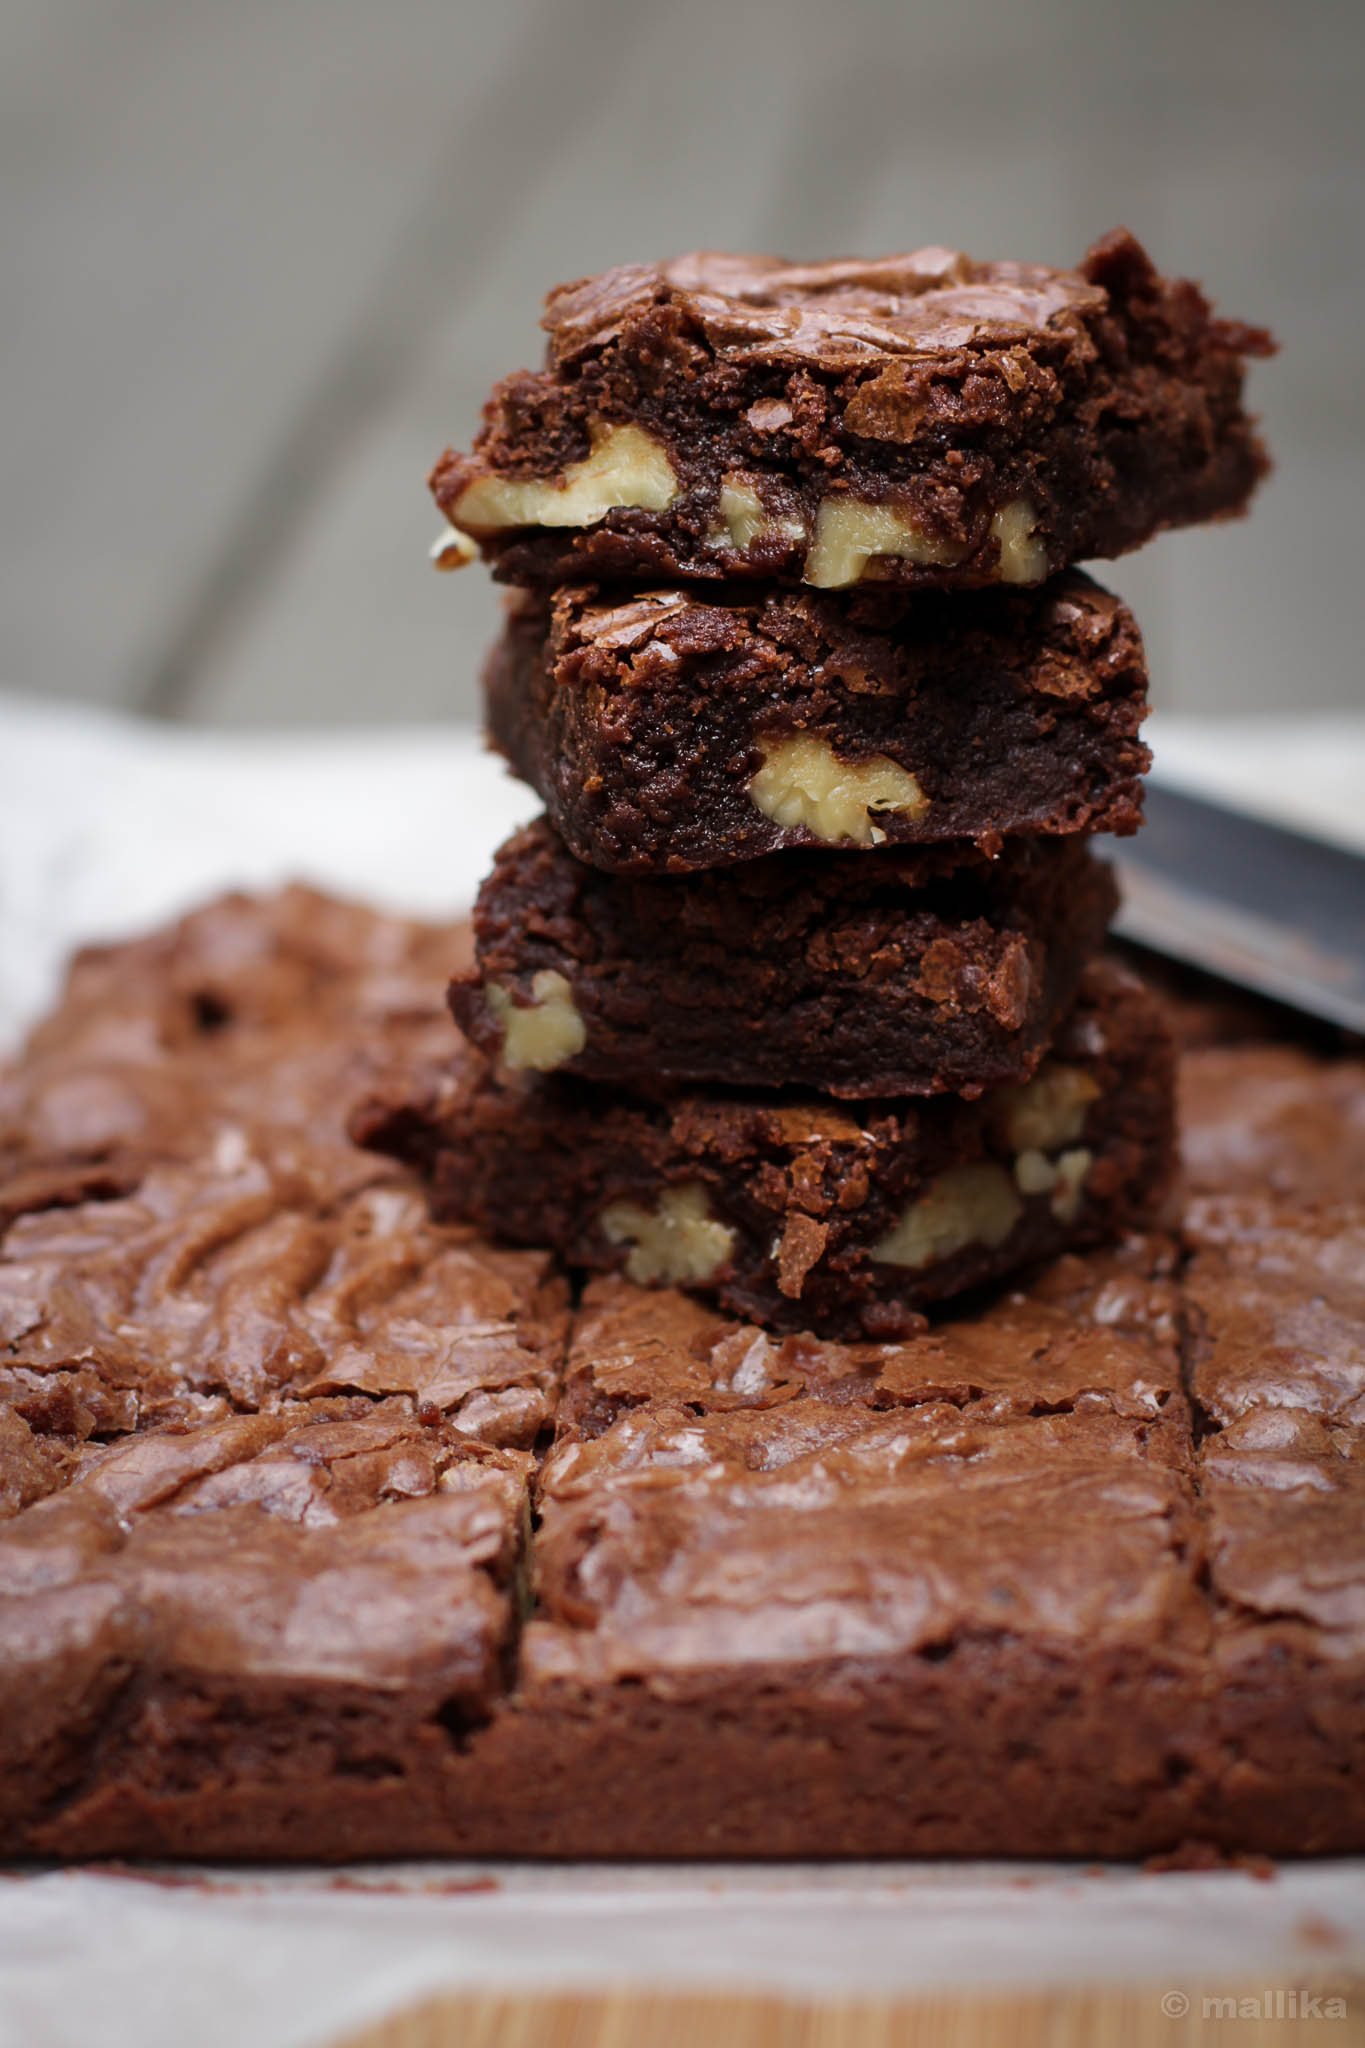
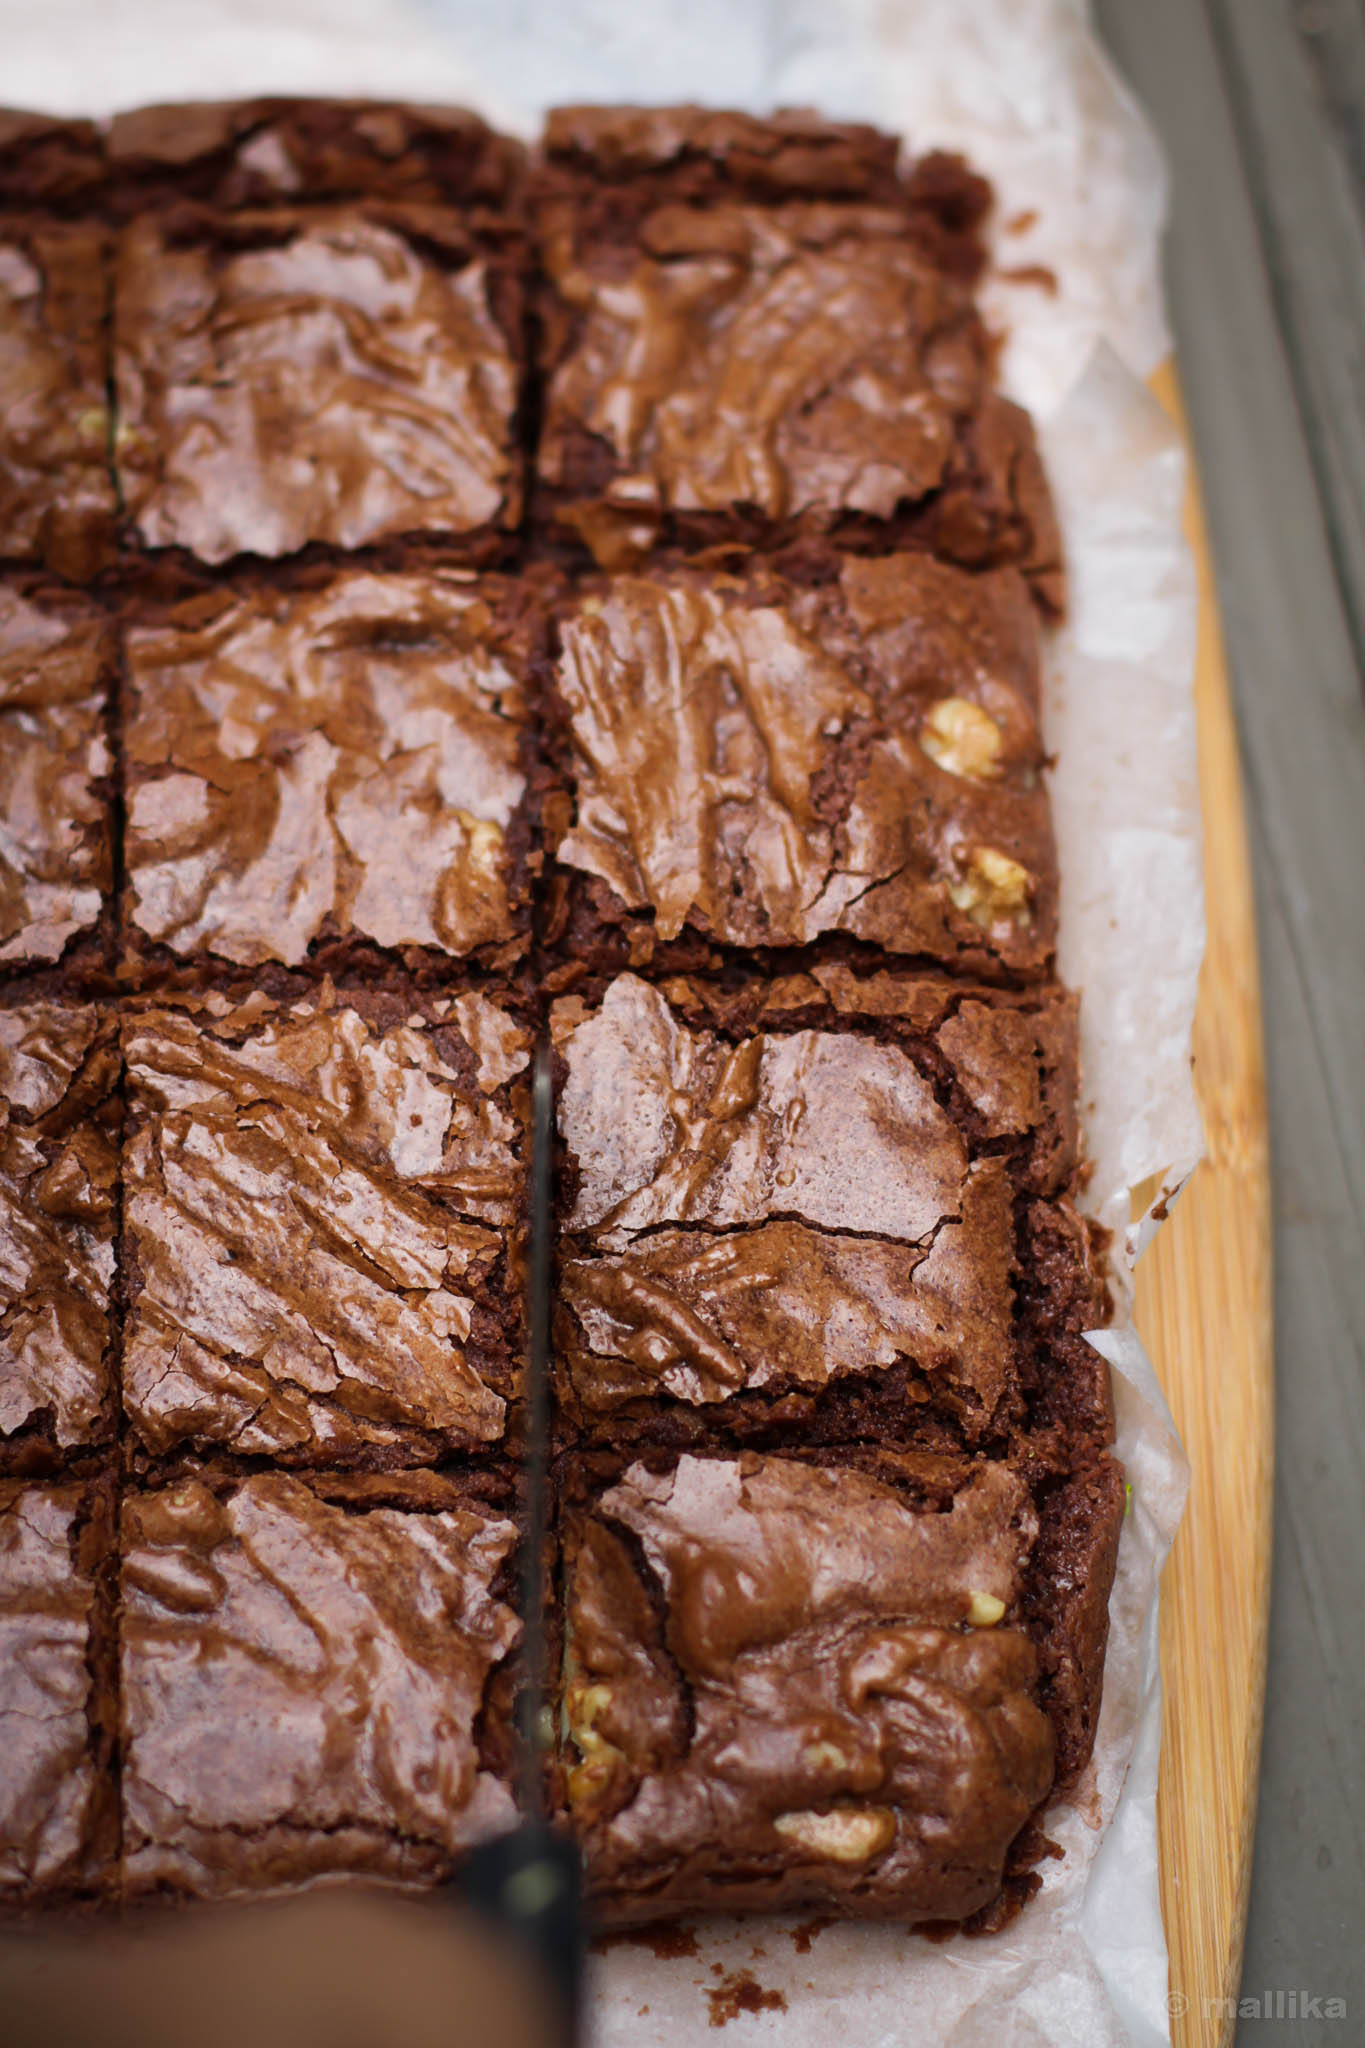
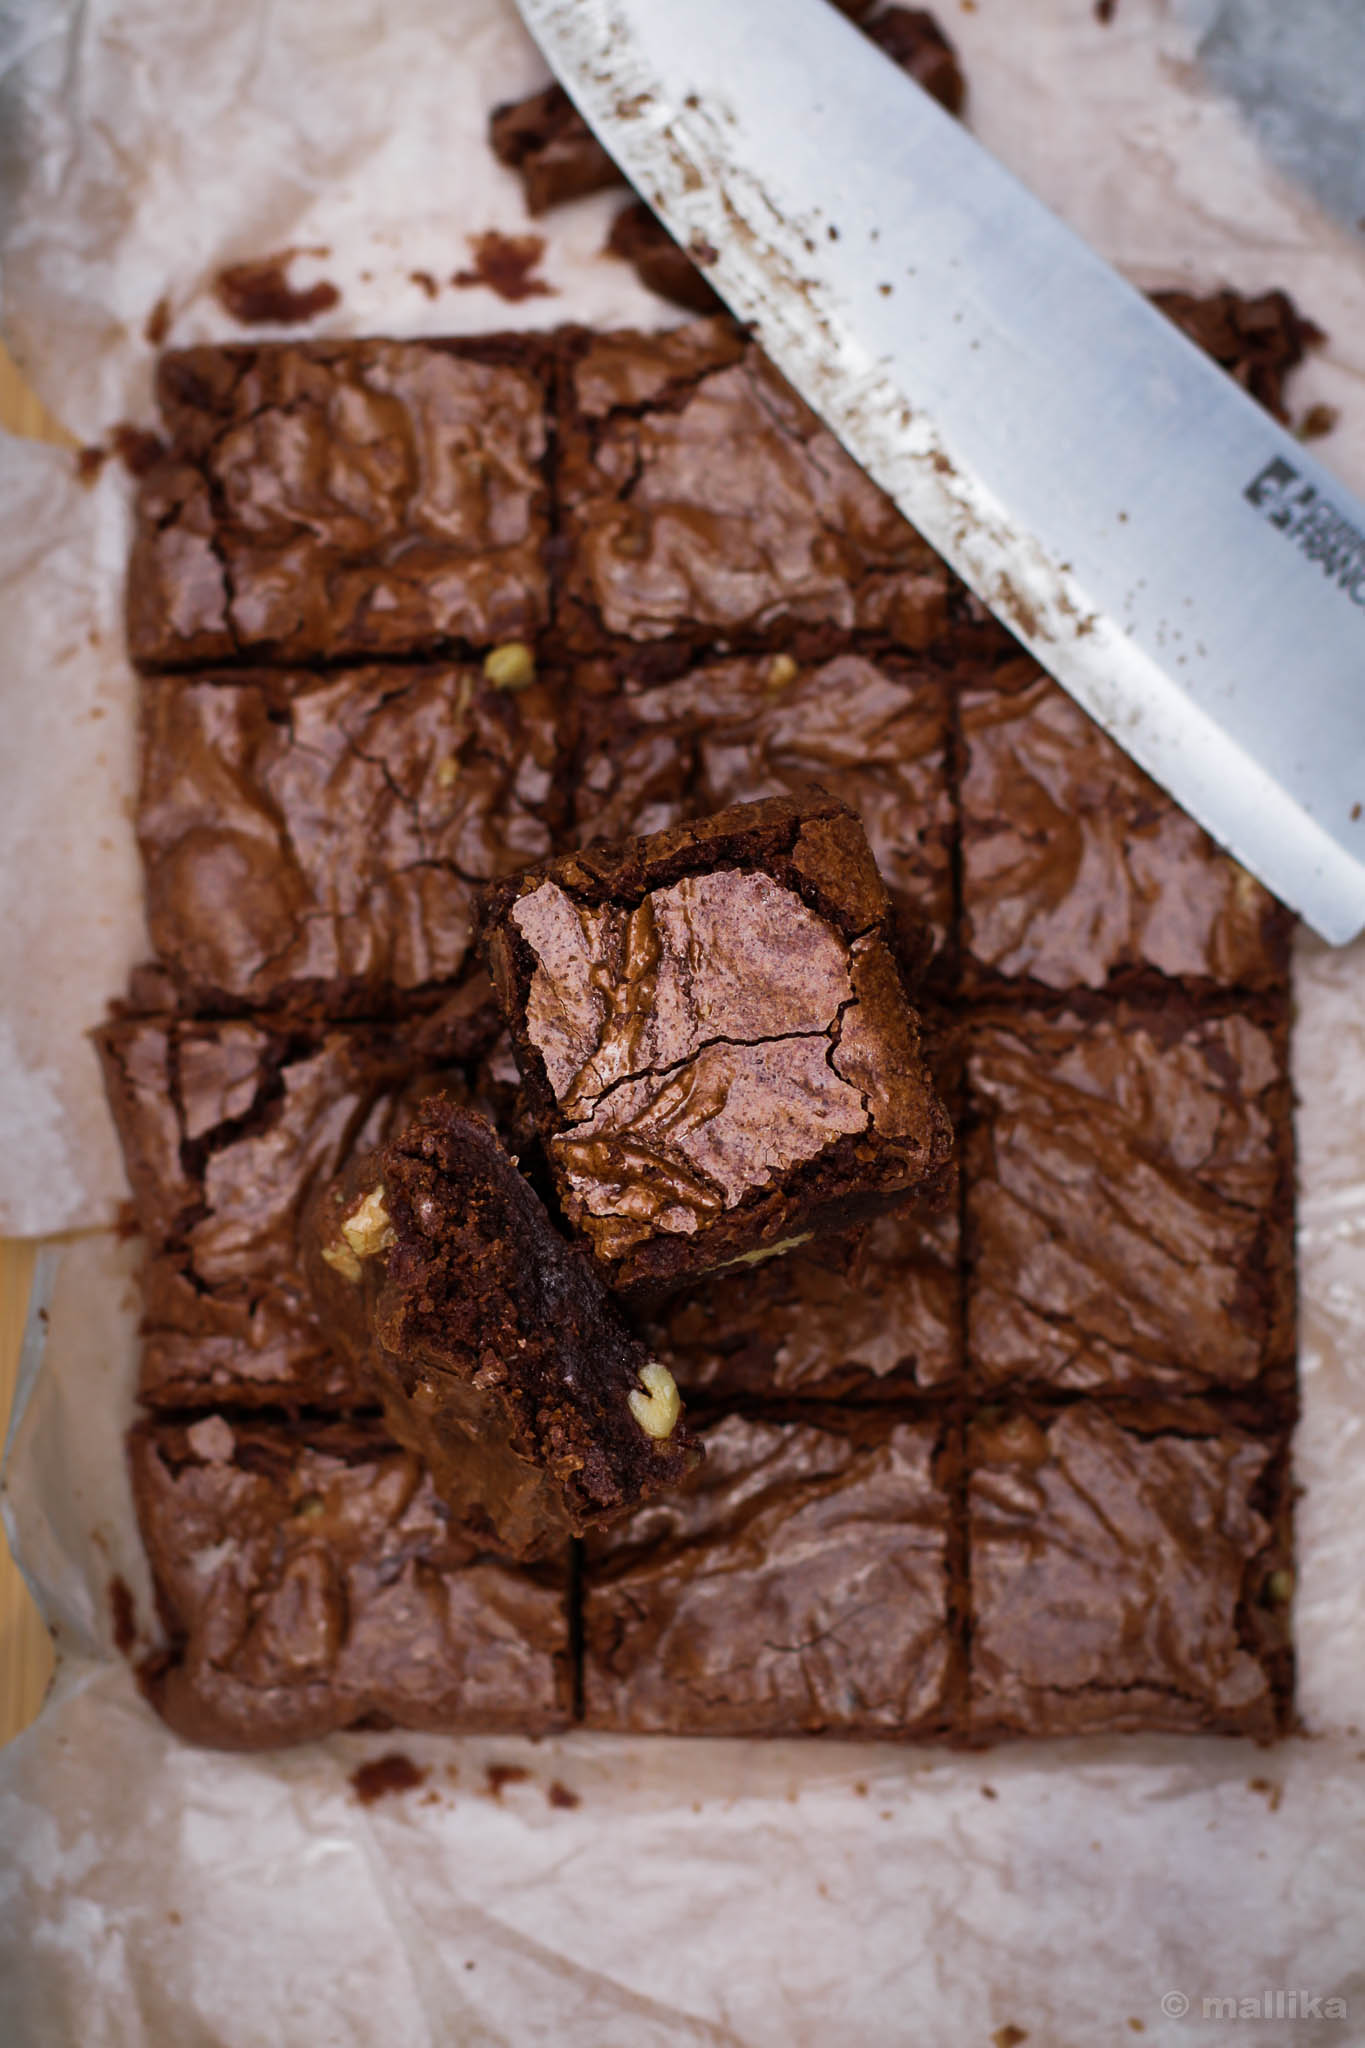
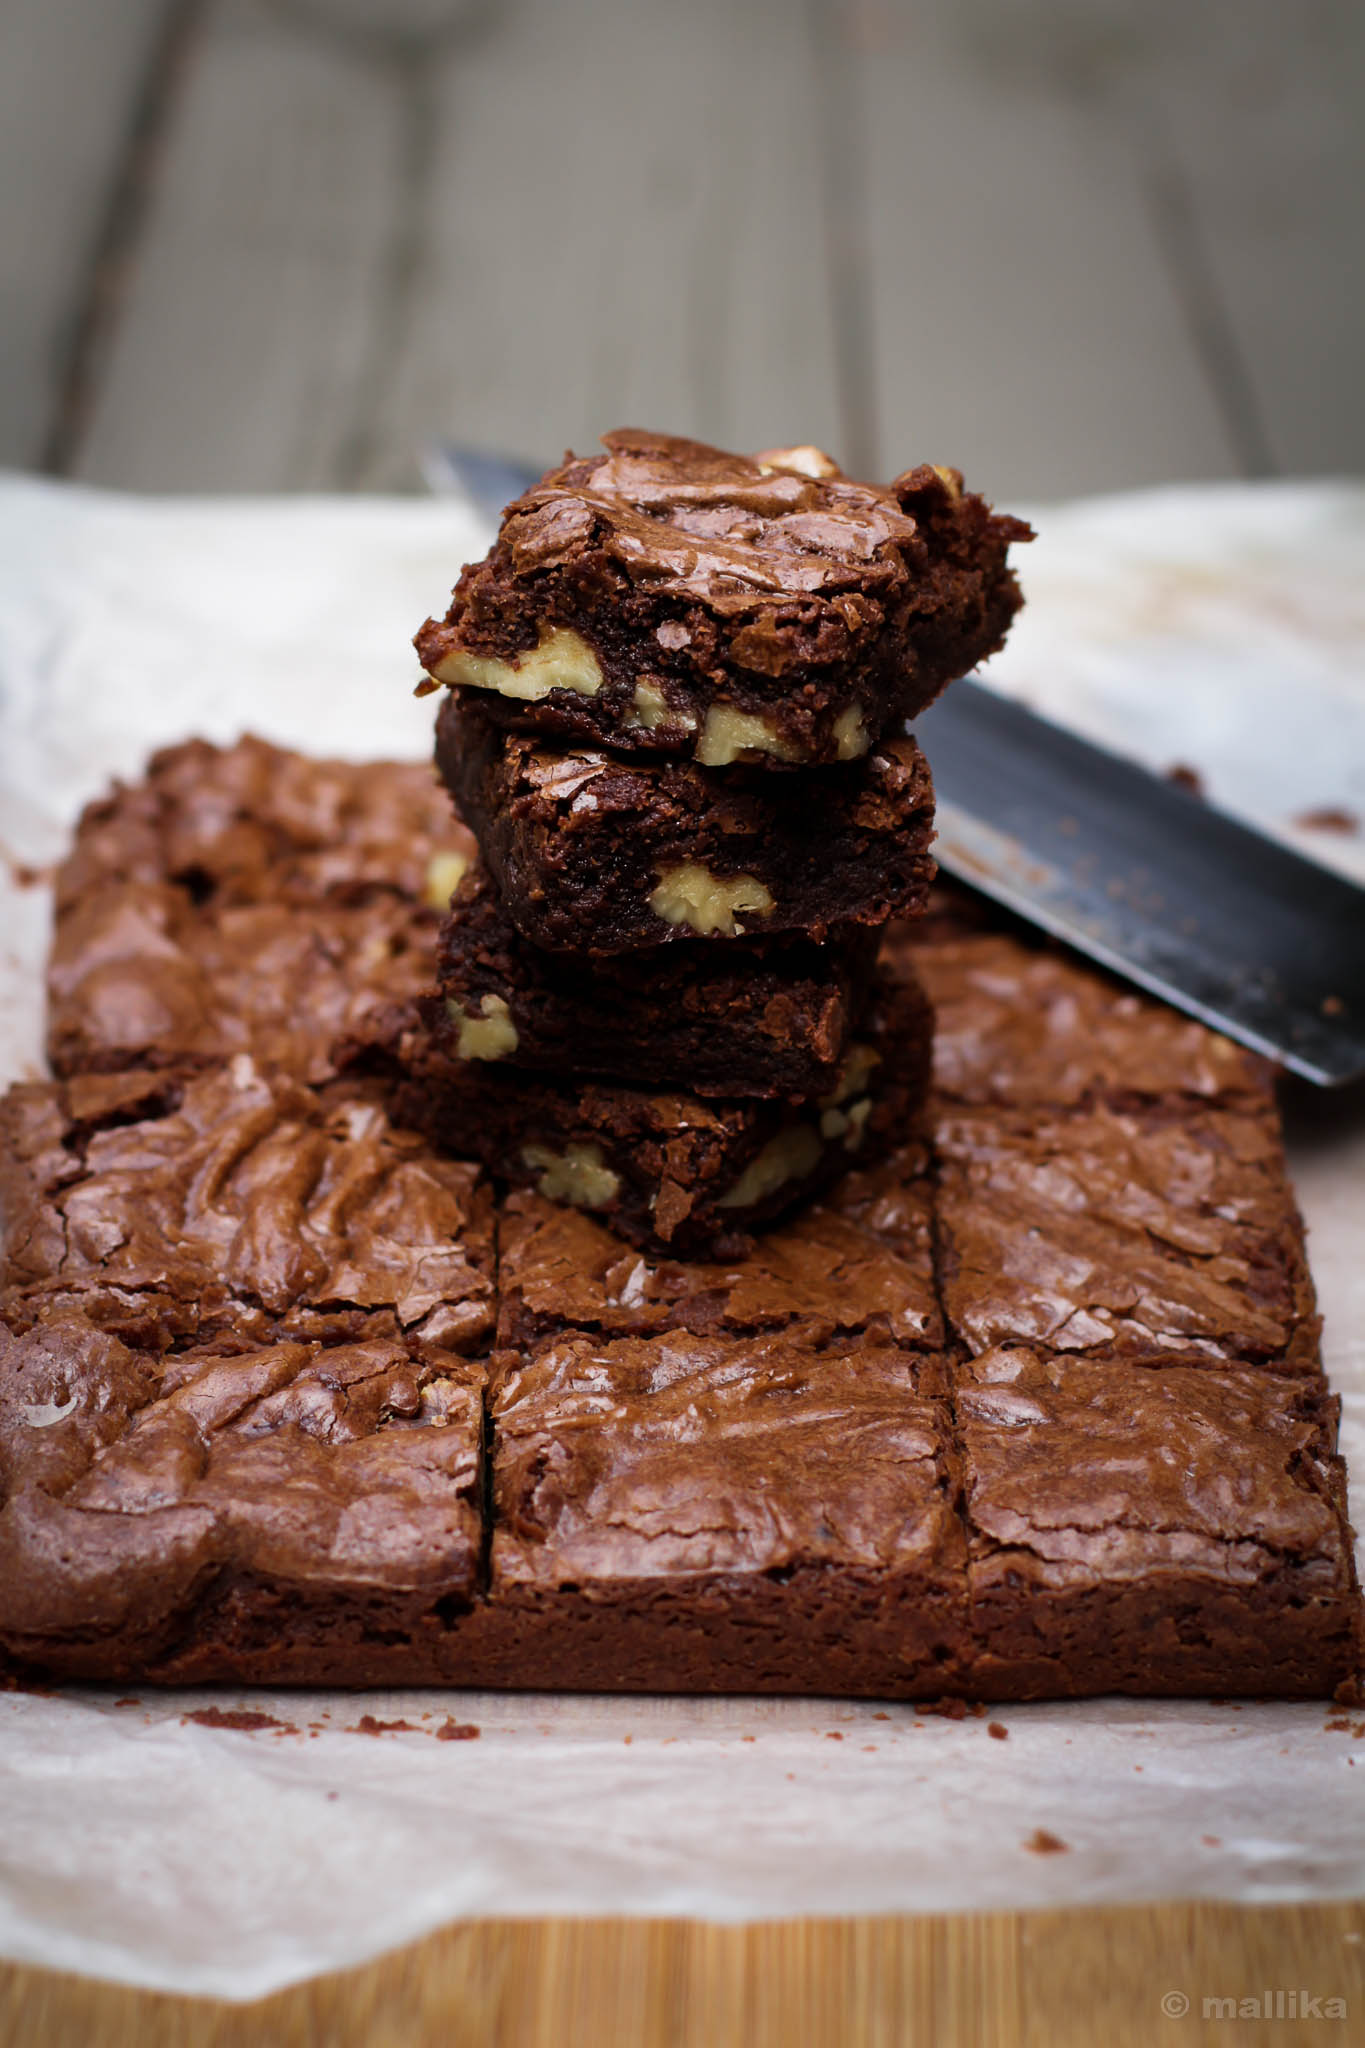
When the sun went down to take its customary daily dip, we warmed ourselves by the fire, lit up the grill and ate Quesadillas, Corn on the Cob and drank Sparkling Fruit Mocktails. Brownies followed for the dessert. I baked these Brownies in the morning we left out and took them along for those camping dinner treats. They are wonderful to share in a group where splurging on good food can never seem enough, more so when you are in a gang of ten odd folks who enjoy good food and hearty laughs!

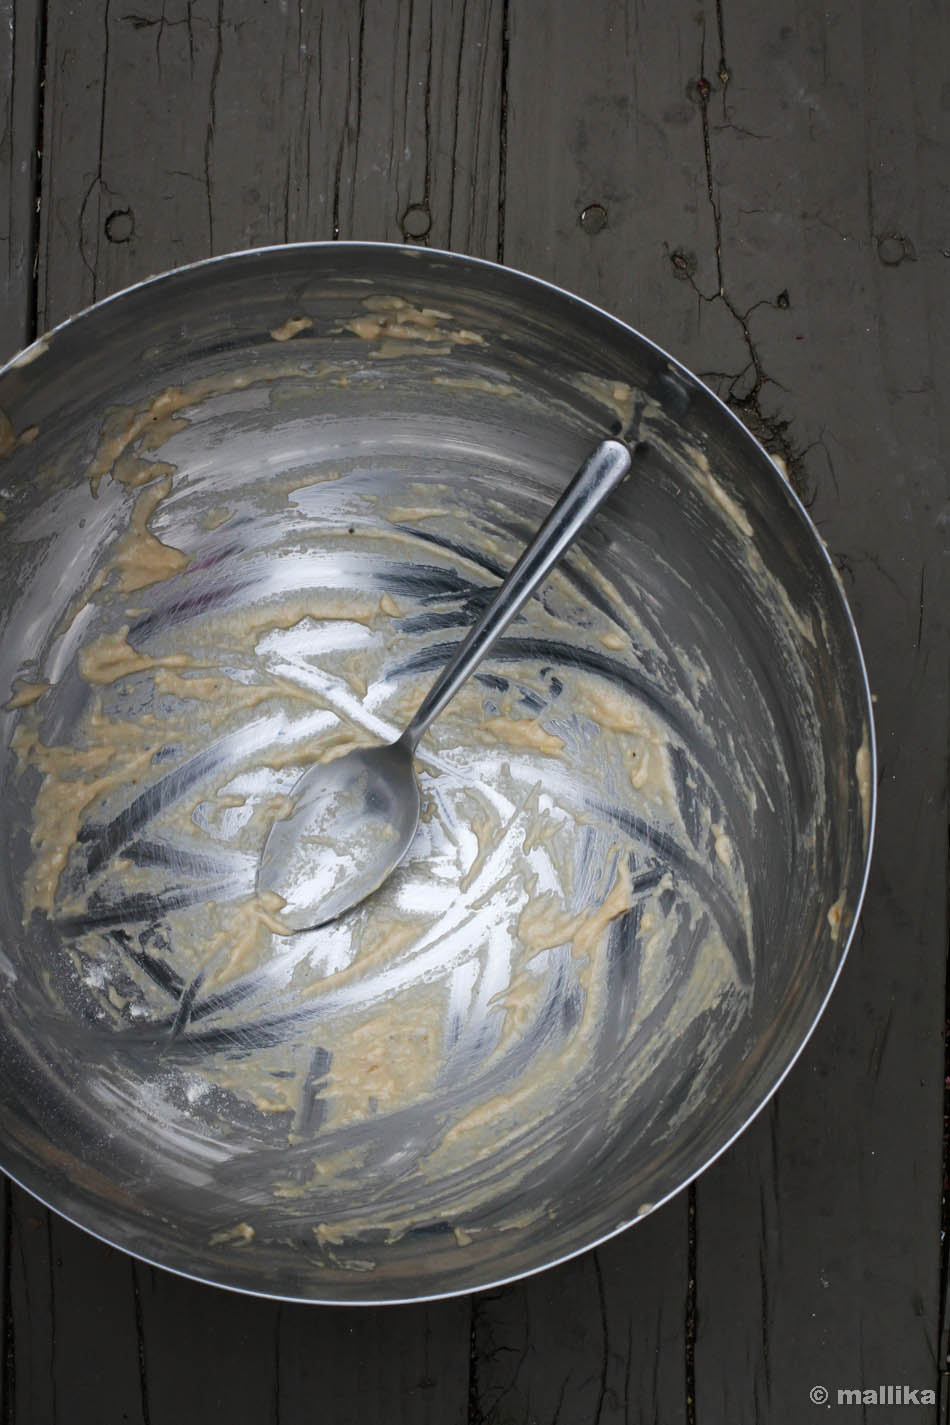
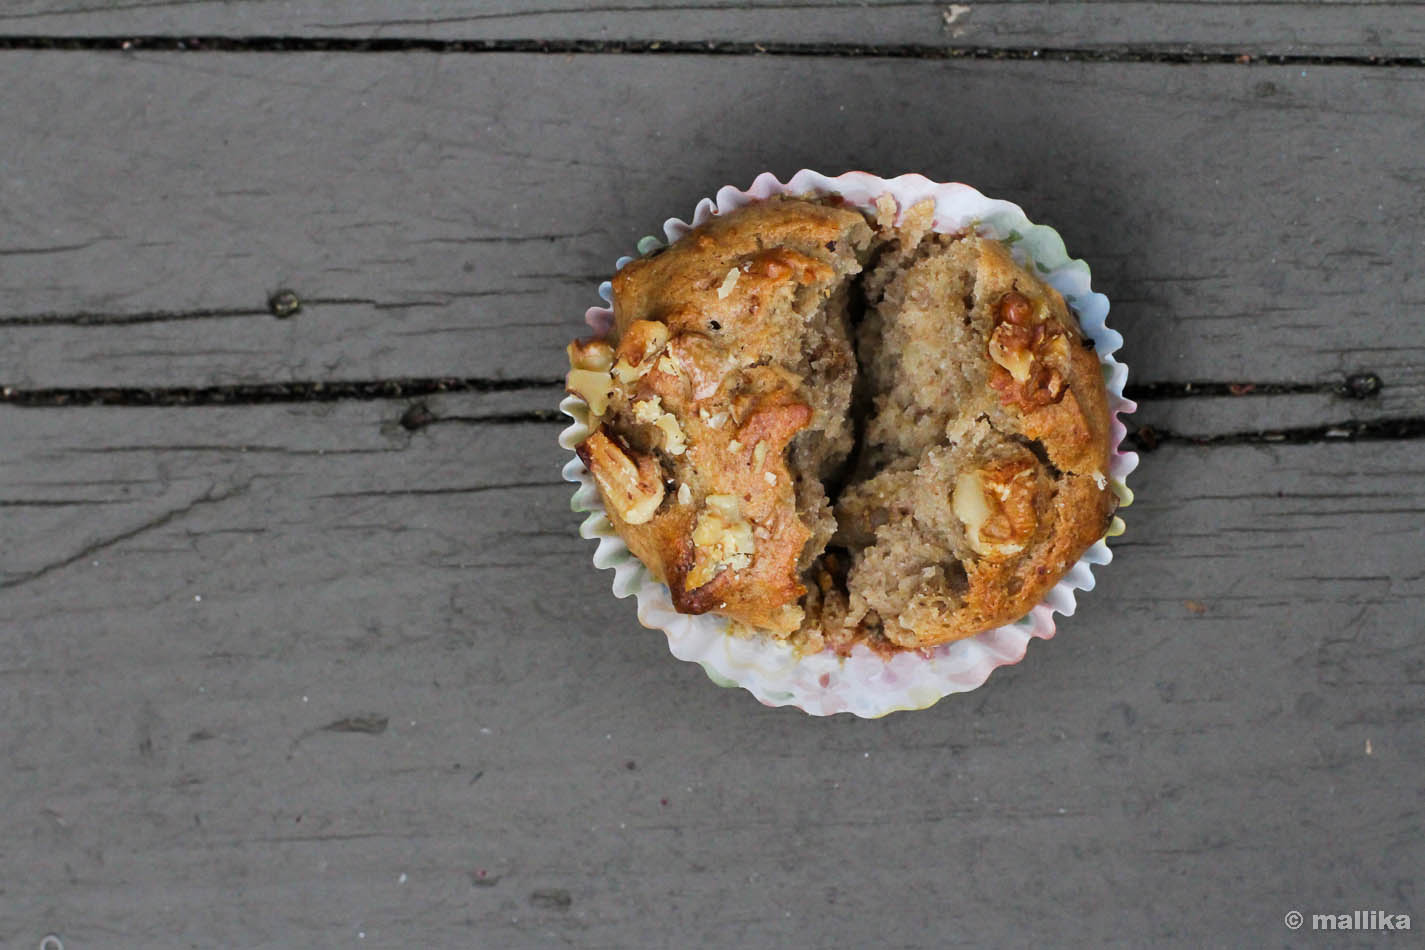
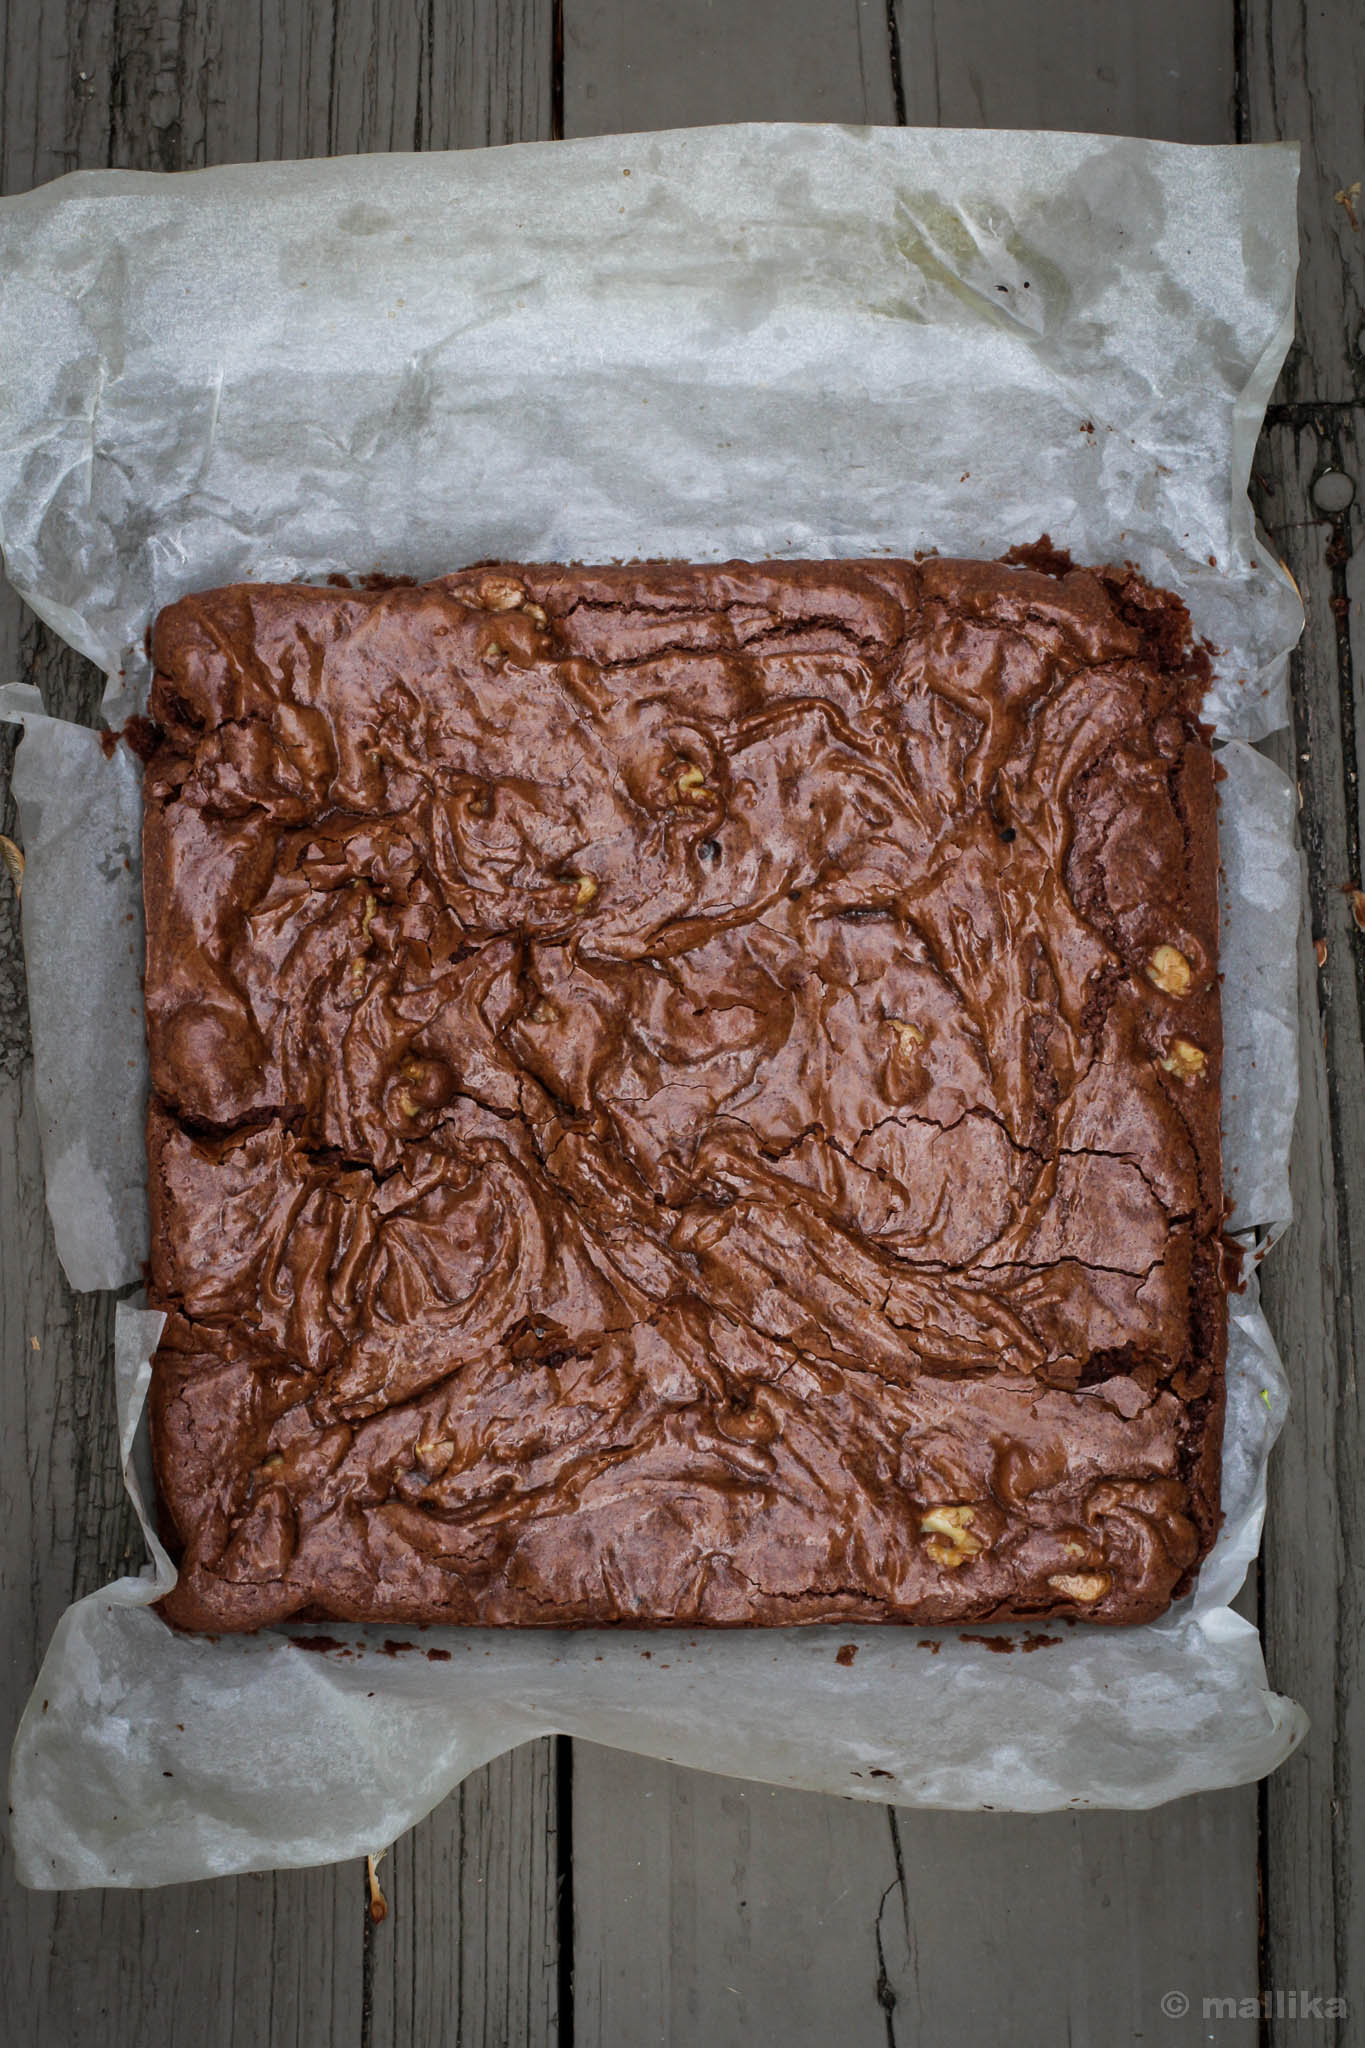
These Brownies are one bowl and simple to make. They are a cross between fudgy and cake-like. While they don't slop, they are intensely chocolaty and rich, much fudge like. They have crackling tops which make them look beautiful. And, no Brownie is good without generous scatter of walnuts. I promise you will love them, as much we all did.

Chewy Fudge Brownies Bites


Chewy Fudge Brownies

INGREDIENTS

1/2 cup of unsalted butter, softened at room temperature
1 1/4 cup of bittersweet chocolate
1 cups of granulated sugar
1/4 tsp of salt
2 eggs
1 cup of plain flour
1 tbsp of cacao powder
1/2 tsp of instant espresso coffee powder
1/2 cup of broken walnuts

DIRECTIONS

Preheat the oven to 350 degrees. Prepare a 9x9” square baking pan by lining it with parchment paper. I like to let the edges of the paper hang up a bit on the sides to make it easy for the removal.

In a large saucepan, melt the butter. Add the chocolate chips and melt them over medium low heat. Once melted remove from heat. Alternatively, you can microwave the butter and chocolate chip on high heat for 1 min. Allow it to rest for 2 mins, then add the sugar, eggs, flour, cacao powder, espresso powder, salt and broken walnuts into the melted chocolate butter mixture. Whisk well together. Spread the batter evenly in the prepared pan, leveling the tops. Bake them for 35-40 minutes. Test by inserting a skewer at the center. The skewer will have flecks, however there should be no wet batter coming out of the baked brownies. Allow them to cool completely and then slice into squares before serving.

Chewy Fudge Brownies Stacked


Notes:

I've used cacao powder here. However, you may use cocoa powder and up the quantity to 2 tbsp. Cacao is stronger than cocoa powder, hence you will require more cocoa powder, if being used.

Banana Cardamom Muffins_1


Over the past 2 months that we have been here in the US, I have baked only once. And that was when these Banana Cardamom Muffins were made, much on demand by my husband. While banana bakes don't make it to the list my top favorites, I love baking with them and I am now slowly getting closer to loving and appreciating them too. I have come to appreciate the way bananas lend an inherent sweetness to a dish and that helps to reduce the overall amount of sugar. And this one certainly did!

Banana Cardamom Muffins_batter


It seems ages since I whipped butter with sugar or whisked batter to make good ol' cakes. On our visit to the States last year, I splurged on baking and took advantage of the large convection oven that the homes here are bestowed with. This time around I made a conscious decision to stay away from baking a ton to avoid all that sugar overload.

Banana Cardamom Muffins_tray


I cannot possibly imagine a home that does not stock bananas. Its such an easy takeaway fruit with easy-peasy peeling and no de-seeding. So clean, mess free, hassle free and completely satisfying to a sweet tooth!

We get panic attacks at home when we run out of them! Seriously!

Banana Cardamom Muffins_2


I believe every blogger should have a repertoire that boasts of a couple of recipes starring 'the bananas'. Cakes and muffins take the lead here. A banana muffin is the easiest bake you can ever put together and there are little chances that you will go wrong. It replaces egg with utmost ease adding loads of flavor. And it hardly matters how its flavored additionally. It could either be the classic vanilla scented or chocolate studded or just none at all! Either ways, they all taste delicious. Bananas sing by themselves. They have a characteristic sweet flavor of their own. So should you leave them by themselves, they will yet shine. May be a kick of aromatic spices will add bounce to them.

Banana Cardamom Muffins_3


These muffins were made on a lazy afternoon to go along with our evening cup of tea. As I set out the muffin liners and put the batter together, I realized that my pantry had run out of stock for vanilla extract. A BIG sin for any baker, I guess! But here's where traditions come to rescue. Our by-gone generations have sworn by the fact that bananas and cardamoms make a match in heaven. And I cannot deny that! We have grown up eating desserts and sweetmeats made from bananas heavily scented with cardamoms. So, when these muffins were made, they swept our home with warm, mellow headiness from cardamoms, the jaggery and bananas, making these undeniably irresistible to wait till they cooled. Couple of them were downed warm right as they were out of the oven. These muffins certainly make a lovely tea time treat. They are wonderful to carry out on picnics and long drives.

As for me, they brought back warm fuzzy memories of home and my mother's kitchen where the pairing of bananas and cardamom ruled the roost on many occasions.

Banana Cardamom Muffins_4


Banana Cardamom Muffins (Eggless, Vegan adaptable)

Yields 9 large muffins

INGREDIENTS

1/2 cup mashed bananas (about 1 large over ripe banana)
1/2 cup milk (replace with soy milk / nut milk of your choice for vegan option)
1/4 cup vegetable oil
1 cup all-purpose flour
1/4 cup powdered jaggery (packed)
1/4 cup fine sugar
1 teaspoon baking soda
1 teaspoon fresh cardamom powder
Handful of chopped walnuts and raisins

DIRECTIONS

Preheat oven to 350ºF/180ºC. Line the muffin tin with paper cases.

Mash bananas along with milk, jaggery and sugar in a food processor. To this, add vegetable oil and whisk well. Set aside.

In a separate glass bowl, sift the all-purpose flour and fresh cardamom powder along with baking soda.

Make a well in center of sifted flours. Add the wet mixture to the dry ingredients. Fold gently. Few lumps are perfectly okay, but do not over beat. Finally fold in the walnuts and raisins. The batter should be thicker than the regular cake batter.

Scoop out spoonful of the muffin batter and dollop them into the lined muffin tins. Scatter a handful of walnuts and raisins. Bake for 25 minutes at 180ºC or until a skewer comes out clean. Allow to cool before removing from pan.

Banana Cardamom Muffins_5


Sunday morning we made a picnic to the nearby animal farm. The little one had been excited about it all through the Saturday as she played and constantly babbled the names of the animals she was supposed to pay visit to. Frisking through her set of animal toys, she managed to identify most of them by names, and we bribed her to take her out for that feat.


We left early on Sunday. The morning I woke up and quickly toasted these sandwiches for the munch. A slather of butter for the richness, few onions and cucumber slices for the base, some fresh basil that I plucked off from the budding plant for flavour, some grated cheese to top it and some herbs paired with fresh crackled pepper to finish, as simple and quick it can be. Shouldn't that how a picnic be? Quick and stress free.

We shoved the picnic basket with these sandwiches and fruits, the rug, paper plates, sauce sachets, napkins and water bottles into the back-seat of the car, put on our sunglasses and drove off to the farm.


It was fun as we saw her enjoy the company of turkeys, rabbits, donkeys, horse, goats and hens. She fed the goats some fresh peas and beans and loved the company of emus. As we munched on these fresh basil and cucumber sandwiches, she fed and shared her little bites to the rabbits too. I’m sure they loved it. In turn she devoured these happily, animating the little bunnies and teaching them how to eat. By the end, she made several babbling conversations and had almost made best friends with them.

Incidentally, on our drive back home, she managed to identify a faded white plastic rabbit thrash bin along a road side and she screamed in joy pronouncing “mama, labbit, labbit!”. Almost like she was united with her long lost friend! A day worthy that was ought to be.


Fresh Basil and Cucumber Sandwich

INGREDIENTS

Couple of slices of whole wheat bread
Butter, to slather over
Couple of leaves of fresh basil, torn
Thin slices of cucumber
Thin rings of onions
Grated cheddar cheese
Fresh crackled pepper
A dash of Italian dried herbs

DIRECTIONS

Pre-heat the toaster / grill / sandwich maker for 5 minutes.

Meanwhile, place 2 slices of bread on a chopping board. Trim the edges and slather butter generously on either sides of these slices. On one of the bread slice, place couple of onion rings, followed by torn basil leaves. Top them with 2-3 cucumber slices, placing them side by side. Top them with more torn basil leaves, some freshly grated cheddar cheese and freshly crackled pepper. Sprinkle a dash of Italian dried herbs. Top it with the second slice. Press down gently and place it in the toaster / sandwich maker. Prepare the following sandwiches the similar way. Toast till they are golden brown and serve hot with tomato ketchup or chutney of your choice.


My attempts at making homemade marshmallows without corn syrup were successful and much appreciated, however not vegan. I’ve made these marshmallows couple of times now and they turn out perfect each time. Simple, easy and just 2 ingredients for a recipe that will not fail. Armed with that confidence and of sheer curiosity, I’ve been trying to experiment with agar-agar as a replacement for gelatin.

Of several sites I’ve read, successful vegan marshmallows have been possible with Xanthum gum, protein isolates, both of which I can’t fetch locally, hence agar is closest ingredient I can rely on. My struggle with making vegan marshmallows has been for a while, but to no avail. Agar simply fails to act the way gelatin does. My guess is that agar and gelatin have a different composition and gelling properties at different degrees, so they behave differently.


It’s magical what gelatin does to sugar syrup when whipped at high speeds, converting the entire syrup into a snow-white mass of fluffy, creamy, melt-in-mouth marshmallows… amazing! Agar fails to whip up the sugar syrup or stabilize it. My experiments with various proportions of agar, also cooked agar with the syrup and attempted to heat agar separately, all yielded disastrous effect to the end result. Even cooked agar at times failed to dissolve well, leaving speckles in the suspension. It either ended up in a pale caramel colored gooey, slimy mass of colloid or a sticky toffee like brittle, nowhere close what marshmallows are meant to be. An utter flop. An assurance that vegan marshmallows cannot be made with sugar and agar alone, they definitely need something more to be whipped up and stabilized. Till I get some Xanthum gum and protein isolates in my reach, I shall leave vegan marshmallows to rest in peace.


That apart, making homemade marshmallows is a breeze and fun too. Many with whom I shared these, were actually stunned when I told these were homemade… a pause, a blink in the eye and prying, some astonished if it was seriously homemade or just tagged so… had to convince! For the chocolate lover that we have at home, these marshmallows may not have made much of an impact, but these S’mores definitely did! He said “Wow, these are yum. Can we have more of these please!!!” S'mores as they call it for some more please... these little sandwich bars are popular American traditional campfire treats consisting of a roasted marshmallow and chocolate sandwiched between two pieces of graham cracker, sinfully yum and decadent.


S’mores

INGREDIENTS

2 Graham cracker squares (I used Nutrichoice cracker squares)
10 gm. chocolate bar, broken/melted if necessary (milk, dark, semi-sweet or bittersweet chocolate)
1 large homemade marshmallow

DIRECTIONS

On a clean plate, place one cracker square. Top it with the piece of dark chocolate. Microwave on high for 15-20 seconds to melt the chocolate slightly. Stick a fork into the marshmallow or using a tong, swirl the marshmallow lightly over open flame till the edges are golden brown. Do not hold longer as they will melt and fall apart. A couple of swift turns should do the job. Immediately place the marshmallow on top of the partially melted chocolate. Alternatively, you may toast the marshmallows under a grill too. Top it with the second cracker and press down gently so that some of the chocolate and marshmallow goo slides out on the sides. When the S'more is fully assembled, let it sit for a few seconds. Gently press them together and eat them like a sandwich! They taste best when warm.


Graham cracker squares are not available in India. An alternative would be digestive biscuits. However, I chose to use Nutrichoice cracker squares. They are thin, salted cracker squares and balance the sweetness from chocolate-marshmallow filling, just right for our tastes. The warm bittersweet chocolate and gooey marshmallows render creaminess to the dessert with a luscious center while the Nutrichoice cracker squares poise the sweetness, perfectly balancing it out. These are perfect little desserts which can be made ahead and taken to parties and adventure trips, pretty enough to win accolades.

Homemade Marshmallows


Over the years there have been couple of recipes I’ve wanted to try but could never attempt for reasons plenty. In a land where ‘certain’ ingredients used primarily in Western cooking were unheard of and almost impossible to fetch, I wouldn’t blame myself if I pushed those recipes aside. Fortunately though, today we live in a pretty diverse city which has access to many of these imported items, it is still a challenge to fetch a Filo sheet, Wonton wrappers or even Puff Pastry sheets. I have not been lucky yet. I have given up mt hands on a local whipping cream, then would you expect me to look out for corn syrup, xanthum gum, agave nectar, etc.? Thanking my stars, least I have access to some good dark chocolate, vanilla extract or butterscotch chips, not with ease though!

I don’t remember eating marshmallows as kids. It’s not something we get here in stores. Only a couple of years ago, on our vacation to Ooty, I must have tasted my first marshmallows. And because you are on a vacation to a new place, you often tend to try foods that are speciality of that place, homemade chocolates and marshmallows happen to be quite popular here. And as predictable it can be, it was not one of those favorites among my parents for the lack of flavors or taste. And hence forgotten too…

Homemade Marshmallows Homemade Marshmallows


Then, two years ago when my husband and me went on a vacation trip to Munnar and last year to Ooty, these marshmallows rocked my memories of those soft, pillow-like, melt-in-mouth candies. I had the freedom to enjoy couple of them there and packed a few to be eaten back home. Again as predictable it can be, marshmallows were never among my husband’s favorites too! So all that pack was devoured by me alone. Of course, to satisfy my husband’s chocolate addiction, our dear Rocky Road Bars were their counterparts!

Being a vegetarian, I was ignorant then that the animal product, gelatin goes into making these marshmallows. Though it doesn’t bother me much, since I am not staunch about vegetarianism (it’s just our way of life… didn’t we consume cod liver oil as kids… or what about the capsules... were eggs ever vegetarian…?), bringing home gelatin did bother me. Over the past two weeks I have been craving for marshmallows and my frantic search for stores in Bangalore didn’t lead me anywhere. Even the candy shops in malls ran out of stock. Are they kidding me???

Homemade Marshmallows


I badly wanted to make them in my kitchen. Google gave ample recipes, most of them had one thing in common, corn syrup and gelatin. Corn syrup is an ingredient that is impossible to get locally and I would have preferred the recipe without gelatin. I’ve never used gelatin in the past, since agar-agar has worked mostly for me. I was skeptical how the marshmallows would turn out if agar powder was used. Despite all the possible research online, I concluded that gelatin was the only way I could get these right, at least for my first attempt. Again, since this was the first time I was attempting marshmallows, I decided to stick by what the recipe demanded, of course minus the corn syrup.

It turned out that these marshmallows were the best ever I’ve tasted. Absolutely yum and totally melt-in-mouth feel. If you taste one of these you’ll realize why you may never want to go back to the store-bought ones. Making these were darn easy and hardly any effort. With no candy thermometer at hand, I was mentally prepared for disasters… what if the sugar syrup ended in a caramel… will I get the right consistency… what the heck is that soft-ball stage… will the syrup whip well to marshmallow cream… will I be able to lift these marshmallows off the tray… if these fail, then what next… ???


Quite a lot of study went into making these little sweet treats. Several sites, recipes, reviews, comments which helped me gear up making these in my kitchen. I was armed with puffed rice at hand to make rice krispies, should these fail on me. And if the marshmallow cream failed to set, my digestive biscuits and dark chocolate were at my custody for some S’mores. Bear with me, these photos were taken at night on my kitchen counter with flash on. What was meant to be a weekend activity, I ended up making these on a weekday night. Put my little tot early to sleep and nudged myself to make these, I could barely hold my excitement. Sugar syrup went on a rolling boil and I kept looking for that soft-ball stage. Every time I threw a drop of that syrup in cold water it would dissolve into thin water. I gave up on that technic and instead stuck by India method of single thread consistency. A safer bet. Dropped a tiny dollop of syrup on a steel plate, allowed it to cool a little and then checked their consistency between my thumb and forefinger for a single string. It worked well. My mixer bowl had the gelatin blooming, however the moment the sugar reached that right stage, in the final boil, I threw in the gelatin to the hot syrup and gave a quick stir. Off the flame, I put the hot vessel directly on my stand mixer and gave the hot sugar syrup the desired blitz till it fluffed up and doubled in volume. Unlike what most recipes suggest (pouring the sugar syrup down the side of the bowl into the gelatin mixture), I added gelatin to the boiling syrup to avoid any lumps or un-dissolved gelatin stuff. I guess it worked well for me.

Homemade Marshmallows


Homemade Vanilla Marshmallows (without Corn Syrup)

INGREDIENTS

1/2 cup cold water
2 tbsp. gelatin
2 cups granulated sugar
3/4 cup water
A pinch of salt
1/2 tsp. vanilla extract

To dust:

1 tsp. vegetable oil
1/8 cup cornstarch
1/8 cup powdered sugar

DIRECTIONS

Prepare a pan: Mix corn starch and powdered sugar. Grease a square baking dish and dust with the cornstarch-sugar powder thoroughly. Grease a spatula with vegetable oil to transfer the prepared marshmallow cream.

Sprinkle the gelatin over cold water and allow it to bloom. Prepare your stand mixer by attaching a balloon whisk. A balloon whisk will help in pumping good amount of air, thus helping them double faster. In a heavy saucepan, combine water and sugar. Bring to rolling boil on medium heat, stirring occasionally. If you have a candy thermometer at hand, boil it till it registers 115 degrees C (235-240 F), soft ball stage. In case you don’t have one, drop a blob of syrup on a steel plate, allow it to cool a little and then check it’s consistency between the thumb and forefinger for a single string formation. As it cools down further you should be able to roll it into a soft ball. Many recipes suggest a soft ball stage by testing the syrup in a bowl of cold water, though I’m not sure why it didn’t work for me. Sugar tends to crystallize, hence keep a keen eye on your boiling syrup. Once it reaches the soft ball stage, quickly add in the salt and bloomed gelatin to the sugary syrup. Turn off the flame immediately and give a quick, proper stir to ensure that the gelatin has dissolved completely. It took me about 8-10 minutes to reach that stage.

Turn on mixer at low speed, slowly increasing it to high, beating it on the highest speed. Beat until very thick, fluffy and double in volume, about 12 minutes is what it took for me on a stand mixer. The entire mass will turn to a clean white fluff and when this cream no longer increases in volume it should be done. At this stage, add in the vanilla extract or flavoring of your choice and give a final whirl for a minute. Do not overbeat as it may stiffen and make it tougher to transfer. Do not feel tempted to touch or taste the marshmallow cream at this stage as it’s very sticky and stingy in nature and you’ll end up in mess everywhere!

Using the oiled spatula, transfer the cream to the greased tin. Scrape off all the batter from the bowl and spread evenly into the prepared pan. Gently level the tops using the greased spatula. Cool overnight or at least 4 hours before slicing. To slice, carefully transfer the entire sheet of marshmallows to a sugar-cornstarch dusted cutting board. Grease a very sharp knife or scissors and cut into desired squares. I suggest not to use a ridged knife as I had trouble cutting with them. Instead a sharp leveled knife should do that job better. Toss with remaining sugar-cornstarch mixture until all sides are evenly coated and no longer sticky.

Homemade Marshmallows


To make mini-marshmallows, I used the rear end of greased piping nozzle, pressed them down on the marshmallow sheet and cut out rounds. To be used on marshmallow floats. They keep for over a week in air-tight containers. The longer you have them, the denser they get, making them perfect for cup of hot chocolate.

The entire process may sound lengthy and tedious, but honestly it isn’t much of an effort to make this fluff. Glad that these marshmallows turned out extremely yum and surpassed my expectations. My husband who’s not a fan of marshmallows too gave me a thumbs up. This recipe is a keeper for sure and I do intend to play with more flavors in future. Also, next on my card is an attempt to get them done the vegan way. Let’s see if the agar stuff works… will keep you posted.


I have a simple post today. Nothing much on my thoughts to pen down. I am back from a short, but adventurous holiday break and it feels great to unwind and refresh during the trip. Wish to have more of these often. Some simple pleasures are truly adorable!

Pumpkins have never worked well with me. Neither as a dessert nor in a curry. Apart from the Pumpkin Walnut Bread, which was certainly loved and adored by all, they haven't suited our tastes much though. I rarely bring them and whenever I do, they last for months in my freezer, finally ending to throw away half of it. I have almost stopped bringing them home. It's like a resolution. Pains to see so much of it being wasted.

One recent occasion saw me bringing pumpkin home again. Don't blame me - it's a temptation to buy when the prices hit low! The nearby store has a routine Wednesday sale on vegetables and fruits. So I ensure that I fill my crates and baskets to the brim every time I shop here on Wednesdays. As I unpacked the stuffs back home, I could see the dire look on my husband's face as he stared at that yellow vegetable as an evil thing.

I hoped to use them in pumpkin pies or make muffins, but even this time we were not in a mood for pumpkins. We need to kind of mentally prepare ourselves to enjoy yellow pumpkins. Wondering why! I doubt these can ever be my good friend! I ended up discarding a lot of it this time too and have resolved never to bring them again. Well, not even for an attempt!

Although, I did enjoy this simple roasted pumpkin seeds which I made a couple of days ago. Simple and nutty. Good for a lazy evening or a simple snack to munch on.


Simple Roasted Pumpkin Seeds

INGREDIENTS

Seeds from one pumpkin
Salt to taste
Chilli powder to taste

DIRECTIONS

Cut the yellow pumpkin to half. De-seed the pumpkin carefully. It can be very slimy to hold. So scoop them to a bowl. Tender seeds taste the best. Remove aged seeds if possible. They may be hard and too nutty to chew on.

Next, wash them thoroughly in running water till the slimy flesh on the seeds are removed. It may take some time, but it is worth the effort. Allow them to dry.

On a roasting pan, spread the pumpkin seeds and roast them on medium-low flame till they are lightly golden brown and crisp. Remove from heat and allow to cool. Season with salt and chilli powder to taste. You may also bake them in oven on 180 deg C for about 15 mins, tossing them on between.

They make a great healthy snack to munch on. Enjoy a healthy treat!