Showing posts with label Cookies. Show all posts


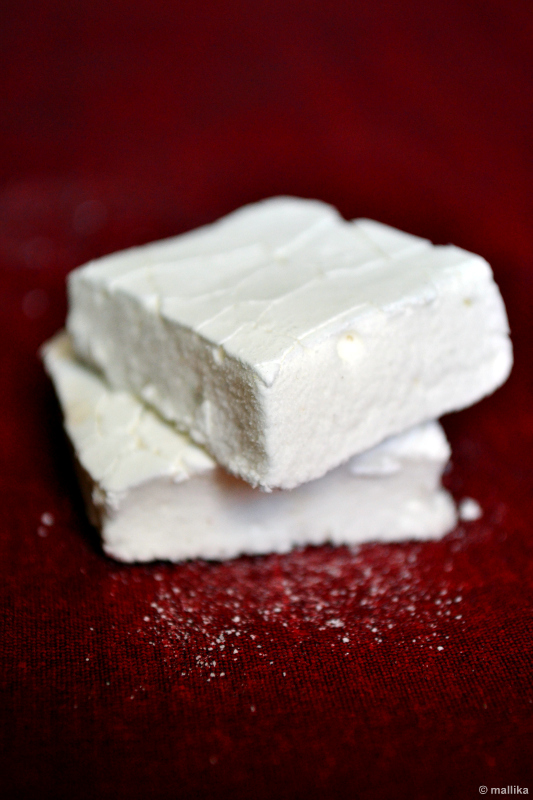
My attempts at making homemade marshmallows without corn syrup were successful and much appreciated, however not vegan. I’ve made these marshmallows couple of times now and they turn out perfect each time. Simple, easy and just 2 ingredients for a recipe that will not fail. Armed with that confidence and of sheer curiosity, I’ve been trying to experiment with agar-agar as a replacement for gelatin.

Of several sites I’ve read, successful vegan marshmallows have been possible with Xanthum gum, protein isolates, both of which I can’t fetch locally, hence agar is closest ingredient I can rely on. My struggle with making vegan marshmallows has been for a while, but to no avail. Agar simply fails to act the way gelatin does. My guess is that agar and gelatin have a different composition and gelling properties at different degrees, so they behave differently.


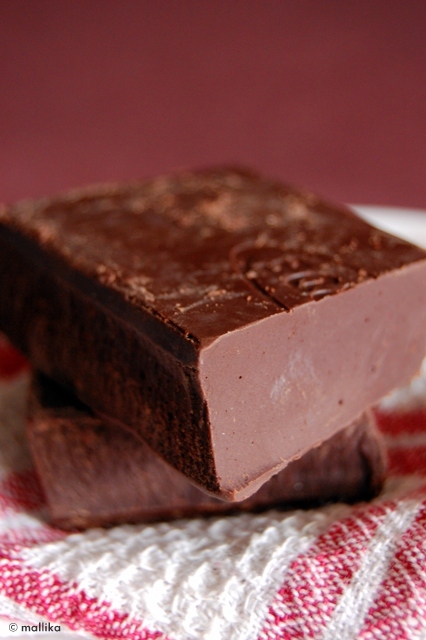
It’s magical what gelatin does to sugar syrup when whipped at high speeds, converting the entire syrup into a snow-white mass of fluffy, creamy, melt-in-mouth marshmallows… amazing! Agar fails to whip up the sugar syrup or stabilize it. My experiments with various proportions of agar, also cooked agar with the syrup and attempted to heat agar separately, all yielded disastrous effect to the end result. Even cooked agar at times failed to dissolve well, leaving speckles in the suspension. It either ended up in a pale caramel colored gooey, slimy mass of colloid or a sticky toffee like brittle, nowhere close what marshmallows are meant to be. An utter flop. An assurance that vegan marshmallows cannot be made with sugar and agar alone, they definitely need something more to be whipped up and stabilized. Till I get some Xanthum gum and protein isolates in my reach, I shall leave vegan marshmallows to rest in peace.


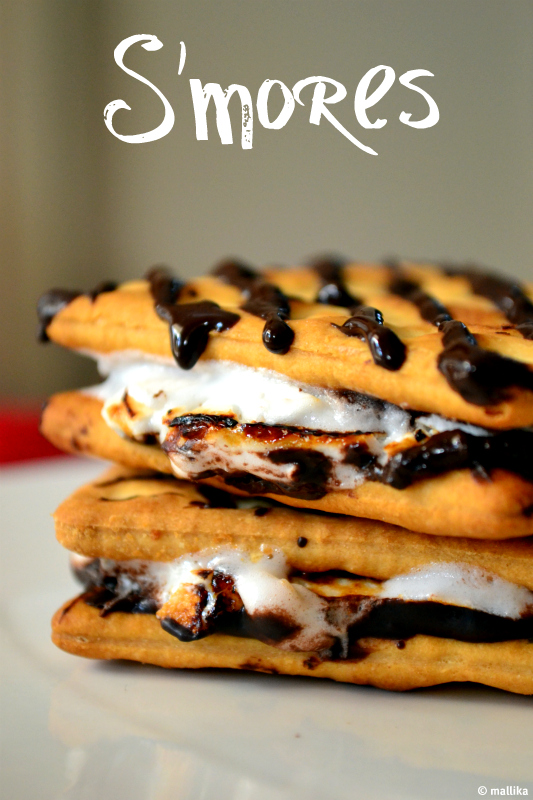
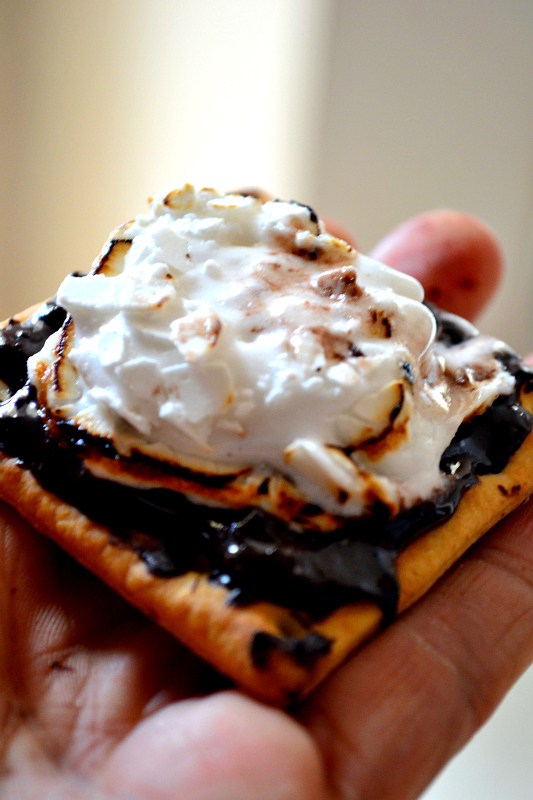
That apart, making homemade marshmallows is a breeze and fun too. Many with whom I shared these, were actually stunned when I told these were homemade… a pause, a blink in the eye and prying, some astonished if it was seriously homemade or just tagged so… had to convince! For the chocolate lover that we have at home, these marshmallows may not have made much of an impact, but these S’mores definitely did! He said “Wow, these are yum. Can we have more of these please!!!” S'mores as they call it for some more please... these little sandwich bars are popular American traditional campfire treats consisting of a roasted marshmallow and chocolate sandwiched between two pieces of graham cracker, sinfully yum and decadent.


S’mores

INGREDIENTS

2 Graham cracker squares (I used Nutrichoice cracker squares)
10 gm. chocolate bar, broken/melted if necessary (milk, dark, semi-sweet or bittersweet chocolate)
1 large homemade marshmallow

DIRECTIONS

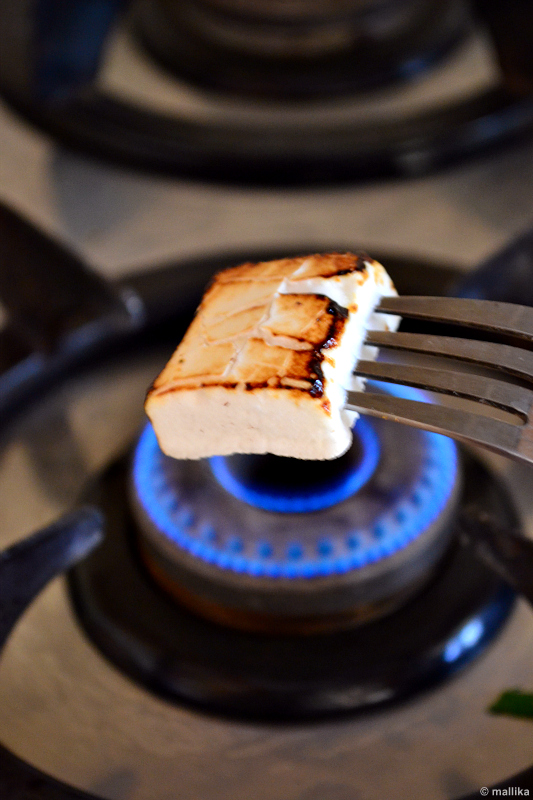
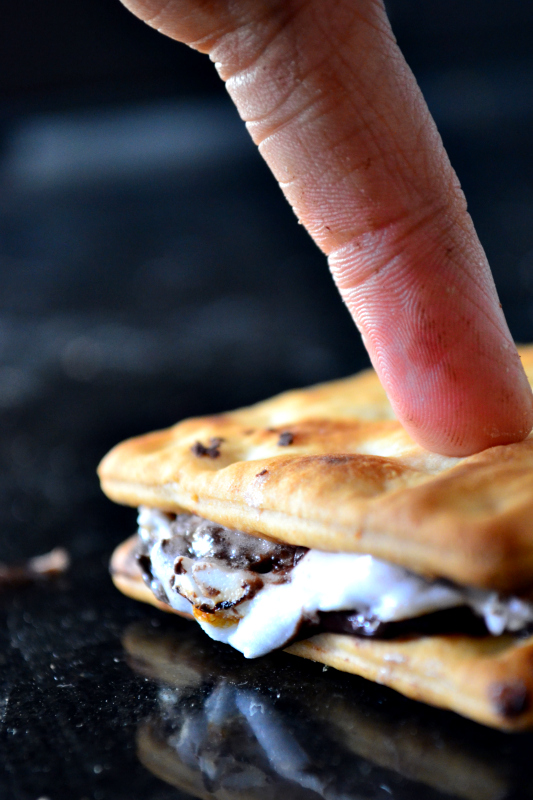
On a clean plate, place one cracker square. Top it with the piece of dark chocolate. Microwave on high for 15-20 seconds to melt the chocolate slightly. Stick a fork into the marshmallow or using a tong, swirl the marshmallow lightly over open flame till the edges are golden brown. Do not hold longer as they will melt and fall apart. A couple of swift turns should do the job. Immediately place the marshmallow on top of the partially melted chocolate. Alternatively, you may toast the marshmallows under a grill too. Top it with the second cracker and press down gently so that some of the chocolate and marshmallow goo slides out on the sides. When the S'more is fully assembled, let it sit for a few seconds. Gently press them together and eat them like a sandwich! They taste best when warm.


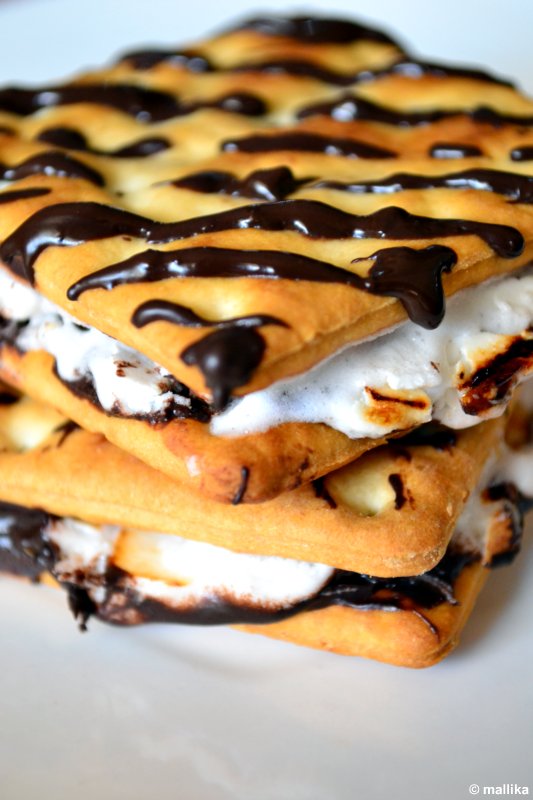
Graham cracker squares are not available in India. An alternative would be digestive biscuits. However, I chose to use Nutrichoice cracker squares. They are thin, salted cracker squares and balance the sweetness from chocolate-marshmallow filling, just right for our tastes. The warm bittersweet chocolate and gooey marshmallows render creaminess to the dessert with a luscious center while the Nutrichoice cracker squares poise the sweetness, perfectly balancing it out. These are perfect little desserts which can be made ahead and taken to parties and adventure trips, pretty enough to win accolades.


It’s been long since I baked some cookies and this seemed the perfect occasion when I should be baking more of them. My little tot is in her teething phase and loves putting almost everything into her mouth. Door-mats seem to entice her more than anything else and we have a tough time hiding them from her. We’ve been playing a lot of peek-a-boo games with her and my little brat is full of untiring energy, life and zest. She’s been gaining strength and weight to crawl and pull herself well now, but should have some more time to go before she can be independent on her feet. While she loves pulling objects and putting them to her teeth, we have a terrible time objecting her from doing so! This seemed the perfect reason for me to bake some cookies so that she can hold them and bite into her itching teeth.

With 2 bunny teeth on lower and 1 on upper gums and the fourth breaking its way out, she hasn’t yet got over her itch to bite into almost anything close to solid. While she’s pretty fussy with her choices when it comes to food, digestive biscuits seem to be her favorites. And no, not the milk dipped softened ones done specifically for her, but a solid bite into the biscuit is what she demands. I played around with these Chocolate & Coffee Whole Wheat Cookies, adapted from the cookbook, Chocolate: The Food and the Music to make cookies which were healthy so she can bite into. I’ve made 2-3 batches of varying ingredients, all on similar lines of the base recipe. For my little one, I skipped chocolate and coffee. I omitted egg completely, instead used thin flax-meal paste. For the adults, I like to use same amount of coffee liquor as much the volume of an egg. They turn out good each time promising to be good companions for your cup of tea. And my little toddler surely seems to be enjoying them.


Chocolate & Coffee Whole Wheat Cookies

Adapted from Chocolate: The Food and the Music

INGREDIENTS

3/4 cup unsalted butter, plus extra for greasing
1 cup brown sugar
1 egg (replace with 1 tbsp. gooey flax-meal paste or 1 tbsp. of coffee liquor if making for adults)
1/2 cup all-purpose flour
1 tsp. baking soda
A pinch of salt
1/2 cup whole wheat flour
1 tbsp. bran (I used whole wheat bran)
1 1/3 cups semisweet chocolate chips
2 cup rolled oats
1 tbsp. strong coffee (Add more for stronger flavor)
2/3 cup walnuts, toasted and coarsely chopped


DIRECTIONS

Preheat oven to 375 degrees F. Grease 2 large cookies sheets. Cream the butter and sugar together in a bowl. Add the egg (replace with 1 tbsp. gooey flax-meal paste or 1 tbsp. of coffee liquor, if making for adults) and beat well, using an electric mixer.

In a separate bowl, sift together the all-purpose flour, baking soda, and salt, then add in the whole wheat flour and bran. Mix in the egg / flax mixture, then stir in the chocolate chips, oats, coffee and nuts. If it's for the baby, skip the chocolates and coffee. Mix well.

Drop tablespoonful of the mixture onto the prepared cookie sheets, dabbing each lightly using the back of a spoon (if you prefer thin, crisp cookies), leaving room for the cookies to spread during cooking. Transfer the cookie sheets to preheated oven and bake for 16-18 minutes, or until the cookies are golden brown.

Remove from the oven, the transfer to a cooling rack and let cool before serving.


I like thin, crisp cookies which have a crunch with every bite. That my prefect bake. On the other hand, my husband prefers more chewy cookies over the crunch. If you want your cookies crisp, you bake 2 minutes longer. For chewy ones, remove the cookies as they begin to brown on edges.

We use flax quite a lot in Indian cooking, specially South. While my mom’s roasted flaxseed chutney powder is my favorite, I personally dislike the flavor of flax in my baked goods. So I was cautious with my use of flax-meal powder this time and made a pretty thin paste instead of a thick gooey one. I like to think these are good for you. They have bran, rolled oats, whole wheat flour, flax-meal, walnuts and chocolate chips in them. Now, isn’t that goodness of everything in one?


I have been unwell from a couple of days with constant cold, cough and high temperature. I was bedridden this weekend, yet trying not to miss out on Football World cup and finals of Wimbledon with weary watery eyes. While I am trying to recover and bounce back into life and action, cooking has taken a short backseat as I am depending on light and easily digestible food. And this one comes from my drafts.

I am posting this recipe for Hazelnut & White Chocolate Cookies which I made for our tea time a few weeks ago. The cookies were simple to make and since I had all the ingredients at hand, I didn't want to miss a try. They came out good, had crunchy edges and softer centres. I loved the crunch from hazelnut. White chocolates aren't my favorites, so they are mostly consumed this way. White chocolate flavor is not the highlight of these cookies, so if you love them, just increase the quantity. Or probably just use milk chocolate chips instead. Our perfect tea time cookies.


Hazelnut & White Chocolate Cookies

INGREDIENTS

1 1/2 cups plain flour
1/2 tsp baking soda
1/4 tsp salt
1/2 cup soft butter
1/2 cup granulated sugar
1/2 cup light brown sugar
1/2 tsp vanilla extract
1/2 egg, cold from the fridge
1/4 cup chopped hazelnuts
1/4 cup white chocolate, chopped

DIRECTIONS

Put the flour, chopped white chocolate, bicarbonate of soda and salt into a bowl. Cream the butter and sugars in another bowl. Beat in the vanilla extract and a cold egg, and then mix in the dry ingredients. Increase or decrease the quantity of egg depending on your cup size. Use egg sufficient to wet the ingredients and bring them together to form a soft dough.

Roll into balls, flatten them a little and place them on a lined baking sheet about an inch apart. Top with a broken hazelnut, if preferred.

Bake on 180 deg C for approximately 18 minutes or till the cookies are done. Transfer them to a cooling rack to harden as they cool.


Hazelnuts are not so common in India. They are mostly sourced as imported products. When I came across them on one of my shopping trips, I couldn't resist but grab a packet at a big price tag. The only form of hazelnuts that I have ever eaten were from Nutella. So we really loved them. Hazelnut compliments white chocolates very well, but my guess would be, they would make a heavenly combination with dark chocolates. No doubts, Nutella rocks!


The weekends always go by in a hush bush. By the time it's Friday and we rejoice over it, it's Monday again that comes by, as if in a blink of en eye. While we are in the middle of the week and I am buried with piles of workload, I look forward to those weekends with a difference. We have been eying at getting more adventurous. I guess it's a better way to put across than say healthy! ;) We finally got our most awaited bicycle, that too a 21 geared mountain bike B-twin and I am enjoying every moment with it.

Just a hunt for the perfect unisex mountain bike took a lot of our time and energy, but it was all fun. Hunted through many shops, mostly to find bicycles that cater to male needs than ease it for women on bikes. Heck! Especially if you are an Indian woman, short at height (that's anything below 5'5", and now don't get at guessing my height!), then you are in trouble for geared bikes! Hate that centre stem that makes it painfully difficult for female riders. After few heated discussions and a couple of hiccups, we made a final stop at Decathlon to take our perfect pick, the French branded B-twin. Getting hang of the gear system was a roller coaster and that didn't take long. Looking forward to an audacious bicycle trip!


Back home it was time to celebrate this with some fresh, home baked Double Chocolate Chip Cookies with inspiration drawn from Nigella's Totally Chocolate Chocolate Chip Cookies from Nigella Bites. Yet another chocolate indulgence at it's best! I hardly changed the recipe, except the title! These are no doubt, the BEST chocolate cookies ever! The original recipe calls for huge amounts of chocolate chips which would lead me to chocolate coma, so I reduced hugely on that! I suggest you to try this recipe yourself and know how good it will do to you!


Double Chocolate Chip Cookies

INGREDIENTS

60g dark chocolate
75g plain flour
15g cocoa, sieved
1/2 tsp baking soda
1/4 teaspoon salt
60g soft butter
38g light brown sugar
25g white sugar
1/2 tsp vanilla extract
1/2 egg, cold from the fridge
90g dark chocolate chips

DIRECTIONS

Preheat the oven to 170°C. Melt the dark chocolate either in the microwave or in a heatproof dish over a pan of simmering water.

Put the flour, cocoa, bicarbonate of soda and salt into a bowl. Cream the butter and sugars in another bowl. Add the melted chocolate and mix together. Beat in the vanilla extract and cold egg, and then mix in the dry ingredients. Finally stir in the chocolate chips.

Scoop out equal-sized mounds using an ice cream scoop and place them on a lined baking sheet about an inch apart.

Cook for approximately 18 minutes till the cookies are done. Transfer them to a cooling rack to harden as they cool.


You can get 6 large cookies or 12 small cookies out of these. I made them in 2 batches. The first half went into the oven, while the second half into the freezer. The first batch looked almost like what you see on Nigella's site. Absolutely decadent! Crusty and rock-like, yet deeply fudgy, just like a brownie. The moment I brought them out of the oven, they vanished quickly. My husband and me devoured almost 3 warm cookies each at a time! So none were left to be photographed.

I really wish I had saved atleast one of that batch for this space. The second batch which came out of the freezer could easily be rolled to a dough. I didn't see the need for an ice-cream scoop. I could easily roll them in between my palms and they went into baking again. The chocolate chips I used in these got melted away with the heat while baking. Unfortunately! Each bite came with the punch of bitter sweet dark chocolate and it was truly a decadent pleasure for the chocolate lover in me.


The weather God has been playing good and we have been receiving decent occasional showers of rain in the evenings. I feel much better being rescued from the scorch of heat. The summers were bad, not as bad as other parts of the country though. But it still came with potful of troubles with continued power cuts at peak hours of the day, sufficient to give a baker her nightmares!

It can't get more irritating when I have my goodies baking half way through in the oven and then the unexpected power cuts that can go on for atleast a couple of hours leave me feeling miserable and I end up with flat cakes or cookies that have to be used as alternatives or end up in thrash! I am hoping it gets better with more rains, though at the moment it's not any good.

All I want to do right now is to dive down cozily into an armchair, with a thought that I am totally carefree and have nothing much to do. Would probably just want to grab a novel, a cup of tea in one hand, cookies to sink my teeth into, melodies of the past being played on radio in the background, cool breeze kissing my cheeks, the murmurs of rain adding a zing of music to my ears... I am feeling exactly this way at the moment. Does this sound a perfect way to lazy around on your weekend or may be a nice holiday?


With the climate changing to better, the temperatures falling and with a few showers, it feels nice to see the dry, sun burnt grounds converting to patchy greens and hopefully lesser power cuts too! And with the cool breeze kissing my cheeks, it reminds me that it's time I convert my home to a baker's bliss, the time when vanilla and chocolate-y flavors waft through air and we descend gracefully into it's blissful aromas.

So I headed straight to make these simple delightful cookies for our evenings. I adapted the recipe from here, however made a couple of changes. I kept it neat with no dry fruits or nuts added to the dough. Instead I chose to frost my cookies with chocolate and finely chopped pistachios. My Oatmeal and Raisin Cookies have been appreciated in the past. These are classic American cookies and the best bet for the ones like me who dislike oats in their true nature. Recipe is quite simple and follows a standard procedure of dry into wet ingredients format.


Classic Oatmeal Cookies

INGREDIENTS

1 cup plain flour
1 1/4 cups oatmeal
3/4 cup brown sugar
1/2 cup unsalted butter, softened
1/2 tbsp flax seed powder
2 tbsp water
1/2 tsp baking soda
1 teaspoon cinnamon
1/2 tsp vanilla extract
A pinch of salt

Decorate:

1/2 cup melted dark chocolate
Slivered pistachios

DIRECTIONS

Preheat oven to 375° F. Mix 1/2 tbsp flax seed powder into 2 tbsp water and keep in the fridge for a few hours. You will notice that the flax seed water will turn to a slimy mixture exactly like that of an egg. I have produced the best results from this mixture.

In a mixing bowl, combine the brown sugar, vanilla and butter until well blended. Add the oatmeal, flax meal water and stir well.

In another bowl, stir together the flour, baking soda, cinnamon and salt. Gradually add to the oatmeal mixture, stirring well. Scoop the dough by tablespoonfuls, spacing each about an inch apart, onto the baking tray. Bake for 12-15 minutes. Transfer the cookies to a wire rack to cool.

For the frosting, melt the chocolate over double boiler or in a microwave. Dip one half of the cookie into the melted chocolate. Drain excess chocolate using the edge of a spatula. Dip into a finely chopped pistachios and allow it to cool over a plate.


These are good as is without any frostings. Frosting them is purely optional. I am not good at frosting, or must I admit that I have the least patience to decorate. However, this time I thought I must leave my laziness aside and try some hand at frosting. I opted to coat them partially with molten dark chocolate and pistachios.

I have been experimenting a lot with flax seeds and honestly, off late, I have begun to dislike even the faintest taste from flax seeds. Though the smell is not so pronounced in this recipe, my taste buds seem to identify it easily, which I don't like. So the frosting made it good for me. However, do not resist to try this. If I don't like it, it doesn't mean it's gross. You may love it. My family did. In fact, they merrily enjoyed it. You may use 1 egg instead of flaxseed.


After a short break with cookies, I am back again to the cookie business ;) And this time it's different from the previous cookies I have posted. I have made these Almond Pistachio Cardamon n' Saffron Cookies a couple of times now and this one is one of our favorite ever, especially with my DH. He always asks for more of these. I have been itching to post the recipe for long now.

Nuts have always been a part of our diet and our favorites too. We love them in any form, as is or in desserts or even as toppings. I always have a few almonds and pistachios slivered for ease.


Another method in which I like to use these nuts is in Indian Styled Almond Milk (Badam Milk), which is quite common at our place. Roasted almonds, pound to powder and flavored with warm scented cardamoms are kept in well sealed air tight containers to help us with long shelf life. Just mix with milk to serve a cup of homemade almond milk in minutes. Recipe? Here it goes... The thought makes me want to grab a cup of it right away!


Making your own Almond Flour at home:

And if you are looking for a simple recipe to make almond flour at home, this is how you can make your own...

Place 1/2 cup whole, un-blanched almonds in a dry mixer. Pulse just until a fine textured meal forms. Don't over-grind or you will land up with almond butter!

The recipe for cookie is quite simple. Here's what we need.


Almond-Pistachio Cardamom n' Saffron Cookies

INGREDIENTS

1/2 cup almond milk powder (You can use store-bought badam milk powder as well)
1/2 cup plain flour
1/2 tsp baking soda
1/2 cup oil/butter
Handful of chopped pistachios

DIRECTIONS

The recipe is as simple as just putting all the ingredients together in a bowl and bringing them together with oil/butter till they bind together. Refrigerate for a couple of minutes to handle the dough well. Knead and roll to a flat surface and cut to shapes with a cookie cutter. Place it on baking tray and bake for 10-15 mins till the cookies brown.

In case you do not have almond milk powder at hand, use 1/2 cup each of almond flour and 1/4 cup of fine sugar and add in the pistachios and saffron to it.


I made these cookies using oil instead of butter and they came out very well. Butter will make these richer in taste. Since the recipe does not call for any butter, it's healthier. Use butter for a richer taste. My homemade almond powder has sugar, so there's no added sugar in these. A store bought almond milk powder would also work great. I have made these with them as well and they too produce equally good results. These cookies are fairly simple and can be put together in less than 10 mins.


Today's post is going to be simple, short and sweet ;) On a Monday, as I am gearing up for the week, I am going through Monday blues with piles of work load and stress at work. Honestly, I am not in a mood to post much here, except for a good recipe to keep your week going good. Hopefully, healthy too with these Whole Wheat Sugar cookies.

I baked a batch of these earlier today and they turned out really good. With a cup of my morning milk, I munched on these to satisfy my sweet cravings. These are effortlessly made simple vanilla flavored cookies. I am not sure if I should say these are cookies or biscuits? Since I like them very crisp, just like what a biscuit would be, I should rather call them biscuits!

I made 2 batches of these. One with plain white granulated sugar and another with brown sugar. Also, using of whole wheat flour instead of all purpose flour was to make it more healthier. Just being experimental at it. The plain white sugar came out the best. The brown sugar wasn't bad too and had a slightly lower tones of sweetness. Give it a try.


Whole Wheat Sugar Cookies

INGREDIENTS

1 cup whole wheat flour
1/2 tsp baking soda
A pinch of salt
1/4 cup veg oil
1/2 cup granulated sugar
1 tsp cold water
1 teaspoon vanilla extract


DIRECTIONS

Sift together whole wheat flour, baking soda and salt in a bowl and keep it aside. Cream together the oil and sugar. It will not turn as light and fluffy as butter. Introduce the vanilla extract to it.

Add the flour mixture gradually until the flour is fully incorporated and the dough is smooth and uniform. Wrap up dough and refrigerate for 2 hours if you are using butter instead of oil (can be skipped as no butter is involved). Remove when you are ready to bake the cookies.

Preheat oven to 180°C. Grease the cookie tray. Place dough on a lightly floured surface and dust with more flour. Gently roll out the dough using a dusted rolling pin to 1/8" thickness.


Using a cookie cutter, cut out cookies and place on sheets about an inch apart. Bake for 10 minutes, rotating sheets halfway through, until edges are golden brown. Transfer cookies to racks to cool completely. Once cookies are cooled, you may dust them with icing sugar or serve as is.

Sometime simple flavors can really give out the best, just like these cookies. I love that mild flavor emitting from vanilla. You may opt to leave them and keep them even simpler. Try lemon zest instead, would work great with citrus flavors.

I like the flecks of granulated sugar on these cookies. They look really nice, like that on Bourbon biscuits. These are light on sweetness and the hints of vanilla flavor is the binge take-away on these. If you need a company with a cup of tea or coffee or simple plain milk, then these can be your best bet.


Since my previous posts on cookies and success with egg-less ones, I have been splurging with more and more of them in my little kitchen. A lots more awaits in future to come. After having tried the healthy Granola bars for breakfast, I hadn't experimented much with the good old oats for long now. So it was time for these Oatmeal & Raisin Cookies.

Rolled oats have been very popular with people on diet, given that oatmeal is well known to lower the cholesterol levels, thus control cardiovascular diseases to an extent. It has high content of carbohydrates, is a good source of protein and fiber which encourages slow digestion and stabilizes blood-glucose levels. Considering so many health benefits, it's a good idea to consume a cup of it a day. Raisins too have a good nutritional properties. They have antioxidant properties and being high in calories, but not fats, raisins are very good source of energy. I have seen my mom, aunts and grandma soak few raisins in water overnight and consume them the following morning. It is said to boost blood generation process.

Oatmeal & Raisin Cookies has been traditional and quite popular in America. I have used Quaker oats, which are the regular rolled oats used for porridge or breakfast muesli. If you find difficulty in fetching brown sugar, use jaggery or honey instead. The flavor would change a little, but it's still fine that way.


Oatmeal & Raisin Cookies

INGREDIENTS

2 cups Quaker Oats (uncooked)
1 cup all-purpose flour
1/2 cup raisins
3/4 cup butter/margarine, softened
1/2 cup firmly packed brown sugar
1/4 cup granulated sugar
1 tsp flax-meal
3 tsp water
1/2 teaspoon vanilla
1/2 tsp baking soda
1/2 tsp ground cinnamon
1/4 tsp salt (optional)

DIRECTIONS

Mix flax-meal with water and allow it to stand for about 30 mins to an hour. It will result in an egg-like gooey mix.

Whisk the butter/margarine and both the sugars in a bowl till they are frothy and creamy. Add in flax-meal water and vanilla and beat them well.


In another bowl, mix the flour, oats, baking soda, cinnamon and salt. Add this to the above wet mixture. Next add the raisins and fold all together till they come together to a rough dough. Drop the dough by teaspoonfuls onto baking tray and bake at 180 deg C for 15 mins or till they brown. Bake them longer if you prefer crispy cookies.

I love oats in this form. They are my best bet! Not being too sweet, they suit my taste way too well. I relished about 4-5 cookies in one go! They were damn good. A big batch of these freshly baked goodies disappeared in no time.

A few crispy edges, a few chewy middles, this bake filled with the goodness of healthy oats and raisins made up a good pair for my breakfast tea and the sunny noon snack. Truly a vegan treat!


I had a can of Amul condensed milk which had been lying in the fridge for few days. It was an open can which just needed to be finished. I was wondering how I could experiment with the little left over sweetened condensed milk. I knew I had many options of using it in halwa or probably ice-cream or may be a kheer. But I had other intentions for these.

I have been eying at some Dulce de Leche recipes for some time now. I like David Lebovitz's website where he not only masters the art of cooking, but brilliant photography. The photos are so good and tempting that I would lick them off from my monitor screen!!!

David, in his recipe says that the first time he had Dulce de Leche he began spooning it directly from the jar into his mouth and before he knew it, he had made it almost all the way through the jar. I too am in the same state whenever I open a can of sweetened condensed milk. I see myself indulging way too much directly from the can. This sweet temptation is just not too resisting. So I can imagine what Dulce de Leches can do to someone when offered!


I made these a few days ago. Before making them, I did a little research on how to go about achieving good results. Most common method was to set the can in a tub of water and bake in oven for 2-3 hrs. Well, that was too much of an effort for me. Not my types, as I have the least patience to carry out such tedious cooking tasks. Another great option was to use a pressure cooker with some water at the bottom of the cooker. Then place the tin in water and cook on pressure. This seemed easier. Since I had a little left over condensed milk, I went ahead with the third option, that's directly heating it on a thick bottomed pan. They were sticky and perfectly toffee like.

However, I find them way too sweet for my little dentures. So I added some crushed milk biscuits into these, shaped them to bite sized biscuits and chilled them for a while. Believe me, they were great. Fantastic!

There is a striking similarity between these with our very own Indian sweets. After all, a lot of our Indian milk sweets and burfis are made from boiling and reducing the milk which forms Khova and is later used in burfis, gulab jamuns, etc. Western countries use Dulce de leches in preparations like cakes, cookies, ice cream, creme caramel, banofee pies, etc. It is also a popular spread on bread toast.


Dulce de Leche

INGREDIENTS

100 g of sweetened condensed milk
1 thick bottomed pan
A wooden spoon to stir

DIRECTIONS

Pour the sweetened condensed milk into a thick bottomed pan. Heat up the pan with the condensed milk till the mixture begins to bubble through. Do this process on a medium low flame with continuous stirring as it's easily susceptible to burning, if left unattended. It took about 10-12 minutes for the milk to turn into toffee.

Once the Dulce de Leche is lightly browned and looks caramelized, turn off the flame and allow to cool. Dulce de Leche will thicken further when allowed to cool. Store in the refrigerator if you are not ready to use immediately. Warm if required before serving.


I would be making these again in future, but probably using the pressure cooker method. The next time, it would be the entire can. Is a Banofee pie waiting? Possible!

Since my purpose of making Dulce de Leche was just experimental, I headed towards experimenting a little more. I made and savored these little bites with my evening cup of tea. These are real quick No Bake Bites which we enjoyed.

No Bake Bites

INGREDIENTS

A packet of milk biscuits
A spoon-full of Dulce de Leche
A few chopped nuts

DIRECTIONS

In a freezer bag, throw a few milk biscuits and nuts. Beat them with a rolling pin. Transfer to a bowl and add the Dulce de Leche to it. The toffee texture is good for it to bind. Bring them all together and shape them as desired. The sole reason I used Dulce de Leche was because I found them way too sweet. This way, the intensity of sweetness was far reduced. Perfect for my taste.

I had a neighbor aunt drop into my home the same evening and she too savored these wholeheartedly. She said it was so good that she would love to re-create the same for her grand-daughter. Now, wasn't that sweet? And of course, she did come back to me for the recipe.


It was 10 years ago that I made Bangalore my home. I was introduced to this city by my dad who moved here on course of his transferable job. Back then, I was a young girl in my teens who had just completed 12th grade, having given Common Entrance Test (CET), I was on an ambitious lookout for an engineering seat in a prestigious college.

Those were the days when dad was staying alone in Bangalore, before we moved with him later. It was post the CET exams during the holidays that dad would take us around the fairly novel city, showing us the city with passionate enthusiasm. Malls were limited, but we had stretches of Brigade and MGs to stroll, Cubbons and Lalbaugs for weekends, Bannerghatta zoos to spend the entire day... Coming to this city, it was with high hopes and ambitions to build a good education and career. Both happened and succeeded.

I loved the city the very first instance for a few reasons which I still hold close to my heart. One of the best weathers throughout the year, which no other city in this country enjoys as much we do. The tranquility and sereneness is truly a paradise which makes it called as 'the pensioner's city'. This is also a city of youngsters with a lot of life, enthusiasm, energy and spirit.

Those were the days when Bangalore was on the brink of development. IT was springing to boom. Today it's a different scene all together. Bangalore has changed and is seeing changes at a galloping pace. Weather is changing steadily and it's alarming to see the rate at which the city is massively growing. With the decrease in number of trees and the invariable increase in traffic, noise and pollution, we really need to ponder where we are heading to. Bangalore is my home. It pains to see the city and the lifestyle changing rapidly. It's just a hope that this change would decelerate in unhurried and dawdling manner.


These were a few heavy words from my grave thoughts. The weather these days is very foggy and chill and I love to cozy myself in the warmth of the quilt. As I wake up every morning, the first thing I look forward to is a cup of steaming hot tea to warm up ourselves. These Raisin n' Walnut Cookies were made for these mornings and evenings to sip with the hot tea. They are just lovely with good crunch on the crust and chewy centers. You'll like them too.

Raisin n' Walnut Cookies

Dry Ingredients:

1 cup whole wheat flour (150 g)
1/2 cups all purpose flour (50 g)
1/2 tsp baking powder
1/2 cup brown sugar (50 gm)
A pinch of salt

Wet Ingredients:

1/2 cup unsalted cold butter (100 g)
1/2 tbsp ground flax seeds
3 tbsp warm water
1 tsp vanilla extract

Add in:

1/2 cup raisins (50 g)
1/2 cup chopped walnut kernels (50 g)


DIRECTIONS

First grind the flax seeds with warm water till they become a mushy egg-like paste. Set aside for later use.

Mix in all the dry ingredients, both the flours, baking powder, salt and sugar in a mixing bowl. Add in cold butter. Using your fingers, work the flour–sugar mixture into butter until dough resembles coarse breadcrumbs.

Next, add the ground flax meal paste along with vanilla extract to this. Fold in gently. Add the raisins and walnuts. Knead gently to form a smooth dough. Chill in fridge. Unlike last time where I was impatient to wait, I allowed the dough to chill for an hour in the fridge. Shape the cookies to rounds and flatten them a little. Place them on the baking tray and bake them a 180 deg C for about 10-15 minutes or till they brown. Remove and allow to cool before serving.

The nutty whole wheat flour combined with all purpose flour is a healthy permutation. Flax seeds have nutty flavors too. Raisins have a tangy sweetness and paired with these deeply wrinkled walnuts, all combined together bring out the best in them in form of these cookies. I have made these a little plumper this time, but the next time I may try to flatten them more for solely crispy baked cookies.


I recently made a batch of Strawberry Muffins again. A pot of strawberry preserve was almost seeing it's end and what could have been a better way for me than using them in muffins? Well, this time it wasn't butter-less, but yet low in fat as I substituted butter to vegetable oil. A kind of an experiment with cooking, which worked good. Blame it on my fridge which had no stock of butter as we used them all for breakfast breads! I had made quite a lot, which seemed to be lasting for a few days.

I don't generally enjoy eating the same over a period of days. As we usually get bored, it was the same case with these muffins as well. We loved them for a day or two, but then it seemed to last in the fridge for longer this time. So instead of discarding these precious sweet treats, I made muffin biscottis out of these.


I removed them from the fridge during the mid-day. Allowed them to come to room temperature and baked them early evening for our tea. As these were being baked, we could smell the warmth coming from the soft scented vanilla and fruity strawberry, gently drifting through the house, ditto like freshly baked biscuits right out of oven. As they cooled, they crisped well. Every gentle bite into these were wonderfully crusty, fresh and invigorating. Perfect to enjoy during our tea time.

No one can say these were made from left over muffins. Why don't you give them a try too?


Strawberry Muffin Biscotti

INGREDIENTS:

About 4-5 strawberry muffins
A little oil or butter to wax the baking tray

DIRECTIONS:

Gently remove the muffins from their paper cover base. Slice them thinly to about 1/2 cm or 0.2 inches thins if you prefer crisp biscotti, or about 1 cm thick if you want chewy treats.

Lightly oil the base of baking tray. You may avoid this step if required. Spread the muffin wafers on the tray. You can place them close and side by side as these won't rise any further. Bake them for 10 mins, more or less (depending on your oven) till the biscotti have browned lightly.


These simple and easy biscotti go really well with tea or evening coffee. Crisp and light, so easy that they can be done in less than 10 mins.


I bake cakes and cookies with no eggs or no butter with a lot of hesitation. You see, I have not had convincing results without these in the past. So my hesitation is valid. I do not have eggs at hand most often. I buy them only with an intention of making a dessert which I have planned in advance on my mind. Else, I never extend myself to cooking anything with eggs apart from desserts.

I am a perfectionist. I love my bakes to be perfect... rich in flavors and heavenly in mouth. When I follow a recipe, I ensure I stick to what measurements and ingredients the recipe asks for. I am always in dilemma when cooking with alternatives as they may not result to what they should be.

My search for alternatives to eggs haven't yielded good results either. Most common alternatives being agave nectar, unsweetened apple sauce, soy yogurt, silken tofu, flax seed powder, ener-g egg replacer, etc.. etc... etc... Most of these, or must I say, none of these are even available easily in Bangalore. Though off late, a few supermarkets have these imported stuffs on their racks, but the prices of imported goods are way too sky-rocketing that purchasing them at exorbitant prices makes no sense. I would rather enjoy them eating outside with no efforts at all!

Flax seeds were hardly available earlier. But they seem to be getting a little popular in bigger super markets. On one occasion when I had seen them in stock in the nearby Foodworld, I got my hands on them. I had been using them in muesli and granola, but never used them as an egg replacer. So when I came across reviews that flax seed can make good alternatives to eggs, I decided to use them in my chocolate-chip cookie recipe.


Chocolate-Chip Cookies

Dry Ingredients:

1 1/2 cups all purpose flour (200 g)
1/2 tsp baking powder
1/4 cup brown sugar (50 gm)
1/4 cup white sugar (50 gm)
A pinch of salt

Wet Ingredients:

1/2 cup unsalted cold butter (100 g)
1/2 tbsp ground flax seeds
1 tbsp warm water
1 tsp vanilla extract

Add-ons:

1 cup semi-sweet chocolate chips (100 g)

First grind the flax seeds with warm water till they become a mushy egg-like paste. Set aside for later use.

Mix in all the dry ingredients from the list above in a mixing bowl. Add in cold butter. Using your fingers, work the flour–sugar mixture into butter until dough resembles breadcrumbs.

Next, add the ground flax meal paste along with vanilla extract to this. Fold in gently. Add the chocolate chips. Knead gently to form a smooth dough. Chill in fridge if necessary. I was impatient to wait though. So I headed to bake them. Shape the cookies to rounds and flatten them a little. Place them on the baking tray and bake them a 180 deg C for about 10-15 minutes or till they brown. Remove and allow to cool before serving.


I am glad I tried this. The flax seed can hardly be noticed or even tasted. One would never imagine that the cookies contained them. They were great. Loved and enjoyed by all. Every bite into the freshly baked warm cookie was decadent and heavenly. It just made our day complete.

It's hard to believe that these are truly eggless! They were crunchy on the outside and chewy in the center. Way to go for a perfect cookie to be mastered!