Showing posts with label Desserts. Show all posts

Lemon and Poppy Seed Muffins


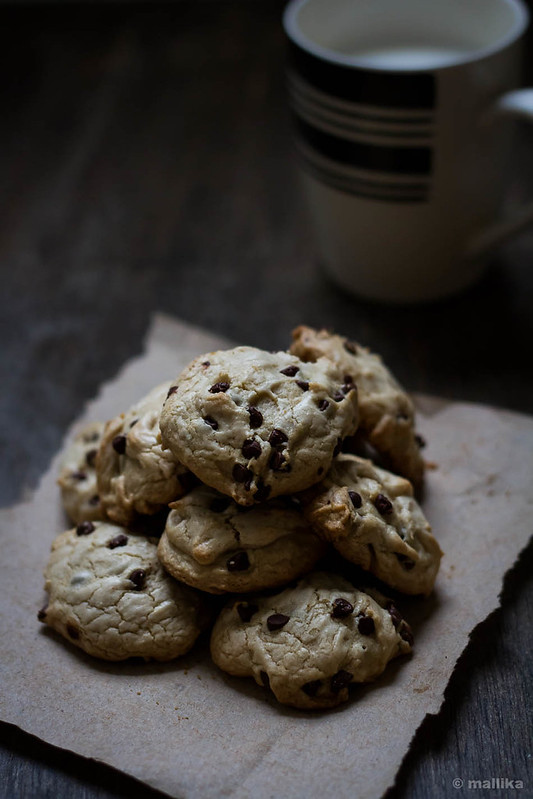
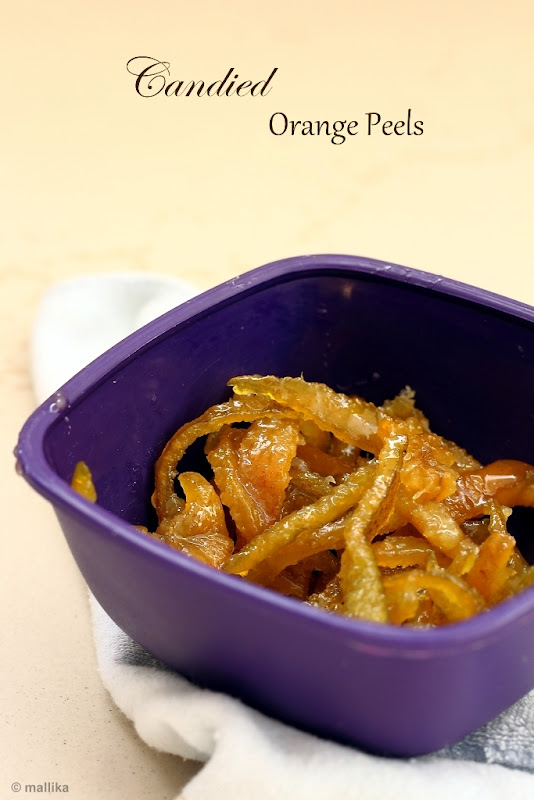
For a long time I did not come across a lemon cake, a lemon tart or a lemon pudding that really deserved an applause. At least not until last week. On occasions where I tried the lemon cheesecake from the best of the restaurants served as a part of their buffet menu in Bangalore, it was terribly disappointing; all failing to leave the lasting impression that would instigate my taste buds to bake and recreate the same lemony desserts at home. Probably that's why I often show least enthusiasm towards all desserts lemony or intensely tart. I made some rarely at home with unsatisfactory results and the ones I ate out were too tart for my tastes. I like to leave the matrimony of lemon and sugar for a well deserved lemonade or those flavored Ravalgaon lemon candies - if you may remember, our parents gave us to suck on for hours as kids while on travel in those dilapidated State Transport buses to fight nauseating attacks.

Lemon and Poppy Seed Muffins


We went out shopping for groceries yesterday. Yes, it was mid-week, but we had to go. That way we make an excuse to drive and take our daughter out every evening.

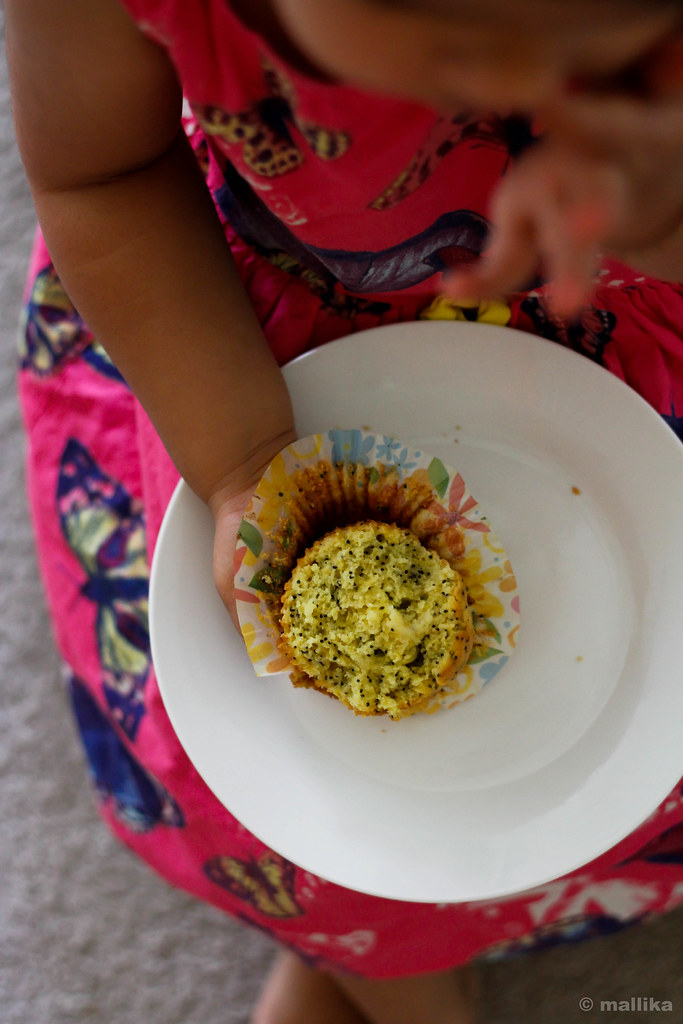
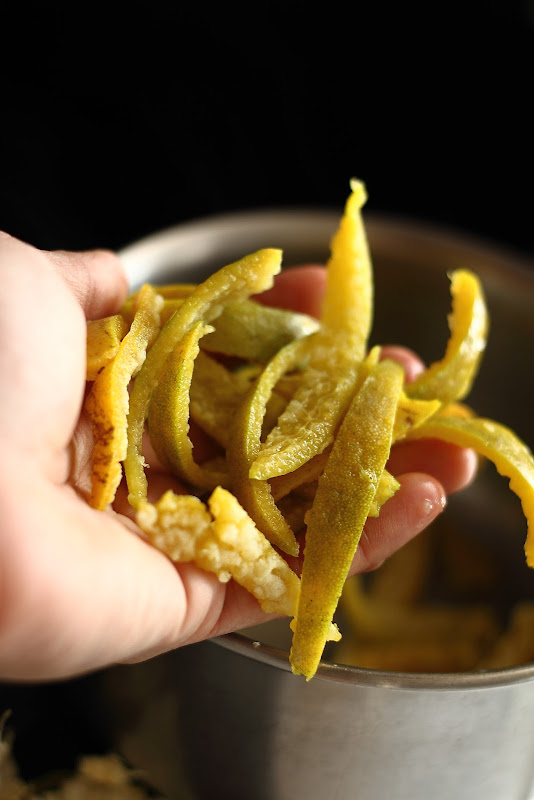
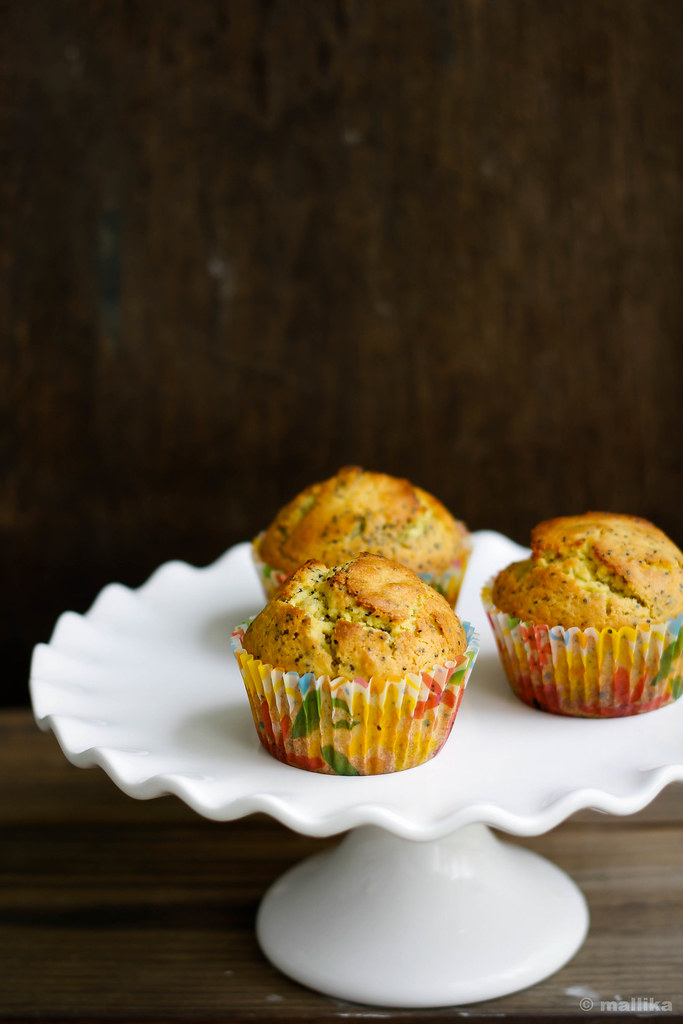
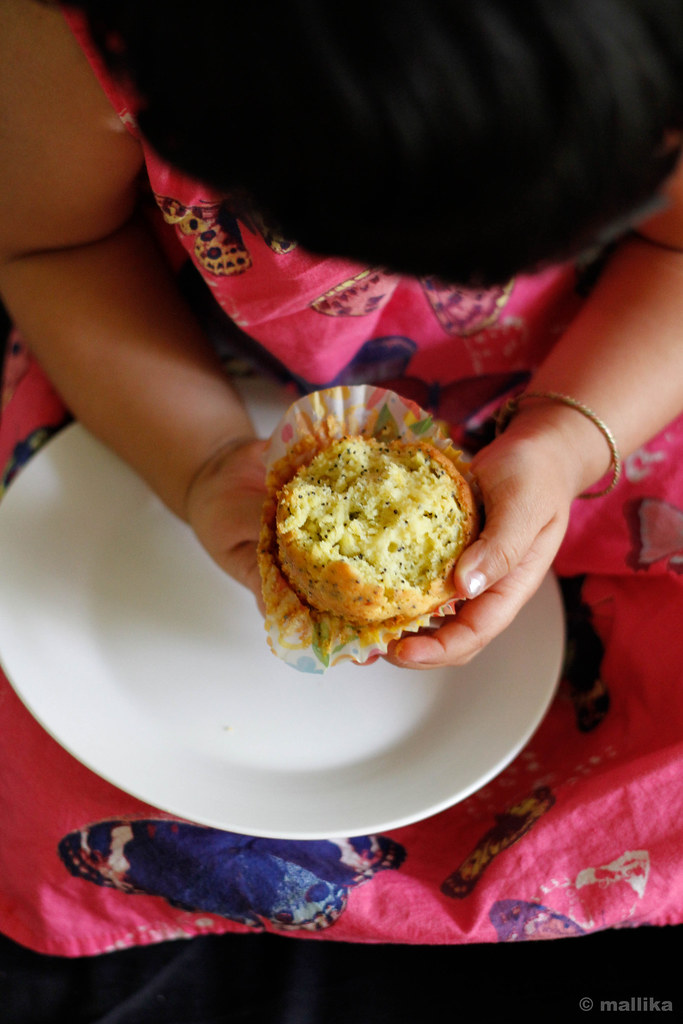
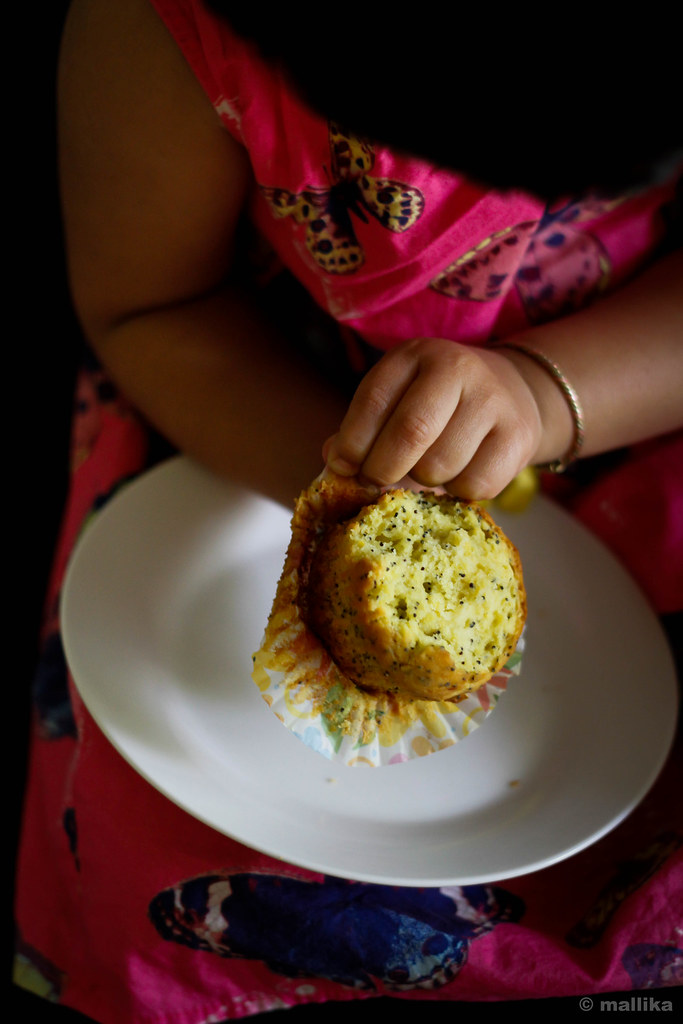
Three big lemons went into my grocery bag last evening, of sizes that resembled the country oranges we get in India. They are a must in my kitchen, in almost every dinner I make. Today, a part of it went into making these lemon poppy muffins, quite close to the one we had for our breakfast in Buffalo, NY last week.

Lemon and Poppy Seed Muffins


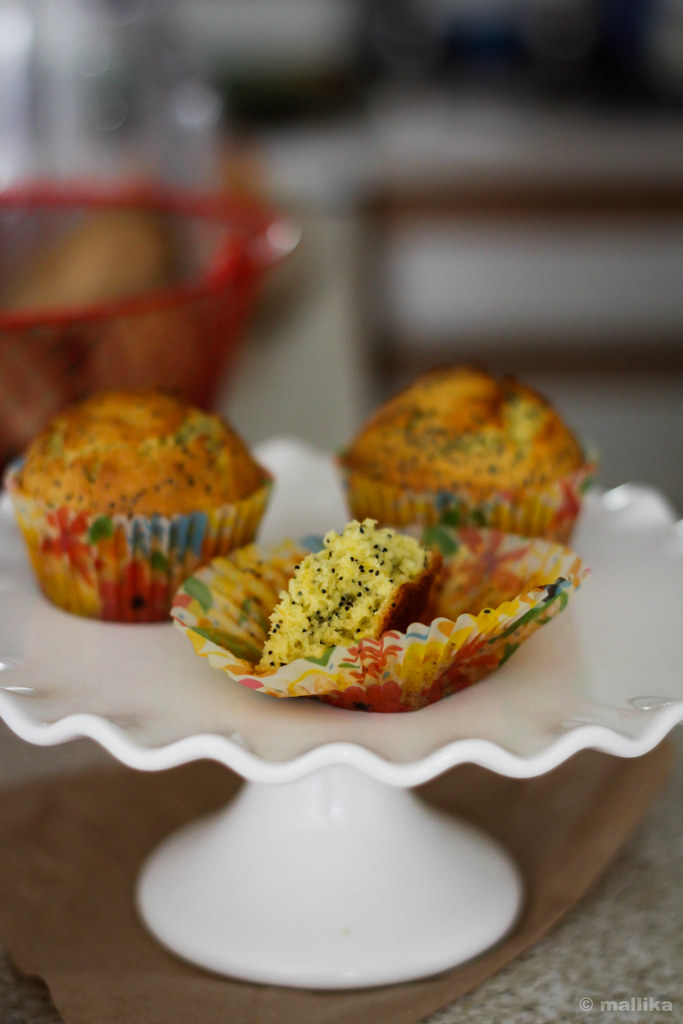
I set out to make these muffins for another trial (sadly some of my past trials with all lemon based desserts had ended in the bin), but they turned out so good that I wanted to record them. So here are the muffins, 4 domed ones I got from the said measurement below. Tweaked, tried and tested over many attempts till I found them good to strike their delicate balance in sweetness, the zest and tang. Good bye to those lemony treats in the past that went into my garbage bins, because they were not to my expectations and rendered futile effort. These will not twitch your brows, nor make you wink with their piquancy. They have perceptible fragrance, gratifying flavor, neither intensely tart, but zesty enough to tickle and refresh your taste buds. They are really really subtle and gentle, so forgive me if you find them too low on lemon notes. And just in case you are like me, you will certainly like these.

Lemon and Poppy Seed Muffins


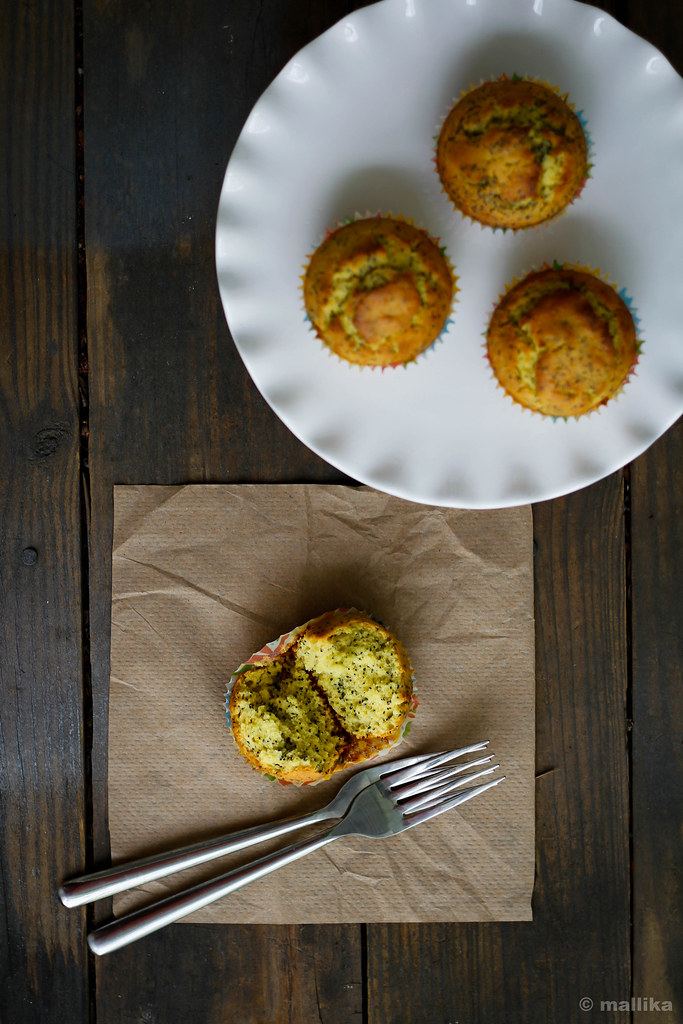
There's my little one, cross legged on the black floor couch in the living room, digging down deep into those muffins. She refused to eat her breakfast today. These muffins were made to bribe.

 Lemon and Poppy Seed Muffins Lemon and Poppy Seed Muffins


Lemon and Poppy Seed Muffins

Makes 4 regular muffins or 8 mini muffins

INGREDIENTS

Dry Ingredients:

1/2 cup heaped all purpose flour
1/2 tsp. baking powder
1/4 tsp. baking soda
1/4 tsp. salt
1/8 cup poppy seeds

Wet Ingredients:

Zest from 2 large lemons
1/2 lemon juice squeezed
1/3 cup sugar
1/4 olive oil
1/8 cup milk
1 egg
1 tsp. vanilla extract

DIRECTIONS

Pre-heat the oven to 350 deg F. Line a muffin tin and set aside.

To make muffins, use the fingertips to gently rub the zests from 2 lemons into the sugar till the lemon oil and its flavor are released into the sugar. I recommend spending at least 5 minutes doing this, since it brings out amazingly refreshing flavor and pale yellow color. Next add the egg, oil, milk, vanilla extract and whisk well.

Sift the flour, baking powder, baking soda and salt into the wet ingredients. Then add poppy seeds and gently mix the wet and ingredients till just combined. Few lumps here and there is just fine.

Spoon the batter to muffin cups up till the 3/4th and bake for 20 minutes at 350 deg F. Remove and allow to cool on a rack to room temperature and serve.

Lemon and Poppy Seed Muffins

_MG_7826


When I first came to the US, I really wanted to explore the local and seasonal fruits and vegetables that are rare or are mostly imported in India. In our weekly visit to the farmer's market, I often look out for local produces, such as asparagus, arugula, broccoli, kale, baby carrots, varieties of squash that are not so native to Indian cuisine. I cook with some, tweak and toss them in Indian spices to suit our tastes, bake the others and some go into salads to be munched fresh. It's kind of satisfying to know that the food you devour is fresh and local.

_MG_7813


Local and seasonal fruits are my absolute favorites. I love the pears we get here, beautifully golden red, crisp, sweet and juicy. Poach them with some spices or relish them as is, they are delicious. The oranges are my all time favorites, and since its in markets all over now, we get them by kilos every week. We bring berries occasionally, because they are tart and mostly suitable to bake desserts or make smoothies than relish them as is. But since its spring time, the markets are full of berries in vivid colors and its too hard to resist this temptation to pick them when you see them all around.

_MG_7702


Considering the tropical climate Southern India has, the vegetation does not support the growth of berries such as strawberries, blackberries, blueberries and raspberries. Getting these berries fresh are rare and even if we do, they are exorbitant and pricey for regular use. The closest local berries I have seen are mulberries, but again they are rare and pricey. Over the years, strawberries have gained popularity in India, but we refrain from buying them often since they are heavily loaded with pesticides to save the deep pink berries from pest infections. Although it's quite common now to get imported canned berries or their preserves, they cannot replace the joy of devouring a real fruit. So while I am here, some of these fresh berries will become a part of my shopping list.

_MG_7815


I have a penchant for blueberries in particular. It must be their distinct blue color, so unusual of a fruit that I rave about. They make amazing desserts while adding glamour and flavor. I have baked with them in the past, like this crumble or cupcakes, made fro-yos and tea cakes and love every bit of their flavor. As they bake, they spread their lovely velvety indigo hues. I find them best to leave them whole in the batter. If you mash or pound them, they make the batter ugly. Instead let them play on their own. As they burst in the heat, they seep out their juices, colors and flavors beautifully. Don't forget a dash of good vanilla extract. They bring out deep flavors of the berries. Additionally they give satisfaction that you've sneaked some fruits in there and know you get a bit of nutrition while adding calories!

_MG_7814


Blueberry Pound Cake

INGREDIENTS

1/2 cup butter (softened)
1 cup sugar
2 eggs
1 tsp. vanilla extract
1 1/2 cups flour divided
1/4 tsp. salt
1/2 tsp. baking powder
1-2 tbsp. milk
1/2 cup fresh or frozen blueberries

DIRECTIONS

Preheat oven to 325 degrees F. Grease and dust flour on a rectangular 7" x 11" cake pan.

Firstly, bring all your ingredients to the room temperature, i.e. eggs and butter. Cream the butter and sugar till it is light and pale. Add eggs one at a time and beat vigorously until light and fluffy. Add a tablespoonful of milk and the vanilla extract. Sift the flour, salt and baking powder together into the creamed mixture and beat. Add another tbsp of milk if the batter is too thick. Gently fold 1/2 the berries into the batter. Pour batter into the prepared pan. Drop the remaining berries into the batter from the top. Bake for 40 minutes, or until a fork / toothpick comes out clean.

_MG_7829

_MG_8359


As a home baker, I tend to have many reservations that I am not so proud of. I have a hard hand at icing cakes or making layered gateaux that look fancy and presentable. I would love to make some, but then, that's a kind of patience I applaud. I have never dared to whip egg whites till date, so I am not close there yet! And oh my cookies, I bake them not so often as I should do!

I have a major problem when I am baking cookies. The one that threats me never to bake them again. Atleast for a long time till I crave some. Sometimes I wonder if I have a sort of leniency towards over-baking. But unlike cakes, where a nice crust is admirable, you cannot mess around with the baking time when it comes to cookies. It has to be perfect, where every hot blow of air from oven matters, every minute counts, probably seconds too. This I learnt the hard way over few failed, overbaked cookies.

_MG_8348


Overbaked cookies taste terrible. They can taste like cardboard, tough and crisp to an extent of being inedible. Moreover it's a shame to offer them. They don't make themselves good for tart crusts sadly. The only thing you can probably do is to brittle and mask them with good dose of roasted nuts to embellish ice creams. For some of those failed attempts that I stay put, here are a batch of some super delicious batch of cookies I baked last week. What matters most is a good cookie recipe, which I assume may not be too hard to find one, along with the perfect baking time and the right temperature, which I assume undoubtedly gets me testing.

Here's a recipe I have tried and tested multiple times. So you can be rest assured these won't fail. They were perfectly baked with a golden bottom, or just baked as I call. Any further may have ruined them. You can bring variations to this recipe. Add in coffee and make them Coffee Chocolate Chip cookies. Or add in some orange extract along with fresh striped orange zests that beautifully pairs with bites of dark chocolate, you'll have some sinful Orange Chocolate Chip cookies. They are addictive, I caution you.

_MG_8361


Chocolate Chip Cookies - Eggless and Vegan

INGREDIENTS

1 cup non-dairy margarine (can be replaced with vegetable oil)
3/4 cup packed brown sugar
3/4 cup white sugar
1 1/2 tsp. vanilla extract
2 1/2 cups all-purpose flour
1/2 tsp. salt
1 tsp. baking soda
1/4 cup warm water
1 cup semisweet chocolate chips (dairy-free for vegan)

DIRECTIONS

Beat the margarine along with both the sugars (brown and white) till it's light and fluffy. Next, add in the vanilla extract. Add the flour and salt, mix well. Dissolve baking soda in warm water and add to mixture immediately. Stir with a wooden spoon and bring the entire mixture to form a lightly wet dough. Next add in the chocolate chips and stir them in. Drop by tablespoonful on to an un-greased cookie tray. Bake at 350 degrees F (175 degrees C) for 10 minutes. Don't over bake!

_MG_8346


Notes:

* The baking time for these cookies depends on the size and temperature of your oven. Hence test batch the cookies, if possible for the exact time. Large number of cookies of bigger sizes may take a minute longer. For this recipe, I used a tablespoonful of measure per cookie.

* I have replaced the quarter cup of warm water with orange juice and it works absolutely fine with the same results. You'll get similar results by replacing with any vegan milk or buttermilk too.

* 1 1/2 cups of sugar (3/4th cup of each sugar) is on the lower side and just about right for this recipe. The rest of the sugar is rendered by semisweet chocolate chips. However if you like your cookies sweeter, you may have to increase the amount of sugar by 1/4 cup.

* This yields a large batch of cookies, approximately 3 dozens. So reduce appropriately.


February is here, much sooner than I had expected. The past month has gone by so fast like a blink of an eye, leaving me wonder what’s making life so recklessly fast paced and ridden. The weeks in January just galloped away, much before I realized that we had stepped into February and are soon half way through into it. Do you sense the same notion that I do? Really, I have no clue why.

I have been feeling too restless lately, my mind too busy, my emotions disparate and my body physically dissolute. Hanging between the pendulums of taking some important decisions, I am primed with making those choices that will bring about big change in our lives. Of taking a stance whether I should or should not. There are many at this moment, some long standing ones that need to be pushed off, some small yet important that cannot be ignored and some as big that they cannot be disregarded. The pressures to be decisive will increase as time clocks away and things will get clearer as I tick off each of these from my bucket-list. Time is a good healer and things will settle down soon. Soon I will come to a consensus to believe that - what happens shall be for our good.


While all of these have kept my mind busy lately, somewhere in the corner of my mind nests my dire desire to stay composed and stress free; of looking out means to get away from these chaos of life. On one such weekend, this Coffee and Walnut Strudel Tea Cake was made.

Coffee and Walnut has always been a winning combination for me, that being one of my favourite choices of cake whenever I order out. The Strudel with Oat topping gives this tea cake a lovely rugged, tough look, without ignoring the beautiful crunch in each bite. Hope you enjoy this cake as much as I did.


Coffee and Walnut Struesel Tea Cake

INGREDIENTS

For the cake loaf:

175 gm. plain flour
175 gm. salted butter
175 gm. brown sugar
1 tbsp. ground flax seed in 3 tbsp. water *
2 tbsp. yogurt *
1 tbsp. strong black coffee
1 tsp. vanilla extract
1 tsp. baking powder
1 tsp. baking soda
60 gm walnut pieces

For Struesel Topping:

20 gm. broken walnuts
20 gm. regular oats
40 gm. plain flour
25 gm. granulated sugar *
25 gm. cold salted butter

DIRECTIONS

Preheat oven to 190º and grease a loaf tin with butter. In a large mixing bowl, sift all the dry ingredients and mix well. Add the walnuts and stir well. In another bowl, pour all the wet ingredients and mix well. Pour the wet ingredients into the dry ones and mix well till just combined. Pour batter into the loaf tin.

To make the Sruesel topping, take the walnuts, oats, plain flour and sugar in a mixing bowl. Gently rub in cold butter into this mixture till its crumbly. Top this crumbled mixture on the cake batter. Bake for 30-35 minutes till a toothpick inserted in the center of the cake comes out clean. Allow to cool on a rack and slice to serve.


* I strongly dislike the flavor of flax in my bakes. However I do realize that flax is one of the easiest and best replacement for eggs. Similarly I always had winning results with yogurt as replacement, hence I combined both of these to get the perfectly textured cake.
* I used granulated sugar for the struesel topping because I ran out of sufficient brown sugar. You may use brown sugar instead.


Gifting or exchanging gifts during festivals per se was never a part of our culture. The only form of festive gifts were probably the homemade sweets and savories we shared with our family, friends and neighbours. However life changes to an extent after marriage, where embracing new culture, their lifestyle and values become essential to maintain the social associates. Exchanging gifts, termed as Shagun is an integral part of my husband’s side of family. Be it an occasion, a festival or just a casual greeting, it is inevitable to exchange gifts as a gesture of love and respect. For someone like me who had never seen this in my part of the world earlier, this seemed a bit prodigal and odd initially. Over years though I have learnt to accept and appreciate this culture and own it as well.


Festive gifting, particularly around this time of the year seems to be gaining a lot of popularity in India too. As known for a fact, Christmas was always associated with sharing of gifts by Santa Claus. As a kid I have lived by my share of dreams and fantasies, hanging stockings by the bedside and window sill around Christmas time, secretly hoping that some Santa would come by riding on his reindeer on this big night and drop a surprise gift that I had been longing to own as mine. I must say assertively that over the many years I hung my stockings by the window sill never did a Santa come by or drop goodies into my stockings. I realized eventually there existed no Santa, nor would my stockings be ever replenished with gifts, so I gave up on them. I wonder though why my parents never bothered to drop any goodies in there. Least I think, as a bribe that idea would have been fab.

With Christmas just around the corner and keeping in mind that these can make great give away gifts to your family and friends this season, I have 2 recipes for you today. The Home-made Christmas Mincemeat is purely vegetarian, much unlike of what it's name suggests. The inspiration to make these came from Nigella Lawson's 'How to be a Domestic Goddess', however the recipe for the same is tweaked and adapted from David Lebovitz's Quick & no-cook Mincemeat recipe I came across here; while the Candied Orange Peels are such delicious bitter-sweet treats that you will love to munch them as is or use in various recipes.


Home-made Christmas Mincemeat

INGREDIENTS

175 g raisins
100 g sultanas / black currants
100 g dried cranberries
100 g candied peel, finely chopped
175 g soft dark brown sugar
Zest of 1 orange
Juice and zest of 1 lemon
1 tsp. all spice mix (a freshly ground with cinnamon, cloves, cardamom and nutmeg)
5 tbsp. brandy

DIRECTIONS

Mix all the ingredients together and stir well. Spoon this into clean and sterilised jars. I sterilise my jars by placing them in warm oven for couple of mins. Allow the flavours to mature for at least 2 weeks. This works great for pies, tarts, Christmas cakes and puddings.


Home-made Candied Orange Peels

INGREDIENTS

2 large thick skinned oranges
2 cups sugar, divided
1 cup water

DIRECTIONS

Neatly score the oranges into quarters. Remove all the flesh neatly and retain the peels. Carefully scrape off the white pith as much possible so that the zesty orange peel can be used. The white pith will render bitterness to the oranges, hence its essential to remove all of it for best flavours. Chop the peels into 1/4-inch-wide strips as shown above in the 2nd picture.

Drop these peels into cold water. Bring this pot of water to a rolling boil. Drain off the water and repeat this twice with a new batch of water. This will soften the orange peels and mellow down the bitterness.

Next, in a thick bottomed pan heat 2 cups of sugar with 1 cup of water. Bring to a simmer and cook till it reaches one thread consistency. Add the peels and cook further till most of the sugar coats the peels and the peels get translucent. Remove from the flame and drain off any excess sugar. Place them on a tray and allow to dry further if you wish to store them. You may also roll them in castor sugar if preferred. However, I used them on the following day in recipes for Homemade Mincemeat (recipe above) and Christmas fruit cake.
How to make Mawa Gujiya, Karanji, Karjikai, Kajjkayalu
I did intend to post this recipe for Diwali, ideally 2 days before the festival when I made them at home. I sat down to jot this post too, all to be published in time, but soon had to leave it partially done since I got busy at many other things that demanded time and attention. There was unpacking from the last trip, and packing for another trip to come. Setting up the diya and lights at home, cooking for Diwali, a bit of photography to post here left little time for me to bring this here on time. Yet, considering the 5-day long festivity that Diwali is known for, I guess its still okay to post it here today. :)

Diwali, 'The Festival of Lights' is a huge festival in India. It's the best time of the year where every household in India is seen busy preparing for the festivities. It's the most coveted festival that we look forward to. Months before Diwali, preparations begin at home. There's excitement about celebrations, profound joy in wishing all, of taking time off to visit family and friends, of spending evenings lighting up the home with diyas and kandeels, and of sharing loads of sweets and savouries to all who visit home. It's mesmerizing to see how homes are transformed beautifully this season.


This Diwali has been quite special and a very busy one to all of us. Just as we crossed 2 weeks since my brother-in-law's wedding, we were at my in-law's place to celebrate the newly wed's first Diwali in full spirits. Such a joyous occasion it was to be with all and celebrate as one family.

No celebration in India is complete without traditional sweets. It makes it more special when the joy of celebration is shared with family and friends. Before leaving home, I made a batch of these Mawa Gujiayas to be shared with my family and friends. The mawa/khoya was home made from a large batch of left over milk powder. Some went into making these jamuns. The large part of the rest made it to these Mawa Gujiyas. Thanks to Suma, her recipe for homemade low-fat mava/khoya is fab and perfect that I will not bother to buy mawa from stores for any recipe in future. I wouldn't bother to detail it out here, rather I suggest you hop over to her site where she details the process very well. If you don't consider making mawa at home, then store-bought mawa do good too.

As they went into this recipe, they made the most delicious gujiyas ever. As a first timer, I do think there is scope for bettering my techniques for frying these. The oil, the heat moderation and all of that. The fact is that I hate slaving over the wok full of oil. Second, I always underestimate the amount of oil required for frying, as obvious to the fact that I don't fry often. It's only during Diwali or Navrathris do these traditional sweets make a part of my kitchen activities.

Making gujiyas are really simple, much unlike of what they seem to be. In case you have store bought mawa, then most of the effort in my opinion goes into frying these. Don't attempt to bake them. They will flop. Here's a small attempt to show how to shape them. Either in form of purses or like empanadas, whatever you choose to like. But be careful as you seal them, since one imperfectly closed gujiya is good to ruin the oil totally. I hope that helps all.


I hope you had a safe and fabulous Diwali.

Here's Veg Bowl wishing all the readers a Happy Diwali!!! Belated ofcourse!


Mawa Gujiya

INGREDIENTS

For the Outer cover:

2 cups Plain flour / maida
2 tbsp. Ghee
Oil to deep fry

For the Filling:

2 1/2 cups Homemde Khoya/Mawa or Store-bought Khoya/Mawa
3 tsp. Desiccated coconut
1/4 cup Cashewnuts
1/4 cup Almonds
1/4 cup Walnuts
Handful of Raisins
1 tsp. Cardamom powder
2 1/4 cups sugar

DIRECTIONS

For preparing the covering, rub in 2 tablespoons of ghee into the flour till they resemble like coarse sand. Be gentle and use light hands. Add water and knead gently into a stiff dough. Cover with a towel and set aside to rest till you make the filling. For the filling, pulse the cashewnuts, almonds, walnuts, dessicated coconut till they have a coarse texture. Don't grind it finely. You will love to bite into them. Lightly roast the nut mixture over low heat till they change their colour. This is an optional step though and you may rule out if you are short of time. Add the grated mawa and sugar into these nuts and stir further on low heat for a minute. Switch off the flame and add the cardamom powder. Oil your hands and divide dough into small lemon sized balls. Flour the surface and roll out the dough into small rounds of 7-8 cms in diameter, similar to puris. Alternatively, you may use an inverted cup with sharp rims to get a nice round shape. Place about 1-2 tsps. of stuffing on one half, lightly dampen edges with water and fold the other half over the stuffing like a moon. Press the edges firmly and pinch them as shown in the picture above, similar to momos. This will help in sealing the gujiyas well and ensure the filling doesn't spill out while deep frying. Heat sufficient oil in a kadai and deep fry gujias on medium heat till golden brown. Allow to cool and serve.

_MG_5584


I have a recipe featuring nuts back to back and my apologies if they are not your take. It simply shows how much I have been nuts about nuts these days! Seriously, the fact is that despite my profound love for them, thanks to this appreciation towards dry fruits and nuts I have inherited from my dear dad, they've always remained in the hind of this blog. For no particular reason, I have been on nut binge off late, indulging in them more than warranted, though I have rarely felt guilty about them. To an extent, the other day, I added roasted walnuts in a typical south Indian styled beans stir fry and felt mighty good devouring them. These Honey Loops & Nuts Chikki made up our sweet treats during mid-day breaks and post meal snack the last week through. Yet, I say, it doesn't justify my love for these roasted treats, almonds and cashews in particular.

Indeed, I have my freezer loaded with them in kilos that should last me a year. Dates, raisins, figs, almonds, cashews, walnuts and handful of apricots. Handful, because dried apricots are tough and not really my favourites. But among the rest it's hard for me to make a choice.

_MG_5593


We are just back from a short vacation in Goa. A vacation to commemorate our wedding anniversary and his birthday. We basked in the serene beauty of Goa’s pristine beaches, green foliage and golden sand. Out there we soaked up the sun, got a massage in the spa and relaxed all day long. We discovered moments of togetherness with the sand castles we built together for our daughter as the frothy waves swept them gently, watched the sun go down the other side of the coast and took long strolls on the private beach. We revived our energies as we went swimming, biking and street hoping (Goan streets and markets never fail to amaze me). No vacation is worth the vacation without good food, so we certainly made our's worth as we binged on loads of delicious good food.

The trip though short (2 nights and 3 days) was packed with energy, fun and enthusiasm. Goa carries an ethereal realm of Portuguese culture that none other city in India has seen and it leaves me amazed each time. We are back home fresh and rejuvenated after this therapeutic vacation, much to an extent that we are craving for another trip soon. :)

Perfecting the holiday mood we were in, I decided not to bake or spend too much effort in the kitchen. Instead I made and carried these Dry Fruit Rolls for our trip. These rolls are not just healthy, but sugar free. They are well suited for toddlers and diabetics. Naturally sweetened with dates and figs, these have my coveted roasted nuts that make this a decadent anytime treat. Hope you'll enjoy them as much we did.

_MG_5597


Dry Fruit Rolls

INGREDIENTS

2 cups pitted and chopped dates
1/2 cup dry figs
3/4 cup roasted cashew nuts
3/4 cup roasted almonds
1/2 cup roasted walnuts
1 tsp. orange peel
2 tbsps. orange juice

DIRECTIONS

Chop dates and figs as finely as possible. This will help in easier blending of ingredients. Combine the chopped dates and figs along with orange juice in a pan and bring it to a boil for about 5 minutes on medium low flame. Using the back of a flat wooden spoon, mash them as much possible. Switch off the flame and allow it to cool. Medjool dates can be best used here. If not, use any moist date you have at hand. I used Lion seedless dates, which were moist enough for this recipe. Remember dried ones are tough and will not help here.

Pulse the dates-fig mixture along with chopped orange peels in a food process as much as possible with no additional liquid or orange juice. It should have a moist and sticky dough like consistency. Roughly chop the roasted cashews, almonds & walnuts and add it to the prepared date-fig dough. Scrape the entire mixture into a plastic food wrap (a butter greased aluminium foil will do alternatively). Roll the wrap over to encase into a roll. Chill for about an hour. Remove from refrigerator and using a serrated knife cut them into rolls of desired sizes.

_MG_5594

_MG_5700


I almost feel stupid when I say this each time, but I have to say it again. It’s nearing October already! Time has been flying way too swiftly and I feel out of control in the whirlwind of life. Where did it go and how so soon? What have I been doing? We’ve crossed major part of the year and are heading closer to the ends. In less than 2 months, we’ll have November and December. And I before I know, we would have crossed yet another year.

I checked the spiral-bound table-top calendar the other day that sits on my fridge top; dusty and untouched, with spiders spinning webs around its edges. I realized, I hadn’t shifted pages on it for months. It read March, with scribbles around dates marking the liters of milk we got delivered each day and encircling dates when my maid took leaves. Oh, was that the last time I even glanced it? May be yes.

_MG_5683 _MG_5681 _MG_5707


Yes, I recall that was the last time we had a milkman deliver us milk at doorstep since he eloped with the advance money cheating on us. It’s been far too long we have been doing away without a replacement for him. And also, probably the reason why I never flipped pages on my calendar and moved dates, since I stopped tracking them. I feel sheepishly low about the passing time. Because I am unable to recollect anything worthy I may have achieved this year.

_MG_5689


On a positive note, the later part of the year brings immense joy to my heart. Loads of festivities, several holidays, family get-togethers and festive food is something I have always enjoyed and looked forward to. October, this year will be hectic, yet fun-filled. We have a calendar packed with activities. Together I hope, we will weave wonderful memories with our family and friends. We have some important birthdays and anniversaries to celebrate. Then there’s a family destination wedding we have been looking forward to. Between these preparations, while cooking has been regular, I have lost the mojo to pursue food photography or blogging simply because 24 hours a day does not suffice my schedule. Alas, if only I had more time to pack in more things I love to do, while the others take the priority.

_MG_5723


Yet in all say, for recipes like this one I have for you today, it takes hardly any effort and time. From start to end, Honey Loops & Nuts Chikkis are done in a matter of few minutes, assuming you have the roasted nuts handy. Even if not, it's no greater effort. Chikkis or Caramelized Nut Bars are my all time favourite pass time snacks. I have made them on several occasions in the past and posted some here and here too.

The key to getting a good chikki is the right level of caramelization of sugar, a golden amber stage where it sets well with the perfect delectable crunch. Honey Loops are just my substitution for Indian puffed rice (a.k.a. murmurra) in a bid to wipe off the last few handfuls that I had in stock. You may as well use the Indian puffed rice with same ease. They lend a lightness and crispness that sets well again crunch of roasted nuts.

_MG_5719


Honey Loops & Nuts Chikki

INGREDIENTS

1 cup mix of roasted almonds & walnuts
1 1/4 cup Kellog's Honey Loops / Cheerios (substitute Indian puffed rice instead)
2 tsp. golden raisins
1 cup regular sugar
1 tbsp. ghee/ clarified butter
1 tsp. cardamom powder

DIRECTIONS

Grease a flat steel plate with some ghee / clarified butter and set aside.

Roast the almonds and walnut on a medium low flame, stirring frequently till they change their color to golden brown and become aromatic. Melt a tbsp. of ghee (clarified butter) on medium low flame in a heavy-bottomed pan. As it melts, add sugar stirring continuously till the sugar melts and begins to turn golden brown. At this stage we need to keep a constant eye on the sugar syrup. When all of the sugar melts completely, switch off the flame and add in the nuts and raisins, followed by honey loops quickly. You need to be swift and quick here. Sprinkle the cardamom powder. Quickly stir all the ingredients and mix well with a wooden spoon. Transfer it to the greased plate. Smooth the prepared chikki with the back of a flat wooden spoon. If you prefer neat squares, use the tip of a knife, drag lines across to form square/bite sized pieces. Allow to cool then break them off.

_MG_5712

Velvet Beet Cake

How to make Velvet Beet Cake| Easy Velvet Beet Cakei
I have attempted to bake a Red Velvet cake on several occasions in the past. There’s a strong temptation to get the perfectly red one with beets and no fake colouring. Alas, I failed. So, I call this one a Velvet Beet cake and not a Red Velvet cake that I would have loved to call otherwise. It’s funny because, each time I got perfectly baked cake with pleasing results and good texture, it was sans that deep red colour that would qualify it to be called as a Red Velvet cake. It always ended up brown and chocolatey, often good to be christened as a nice Chocolate cake. Even the best of the beet cake recipes have not helped me.

So it stays to be a Beet cake, till I achieve the perfect palette of colours in them and share them with you here. :)

_MG_4667 _MG_4674


None can ever figure out that beets are sneaked in there. Not even the husband who saw me busy puree them late night and putting them together! He says he can’t imagine a cake out of beets. But why not, when we have cakes made from carrots? And you are sure to get a thumbs up. Don’t let the folks know there’s a vegetable in there. It makes them biased. Instead, let them enjoy, allow them to take second and third helpings and let the cat out of bag later. I bet you’ll get gawked looks like I did! It’s amusing.

_MG_4676


I say this one is extremely healthy. Because I use olive oil instead of butter, beet puree makes up for the eggs, organic vanilla powder and brown organic sugar add depth of flavors instead of the refined one. So it’s eggless, butterless and certainly healthy with vegetable sneaked it. I feel no guilt when I feed my daughter the slices of this cake as she despises beets in their true form. This way though I sneak them into her and I am a happy mother to a cheerful toddler.

_MG_4693


Velvet Beet Cake

Recipe minimally adapted from here

INGREDIENTS

1 medium sized, beetroot (boiled until tender, then puréed)
1/3 cup oil (I used Olive-Pomace oil)
1 1/4 cup organic brown sugar
1 1/2 tsp. organic vanilla powder
1 1/3 cup plain flour
1/4 tsp. salt
1/2 tbsp. cocoa powder
1 1/2 tsp. baking powder
1 cup milk (use any vegan milk of your choice, like soy or cashew milk for vegan option)

DIRECTIONS

Preheat oven to 180 deg C. Grease the bundt pan with oil and dust with plain flour.

Wash thoroughly and boil the beet until its soft and tender. Using a blender/mixer, purée it to a fine paste along with milk and brown sugar. Opt for regular sugar if you don't have brown sugar. Next add in oil and vanilla powder/ extract and blend further until incorporated. Set aside. In a separate bowl, sift together flour, cocoa powder, salt, and baking powder. Add the flour mixture to the beet milk mixture and stir gently until all is well incorporated into the batter. Bake for 40 minutes or till done. Insert a toothpick in the center of the cake and test for done. Remove and allow the cake to cool on a cooling rack. Serve as is or with dollops of cream or ice cream.

_MG_4695