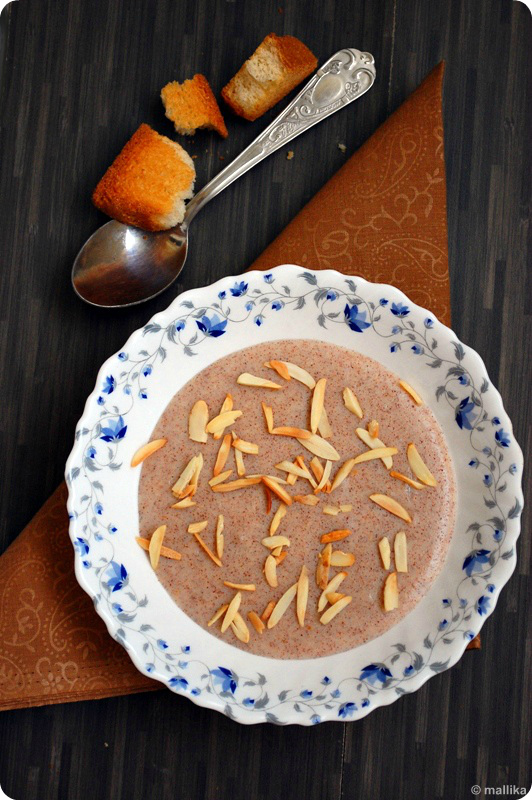
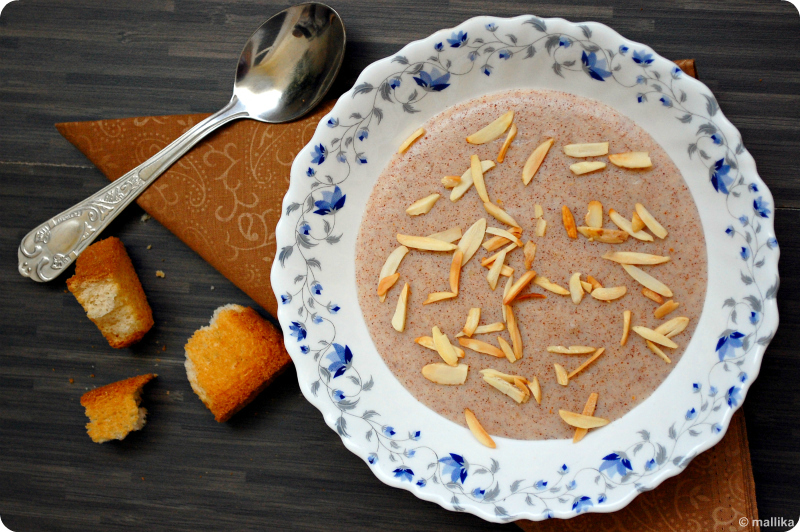
We celebrated Makar Sankranthi on the 15th Jan at home in a small way. Nothing much really, except when it comes to food I wouldn't want to miss any kind of celebration. Since it's my daughter's first Sankranthi, keeping in mind the festive mood, I made two versions of Pongal, the sweet and the spicy version. Gud Pongal or Sihi Pongal, (sihi meaning sweet) is made of jaggery and is one of the easy and healthiest desserts that I have ever learnt to make. Though I don't often make this, Sankranthi gives me the best occasion to make and share this simple and easy recipe.


It also happens to be one of my husband's favorites... he often tells me that during Pongal festival, their neighbors would often send them both sweet and spicy pongal and as kids they would go raring over it and relish it unendingly. I rarely find him asking me to make something specific, but when these reminiscences of childhood bring back fond memories and he insisted I make some of this for him I couldn't refuse. This happens to be a common dish in most Tamilian homes during this festival.


Sihi Pongal

INGREDIENTS

3/4th cup moong dal
1 cup rice
1 cup milk
2 1/2 cups jaggery
1 tsp freshly pound cardamom powder
Handful of raisins and cashewnuts
3 tbsp of clarified butter / ghee
1/2 cup freshly grated coconut


DIRECTIONS

Wash, clean and pressure cook the dal and rice with 4 cups of water for 3-5 whistles. Alternatively cook them in a vessel till they are well done and mushy. Once cooked, add a cup of milk and jaggery and bring it to a gentle boil. Gently mash them using a spatula.

In a separate pan, heat 3 tbsp of ghee. Fry the cashewnuts and raisins and add to the pongal. Add the powdered cardamoms finally in the end. Mix well and serve hot.


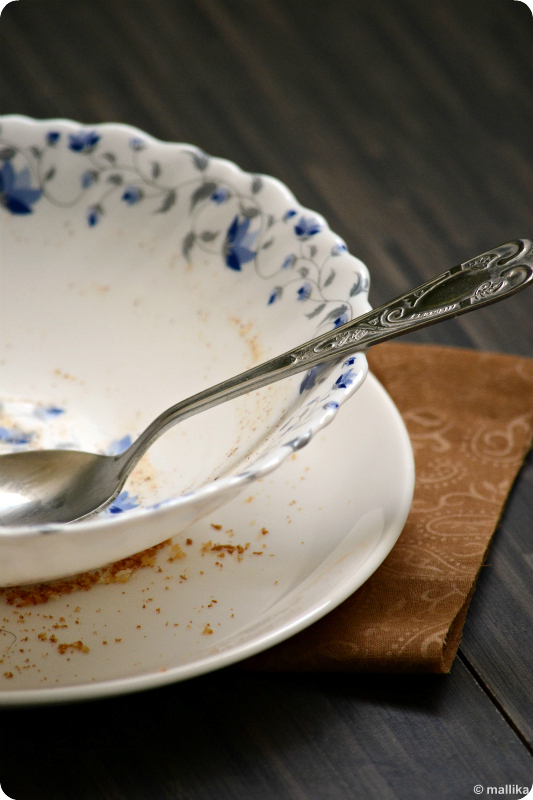
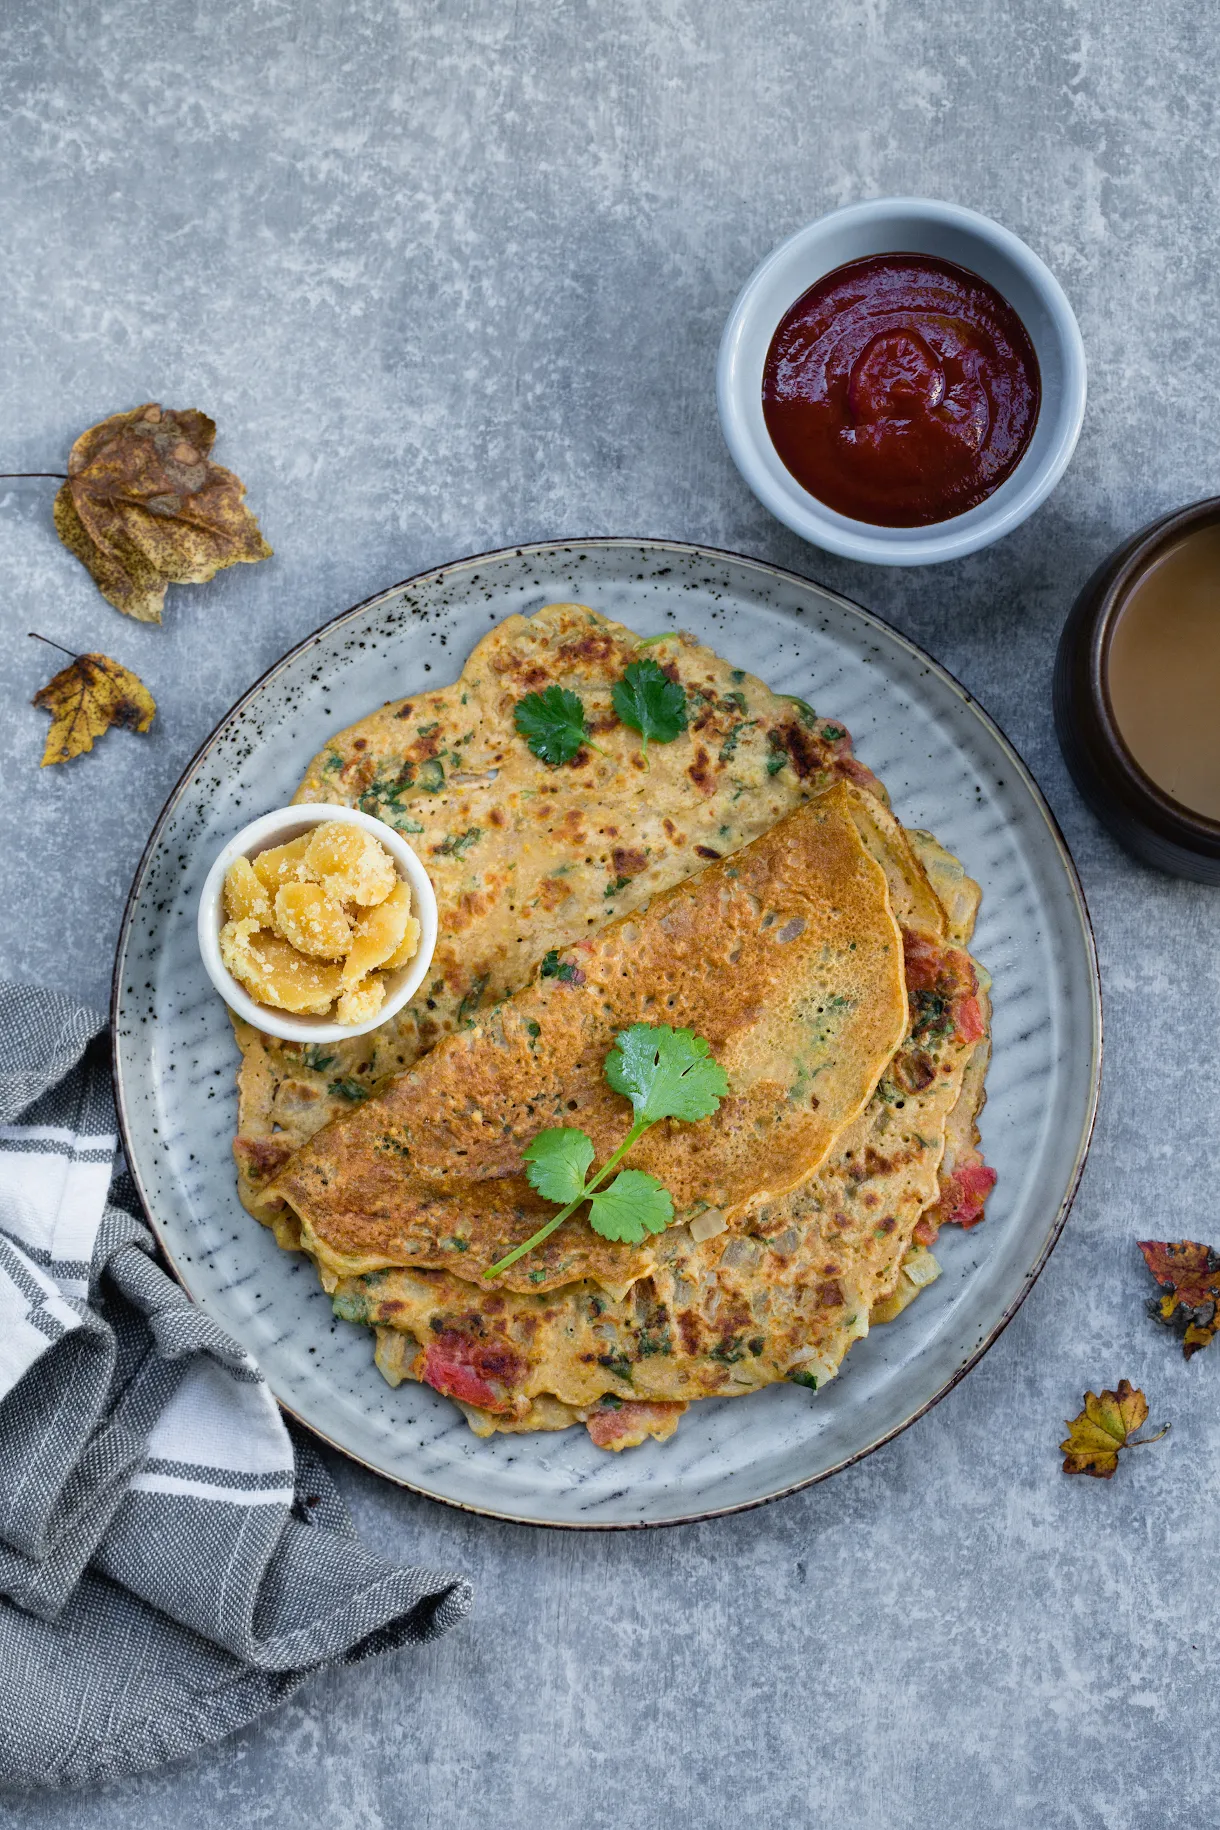
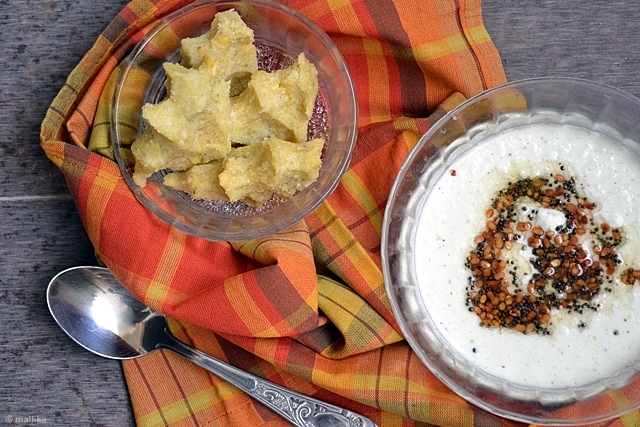
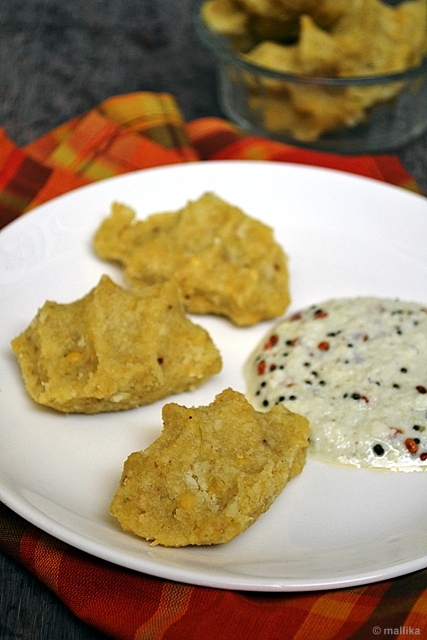
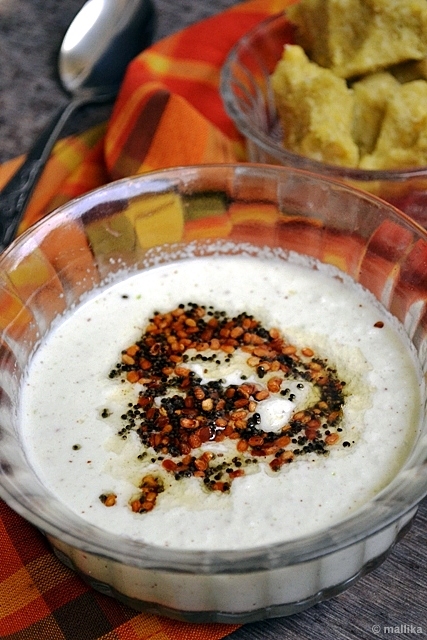
Be sure to serve this with a massive dollop of ghee. Every morsel of this sweet pongal is heavenly and that dollop of ghee only elevates this experience. Rice and dal have starch which make this sticky on tongue if no fat is added. Adding ghee will balance the starch and enhance the flavors. Our fussy daughter is too choosy about food and variety. While she shuns the regular dal-chaawal combo, she happily enjoyed this Pongal and that gave me immense satisfaction.


I have been meaning to do this post since long. Somehow I have been procrastinating and what was meant to be posted two months ago is coming up now. This is meant to be a baby food, but in due course I have taken keen liking to this and have made it my meal too.

For almost 5 months, we did not introduce any external food to my daughter and she was fed on milk alone. However, since her 5th month, we introduced light foods like juice and mashed bananas. I had to get back to work, which meant feeding her in my absence was a challenge. We put her on external semi solids in her 6th month, with our baby growing from an infant to a toddler, only milk would not suffice for her growth.

My mom often teases me that I had strong affinity toward food since my birth. While most babies easily fuss about food and expect variety in terms of colors and flavors, I would happily take what ever was fed to me.

One of the most common baby foods made with utmost care and regard is this Ragi Manni which simply translates to Finger Millet Pudding. Finger Millet, called as Ragi in Kannada is very nutritious as it's gluten-free and high in proteins, minerals, calcium and fibre. Ragi Manni is one of the best food you can begin to feed your baby with. It has a semi solid consistency and a texture similar to pudding.


It took me deal of an effort to make this brown slush look presentable. I mean how good can a porridge look otherwise? Left undisturbed for a few minutes, you know there's an ugly layer that forms on top making it totally unpresentable.

Ragi Manni

INGREDIENTS

Ragi - 1/2 kg
Handful of Almonds

DIRECTIONS

Wash and soak ragi millet for 8-10 hours or overnight. Drain the water out completely. Tie the soaked ragi in a thin cotton cloth like that of muslin and hang them in a cool, dry place to germinate. Within next day or two you should see the millet sprout. Once sprouted, spread them on a clean plate and allow to dry in shade.

Soak almonds for a couple of hours. Drain the water and skin them. Allow the almonds to dry along with the millet.

Heat up an iron pan to medium low flame and gently roast the sprouted millet and almonds till it pops. Since this is a baby food, be careful not to let them burn. It may take some time, but be patient. Once roasted, allow them to cool down completely. Using a heavy duty grinder, grind it into fine powder. Store this powder in a clean, dry, airtight container.


Prepare the baby food:

There are two ways we make this. Sweet and Salt version. My daughter has less of sweet tooth and enjoys the salt version better.

Dissolve 1 teaspoon of ragi powder in milk ensuring there are no lumps. Heat this on a low flame till ragi is cooked and it thickens. Heat through well stirring constantly. Once completely cooked, add in sugar or jaggery to taste. I use sugar since the jaggery often has dust and many impurities. Allow to cool and serve to your baby.

For salty version, dissolve 1 teaspoon of ragi powder in 1/2 cup of water. Bring this to a boil, stirring on a low flame. Once thickened and completely cooked add salt to taste. Allow to come to room temperature. Add in yogurt to this prepared ragi, whisk well and serve to your baby.


Celebrations generally continue at our place with birthdays falling in the first week of January. The Capri girl that I am, I am usually flooded with greetings not only for the New Year, but following my birthday too. I am extremely poor at remembering birth dates and I feel overwhelmed when people take effort to remember my birthday and wish me, including my close friends whose birthdays I've always missed to wish. It happens often that I end up remembering them a week or even a month later, then repenting not having wished them, once again.

The trip to Mangalore earlier during the Christmas was fun. Being at home town is always comforting and that too in a city where I grew up and spent most of my teen life. Yes, I do have a sense of belonging attached here. We relaxed and the trip took us away from all the hustle bustle of city life. We rested through our stay, while the calm, serene and peaceful city indeed did the best to our souls and we felt extremely rejuvenated post the trip.


And even as we were bouncing back to our routine life, we had another trip planned in advance to Mumbai. Hubby hadn't seen Mumbai for more than a decade and badly wanted to pay a visit. With all that travel and bag packing done, there wasn't much scope for baking for my birthday. Fortunately, we were home on the New year eve. With our baby around, her sleep and food patterns would hamper her schedule and put us to trouble, so we stuck to staying indoors and partying at home. Same evening when I had a little time at hand, I put a few ingredients together and worked briskly to bake this simple yet delicious cheesecake which we not just enjoyed over the New Year Eve, but was carried over to my birthday as well.


Baked Cheesecake with Orange Glaze

INGREDIENTS

For the Crust

75 gms digestive biscuit (I used McVities)
1 tbsp sugar
4 tbsp melted butter

For the Filling

1 cup grated homemade fresh paneer (cottage cheese)
1 cup medium fat cream
1/2 cup thick hung yogurt/Amul Srikhand
1 cup sugar
1 tsp vanilla extract
1 tbsp corn starch

For Orange Glaze

1/2 tsp agar-agar powder
1/4 cup orange juice, fresh or canned
1 tbsp sugar or more, depending on your taste
1 tsp orange rind
Flesh from 1 orange


DIRECTION

For the crust: Mix the finely crushed biscuits, sugar and butter and press the mixture evenly into a 6" diameter loose bottom tin or a spring-form pan. Chill in a freezer.

For the filling: Blend the paneer till it's liquid and pour-able. Add the hung yogurt and sugar to blend with paneer further. Ensure it's blended well uniformly. Whip in the medium fat cream and add it to the above mixture along with corn starch and vanilla. Whiz once more.

To assemble: Pour the filling over the set crust. Bake in a hot oven at 200 degree c (400 degree f) for 15-20 minutes or till the sides are set and the center is still a little jiggly. Remove and allow to cool in th refrigerator.

To prepare the glaze: Dissolve the agar in cold water and bring it to boil. Add in the orange juice, rind, sugar and orange flesh. Bring to a boil and pour on prepared cheesecake. Allow to set. Decorate with orange rind if desired.

The key to a good cheesecake is to allow it to set overnight or at least for 6 hours in refrigerator. That's when the flavors develop and mingle well, also letting the cake set firmly. The cheesecake was fabulous and made up for not just the New year, but my birthday too. On the flip side, I found the crust uneven and thicker on edges and I need to work on getting them right. I also felt the filling could have increased in quantity for the crust made, which would in turn give the cake the desired height, making it more presentable. But nevertheless the cheesecake had all the flavors right. The orange flavors burst out with every bite. The orange rind is extremely refreshing and adds that zing factor to this cheesecake, so I suggest you do not miss on that. They not only add flavor, but the glamuor element to the cake. Cottage cheese cannot be tasted and blends well with the cream, thus making this cake soft, moist, cheesy, citric and rich. A totally decadent treat.


Hope you guys are having fun time with your family and friends. A little late though, but I am happy I managed to post this for the holiday season. Travel to Mangalore with my family kept us busy. Packing bags and cleaning up the refrigerator took a deal of my time. Packing bags was never this challenging as it was offlate with the baby. The baby bag almost took the entire world in it, all in minature sizes! The chill Bangalore weather just added more winter clothing to the travel bag making it heavier. Phew!


With all this, I had least expected I would bake. Hubby was back from his adventure trip and demanded a fruit cake. I rebeled initially, given the amount of work I had at hand, but later couldn't resist the thought of baking for Christmas, to bake and pack something that we could carry for our trip too so that our family could enjoy.

Spices, fruits and nuts make such a quintessential part of Christmas baking, that without them the holiday's celebration does not sound complete. This is the coldest time of the year and the spices and liqour soaked fruits and nuts give all that warmth to make the winter holiday season eventful.


Baking a cake didn't figure out in my list this year, that's probably because a spiced fruit cake uses exotic ingredients like the best of fruits and nuts, soaked in liquor, tossed in homemade spice mix and baked to lend warm, heart rendering flavors to the cake. When there's so much of pre-planning and process involved, I ensure I make it with utmost care and caution. And that calls for time and attention. Instead on the lines of similar flavors, I had in mind these spiced bars that I baked the morning we left outstation, so that we could enjoy them through our journey with ease.

I apologize for these snaps. They aren't the best and do not justify the burst of flavors these bars have. I photographed them in a hurry and packed them off to be relished later.

Spiced Fruit and Nut Christmas Bars

Inspired by Panforte Di Siena from Big Book of Baking

INGREDIENTS

1 1/4th cup all purpose flour
3/4th cup brown sugar
3/4th cup butter
1 tbsp mixed peels
1 tbsp honey
1 cup Kahlua/Tia Maria/Coffee liquor
1 cup mixed fruits and citrus peels (raisins, sultanas and dates)
1 cup mixed roasted nuts (almonds, pistachios, melon seeds, walnuts, etc.)
All spices homemade mix


DIRECTIONS

Pre-heat the oven to 180 deg C. Grease and line a square cake tin. If you prefer wedges, use a round baking tin.

Chop the dates finely. In a saucepan, add in kahlua, honey, brown sugar and butter along with raisins, sultanas and chopped dates and bring it to a rolling boil. Boil for about 6-8 mins. By this time the raisins and sultanas will swell. Add in the citrus peels and all spice mix. Turn off the stove and allow to cool a little. As the mixture cools down, add in the all purpose flour and stir well. Finally add in the chopped roasted nuts to this mixture and toss them together. The batter is bound to be stiffer than the regular cake batter. Transfer it to the prepared cake tin and bake for 35-40 minutes. Once baked, remove from oven and allow to cool a little. Slice them to bars or wedges as desired.


These bars were inspired by Panforte Di Siena from Big Book of Baking, but with a difference. They are a cross between cake and cookies, sort of like fudges. These bars are rich and buttery, so you may reduce the butter to half a cup as well. I used Kahlua to flavor them. The hint of coffee liquor comes out subtly against the warm coziness from spices in an earthy backdrop from brown sugar. A touch of Christmas with a mélange of vivid flavors.

With just 3 days to go, New Year 2012 will be here. The advent of new year comes new hopes and new possibilities. I hope this year brings good luck, joy and happiness to all and brightens up every life. Here's wishing all my readers a Happy New Year 2012.


You know Christmas is here when your eyes tune to seeing shades of reds and whites everywhere. I am eyeing at the holiday season which is all set to beckon us with some travel, which means loads of fun and excitement with family and friends, which I am eagerly looking forward to. To all my fellow readers, I extend my warm and hearty wishes for Merry Christmas and Happy New year.

Seriously, I can't imagine Christmas without a fruit cake of any kind. Christmas is already here and my fruits aren't soaked yet. I would probably settle for a store bought one. Sweet cravings of plum cakes and rose cookies flood my memories as I think of them. The deep amber cakes dotted with dry fruits and nuts lining the stretch of glass shelves in bakeries and cake shops tempt me further and the aromas linger, hanging on so strong and etched.


Last week my hubby and dad set out on a biking expedition to greener pastures to enjoy the serene country side. The nature lovers that they are put the two of us, mom and me into trouble! With their trip came additional responsibility of bag packing and baby sitting my daughter. And you know that with a nine month old baby at arm all the time, who craves for the best of our attention, it can't get any easy for us. With more in my hand than I can ask for this year, I doubted if I could really extend myself to bake for the Christmas course.


Right before the day they set out on their trip, I scuffled through my pantry to pull out packets of roasted pistachios fervently, all of which I have been zealous to put to use for long. I put together pistachios and chopped chocolate chunks to make half a dozen ultimate pistachio chocolate chunk muffins for the ultimate adventure biking trip! These muffins were not only eggless to boast for, but also rich and luxuriously decadent that with every bite their energy levels boosted to the zenith!


Pistachio Chocolate Chunk Muffins

INGREDIENTS

1 cup all purpose flour
1/2 cup whole wheat flour (or use 1/2 cups all purpose flour instead)
1 tbsp corn flour
1/4 cup milk
3/4 cup melted butter
1 cup minus a tbsp of sugar
1 tsp baking powder
1 tsp baking soda
1 tbsp chopped pistachios
Fistful of chocolate chunks

DIRECTION

Pre-heat the oven to 180 degrees C. Line muffin liners on muffin pans. Sieve together all purpose flour, wheat flour, baking powder and baking soda. Keep aside. Beat the butter and sugar till it's light and frothy. To this add vanilla extract. Add the wet ingredients into the dry ingredients and toss gently till they are just combined. Finally add the chopped pistachios and chocolate chunks and give a final stir. Transfer the batter to the prepared muffin cups. Bake for 30-35 mins or till top looks golden brown done.


I draw inspiration from dozens of recipes I see flooding across the net, all hosted in style and glamor for the holiday season. Every click takes me to a new recipe and it tempts me further. As I bake a fruit cake of some sort every year, this year too plans weren't any different. I would have probably exhausted myself pondering hard what best I could do to revamp the traditional fruitcake I have been making since couple of years.

When I came up with these muffins, I was so glad the way they turned out, moist and crumbly, yet not utterly sweet and the buttery richness lent it a decadence which both the men enjoyed through their journey. Again, dad being particular about eggless cakes, these eggless muffins were enjoyed by him too without complaining. With pistachios and chocolate chunks you know they can't go wrong. Pack off to be given to your family and friends this holiday season!

Merry Christmas & a Happy New Year!!!

Besan Cheela

How to make BESAN CHEELA | VEGAN OMLETTE | BESAN PUDA Recipe
Besan ka Puda is what my mother-in-law calls them as. Vegetable Omelette or Tomato Omelette is what I have always known them back at my place. Besan Cheela is yet another name for the same. It's a protein loaded breakfast made with besan (chickpea flour) and water, whisked into a dosa batter like consistency. Turmeric, salt and coriander leaves are added. As with traditional egg based omlettes, lots of finely chopped onions, tomatoes and green chillies go into this batter. Or you can leave it plain if you prefer.

Add more health if you will with finely chopped veggies like grated carrots, beans, cabbage or spinach. I love adding tomatoes, but that's totally optional (above pictured has no tomatoes, and the below pictured was made with tomatoes in the batter). My mom would use thinned yogurt to whisk the batter. It makes these pancakes softer and more flavorsome. She'd also place slices of Amul cheese on one half, turn over the other half of the omlette and cook till gooey and molten. The gooey cheese does something magical that no kid can ever refuse!

It's a healthy protein-rich breakfast dish that can keep you full and nourished for a couple of hours. It's good as a healthy evening snack if you plan to skip dinner. It is sure to satisfy your rumbling appetite.

You can serve these with some green chutney, but we've always had them with ketchup and I stick by it 😅. Besan omlette and ketchup is quite a combination! Well, it's memories you see.

Tomato Omlette


Besan Cheela | Vegan, Gluten-free Omelette

INGREDIENTS

2 cups besan (also called as gram flour, chickpea flour, garbanzo flour)
1/2 cup chopped onions
1/2 cup chopped tomatoes
1 tsp chopped green chillies
1/2 cup chopped coriander (dhania)
1/2 tsp chilli powder
Salt to taste
1 cup water
Oil for cooking

DIRECTIONS


Combine all the ingredients in a bowl and gradually add a cup of water to get smooth, dropping consistency batter, similar to the one we get when an egg is whipped.


Heat a non-stick pan/tava on a medium flame. Grease it well with a teaspoon of oil. Pour a ladle full of batter and spread the batter evenly in the pan.


Cover it with the lid and allow to cook for 4 to 5 minutes on a medium flame or till it browns in colour and the edges crisp. Open the lid, drizzle some oil and turn it upside down and cook the other side till it turns to brown in colour and crispy. Repeat the same process with the remaining batter. Serve hot with tomato sauce.


Served hot with either green chutney or tomato ketchup, this Besan Cheela is a lip smacking dish that easily makes up for an excellent eggless, vegan and gluten-free omlette with similar textures and flavors to that of it's egg-y counterparts, ofcourse devoid of that awful smell or taste from eggs. Gram flour has relatively high proportions of protein in comparison to other flours, so you'll not miss out on that. Though this is quite satisfying for our breakfast, this is a fantastic tea-time snack too. Simple and easy to make, it can be put together in less than 5 mins and is a good rescue for bachelor cooking or to serve at-the-drop-of-hat guests.


To forget the real world outside and just being glued to the big screen for three hours, there’s something almost magical about the way movies can whisk you away to another place and time, all without leaving your seat. My husband and I are big movie buffs, that we are often found at the theater on weekends. And no, that does not account for watching a DVD at home. It has to be a theater. Period.

If there's something I miss the most, it's camping at a theater on the weekends. I can probably watch the same movie at home on a DVD, but it can't beat that theater experience. I am eagerly waiting for my daughter to grow up... with a hope that we can go back to watching movies, pick up those nachos and popcorn, sit back and relax to catch up movies in theater together as a family and revive that experience on 35 mm screen. For the moment, there's enough on my plate, that I can't seem to find enough time for movies or other entertainment.


Weekends have been catching on me like crazy, we did pretty much nothing but stayed back at home. Rest, rest, rest, that's all my body cries for... and weekend seems to be the only time I can catch a bit on my sleep, personal space and hobbies. I love it that I have so much in hand, hopping around like a bunny all the time with so much to complete that I have no time to think about anything.

Of-course, I missed baking through the week so much that I promised I would dedicate an entire afternoon doing just that. This Spinach and Mushroom Lasagna was my effort to make a gloomy weekend peppy. I think I was pretty much fruitful at that. :)


Spinach and Mushroom Lasagna

INGREDIENTS

Lasagna sheets, about 8-10 numbers
2 tablespoons butter
4 tablespoons all-purpose flour
3/4 ltr milk
A tsp of nutmeg powder
1/2 cup grated Cheddar cheese
1 pack Button mushroom (about 200 gm)
1 bunch spinach
Salt and freshly ground pepper to taste

DIRECTIONS

Prepare the lasagna sheets as per the instructions on the pack.

Bechamel Sauce

Melt the butter in a heavy saucepan over a low heat and stir in the flour and saute until the mixture darkens slightly (about 1/2 min). Gradually pour in the warm milk, stirring continuously until the sauce is smooth and begins to thicken. Add in a bay leaf. Reduce the heat and stir until it boils. Stir constantly as it tends to settle and burn at the bottom if unattended even for a minute. Heat until the sauce thickens to a thick-custard consistency (about 5 mins). Season with salt, pepper and nutmeg. Mix in generous tablespoons of grated cheddar cheese.


Prepare the vegetables

Pick, clean and wash the spinach and mushrooms. Chop them roughly. Heat some oil in a pan and throw in the spinach. Cook till they are wilted. Add in the mushrooms and saute them for 2 minutes. Do not over cook else they will turn soft and mushy. Season with salt and pepper.

Assembling the Lasagna

In an oven-proof dish, layer the lasagna sheets first, followed by a layer of spinach and mushroom mixture. Follow it up with white sauce and spread it well. Layer lasagna sheets again, another layer of the spinach mushroom mixture, followed by the cheese sauce, then another layer of lasagna sheets followed by the remaining veggies and then the remaining cheese sauce. Top with grated cheddar cheese. Bake in oven at 180 C for about 30 mins or till the top cheesy layer browns.


Cook the pasta a little less than done (al dante), since it absorbs liquid from the sauce and cooks further when you bake in oven. The amount of cheese to be used is your choice, reduce if you are on a diet. But I suggest you use a big helping of good cheese since the paste per se lacks spices, especially if it uses the white sauce (as against my comparison with Indian cuisine), it's only the cheese that offers a rich taste to this dish. The lasagna is a meal in itself. Pair it with salads and they'll make a complete meal for you.


I am bidding an adieu to November and giving a warm welcome to cold Decembers which I am eagerly looking forward to. While the Western countries have almost set foot into holiday season with Halloween, Thanksgiving and now Christmas to look forward to, my blog hopping takes me across to sites with numerous recipes posted marking the holiday season. Foodbuzz, Tastespotting and Foodgawk have been bubbling with tempting pictures of food ranging from pies, cookies, cakes, roasts, et al., all for the holiday season.


With Diwali going by the last month, I pulled down the lights and diyas only to put it aside for some time. On the back of my mind, I knew Christmas will be here soon and these would be put to use again. I have been scuffling through my cabinets to pull out the decorative baubles and tinkles which have not only left me fascinated over years, but also draw my daughter's attention these days. The vivid colors from wreaths and ornaments have caught her undue attention and the tinkling sound from bells seem to keep her engaged endlessly. Christmas has caught up with her and the lights fascinate her beyond anything. We'll soon put up the Christmas tree, light it and decorate our home. I don't think I even need a reason for celebration!


I decided upon the quintessential baking of fruit cake this year too, which may sound usual since I do it every year during Christmas. It's neither tradition nor a norm I follow, it just makes me feel good. For a long time now, I pushed burning my oven to Christmas, since baking needs precision in measurement of ingredients and with a baby on my arm most of the time, I can hardly imagine doing that.

The weather I guess has been a good motivator for these biscuits. And though the sun comes out occasionally beneath the silver lined clouds to warm up overcast skies, yet there's an exhilarating nip in the air which has been my real boost for these Cheddar Black Pepper Biscuits.


Cheddar Black Pepper Biscuits

INGREDIENTS

2 cups all-purpose flour
1/3 cup salted butter
3/4 cup buttermilk
1/4 teaspoon salt
1 tablespoon baking powder
1/4 cup grated cheddar cheese
1 teaspoon freshly ground black pepper
1 teaspoon red chilli flakes (optional)


DIRECTIONS

Preheat the oven to 450°F and grease the pan with a teaspoon of the melted butter.

Combine the flour, baking powder and salt in a bowl. Cut chilled butter to small cubes and add it into the dry ingredients. Rub using your fingertips until resembles bread crumbs. Add the buttermilk and mix briefly, just to incorporate it. Try to work gently, do not overwork the dough else the biscuits will not be delicate and light.

Gently mix in the cheddar and black pepper. The dough will be fairly sticky. Place the dough on a smooth, well-floured surface and pat with your hands to about 3/4 inch thick. At this stage you can either wrap them and place it in freezer or continue to bake. Roll and cut out the biscuits, using a cookie cutter. Dip the cutter into flour between cuts to keep from sticking. Place the biscuits on the prepared pan. Prick them with fork. The remaining dough may be gently gathered together and rolled out again for more biscuits. Brush the tops lightly with melted butter.

Place the biscuits in the oven and bake for about 10 minutes or until the tops are golden brown. Remove from the oven and allow them to cool a little. Lift them from the baking tray and serve warm.


The dough is fairly sticky, hence refrigerating it helps in better handling of the dough. Roll them thinner than I did and they will end in crisp, nibbling biscuits. Roll them thicker and they will make scones. Serve them with some sliced tomatoes and cheese and they make raving starters for any party.

I love my biscuits warm and spicy. Adding a dash of chilli flakes pepped up the biscuits and added warm notes to it. We paired them with a warm cup of tea and these spiced flaky biscuits made a great companion for a relaxed chill, rainy evening.

Nuchinunde


I am pitiful at authentic South Indian cuisine. I can make an excellent tove or saaru and whip up nearly good tamblis, rava idlis, dosas and few chutneys with ease. Then there are a few exceptions with our own Hulis, sasive, gojjus in which I fair just about okay, but I hardly dare to make anything 'South Indian' beyond that. We grew up eating traditional meals that included ,wide variety of huli, palya, sasime, gojjus, etc in our daily course. Bisi bele baath, Chitranna, Kadabu, Holige were meant for occasions. But then that's not where our cuisine is limited to. Karnataka cuisine is very diverse and if I had to gauge myself then I would feel terribly guilty where I stand.

In all honesty I would never dare to compete with the one who cooks South Indian food on a daily basis. Our cuisine uses very little oil and the fat mostly comes from the use of coconut. Even in recipes where coconut is not used, it is a blend of freshly ground spices used with a delicate balance that brings out the best from the dishes. To balance the spices, tang and sweet itself is a challenging act. To say, mastering them to bring out authentic flavors will take years. It's a fear that I would go through one of those catastrophic moments if I tried them in my own kitchen.


There are a several recipes out there that are confined to regions alone, those which rarely make to hotels and restaurants menu cards, and most of our non-Kannadiga pals may have never heard or known of them by taste. Our hotels restrict to publicizing Idli Sambhar, Dosa Chutney or Bisi Bele Bath, touting falsely for all to believe, this is what Kannadigas eat. Which isn't entirely true, really. Nucchinunde is one such breakfast dish I had not heard or eaten anywhere before. It was never made at my mom's place, so I don't know exactly what it tastes like. But on a quick google search for some traditional Karnataka recipes, I came across couple of sites citing Nucchinunde as one of the traditional recipes seen in Karnataka households.

I've tried the recipe from various sites, but the use of tuvar dal alone gives out a strong dal flavor which is not my favorites. So I tweaked the recipe a little by addition of rice flour to suit us. This is loved by all at home and is now this is a regular menu at my place.


Nucchinunde

INGREDIENTS

1 cup togari bele / tuvar dal / split pigeon peas
2 tbsp rice flour
1 inch ginger chopped
1/4th cup fresh grated coconut
2-3 green chillies
A pinch of hing
Salt to taste

DIRECTIONS

Soak split pigeon peas in water for an hour. Drain out the water completely and grind coarsely without adding water. Add green chillies, finely chopped ginger, fresh grated coconut, salt to taste, hing along with 2 tablespoons of rice flour while grinding.

Pinch balls from the dough and press them between the fingers and palms of your hands such that finger impressions are retained on the dough. Place them in a steamer/rice cooker and steam them for 10-15 mins. Serve hot with coconut chutney and laden with ghee.


Coconut Chutney

INGREDIENTS

1/2 cup grated coconut
2 green chillies
Salt to taste
1 tbsp sour yogurt

For Tempering:

1 tsp Oil
1 tsp Mustard seeds
1 tsp Urad dal

Grind the grated coconut with green chillies and salt to taste along with a tbsp of sour yogurt till smooth paste. Transfer this to a serving dish. To temper it, heat some oil, add in mustard and urad dal and let them splutter. Add this to prepared chutney.

The recipe may not be authentic, but is surely traditional. I tweaked the recipe to suit our palate, but you can omit the rice flour and use only tuvar dal if you want to keep it authentic. That way the Nucchinunde will be soft and perfect. Increase in rice flour beyond 2 tablespoons will make the resulting Nucchinunde stiff. Again, there is no hard and fast rule with spices too. It's one of those traditional recipes I make during our festivals and we have come to relish this with either simple coconut chutney, sambhar or vegetable kurma.