I hold high esteem for the old school thought of sun-drying vegetables and fruits for prolonged life. I do consider its fabulous, no doubts. After all we Indians aren't novice to this technique. We've done it for ages. Our grandmas did it and our moms took over. The art of making crisp happalas (papads) and sandiges came down to us through traditions and we've enjoyed them endlessly on several occasions, meals and dinners. But, heck this technology is luring. Like, I've never thought of making sun-dried tomatoes at home, and if you ask, I would probably never give it a try. Slaving over them for weeks, what if that only means keeping a keen check on the tomatoes as they slowly get kissed by the sun to age into crisp-crimson-red tart, all that seems enticing, but is quite an effort I like to rule out for now.

So, I headed over for the alternatives. The oven called out to me. Replicating the same stuff in my oven resonated my thoughts. But again, that meant couple of hours of drying in the oven too. Back while in college, my semester project work had seen me working on ‘Drying Characteristics of Garlic’ where I did a study on ‘Industrial analysis of Tray Drying and Microwave Drying methods’ using some scientific laws, exponential terms and thermodynamics, none of which I can recall now. That study however told us that up to 88-90% energy, power and time could be saved with microwave drying and that was interesting. Back then too, beyond all those calculations, I enjoyed peeling the cloves, chopping and inhaling the pungent aromas of the drying cloves, their analysis, textures and tastes. See, how I had a foodie blood running in me, that had me food associated with my project work too! As an engineering student, I was no way associated to home science, yet I managed to fit that in! :)

On the same lines, I went ahead and made a really small batch with just 3 tomatoes, just for trial, least I may not have to discard the whole lot in fits of a disaster. Glad I gave this a try. They may not be the best, not exactly the sun-kissed kinds, but pretty much close. You dunk them in the goodness of garlicky olive oil, herbs and spices and they just resonate the original stuff.

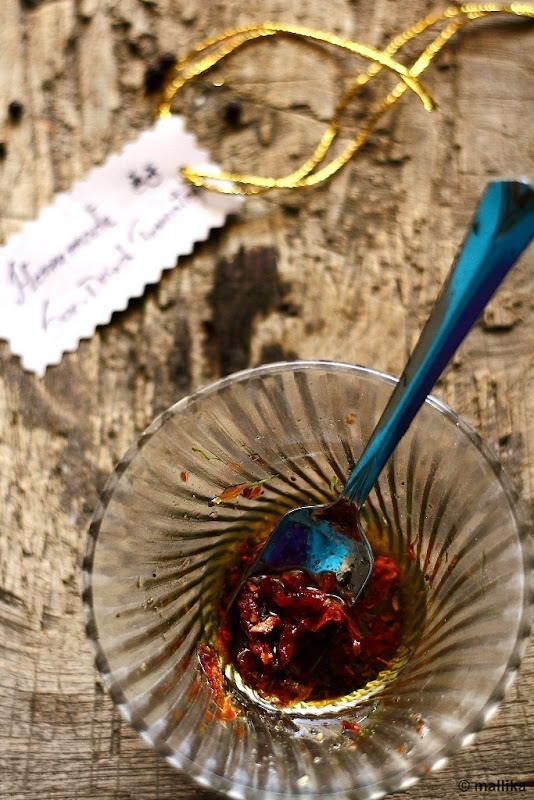
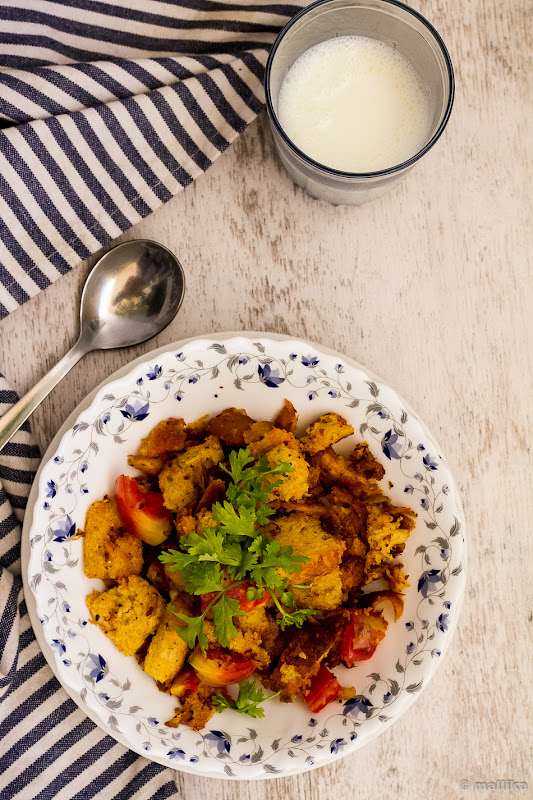
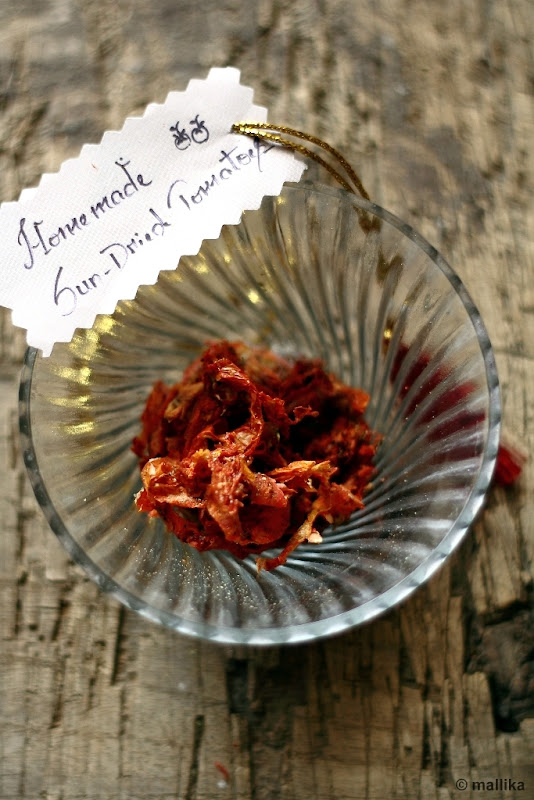
One of the mistakes I did probably was to chop them to fine rounds. They seeped out a lot of water and once dehydrated they thinned down a lot and got glued to the plate. Instead, I suggest you chop to halves and place them on the chopped side down. Microwave them one side for couple of minutes and then turn them around and microwave further till dehydrated. That way they will remain firm pieces, unlike mine that ended in strands. Nevertheless, for a trial they were good. These tart beauties are instant and can add that concentrated sweet sour flavor to your salads, pizza, dips or even breads and last long.

Homemade Sun-Dried Tomatoes (Off the Sun, in a microwave)

INGREDIENTS

3 large tomatoes
A few pinches salt & pepper
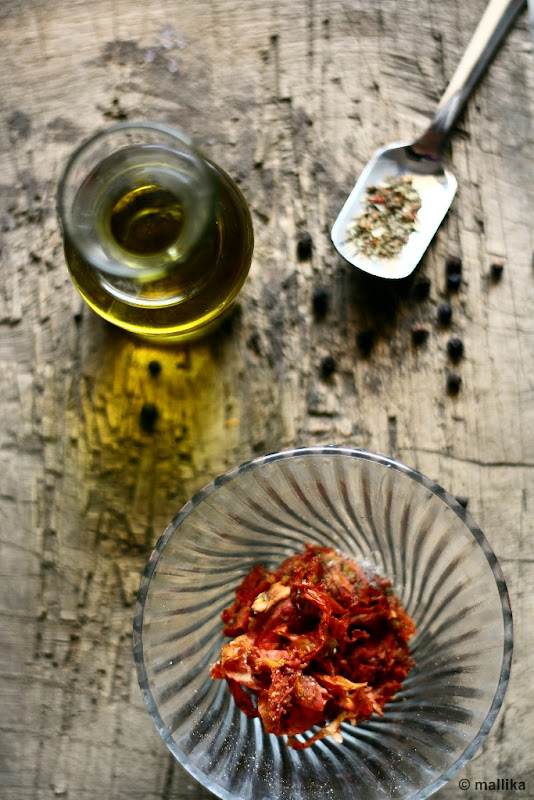
Couple of pinches of oregano seasoning
1 clove garlic, crushed (optional)
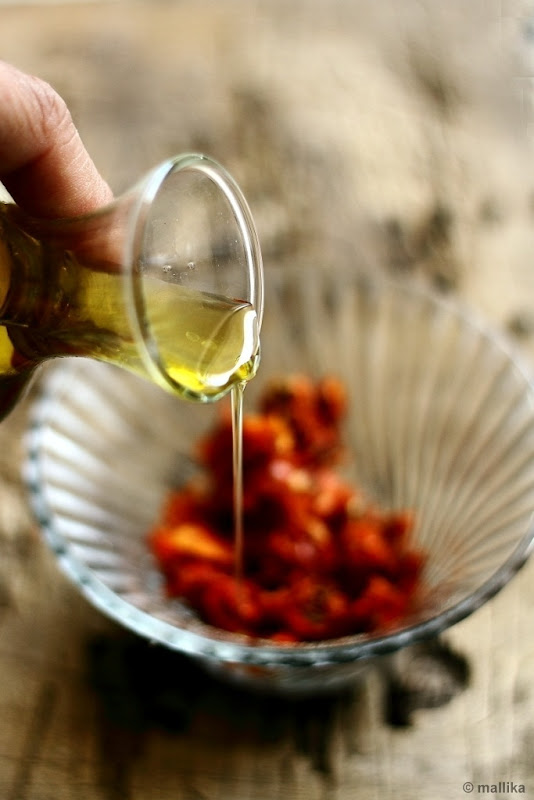
1/2 cup olive oil (optional)

DIRECTIONS

Wash and clean the tomatoes and chop them into halves. Scoop out the flesh using a slotted spoon and place them in a microwave proof flat dish, cut side down. Brush each cut piece with some olive oil and microwave on high for about 3-4 on one side. Flip the tomatoes over and microwave again for another 3-4 minutes. The tomatoes will leave out a lot of water. Take care and keep a keen eye so that they do not burn. Continue to microwave each side till the tomatoes wilt and become dry.

In a small pan, heat some olive oil and fry the garlic till they leave out flavors to the oil. Once they are brown, remove them from the oil and discard. Add in the oregano seasoning, salt and pepper to taste. In a bowl, place the dried tomato flakes and pour the garlicky olive oil. Season further if required. Use in dips, sauces, salads and pizzas as preferred.

Rava Idli with Vegetable Sagu

How to make Rava Idli with Vegetable Sagu | Vegetable Sagu Recipe
Traversing through my old posts recently, which in a way I don’t do too often, strangely it felt odd for me to read of what I had written. Some made me laugh, some made me travel down the memory lane, some errors I fixed, some I felt proud of, I suppose it’s an anomalous sensation to read your own stuff. Some photographs made me think I should change, like the Marshmallows and S’mores, especially the ones I shot at night. Then as I dug deeper to my old, unheeded posts of 2009s, I thought they needed a makeover. Maybe sometime in future, when I recreate the same recipe and shoot again, I shall update them here. Or probably I’ll leave them that way and they’ll remind me how much I have evolved over the years in blogging.

You know I should hold on to penning down too much. Over the past couple of weeks, my posts, the write ups, have been spanning too long. I promise it’s not intentional. I like to write, to put my thoughts in words and do hope you enjoy reading them as much I love sharing my thoughts on food and memories with you.

Rava Idli


Having said that, I promise to keep this one short and savoury. Basically a spiced, savoury, breakfast semolina cake. This Rava Idli, is a common Karnataka breakfast dish and most loved by all of us at home. It repeats itself almost every week. Not the kinds we get at a restaurant, that’s dense, heavy and feels stodgy with one slice, but instant, light and the kinds you want to indulge in more than just one. Pair it with chutney or serve this with vegetable sagu like it’s done traditionally, this one will send you taste buds whirring for more. Whoosh, you can’t help but love it!


Rava Idli

1 cup regular yogurt (not thick, Greek yogurt kinds)
1 cup semolina (sooji rava)
2 tbsp. oil
1 tsp. mustard seeds
1-2 green chillies
1 sprig curry leaves
1 tsp. Channa dal
1 tbsp. broken cashew nuts
1 tsp. baking soda (or an unflavoured fruit salt, like Eno)
Salt to taste

Mix a cup of semolina in cup yogurt and set aside for 10 minutes. If using thick store-bought yogurt, then thin it down by adding water. I've used regular skimmed milk homemade yogurt here. While the batter is resting, prepare the tadka. Heat the oil in a small frying pan. Add in the mustard seeds, channa dal, cashew nuts, curry leaves and heat till the mustard seeds begin to splutter. Turn off the flame and add this to the semolina, yogurt mixture. Whisk well. Add chopped green chillies and salt to taste. Finally add in the baking soda (or a sachet of fruit salt, if using), give the entire batter a quick, good whisk. The batter should be thick, similar to idli or cake batter. Transfer the batter to an oiled cake tin. If you have idli moulds, its best to use them. However you don’t own idli moulds, use regular cake tin for this purpose.

Heat a steamer / rice cooker. Place these moulds in the steamer and cook for 15-20 mins. Alternatively you can microwave it on high power for 4-5 minutes, till skewer inserted comes out clean. Slice and serve hot with any chutney of your choice or with vegetable sagu as available commonly in restaurants.


Mixed Vegetable Sagu

Mixed vegetable sagu is a popular Karnataka dish, typically served in Bangalore restaurants. It’s spicy and goes well with puris, dosas, aappam, and even rice. For best results, ensure that the vegetables are cooked just right – they should neither be crunchy nor too mushy, just the right bite.

INGREDIENTS

For The Masala Paste

2 to 3 green chillies, roughly chopped
4-5 peppercorns
2 tsp. coriander powder
1/2 tsp. cumin seeds
1/2” stick cinnamon
2 cloves
3-4 garlic cloves (optional)
4 tbsp. freshly grated coconut
1 handful of cilantro

Other Ingredients

1 tbsp. oil
1 tsp. mustard seeds
A pinch of asafoetida
A sprig of curry leaves
1 large onions, finely chopped
2 cups chopped mixed vegetables (potato, carrots, beans, capsicum, cauliflower green peas)
Salt to taste

DIRECTIONS

To make the masala paste, grind all the ingredients mentioned under masala, adding little water to a thick, fine paste. Keep aside.

Next, heat oil in a wide mouthed frying pan and add the mustard seeds. When the seeds begin to splutter, add asafoetida and torn curry leaves, and sauté well on a medium flame. Add the onions and sauté on a medium flame, while stirring continuously till they turn translucent. Add the mixed vegetables, salt and 1¼ cups of water, mix well and cover and cook on a medium flame for 12 to 15 minutes till the vegetables are tender, stirring in between. Add the prepared masala paste, mix gently and simmer for another 5 minutes. Serve hot with Rava Idli.


I eat bread with not much favor to it. It's something I like to reserve as a last option. It wasn't until I began baking some at home did I really take much liking to it. Even as a kid I did not enjoy it much. At home, Sundays meant the day to relax and unwind and that meant some time off from cooking for mom too and that's when bread for our breakfast was a usual affair. We had many Sundays with bread sandwich for our breakfast. Saying that I do not rule out that homemade bread is indeed fresh and tasty.


Although one of the ways I did enjoy bread was in form of this Masala Bread Upma that was spiced well and tasted delicious. I often frowned at the sight of bread loaves served with butter or jam, but the moment it was converted to this upma, I would relish bowls full of these and go for the second and third helpings too. The base of the kadhai had crumbs of crusty bread stuck to it and that tasted heavenly. I have memories of scraping it off, not sparing the spatula too, relishing every bit of the last spiced crumb! Well, I still do it till date. :) Hope you too love this recipe as much as I do.


Masala Bread Upma

INGREDIENTS

6 Bread slices
1 tbsp. vegetable oil
1 tsp. mustard seeds
1 tsp. red chilli powder
1 tsp. turmeric powder
1 onion, finely chopped
1 large tomato, diced
1 green chilli
2 tsp. peanuts
1 sprig of curry leaves
Coriander leaves to garnish, optional
Salt and lime to taste

DIRECTIONS

Stack the bread pieces on top of each other and dice them through using a knife. Tear them into 1 inch cubes. Else tear them roughly using your fingers, crumbling them through into uneven pieces.

Heat oil in a pan and fry the mustard seeds. Once they splutter, add in the curry leaves, the chopped onions and peanuts. Fry them on medium high flame till the onions turn slightly brown in colour. Add the chopped green chillies, turmeric powder, chilli powder and fry further for a minute. Add the diced bread pieces and stir them well gently. Fry for a couple of more minutes stirring till all the masala has coated the bread pieces well. Finally add in the diced tomatoes and season with salt to taste. Fry further more for 2 minutes. Remove from flame and add a dash of freshly squeezed lime juice to taste. Serve hot.


I made this quite a while ago but I don't know why I had been procrastinating on this one. It just sat in the corner of my drafts and though every time I thought of posting it other recipes caught my attention. I finally decided to put this recipe here, least I forget and it goes into hiding.

A while ago I had posted the recipe for a quick instant evening snack, Corn & Mint GuLiappa along with which I served this lip smacking peanut chutney powder. I promised then that I would share this recipe with you in the following post, but that didn't happen. So here it comes. This recipe is quite simple and comes from my mom and hope you too love it the way we do. It goes well with dosas, idlis and other breakfast dishes, as well pairs well with steaming hot rice and dollop of ghee.


Peanut Chutney Powder

INGREDIENTS

1 cup peanuts
2 tsp. red chilli powder
3-4 cloves of garlic
1 tiny piece of tamarind
Salt to taste

DIRECTIONS

Dry roast the peanuts along with cloves of garlic on a medium low flame till the skin turns to a darker color and the garlic is dry (has no moisture left). Let it to cool for a few minutes. Using the palms of your hand or placing peanuts between two towels, rub them to remove the skin. Grind the roasted peanuts, the roasted garlic along with chilli powder, tamarind and salt to taste till its powdered. You can leave tiny flecks of peanuts in there if you want a slight crunch. I prefer to grind it to a fine powder and serve it with a dollop of fresh ghee. Use as is or serve with ghee or dahi.