Showing posts with label Multi-Cuisine. Show all posts

Easy Cinnamon Rolls

How to make Cinnamon Rolls with Cooked Frosting | Easy Cinnamon Rolls Recipe
With Christmas around the corner and less than 4 days to go before you can sing Hallelujah, the Lord has come, I thought I'll peep in to help you with a lovely classic breakfast for your family to wake up to this Christmas morning. Its typically Western, hearty and sweet to call your morning off to a good start, supple enough that you may want to lay your head on it and snooze again, gives you the comfort of your bestie's company, and is the festive sorts that you can set up on table for your guests to dessert on.

Rising Bread DoughCinnamon Rolls (1)


For the longest time, I've had aversion to cinnamon in all things sweet. Let me not even get to the whys of it, for all I know, cinnamon in my arena existed best in the legion of savories, given the exception for a good Christmas fruit cake where it favorably unites with clove, cardamom and other spices, veiled in a way that it does not hit your senses directly and ruin the flavor. But, here it comes finally, the world coveted Cinnamon rolls looming right out of my kitchen to yours. I’m close to being a convert, convincingly not a cinnamon-dessert-hater anymore. These don’t look a lot like the traditional rolls. I mean they are not enormous in size to consume your palm, certainly not the perfect looking rolls that stand flawlessly edged shoulder to shoulder giving them a clean rip, nor do they bask in the sugary coated frosting that sinks into every groove merrily.

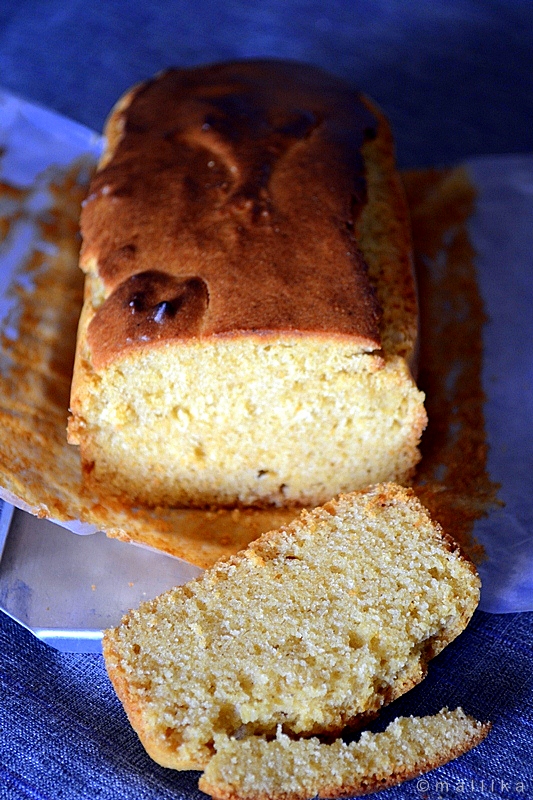
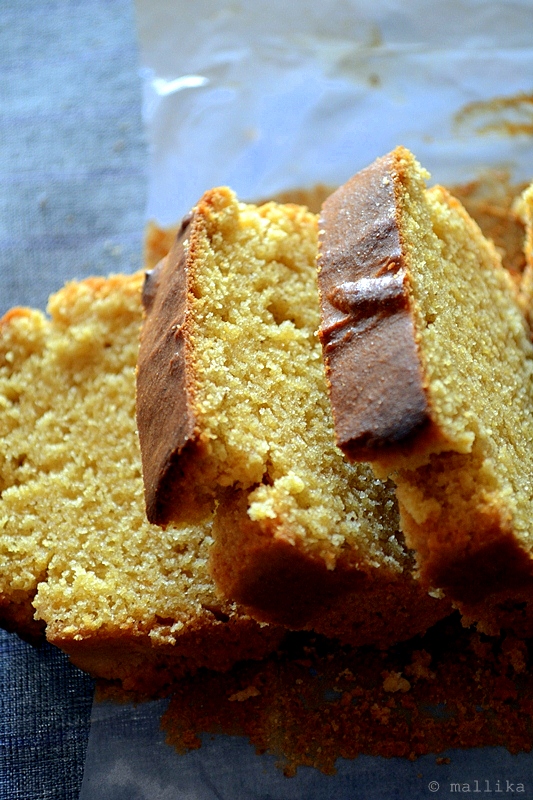
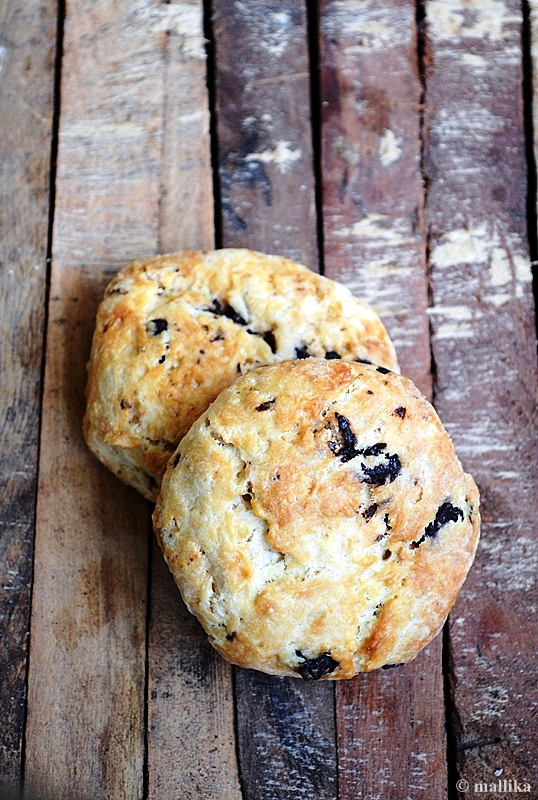
I would probably rechristen these as cinnamon pull apart rolls; owing to the pans I had and the amount of dough I made, they ended up this way. But they are cinnamon rolls essentially, so let's stick to that. They don’t snatch away the authenticity from the traditional ones. They smell great in and out of the oven, are near identical in their recipe, forgiving the eggs in the dough. They sat squishing in an eight inch round baking pan, my ideal dish to bake a nice chocolate cake in, but this time around they doubled up as my bread pan too, saving me gracefully from sunken cockeyed bread had I baked them in my ten inch dish instead. They nudged for space as they puffed up on their second sitting, and, by the time they were out they looked glorious in their golden crevices and sugar burnt hunches, flattering into characteristic pull apart rolls that need to be forked by the thumb and forefinger to tear them apart from their siblings. There’s a fun thing to it, to tear it apart in submission in an imperfect way and dunk it in milk over giggles and laughters with our little girl while tapping our feet to the melodies of Christmas jingles. That’s when you know you are up for a good start to a holiday season.

Cinnamon Rolls (2)


The frosting is purely optional. As for a daily bread, I would stay away from frosting these. They are sweet on their own and make a wonderfully perfect Sunday breakfast with a slather of some salted butter, or cream cheese and coffee by the side. But we are in a holiday season, and that calls for some adornment on the table to give it a festive ring. I have a clean, less sweeter old fashioned cooked vanilla frosting recipe that works really well for me. Since the bread is sweet by nature, a lighter frosting like this one is pleasing to our tastes. Unlike the traditional frosting where you mix milk to confectioners’ sugar till you get a desired consistency, this one is far better version that gives me a similar thick pour-able consistency, albeit far less sweeter than the original version. Give it a try, may be you'll fall for these too.

Cinnamon Rolls Plated


Cinnamon Rolls with Cooked Vanilla Frosting

INGREDIENTS

For Cinnamon Rolls:

2 1/4 cups all purpose flour
3/4 cup milk (I used full fat milk)
1/4 cup butter
1/2 tsp salt
1/4 cup coconut sugar
1 tsp. active dry yeast (or rapid rise)

For the Cinnamon Sugar Filling:

1/4 cup light brown sugar
1 tbsp. cinnamon powder
2 tbsp. melted butter

For the Cooked Vanilla Frosting:

1 cup full fat milk
3 tablespoons all-purpose flour
1/3 cup coconut sugar
1/4 teaspoon vanilla

DIRECTIONS

Heat the milk and butter in a large sauce pan till the butter has melted into the milk. Remove from heat and add in the sugar. Stir well and allow it cool down to lukewarm. The milk should be tepid enough to activate the yeast, but not too hot, else will kill the yeast.

Transfer the warm milk to a large mixing bowl and sprinkle yeast into it. Let it sit for 10 minutes, so that the yeast can feed on the sugar and froth.

Next, add flour starting with 1/2 cup at a time and stirring well as you go. Once it forms a loose batter, add the next half cup of flour and stir well. This will help activate the gluten in the dough and yield soft supple dough, resulting in a good, fluffy bread. Continue using all of the flour and stir well with each addition till it comes together to form a sticky dough. Knead it for a minute or two till its soft and supple.

Place the dough in an oiled deep dish and cover it with a dish cloth. Let it rise in a warm place for about 2 hours. By this time the dough should double in size.

Transfer the dough to a lightly floured surface. I use the clean kitchen counter top that provides me ample space to work my dough on. Using a flour dusted rolling pin, roll the dough into a thin long rectangle. Brush it generously with melted butter. Prepare a mix of sugar and cinnamon powder and sprinkle it generously all over the dough.

Starting at the longer edge side, roll up the dough as tight as you can till forms a long log. To avoid opening up, place the seam side down. Using a cleaned knife dipped in flour, cut the log into slices of 1.5 inch each. Butter a 8x8-inch round baking tin. Place the rolls into the buttered tin, next to each other. Brush the rolls with some melted butter. Set aside to rise again for 45 minutes.

Preheat the oven to 350 degrees F. Bake the rolls for 25-30 minutes or until the bread is golden brown in color. If the top of the bread seems to change color sooner, while the underside still seems uncooked, cover the top with an aluminium foil and continue to bake till done.

Remove from oven and allow it to cool completely. Frost as desired.

For the frosting, combine milk and flour in a saucepan. Cook over medium low heat, stirring constantly, for about 3-5 minutes. The mixture should thicken and come to a boil. Add in sugar and stir well. Boil till the mixture coats the back of a wooden spatula, i.e. of custard consistency. Turn off the heat. Stir in vanilla essence. Cool completely. Before serving, whisk the frosting really well and swirl using a spoon on the cinnamon rolls.

Eggless Cinnamon Buns

Pecan, Cranberry, Coconut Granola_1

How to make Pecan, Cranberry and Coconut Granola | Easy Granola Recipe
Another year has arrived and in less than an hour 2015 will be gone. All gone, like vapors transpiring into thin air till there’s none you can see. I see and feel those last few minutes transpire as I sit down to put this post together. The calendar ticked away without notice. Days rolled into nights, snapped to weeks, cascaded till they sprinted into all 12 months. And finally, in a few hours from now we will gallop into the finishing line, calling it a year. A year that will be gone forever. For me, this was faster than anything I have known. Faster than the blink of an eye. Faster than the speed of lightening. Faster than the fastest I know.

Granola prebake Granola


My jaws dropped at the crack of this dawn in a sudden realization that something worthy is going away forever. A year made up of 365 well-meaning days. Either you’ve made the best of it or wasted it. There are days that made you laugh hard or the ones that had your faces dug into pillows and weep into nights. If you are like me, you would assume you've hung in neither ends of extremes. The year came and passed by with good measure of mighty highs and lows, in a sweet sour concoction, like biting into a digestive candy that gives you a balanced taste in bits of everything - sweet, salt, spicy and tangy. Though I am unable to concur what it has been sort of, it sure has been a mixed bag of emotions. It makes you think. It worries you. It brings you hope, dreams and aspirations plenty that paves way into welcoming the new year with wide arms. While 2015 has been generous and giving, etching many memorable moments that evoke nostalgia, I’m also thankful for it giving the greater positivity & strength to face the welcoming of the new year.

Pecan, Cranberry, Coconut Granola Served


So let this year come on us. I wish it brings large measures of health, happiness, and prosperity for all. I pray it brings peace on earth. Peace in minds, at heart, in relations, with neighbors, friends, nations and across the globe. Irrespective of what race we belong to, let love be unbiased by color, united by humanity and progressive by nature. I wish your moments are filled with joy, laughter, trust, immense love and happiness. Happy New Year to each one of you for a fantastic 2016 and wishing you have greater prosperity & fortunes to the extent that it increases in great leaps and bounds for this new leap year!!

As I bid adieu to the year gone by and welcome the new year, I share with you a recipe for this Pecan, Cranberry and Coconut Granola that is just the perfect way start the first day of the year with. With the festivities and the week long celebrations gone by, lets make new beginnings with a fulfilling breakfast to treat our families to. Here's a recipe promising ease and health together with home made joy at breakfast table for your family.

Pecan, Cranberry, Coconut Granola Plated


Pecan, Cranberry and Coconut Granola

INGREDIENTS

2 cups instant oats (old fashioned oats preferred)
1/2 cup shredded dry coconut
1/4 cup dried cranberries
1/4 cup broken pecans
1/2 cup maple syrup (or honey)
1/2 cup coconut oil

DIRECTIONS

In a clean bowl, combine oats along with dry coconut, cranberries and pecan nuts. Drizzle the vegetable oil and maple syrup and toss well.

Bake in a pre-heated oven for 30 minutes at 180 deg C till the oats begin to turn golden brown, tossing them once in every 10 minutes to ensure even cooking.

Remove and allow to cool completely before storing them in a clean dry container. Serve with warm or cold milk.

Pecan, Cranberry, Coconut Granola

Tomato Three Cheese Thin Crust Pizza

How to make Tomato Three Cheese Thin Crust Pizza Recipe
Another month has gone by and boy, October is here! I had promised myself to get out of the cocoon and post atleast couple of more recipes before the end of September, but I failed myself again.

The changing months remind me how blessed the second part of the year has been, particularly this year with some long weekends falling back to back over the past 3 weeks. We had Ganesh Chaturthi fall on 18th Sep, the Friday, followed by Bakrid on 24th, the Thursday last week. It came as an advantage when the leave on Thursday was called off and pushed to Friday. As an unplanned holiday, we decided to make the best of a long weekend break, stayed home, sewed some teeny-weeny clothes for the little girl's barbie, napped well in the noon and baked some delicious pizzas for our dinner.

Pizza dough prep Pizza dough prep_1Pizza dough prep_2


For a long time now, making pizza at home has not just been a menu of convenience and break from the usual course, but very therapeutic when made from scratch. Its a joy to watch the yeast act it's way through the dough, rise and double it up. Intimidating it may sound. But there's hardly anyway one can go wrong with a pizza flatbread if the yeast has played its part well.

Making the dough and sauce from scratch indeed calls for some pre-planning and can end up being time consuming if you are time crunched, but this is what makes the most delicious pizza, with slices that are endearing and smell of freshly baked bread, topped with molten lava of cheese to boast.

So, I've made pizzas several times at home. Combinations vary. Toppings change. Each time they evolve. Yet, every time they sing of freshness and subtlety. The flavors burst and melt with each bite. At times they are made quick, simple and unpretentious, on other occasions they can be fancy with a varirty of vegetable toppings. I decide toppings on a whim, unplanned and unprepared. But they hardly matter. When you have good cheese to camouflage, you always have sumptuous and satisfying slices on your plate and lips that curve into a smile. Don't forget, a well made crust and good cheese is the key, and you have a winning recipe.

Pizza prep


There are several recipes available for a good pizza dough, but this recipe always works like charm for me, especially when I prefer to use whole wheat flour. It may seem unusual to use milk based bread recipe in a pizza dough, but I prefer it for the soft, supple and airy results it provides to a dough base that holds the sauce, vegetables and cheese well, yet doesn't lose its texture. The whole wheat flavor adds a healthy twist with a nice nutty backdrop to whatever toppings you want to layer on.

One of the reason why I love keeping the crust on the thinner side is that the dough doesn't require time to rise after proofing nor requires par-cooking. As the dough rests and doubles, you prepare the sauce, cook, simmer, season it and let it cool. Then you roll out the dough and let it rest on the counter while you prepare the toppings. For a recipe like this three cheese tomato pizza, all you need a good dough base and a fresh tomato basil sauce with three variety of cheeses you can get your hands on. Remember, mozzarella is a must for that gooey-stringy mess. The others are much upto your choice. I suggest you get the best fresh mozzarella possible. I chose a combination of cheeses with high, medium and low melting points. Ricotta has a low melting point, and I paired it with cheddar and mozzarella with medium to high melting points. That helps avoid this pizza disintegrate into a cheesy mess.

Tomato Three Cheese Thin Crust Pizza_1


Tomato Basil Pizza Sauce

INGREDIENTS

8-10 pods of garlic, finely chopped
1 1/2 cup tomato puree
1/4 cup tomato sauce (optional)
1/4 cup of fresh basil leaves, torn
1 tsp. dry oregano (optional)
2 tbsp olive oil
Salt and Paprika to taste

DIRECTIONS

Saute finely chopped garlic in oil for 2 mins till they turn transparent. Add the tomato puree and stir well. Simmer and cook for atleast 15 minutes or till it reduces and leaves oil from the sides of the pan. Add in the tomato sauce and stir well. Cook for another 5 minutes. Add in the freshly torn basil leaves, dry oregano herbs (optional), paprika and salt to taste. Stir well. Turn off the flame and set aside to cool. Use this sauce to spread over the pizza base.

Three Cheese Tomato Thin Crust Pizza

INGREDIENTS

For the dough base:

Follow the recipe here or use a store bought thin crust pizza base

For the homemade sauce:

Homemade (recipe above) or store bought pizza sauce

For the toppings:

1 large tomato, de-seeded and sliced in rounds
1 onion, sliced
1/4 cup ricotta cheese
2 slices of cheddar cheese, torn
1 cup mozzarella cheese, grated
Salt and pepper to taste
Italian seasoning / Italian herbs

DIRECTIONS

Pre-heated oven at 200 deg C.

For a thin crust pizza, roll out the pizza dough as thin as possible, about ¼ inch thick. Prick all over the pizza dough using a fork. Allow it to sit on the counter for 10 mins.

Place the pizza on the pizza tray. Top with homemade tomato sauce and slather it evenly. Top with sliced tomatoes and onions. Sprinkle drained ricotta cheese, followed by cheddar and topped by generous amounts of mozzarella cheese. Bake in a pre-heated oven at 200 deg C for 20-30 minutes or till the cheese melts and the edges of pizza brown. Slice into wedges and serve immediately.

Tomato Three Cheese Thin Crust Pizza

Blueberry Muffins


It takes me a while usually to compose myself a good deal of writing here, that's if I have stayed too long away from thinking or haven't perched my fingers on the keyboard for a while. Although this not being the case always, I still feel like a sophomoric with words, for today. Where do I begin? What do I tell you?

We are past a week since the 4th of July and I hope you had a wonderful one like we did. Usually, for us, the 4th of July passes by without notice. That's if we were in India, it would have been just another day. Just like how the 3rd of July rolls up on the calendar, follows into the 4th and then into the 5th. But here in the US, it means more than just that.

I did not grow up learning a lot on American history. I don't remember a streak of it either. 4th of July passed as just another date on the calendar. Many years later when I started working, as part of the corporate curriculum, we were trained on the nuances of American lifestyle, their culture, and in general, their ways of life. We were taught, that while dealing with American clients, how one had to roll their tongue to get the 'R's right; a lesson or two that might impress an American and make us sound like one among them. It also preceded into understanding their holidays - the most essential and beneficial part of the training which came with some promises that every offshore engineer had an obligation to know. A promise of leaner workloads on those holidays, one that each of us looked forward to, a promise that one could possibly take a day off and travel far off place to meet their loved ones and share an extra day for the weekend. A promise that we could catch up some extra hours of lunch and coffee breaks that day. There were just a handful few to remember. Those handful that could be counted on fingertips, all defined well by dates and not by planetary movements like ours did. What thrilled us beyond all was the fact that most of these Federal public holidays were observed on the day preceding or succeeding weekend, irrespective of the day of week or weekend it falls in the year.

It intrigues me often why American Independence Day is always greeted with 'Happy 4th of July'. It could well be wished as Happy Independence Day! But like how most cultures are woven through customs and long time traditions, this one still remains to be called Happy 4th of July. So, I ask I hope you had a good one! And, if you know better, let me know why its a 'Happy 4th of July' and not 'Happy Independence Day'!

While the blog-sphere has vast variety of recipes flooding most spaces with the symbolic red and blue colors of the American national flag, I set out to bake some red and blue berry dotted muffins as a tribute to this tradition. My plans to bake Blueberry Raspberry Muffins toppled when I realized I was out of stock on Raspberries and was in no mood to rush out early in the morning. Nevertheless, these Blueberry Muffins were made and devoured for our breakfast, just the American way.

Blueberries


Blueberry Muffins

INGREDIENTS

3/4 cup all purpose flour + 1 tbsp to toss blueberries into
1/2 tsp. baking soda
1 tsp. baking powder
1/8 tsp. salt
1/2 cup sugar
1/4 cup vegetable oil
1 small egg (If using a large egg, suggest to use 1/2 an egg)
1/2 cup yogurt
3/4 cup fresh blueberries

DIRECTIONS

Preheat oven to 380 degrees F.

In a large bowl sift together the flour, baking soda, baking powder, and salt and set aside. Separately toss the blueberries with a tbsp of all purpose flour and set aside.

In another large bowl, whisk together the sugar, oil, egg and yogurt. Add the dry ingredients into the wet and stir the mixture gently using a wooden spoon in figure 8 motion. Add the blueberries to mixture, stir them in, reserving a handful of blueberries to be topped on the muffins.

Scoop the mixture to muffin cups and fill up to three quarters. Sprinkle the remaining berries on top of muffins and poke down lightly. Bake for 20 to 25 minutes, rotating pan halfway through. Remove from oven and turn out, and allow to cool completely. Serve warm or store in airtight container for 2 to 3 days.

Blueberry Muffins_2


About 4 years ago when my husband made his first trip to the States, he had asked me what is it he could get for us from there. Like there was no tomorrow, I had requested bag full of goodies that he bought from there. My list ran long and seemed endless. That was the time I was hardly a year into blogging and baking and photography were the new fad. A large springform pan, the mezzaluna, a pie dish, few ramekins, many muffin cases, dried cranberries, blueberries, ounces of walnuts, almonds, artefacts, photography gears, and what not. He patiently went hopping shop to shop carrying my list around and satisfying my needs and wants. The bags were stuffed to their brim, as if they were about to burst out, crossing their baggage limits on his return back home. As he opened each suitcase, I was fascinated like a kid opening her birthday presents with excitement. Over the years, I have hardly used the springform pan. The pie pan worked best for cakes, while the ramekins made their neat appearance for chutneys, sauces and dips to be served when we had guests around. I used mezzaluna a couple of times to chop the greens, but it was too pricey was daily use and nothing seemed to work better than the good ol' kitchen knife. The only solace, I've used the muffin cases on couple of occasions and exploited the dry fruits and nuts in almost every dessert I made.


Last year, when my husband made frequent trips abroad, I asked him to travel light, partly because my home was brimming with so much clutter that I could not afford to add more to it, and mainly because what I assumed then to be unavailable in Indian markets is now widely available in most stores. From exotic ingredients to baking essentials, its far more simpler to fetch them now than it was long ago.

On his previous trip, he came back home with a pack of organic Quinoa to surprise me. Having never tasted them in the past I was quite apprehensive about what they would taste like. The first I made them, it wasn't best of those grains I had, yet over couple of recipes I have acquired their taste and quite like them now. My simplest way is to consume them as salad. They have a lovely crunch when lightly toasted. Balsamic adds a great depth of flavour and tang, while brown sugar counters it with a mild sweetness that I adore it. Simple, yet flavoursome.


Quinoa Salad with Balsamic, Mint & Walnuts

INGREDIENTS

1 cup / 150 gm Quinoa
1 tsp. Butter
1 tbsp. Balsamic Vinegar
1 tsp. Brown Sugar
2-3 sprigs of Mint leaves
5-6 Walnut Kernels
1 Tomato, diced
Handful of Black Olives and Jalapeños (optional)
Salt and Pepper to taste
Processed Cheese, grated (optional)

DIRECTIONS

Cook 1 cup quinoa in about 2 cups of water. Quinoa takes about 15-20 minutes to cook and is done when its translucent with a visible white ring around the center kernel. Remove the cooked quinoa from heat and allow to sit five minutes. Fluff them gently with a fork. Next, in a wok, add a teaspoon of butter and lightly saute the cooked quinoa till its slightly toasted. Add salt, brown sugar and balsamic vinegar. Saute the quinoa for a minute so that most of the balsamic vinegar is absorbed. Turn off the flame and add in the mint leaves, walnuts, diced tomato, olives and jalapeños. Season with pepper to taste. Serve cold and top with cheese and more walnuts before serving.


Sunday morning we made a picnic to the nearby animal farm. The little one had been excited about it all through the Saturday as she played and constantly babbled the names of the animals she was supposed to pay visit to. Frisking through her set of animal toys, she managed to identify most of them by names, and we bribed her to take her out for that feat.


We left early on Sunday. The morning I woke up and quickly toasted these sandwiches for the munch. A slather of butter for the richness, few onions and cucumber slices for the base, some fresh basil that I plucked off from the budding plant for flavour, some grated cheese to top it and some herbs paired with fresh crackled pepper to finish, as simple and quick it can be. Shouldn't that how a picnic be? Quick and stress free.

We shoved the picnic basket with these sandwiches and fruits, the rug, paper plates, sauce sachets, napkins and water bottles into the back-seat of the car, put on our sunglasses and drove off to the farm.


It was fun as we saw her enjoy the company of turkeys, rabbits, donkeys, horse, goats and hens. She fed the goats some fresh peas and beans and loved the company of emus. As we munched on these fresh basil and cucumber sandwiches, she fed and shared her little bites to the rabbits too. I’m sure they loved it. In turn she devoured these happily, animating the little bunnies and teaching them how to eat. By the end, she made several babbling conversations and had almost made best friends with them.

Incidentally, on our drive back home, she managed to identify a faded white plastic rabbit thrash bin along a road side and she screamed in joy pronouncing “mama, labbit, labbit!”. Almost like she was united with her long lost friend! A day worthy that was ought to be.


Fresh Basil and Cucumber Sandwich

INGREDIENTS

Couple of slices of whole wheat bread
Butter, to slather over
Couple of leaves of fresh basil, torn
Thin slices of cucumber
Thin rings of onions
Grated cheddar cheese
Fresh crackled pepper
A dash of Italian dried herbs

DIRECTIONS

Pre-heat the toaster / grill / sandwich maker for 5 minutes.

Meanwhile, place 2 slices of bread on a chopping board. Trim the edges and slather butter generously on either sides of these slices. On one of the bread slice, place couple of onion rings, followed by torn basil leaves. Top them with 2-3 cucumber slices, placing them side by side. Top them with more torn basil leaves, some freshly grated cheddar cheese and freshly crackled pepper. Sprinkle a dash of Italian dried herbs. Top it with the second slice. Press down gently and place it in the toaster / sandwich maker. Prepare the following sandwiches the similar way. Toast till they are golden brown and serve hot with tomato ketchup or chutney of your choice.


I studied much in an all girls’ high school, so I don’t remember knowing Valentine’s day then. There was no excitement but life as usual like any other day. College life although had a different story to say. Valentine day was about the excitement to dress smart, an anxiety to get sneaky looks from boys, may be a couple of roses, candies and teddies too. Red was a too bold colour to wear, so it stayed away for the day. All were dressed their best for the day, yet they made it look modest, atleast not to be dragged into peppy conversations by friends. There were hopes for those red roses, seeking male attention, for chits of proposals that came through those less known common friends, an ice-breaker conversation, probably a plea to join for a coffee in a coffee shop, and like I said it was an odd anxiety and hushed excitement. Those were the days in college.

Later, life at workplace was a much serious affair. There was a spirit to celebrate the love day, but in a festive way. The fun committee organized entertaining events to promote healthy relationship among peers. There were red roses on every bay, floating balloon hearts across cubicles and team building activities to build rapport. We were encouraged to dress in red, but essentially it did not really mean about love or being in love. It was about anyone whom you cared for and could be your Valentine. I loved that spirit. I respected it and enjoyed it through.


My husband and I hardly got time to celebrate the Valentine’s day ever. We never went out for candle lit dinners, throw parties or the big bashes. We dream about it, but then we are working couples with little time at hand. We exchange no gifts, just hugs and kisses. Instead we sit down and enjoy a home cooked meal together. He cares for me, so he lets me to dig into my favourite dessert for the dinner just that evening, and we relish it together. Over the years, my meaning for love and lust has changed by leaps. Today, it’s about trust and support, of care and affection, of expressing less by words and more in actions, of being faithful and sympathetic. My considerations have changed, because it’s about being selfless and sensitive. It’s a beautiful feeling, and is meaningful by nature. Love is magical. The greatest joy comes from our little daughter, who is a gift of God given to us by the virtue of that bonding and togetherness. She brings life into us, she paints it vivid, makes it worthy to live, and she ties our bonds for a lifetime. Life is short, I like to live it sweet. So why waste even a day that’s dedicated for a purpose?


My menu is sketched. I’ll have some Ginger Lime Pops for my daughter to bite into, that will keep her busy. These Pan Roasted Fiery Balsamic Carrots will make it quick and perfect for the weekday dinner table. And I’ll serve them with some fresh spaghettis and some homemade pesto. I am still dreaming of what dessert I can make. But certainly I would love to pair it with a dollop of Classic Vanilla Ice cream. I think this will make it perfect.

Lay your table, set your glasses, pour the wine, don your apron and get set to whirl up your kitchen this Valentine day. Have a fabulous day with your loved ones and don’t forget to express that you care for them.


Pan Roasted Fiery Balsamic Carrots

INGREDIENTS

3 Carrots, medium sized
1 tsp. Olive oil
2-3 cloves Garlic chopped
2 tbsp. Balsamic Vinegar
1 tsp. Brown Sugar
1 tsp. Red chilli flakes
Salt to taste

DIRECTIONS

Wash the carrots thoroughly and chop them to ½ inch fingers. Blanch them in boiling hot water for 2 minutes. Remove them and shock them in cold water.

Heat oil in a pan and sauté the chopped garlic till they sweat. Next add in the balsamic vinegar and sauté till it reduces to half. Add the blanched carrots, followed by the brown sugar and red chilli flakes. Stir fry for a couple of minutes on medium high flame till the balsamic sauce glazes all the carrots well. I like to smoke the carrots a bit by tilting the pan close to the fire and letting them burn tad bit. They almost taste like grilled. Finally season with salt and herbs, if preferred.

I hold high esteem for the old school thought of sun-drying vegetables and fruits for prolonged life. I do consider its fabulous, no doubts. After all we Indians aren't novice to this technique. We've done it for ages. Our grandmas did it and our moms took over. The art of making crisp happalas (papads) and sandiges came down to us through traditions and we've enjoyed them endlessly on several occasions, meals and dinners. But, heck this technology is luring. Like, I've never thought of making sun-dried tomatoes at home, and if you ask, I would probably never give it a try. Slaving over them for weeks, what if that only means keeping a keen check on the tomatoes as they slowly get kissed by the sun to age into crisp-crimson-red tart, all that seems enticing, but is quite an effort I like to rule out for now.

So, I headed over for the alternatives. The oven called out to me. Replicating the same stuff in my oven resonated my thoughts. But again, that meant couple of hours of drying in the oven too. Back while in college, my semester project work had seen me working on ‘Drying Characteristics of Garlic’ where I did a study on ‘Industrial analysis of Tray Drying and Microwave Drying methods’ using some scientific laws, exponential terms and thermodynamics, none of which I can recall now. That study however told us that up to 88-90% energy, power and time could be saved with microwave drying and that was interesting. Back then too, beyond all those calculations, I enjoyed peeling the cloves, chopping and inhaling the pungent aromas of the drying cloves, their analysis, textures and tastes. See, how I had a foodie blood running in me, that had me food associated with my project work too! As an engineering student, I was no way associated to home science, yet I managed to fit that in! :)

On the same lines, I went ahead and made a really small batch with just 3 tomatoes, just for trial, least I may not have to discard the whole lot in fits of a disaster. Glad I gave this a try. They may not be the best, not exactly the sun-kissed kinds, but pretty much close. You dunk them in the goodness of garlicky olive oil, herbs and spices and they just resonate the original stuff.

One of the mistakes I did probably was to chop them to fine rounds. They seeped out a lot of water and once dehydrated they thinned down a lot and got glued to the plate. Instead, I suggest you chop to halves and place them on the chopped side down. Microwave them one side for couple of minutes and then turn them around and microwave further till dehydrated. That way they will remain firm pieces, unlike mine that ended in strands. Nevertheless, for a trial they were good. These tart beauties are instant and can add that concentrated sweet sour flavor to your salads, pizza, dips or even breads and last long.

Homemade Sun-Dried Tomatoes (Off the Sun, in a microwave)

INGREDIENTS

3 large tomatoes
A few pinches salt & pepper
Couple of pinches of oregano seasoning
1 clove garlic, crushed (optional)
1/2 cup olive oil (optional)

DIRECTIONS

Wash and clean the tomatoes and chop them into halves. Scoop out the flesh using a slotted spoon and place them in a microwave proof flat dish, cut side down. Brush each cut piece with some olive oil and microwave on high for about 3-4 on one side. Flip the tomatoes over and microwave again for another 3-4 minutes. The tomatoes will leave out a lot of water. Take care and keep a keen eye so that they do not burn. Continue to microwave each side till the tomatoes wilt and become dry.

In a small pan, heat some olive oil and fry the garlic till they leave out flavors to the oil. Once they are brown, remove them from the oil and discard. Add in the oregano seasoning, salt and pepper to taste. In a bowl, place the dried tomato flakes and pour the garlicky olive oil. Season further if required. Use in dips, sauces, salads and pizzas as preferred.


It may sound clichéd, I really hate stating the obvious, but it is insane how quickly a year can fly by. I can’t believe that it’s time an entire year has gone by and we are close to its end. With hardly two days to go we will soon bid a bye to it. I hope you had a great time holidaying this Christmas with your family and friends. In a retrospect to the year 2012, it has been a fantastic one in all aspects that it pains parting away from it. It seems soon, too soon and I can’t come to terms in accepting that we are close to its finale. On a positive note, I am looking forward to the brighter prospects of 2013. My daughter is growing bigger and niftier with every passing day. The coming year she will turn 2 and may be step her first foot into schooling. She’s a quick learner and I am sure she will make waves in years to come.


To retrospect the year, the earlier part of the year has been quite eventful on personal and professional front. Firstly, I switched my job from what was right next door to travelling for hours in distance, yet I am in a sense of great satisfaction, getting what I expected out of my job. Then, as my daughter turned one this March, she moved out from her infant phase to being a high energy, active toddler which has been quite a welcome progress. That reasons why I have been quite lenient in blogging this year, despite taking time off in late evenings to keep my blog going. Strangely, I realized that I have been better than the last year where I had just about 37 posts and this year I crossed 40+ posts. Somewhere in February, I took a huge step when I moved out of blogspot to my own domain, but that was a wise decision, because I still love cooking, sharing, writing, clicking and blogging and all that’s associated with it! Sadly I missed out on many invites to media and blogger events that kept flooding my mailbox. But I realize I cannot stuff myself more than what I can take. So that’s okay.

This time of the year is when most people take a sabbatical, planning week long holidays or partying. What are your plans? The spirits are high, mood is warm and light and one inevitably tunes to being merry as the magical charm of New year steeps in. Hope you too enjoy these festive days with your families and friends and welcome the New Year with new hopes, dreams and loads of prosperity. In absolute desire to bid adieu to this year, here’s a quick pasta dish, Fusilli in Cheese Sauce I’m sharing with you. It’s nothing different than the traditional mac and cheese we’ve grown up eating. But yet, I would never want to replace the macaroni with any other kinds of pasta if I am making these. I always stock macaroni, but on odd days like this one, I ran out of macaroni and went ahead with fusilli. Here I did use fusilli, so I call it as Fusilli in Cheese Sauce, since Mac and Cheese, is Mac and Cheese and nothing else!


Fusilli in Cheese Sauce

INGREDIENTS

500 ml regular milk
1 onion, peeled and quartered
1 garlic clove
1 bay leaf
200 g macaroni (1 pack)
1 tbsp. butter
4 tbsp. plain flour (30gm)
125 g cheddar cheese, grated

DIRECTIONS

Cook the fusilli pasta in rolling boiling water with salt till its al dente. This will take about 10 mins or so. Drain out the water and then run the pasta under cold water to stop the pasta from cooking further. This also helps in keeping the pasta separate. Add a dash of olive oil, toss well and set aside.

Cut onion into quarters. In a milk pan, heat the milk along with onion, garlic and bay leaf until almost boiling. Remove from the heat, leave covered to infuse for 10 mins, then strain. Reserve the onion and garlic and use them as paste in other gravy dishes.

In a wide mouthed pan, melt butter. Add flour and cook stirring constantly for about a min on medium low heat. This is called as roux and is the base for thickeners. Pour the warm infused milk into the roux until smooth. Simmer for few mins, stirring often, until the sauce has thickened. The sauce is done when its thick enough to coat the back of a wooden spoon. Check by running your finger through the sauce on a spoon and it should leave a trail. Remove the pan from the heat, then add the cheddar cheese. Then stir until the cheese has melted. Season well with salt and pepper. Serve hot.


Blogging, in its beautiful entity has opened its doors to multi cultures and cuisines across world. It paves avenues to several dishes and new recipes that one had unheard of in the past, though using common day to day ingredients in various ways. Diverse flavors, myriad tastes, yet that homely touch of basic ingredients go into making of this stupendous cake belonging to another cuisine. Like, I had never known or heard of cornbread before, only until I discovered the joys of culinary blogging and blog-hopping. Makki ka atta or Cornmeal / Maize flour is quite commonly used in our Indian kitchens, especially in the North. You simply can’t miss Makki ki roti with sarson ka saag at a dhaba if you were in Punjab. Yet the same cornmeal used in our very own Makki ki roti is completely renovated to this cornbread, a native to American cuisine, one that most of us here have probably not tasted or heard of. That’s amazing since it gives me yet another healthy breakfast dish to add on to my list of ever hunting recipes for our mornings!

Thanks to the Native Americans, for we’ve got corn bread. But then history has it that its humble beginnings can be traced back to the Indians. We’ve used corn ground into meal and flour for years in our cooking and that became a part of our tradition. Owing to the benefits of corn, Westerners too adopted the practice of making corn bread and is said to have become popular around Civil War time as corn was plentiful and cheap.

Today’s recipe for Cornbread is inspired from a couple of recipes I hunted online. I pinned down a few recipes, tweaked some, attempted to miss out on eggs, aiming at a Cornbread that would result in a light and fluffy eggless Cornbread. The first time I made these, they hung between flavors of sweet and salt, also with a pronounced taste of baking powder. I knew instantly I messed up somewhere. On another attempt I tweaked a few more changes and it came out absolutely delicious. I used only whole wheat flour to keep it healthy. The bread is quite nice and nutty with a heady cornmeal aroma which we loved. And if you have a cast iron skillet, use them… it can’t get better!


Eggless Cornbread

INGREDIENTS

1 cup cornmeal (a little coarser grind if possible)
1 cup whole wheat pastry flour
2 tsp. baking powder
1/3 cup honey (replace with maple syrup / sugar for vegan option)
1 cup milk, room temperature (replace with soy milk for vegan option)
1/4 cup olive oil
1 tsp. salt

DIRECTIONS

Preheat your oven to 180 degrees C. Paint the bottom and sides of your cast iron pan with butter or oil. Set aside. In a large bowl, measure out all of the dry ingredients (flours, baking powder, salt), and in another smaller bowl, measure out all of the wet ones (honey, milk, oil). Pour the wet ingredients into the dry ingredients and stir them together till just combined. Now pour the whole mixture into your cast iron pan. Bake your cornbread for 30-45 minutes or until a toothpick stuck into the center comes out clean.

To make it vegan, replace honey with maple syrup or regular / brown sugar and milk with a vegan milk of your choice. Hope you make this one and enjoy the benefits of corn in your breakfast.


As a child I was hooked to story books which eventually graduated to reading novels in my teens. The classics as they are called, I was often lost in thoughts on reading Jane Austen’s novels which were mostly set in a backdrop of classic, opulent English setting of the Victorian era. The emotionally powerful stories vividly spoke about English lifestyle and their culture. As a petite girl, these stories often left me mesmerized in fantasy. The stories had women carrying an unequivocal English dignity and austerity, replicating a sophisticated class that was explicitly an emblem of the elite British culture.

Food often made masquerading appearances in these novels. Like the scenes where the English women walked in through the long corridors, sweeping their gowns as they passed by, the house maids poured in steaming hot tea from vintage kettles to tea cups held by their saucers and they sat by the fireplace in their lofty countryside mansions, overseeing acres of green pastures, speaking softly, elegantly, slowly sipping away their afternoon tea along with freshly baked cakes, warm scented scones and buttery biscuits. You bet, I’ve fancied being a part of this culture.


I often loved the way life appeared over there, chic & classy, at least from the way it was depicted in these books, albeit a nostalgia for something I did not really know as a fact but only experienced through these books. More often I dreamt of taking a trip to the English countryside, sipping that afternoon cup of tea and taking luxurious bites into those warm scones and biscuits.

I wonder at times what took me so long to bake these scones. Oddly, I’ve baked classic cakes and English teacakes on couple of occasions, but never made a start with scones. Glad I headed for a start and I loved the effort that went into making these. It was an afternoon that went fruitful in baking these scones and savouring them to our satisfaction. Here's another attempt at a step by step to help you with these Chocolate Chip Scones.


Chilled butter, grated and cut into flour, baking powder, sugar and salt. Butter being rubbed into the flour mixture till it resembles coarse meal, similar to bread crumbs.


Cream poured into flour, while chocolate chips being thrown in and dough brought together with light hands. Dough being rolled to form scones.


Dough being cut out into scones using a biscuit cutter. Pressing the remaining scraps back together to form another piece. Brushing the scones with cream for that golden crust.


Look at those oven baked beauties. Pass me those golden, light and creamy scones for my tea please!

Chocolate Chip Cream Scones

INGREDIENTS

2 cups all-purpose flour
2 tablespoon baking powder
3 tablespoons sugar
1/2 teaspoon salt
5 tablespoons chilled, unsalted butter, cut into 1/4-inch cubes
Handful of chocolate chips
1 cup heavy cream

DIRECTIONS

Pre-heat the oven to 220°C.

Place flour, baking powder, sugar and salt in a large mixing bowl and mix them well. Grate chilled butter into this mixture. Using your fingertips, rub butter into the flour mixture till it resembles coarse meal.

A few larger butter lumps are totally fine. Stir in chocolate chips. Stir in heavy cream and mix gently using a fork until the dough begins to form. Transfer the dough and all dry, floury bits to countertop and knead just until it comes together into a sticky ball.

Pat the dough onto a lightly floured work surface. Using a rolling pin, gently roll it into a 3/4-inch thick circle. Dip the biscuit cutter in flour and cut out scones. With light hands, press the remaining scraps back together to form another piece (like what I did) and cutting until dough has been used up. The scones that are made from the remaining scraps will be little denser compared to the others, but they taste fine. Brush the scones with cream or milk for golden crust.

Place rounds or wedges on ungreased baking sheet and bake until scone tops are light brown, 12 to 15 minutes. Cool on wire rack for at least 10 minutes. Serve warm or at room temperature.


Here are a few notes to get some well risen scones:

Do not knead or over mix the dough, else it will come out tough. Handle it with light hands. Lightly dipped the biscuit cutter in flour to cut scones from the dough. Don't twist the cutter, or the scones may not rise evenly. Place the scones side by side on a lined baking tray so that as they rise the sides will keep up straight and even as they cook. Finally, scones taste best served with some clotted cream and any fruit preserve. Serve them warm with tea for your evenings.

The recipe here calls for a good dose of heavy cream, and perhaps could be the reason why they are good to taste! Undoubtedly, when you do bake things made of butter and heavy cream in them, the resulting bite would only melt in your mouth.