Showing posts with label Nut-Free. Show all posts

Carrot Soup

How to make Easy Carrot Saaru, Easy Carrot Soup
All through the fall, I stocked pumpkins at home in sheer keenness to make a good pumpkin soup that I could share with you all. I was amused, delighted beyond words to watch pumpkins everywhere, on market stands and home fronts, in malls and on window sills, on blog feeds and in ad mailers. Our favorite grocery stores smelled warm from pumpkin spices and its produce. Our office had spice infused fresheners in the lobby to welcome guests. The coffee was not spared either, flavored with pumpkin spice in it too! Tell me, who wouldn't be lured? So each time we stepped out grocery shopping, along came a pumpkin or its sibling in form a squash, that made its way into our shopping cart, judiciously sized to suit two meals for us as a family.

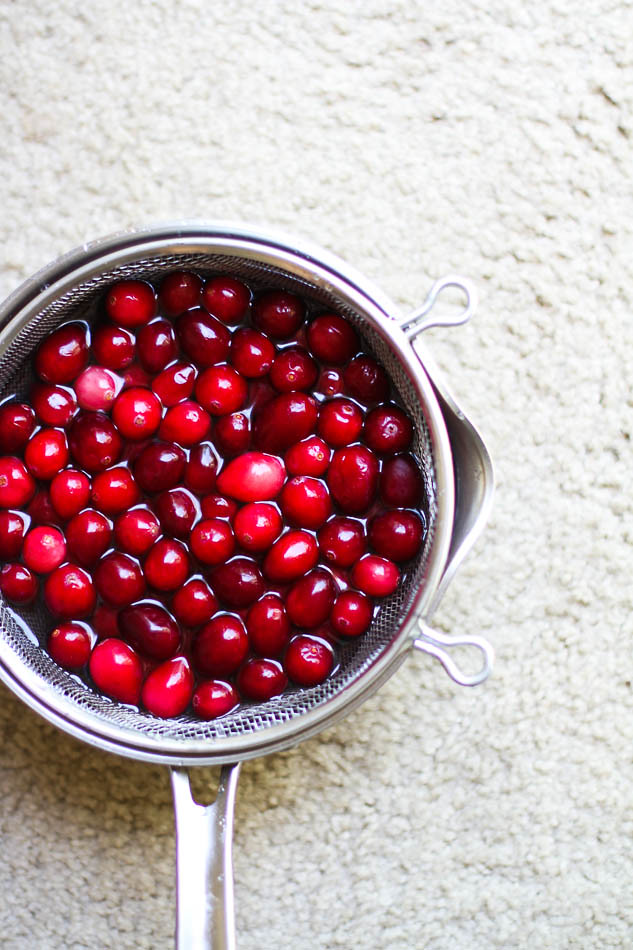
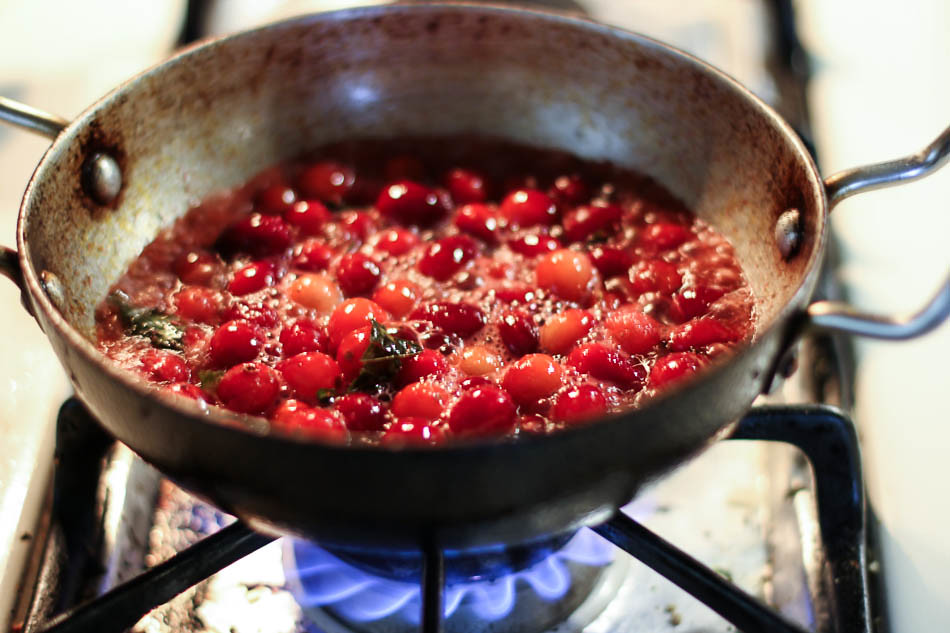
On a seasonal high note, I did make soups and stews, and plenty at that, laboriously skinning the peels, slicing and dicing them, and boiling them to pulp over pot of stock. I choose not to bake, rather simmer over a pot on stove, as that's a task I like to leave for days far less busier than weekdays, when I don't have the time to worry about our over-sensitive fire alarm screeching off at the slightest variation of warm air emanating from the oven. That's another story to say. The soups though did turn out creamy, and deliciously vegan, not necessarily warranting any fat or cream in regard to heighten the flavors or their sumptuousness. But they got gulped down faster than I expected, hot and steaming, ladles after ladles, cold fingers wrapped around the warm bowl for comfort, either dunked by toasted garlic bread or tossed along with piping hot rice, savored snugly in our warm dining area while the leaves were busy shedding under the seasonal transition.

Carrot Saaru


It happened so, that each time I planned a soup, I was swooned by the dire beauty of the squash and pumpkins, that I shot several preps of them much ahead of sunset in the noon. By the time the squash was sliced and diced, cooked, pureed and boiled to perfection, finally seasoned to be served, it was time sun called his day and the darkness overcast the late noons in its thick black bile. I finally gave up on presenting my super-creamy-vegan-butternut-squash-soup here, instead, the year end holiday baking mania took over the house bringing more cheer to otherwise gloomy noons.

We've step foot into the new year, and I've welcomed it with my arms wide open. I have no resolutions that pound my mind hard, so there's none really to make. But I realize this blog is devoid of soups and I want to fill that space. I need to make a beginning, and here's one that fills the bill so well. Apt in time, a recipe for a good Indian soup in the beginning of a new year. It can't get better than this.

I pray this year croons high hopes, brings truck loads of good luck, fab health and immense happiness, and heaps of enthusiasm to live the year ahead positively. I should have been rolling in trays of sweets or brought a dessert along here, commemorating the new year and reminiscing 'oh whatta year 2016 was for me!', because it was gratifying in good sense, and worthily etched into our memory with a fair balance of highs and lows, but instead, I have come along with bowls of warm and comforting homemade carrot soup that clamors itself so South Indian. This is what makes me the happiest - simplicity in a bowl. It defines what I would love my year to look like - simple, clean, uncluttered and subtle in my living and approach.

Carrot Rasam


Carrot Saaru | Carrot Rasam | Indian Carrot Soup

Prep Time: 15 mins | Cooking Time: 15 mins | Serves 4

INGREDIENTS

2 carrots, chopped
2 cups water
1 tbsp. tamarind paste
1 tsp. sambhar powder
1/2 tsp. turmeric powder
Salt to taste

For Tempering:

2 tsp. oil
1 tsp. mustard seeds
1/2 tsp. asafoetida powder
1 sprig of curry leaf
1-2 whole red chillies torn

DIRECTIONS

Boil the chopped carrots along with 2 cups of water and turmeric powder until they are fork tender. I pressure cook them on 2 whistles as its quicker to do so. You can pan boil it if you do not have a pressure cooker. Once done, allow it to cool and blend it to a puree in a mixer.

Transfer the carrot puree into a thick bottom pan. Stir in the tamarind paste, salt and sambhar powder. Add additional water to adjust the consistency of the saaru / soup. I like to have this saaru slightly thicker than our traditional rasams as it brings out the texture and flavor of carrots well. Bring the saaru to a rolling boil and then simmer for about 2-3 minutes. Turn off the flame and set aside to temper.

To temper, heat oil in a small pan. Add mustard seeds and allow it to splutter. Add the asafoetida powder, torn red chillies and curry leaves and fry briefly for few seconds. Turn off the flame and add this to the prepared saaru. Serve hot with steamed rice or drink them steaming hot right out of soup bowls.

Carrot Soup


Easy Cinnamon Rolls

How to make Cinnamon Rolls with Cooked Frosting | Easy Cinnamon Rolls Recipe
With Christmas around the corner and less than 4 days to go before you can sing Hallelujah, the Lord has come, I thought I'll peep in to help you with a lovely classic breakfast for your family to wake up to this Christmas morning. Its typically Western, hearty and sweet to call your morning off to a good start, supple enough that you may want to lay your head on it and snooze again, gives you the comfort of your bestie's company, and is the festive sorts that you can set up on table for your guests to dessert on.

Rising Bread DoughCinnamon Rolls (1)


For the longest time, I've had aversion to cinnamon in all things sweet. Let me not even get to the whys of it, for all I know, cinnamon in my arena existed best in the legion of savories, given the exception for a good Christmas fruit cake where it favorably unites with clove, cardamom and other spices, veiled in a way that it does not hit your senses directly and ruin the flavor. But, here it comes finally, the world coveted Cinnamon rolls looming right out of my kitchen to yours. I’m close to being a convert, convincingly not a cinnamon-dessert-hater anymore. These don’t look a lot like the traditional rolls. I mean they are not enormous in size to consume your palm, certainly not the perfect looking rolls that stand flawlessly edged shoulder to shoulder giving them a clean rip, nor do they bask in the sugary coated frosting that sinks into every groove merrily.

I would probably rechristen these as cinnamon pull apart rolls; owing to the pans I had and the amount of dough I made, they ended up this way. But they are cinnamon rolls essentially, so let's stick to that. They don’t snatch away the authenticity from the traditional ones. They smell great in and out of the oven, are near identical in their recipe, forgiving the eggs in the dough. They sat squishing in an eight inch round baking pan, my ideal dish to bake a nice chocolate cake in, but this time around they doubled up as my bread pan too, saving me gracefully from sunken cockeyed bread had I baked them in my ten inch dish instead. They nudged for space as they puffed up on their second sitting, and, by the time they were out they looked glorious in their golden crevices and sugar burnt hunches, flattering into characteristic pull apart rolls that need to be forked by the thumb and forefinger to tear them apart from their siblings. There’s a fun thing to it, to tear it apart in submission in an imperfect way and dunk it in milk over giggles and laughters with our little girl while tapping our feet to the melodies of Christmas jingles. That’s when you know you are up for a good start to a holiday season.

Cinnamon Rolls (2)


The frosting is purely optional. As for a daily bread, I would stay away from frosting these. They are sweet on their own and make a wonderfully perfect Sunday breakfast with a slather of some salted butter, or cream cheese and coffee by the side. But we are in a holiday season, and that calls for some adornment on the table to give it a festive ring. I have a clean, less sweeter old fashioned cooked vanilla frosting recipe that works really well for me. Since the bread is sweet by nature, a lighter frosting like this one is pleasing to our tastes. Unlike the traditional frosting where you mix milk to confectioners’ sugar till you get a desired consistency, this one is far better version that gives me a similar thick pour-able consistency, albeit far less sweeter than the original version. Give it a try, may be you'll fall for these too.

Cinnamon Rolls Plated


Cinnamon Rolls with Cooked Vanilla Frosting

INGREDIENTS

For Cinnamon Rolls:

2 1/4 cups all purpose flour
3/4 cup milk (I used full fat milk)
1/4 cup butter
1/2 tsp salt
1/4 cup coconut sugar
1 tsp. active dry yeast (or rapid rise)

For the Cinnamon Sugar Filling:

1/4 cup light brown sugar
1 tbsp. cinnamon powder
2 tbsp. melted butter

For the Cooked Vanilla Frosting:

1 cup full fat milk
3 tablespoons all-purpose flour
1/3 cup coconut sugar
1/4 teaspoon vanilla

DIRECTIONS

Heat the milk and butter in a large sauce pan till the butter has melted into the milk. Remove from heat and add in the sugar. Stir well and allow it cool down to lukewarm. The milk should be tepid enough to activate the yeast, but not too hot, else will kill the yeast.

Transfer the warm milk to a large mixing bowl and sprinkle yeast into it. Let it sit for 10 minutes, so that the yeast can feed on the sugar and froth.

Next, add flour starting with 1/2 cup at a time and stirring well as you go. Once it forms a loose batter, add the next half cup of flour and stir well. This will help activate the gluten in the dough and yield soft supple dough, resulting in a good, fluffy bread. Continue using all of the flour and stir well with each addition till it comes together to form a sticky dough. Knead it for a minute or two till its soft and supple.

Place the dough in an oiled deep dish and cover it with a dish cloth. Let it rise in a warm place for about 2 hours. By this time the dough should double in size.

Transfer the dough to a lightly floured surface. I use the clean kitchen counter top that provides me ample space to work my dough on. Using a flour dusted rolling pin, roll the dough into a thin long rectangle. Brush it generously with melted butter. Prepare a mix of sugar and cinnamon powder and sprinkle it generously all over the dough.

Starting at the longer edge side, roll up the dough as tight as you can till forms a long log. To avoid opening up, place the seam side down. Using a cleaned knife dipped in flour, cut the log into slices of 1.5 inch each. Butter a 8x8-inch round baking tin. Place the rolls into the buttered tin, next to each other. Brush the rolls with some melted butter. Set aside to rise again for 45 minutes.

Preheat the oven to 350 degrees F. Bake the rolls for 25-30 minutes or until the bread is golden brown in color. If the top of the bread seems to change color sooner, while the underside still seems uncooked, cover the top with an aluminium foil and continue to bake till done.

Remove from oven and allow it to cool completely. Frost as desired.

For the frosting, combine milk and flour in a saucepan. Cook over medium low heat, stirring constantly, for about 3-5 minutes. The mixture should thicken and come to a boil. Add in sugar and stir well. Boil till the mixture coats the back of a wooden spatula, i.e. of custard consistency. Turn off the heat. Stir in vanilla essence. Cool completely. Before serving, whisk the frosting really well and swirl using a spoon on the cinnamon rolls.

Eggless Cinnamon Buns

Banana Oatmeal Cookies Snack

How to make Healthy 3 Ingredient Banana Oatmeal Cookies Recipe
The calendar on the bottom of my screen reminds me each day how fast we are getting close to the end of December. That means, we are just 2 weeks away from waving goodbye to this year (stop twitching your eyes, will you!) and, we are only 7 nights away from Christmas! 7 nights, that's just about a week. Yes, yes, just about a week I said! Sooner we bat our eyelids, that will be snapped away too. Now hope you are not smirking at me or raising your eyebrows in an oddly muddled way! If you did, then I assume you have sprung up on your toes and are heading right to your desk to grab that paper and pen to sort your Christmas shindig. So by this time around next week, I imagine the table will be laid out, and cutleries matched up, stockings set up high on the window sill where the fairy lights are twinkling in a chord, rushing through last minute gift wrapping and cookie plating, and in the reclusive spot of your home there may be a party planned with folks boisterously chiming in Merry Christmas while sipping away some eggnog.

I don't mean to scare you by any means. While we are nearly there in the last lap of the year with another 15 days to go, we are still left with the best few days of 2016 to live with. I wanted to knock your door and remind you on that. By that I mean, I wouldn't want you to burn out and hyperventilate planning the whole carte du jour for the D-day celebrations, rather take it slow and easy, plan with a breather, living the last few days of this year insanely happy, making it a memorable one.

Banana Oatmeal Cookies Ingredients 1

Banana Oatmeal Cookies Ingredients 2

Banana Oatmeal Cookies Prepped


We got the taste of our real winter snowfall yesterday that lasted a couple of hours. By end of the day, all the white snow flaked icing was one into a slushy mess. Predictions are it will continue to snow over the week, slipping into weekend. This morning we woke up to see our world swallowed by mesmerizing white everywhere. I dumped myself in layers and layers of warmers, mufflers and whatnot, yet, chill air was strong enough to render my eyes watery, feet numbed and nose tips frosted. By the time I was home, my coconut massaged hair had frozen to thick dreadlocks and my toes had lost their sense of belonging. Today was the coldest winter I've ever witnessed in my life, and this is just the beginning, an experience worth a memory, a teaser to what lies in the months ahead. Now I'm seriously thinking of a balaclava, no matter how comical I may seem.

In the run to year end celebration, I've turned on my oven to warm up our home and bake some delectable goodies. Between churning out my favorite fruit cakes that will go out to friends and colleagues, I have some healthy cookies baking on the side, that serve as an instant solace to curb the cravings of my little girl and me. While the air is heated and scents of fruits and spices waft through the kitchen, these cookies are made instantly with left over bananas, some oatmeal and chocolate chips, just 3 ingredients put together into a loose dough and baked to form soft cake like cookies. They are an instant ramification of salvaging some near dying overripe bananas that are honey sweet and boost of potassium in abundance. They are healthy, have no fat, can be customized to your will by replacing chocolate chips with nuts and raisins of choice, are gluten free, dairy-free, can be easily passed on for breakfast or on-the-go snack at odd hour with no guilt. Now that's what you need on your hand while you are raking your brain sketching out the Christmas menu. Go ahead and bake these along too.

Banana Oatmeal Cookies Served Healthy Banana Oatmeal Cookies 1

Banana Oatmeal Cookies

Healthy Banana Oatmeal Cookies 2


Healthy 3 Ingredient Banana Oatmeal Cookies

Prep Time: 5 mins | Bake Time: 12 mins | Yields: 9 medium sized cookies

INGREDIENTS

1 large overripe banana
1/2 cup quick-cooking oats*
1/4 cup chocolate chips*
1 tsp. vanilla extract (optional)

DIRECTIONS

Preheat oven to 350°F.

Mash the bananas in a medium bowl. Add the oats, vanilla extract and chocolate chips. Stir in well to form a loose dough.

Using an oiled spoon, drop a tablespoonful of the cookie dough to a baking tray. Flatten them down gently into a disc shape if desired.

Bake for 12-15 minutes. Remove from oven and allow to cool on a cooling rack. Serve with tea or coffee or take as an on-the-go snack.

Banana Oatmeal Cookies (2)


Notes:

* Use gluten-free oats for gluten-free option
* Use vegan chocolate chips for vegan option
* Replace the chocolate chips with raisins or nuts like almonds or walnuts for a nut based option
* Vanilla extract is optional but highly recommended for more flavor. You can do without it however.

Cranberry Tokku

How to make Cranberry Tokku, Easy Cranberry Pickle, Cranberry Relish
I started blogging in a time when the internet world had taken to blogs burgeoning everywhere like little mushrooms enticed by rains. There was an unfaltering gush of novel, unexplored cuisines, recipes, ingredients and more, all brimming on various sites with their evocative photographs and stories, each compelling and competing by themselves to make a mark on the space. I'd viciously eye those berries and stone fruits that would pop up randomly every now and then, in seasons and festivities, their crimson reds, navy blues and sunlit ambers marrying blissfully into butter, sugar and flour to settle into marvelous looking desserts - desserts that could trigger hunger at odd hours of the day and post hefty meals; leaving me much in envy of being unable to get my hands on them back in time, while the world around rejoiced in celebration with such food.

That said, what did not make much of an appearance on the web space were fresh, glossy, scarlet red cranberries. There were several recipes out there that had them in scones, breads and cakes, mostly used in dried form, the kind of ones that are drowned in sugar and shriveled to douse the tart flavor. For a while, now that these are easily accessible in India, I too made my convenience with using the dried varieties in our favorite mincemeat recipe that sat bathing, cramped up with other dry fruits and weighed down by nuts in a heady spiced rum concoction for months before being brought out to be baked into Christmas Fruit Cake.


I had never seen fresh cranberries in the past till I came to the US. With dried cranberries available on ease, it was what it was known to me. For several years till lately, I was tricked into assuming that cranberries were akin to karonda, or karvanda (as known in Kannada), the tart-sweet Indian berries commonly used erstwhile in Indian pickles. I was excited about cranberries being karvanda, for two reasons.

One, I had never seen a karvanda bush, nor tasted its fruit in ripe, however I grew up hearing my dad often commend his love for these extinct pickling fruits, reminiscing how he missed watching his mother and grandmother collect the tart green berries off the bushes that grew in their backyard while the summer set in, of how they let them mature in brine for weeks, hand pounded the fresh spices and amalgamated them for months in sun to be pickled. Those were his memories, far and few, raved and deemed. For me, in rare times that I met a marinated young karvanda berry eye to eye, it was always camouflaged, heavily absorbed in red spices, and tart from being infused with bite sized mangoes pieces, served as delicious pickles alongside other dishes in odd occasions of weddings or family gatherings. Hardly an acquaintance to delineate something about.

Yet, those who grew up in the North of India may spin you tales of their childhood spent twiddling around the karonda (as they call it) bushes in the backyard of their aunt's, grandma's or friend's home, plucking them and popping it to their mouths with puckered face; karonda being more popular in the North of India than in the South where I grew up.


For second, Karavanda wasn't popular in generation of our times by any means; at least, it wasn't regarded high as the imported peers were. No one told us how good they were, no magazines or food channels professed it high, nor did our Sunday markets run its produce, probably because a lot of our Indian population was either disinterested to honor it or the ones like me, had hardly known it by trait. For a long time I did not know what it was called in English, or if it did exist in the lexicons of English circles. On the other hand, we had newspapers and magazines that constantly spoke of how fab cranberries were in beating the beast out of cancers and UTIs, tipping off cranberries to be our very Indian karavanda, and how our long forgotten fruit had captured attention in the West and that it may be touted as a superfood, pronto. Internet added to that fad with burst of knowledge.

My assumptions may have been misleading me, but thankfully I know today that karonda is karonda and cranberry is cranberry. Both live in separate worlds, with different identities, in their own identities that can't be swapped. It took me a trip to Nantucket in summer to realize this. That's where I saw the process of cranberries being grown and harvested, much unlike the trees that my grandmother harvested from, but bog flooded and cragged from vines. I came back home with a bag full of organic cranberries to turn them into a desi relish!


That brings me to this interesting recipe I have to share with you today. A mod-western ingredient with a traditional twist. The east meets west kinds. An old wine in a new bottle. This cranberry chutney, a dip, or more traditionally a thokku. Its very Indian at heart, its spices and the flavor - piquant, tart and delicious in a tiny blob on the side to any dish. You drag a lump of it with your fingers and mix along with steaming hot rice or simply scoop a small portion with your roti or dosa and relish it. Its makes a kicking dip to tortilla chips or even khakras, and that's exactly how I've zinged up over the past couple of evenings alongside my tea.

Cranberry Tokku

INGREDIENTS

2 cups fresh cranberries
5 tbsp. vegetable oil
2 tsp. red chilli powder
1 tsp. fenugreek seeds powder
1 tsp. asafoetida (hing)
1 sprig curry leaves
Salt to taste

DIRECTIONS

Heat vegetable oil in a kadai/ wok. Add mustard seeds and fry till it begins to splutter.

Next add the red chilli powder, fenugreek powder and the asafoetida into the oil and fry for 5 seconds. Do not allow spices to burn.

Add the torn curry leaves and fry for few seconds till they turn crisp.

Reduce the flame and add the fresh cranberries. Stir them in to coat all the spices. Cook till they pop and begin to reduce in volume. Using the back of spatula, gently mash them. Add in salt to taste and stir continuously until the cranberries soften, reduce in volume, and begin to lump, and the oil begins to separate.

Remove from heat and allow to cool completely. Store in air tight ceramic or glass containers.

Notes:

* You can add a tablespoon of jaggery to balance the tart incase you do not like the sour taste of the thokku.
* Fenugreek powder is bitter on its own, however when fried in oil it imparts a lovely flavor to the dish. It's the heart of this thokku and hence do not skip this ingredient.
* If you plan to store this over the counter for couple of days, its important you do not skip the amount of oil suggested. However, incase you plan to make a smaller quantity that will be consumed in a day or two, you can reduce the oil content. Oil helps in longer shelf life of any pickle.
* If you don't like heat, reduce the amount of chilli powder. We love our pickles spicy, so you may find the red chilli powder on slightly higher side. The heat of the chillies is also dependent on the kind of chilli powder you use. Hence use it judiciously.

Oatmeal Chocolate Chip Cookies

Oatmeal Chocolate Chip Cookies | Easy Oatmeal Chocolate Chip Cookies Recipe
In our direct sight, right outside our balcony are two young, strong maple trees that stand next to each other in a row. They are probably the last of few trees in our region to hold on to their deepest summer greens, while across the street, the one that we take to drop our daughter to the school bus stop, the towering maples have turned into fiery red, fancy yellows, even burnt browns, scattering themselves on sidewalks and spilling over streets in favor of the autumn's climax that we saw a week ago. The leaves trodden path smell of gentle rot, casting that sweet autumn perfume in air, as many wear their bare-dare look and poke their woody nibs high into the murky skies.

By the time the first streak of sun rays hit our home, we are wide awake, our hair strewn, usually done with brushing and sipping a cup of hot ginger tea for the two. We are at a point when we begin nudging our daughter out of her sleep. That takes us a two-man effort to canoodle, our attempts to wake her up over several minutes - the husband and I, at times her dear grandma adds in too, to pull her off the bed and tow her to the bathroom to start her day with. By this moment there's enough light curtailing the darkness of dawn, and the two maple trees outside our home are well in our sight. We watch it every morning in exhilaration for its transformation, awaiting patiently as it takes its turn to move from greens to yellows, and then to browns. For all the autumn we have seen this season, these two are holding on to their cavernous greens. Did I not say they were strong?

Yesterday, this Saturday morning, voila! The magic unfolded. Leaves changed hues, turning themselves to beautiful golds and bronzes, some earthy greens and blazing reds splashed in random - autumn's treat to us. The curtains stayed open all day long, the doors left ajar despite the chill air, providing us with a better sight and coverage to the trees overall, as we stepped out excitedly to snap a few moments to be treasured. For the next couple of days, the magic shall prevail till they turn matte coppers, sway feebly into air, and pile up in heaps of burgundies and russets on the ground below, before the snow flakes engulf them in uniform of black and white.

IMG_3129 IMG_3130 IMG_3138 IMG_3136 IMG_3129 IMG_3130


With fall around, there's an awesomeness in air that makes home baking more gratifying. With the year end coming closer, and the holiday spirit in air, desserts will make their prominence on family lunches and dinner gatherings. Oatmeal and Chocolate Chip Cookies are just the perfect things you could bake this season. They'll add more charm to your coffee trays that will roll in as guests visit you. If not, consider them gifting to your loved ones and bring joy to their celebrations.

The recipe is adapted from All Recipes. In my quest to find a good recipe for eggless version of Oatmeal Chocolate Chip Cookies, I researched a bit and tried a couple of recipes with varying results. I highly suggest this recipe, albeit minor modifications. I advice you do not cut down on the fat content in this recipe, and balance the brown and white sugars to the below said, that is, if you care for crisp cookies. The cookies do spread a bit, so place them well. We are a family that loves crisp cookies, very Indian in that aspect, so I like to flatten these cookies with a fork before baking. The recipe here will make you a batch of about 16-18 medium sized cookies depending on how much you fill your tablespoon with. If you wish to bring fall to your cookies, add a nice helping of sweet cinnamon and heady nutmeg powder to this recipe. So pull your pans out, warm up your oven and let's bake a batch of these Oatmeal Chocolate Chip Cookies.

Oatmeal Chocolate Chip Cookies

Prep: 10 mins | Cook: 12 min | Makes: 16-18 cookies

INGREDIENTS

1 cup salted butter
1/4 cup packed brown sugar
3/4 cup white sugar
1 teaspoon vanilla extract
1 1/2 cups all-purpose flour
1 teaspoon baking soda
1/4 cup boiling water
2 cups rolled oats
1 1/2 cups semisweet chocolate chips (I used mini chocolate chips)

DIRECTIONS

Pre-heat the oven to 350 degrees F (175 degrees C). Line the cookie tray with baking / parchment paper and set aside.

Bring the butter to room temperature, and beat it with brown sugar and white sugar till its light and fluffy. Add in the vanilla extract and all-purpose flour to this and mix.

Next in a separate bowl, dissolve a teaspoon of baking soda in boiling water. Add this to the above mixture and stir gently.

Stir in the rolled oats and raisins and mix them in. Drop by tablespoonful into a tray lined by baking / parchment paper. Bake at 350 degrees F (175 degrees C) for about 10-12 minutes. Don't over bake.

Remove from baking tray and allow them to cool completely on a wire rack. Store them in a air-tight container.

Oatmeal Chocolate Chip Cookies

Kodubale

How to make Kodubale | Easy Kodubale Recipe
It's eve of Diwali today, that time of the year I look forward to the most with great yearning and excitement. Its around this time I hit my best stride. I'm the happiest, consumed by thoughts only positive, blurring out all negativity and pessimism, guzzled with happiness, reflection, joy and celebration, irrespective of how high or low the year may have been. I hope yours was a fantastic one and continues to be so in the year ahead. I wish you a wonderful Diwali, and a year filled with good luck, health and prosperity. Wish you all a Happy Diwali and a prosperous New Year!

Kodubale_02


Right now as I write this, I sit on my dining table overlooking our balcony lit with tiny serial bulbs, running end to end, hung over the balcony parapet like wet jeans on cloth liners, its warm LEDs creating a bokeh effect on the hindsight in a very soothing way. Our little girl has been running around the home in sheer excitement of the festive hoopla. I miss the sounds of zameen chakras, rockets and phooljhadi (flower-pots) bursting in the vicinity, that reminds me of home back in India; but in a few minutes from now we'll head out to the local temple about 5 miles from home, where sounds of bursting crackers and rings of temple bells will chime alongside families wishing each other Happy Diwali. There's community get together - with prayer, celebrations, food and musicals to round off the night. Also, with parents around, our home is smelling of kodubales and shankarpalis and that's nothing short of what Diwali has been for us - food and celebration, both in plenty.

Before I head out, I'll leave you with this recipe for Kodubale, a traditional Indian savory snack that we grew up eating way too often, that there came a point when I hated it by heart. After I moved to Bangalore, I did not eat them for years. And then slowly, there came a time when I went back to eating them on my occasional trips to Mangalore, where they are made in plenty. It wasn't with much fervor though, but I know why so. Kodubales are made plenty in Mangalore - every bakery stocks them, every house stocks them, they are gifted too. They stay fresh for long, so most homes will serve you with a plate of these alongside tea. Women in most households have a recipe of their own, so they either whip up batches and stock by larders or they rush out to the nearest bakery to buy them the moment they hear a guest is about to arrive. My relatives even brought them along to gift whenever they visited us. Eventually it was overdosed and I saw aversion to it.

Of what I remember, these require no occasion to treat upon really. You make them on whim, serve your guests, feast them on festivals, snack on them in evenings with your tea, or simply carry them on your bus rides to munch on when odd hunger pangs strike. They are fried ofcourse, but they won't do much harm as a lot of the rice flour in the recipe is immune to absorbing oil. So you'll have a delicious savory that you can eat guilt free. I highly advise not experimenting these with baking, as they can obviously end disastrous. But if you have courageous nerves that I don't have, and you are successful at baking these, please share your tips with me. I will be overwhelmed to hear from you. On another note, you can control the amount of heat to your liking. I love these spicy, but if you like them low on spice, use a milder chilli powder for the heat. They are delicious I bet!

Kodubale_03


Kodubale

Prep: 30 mins | Cook: 20 min | Makes: 3 dozens

INGREDIENTS

Dry Ingredients:

2 cup rice flour
3/4 cup roasted split bengal gram (huri kadale)
1/2 cup desiccated dry coconut (powdered copra)
1/4 cup maida / plain flour
1 sprig finely chopped curry leaves
1 tsp. red chilli powder (I use a spicier one, such as Guntur chilli powder)
2 tbsp. sesame seeds
1/2 tsp. good quality asafeotida
Salt to taste

Other Ingredients:

2 tbsp. hot ghee
Oil for deep frying

DIRECTIONS

In a mixie, pulse the roasted gram into fine powder and keep it aside. Mix all ingredients mentioned under dry ingredients list along with roasted gram flour and make a well in the center. Add hot ghee and mix into the flour. Add just enough water to knead it into a firm dough.

Pinch out lemon sized balls of the dough and roll them using your palms into a long, 1 cm thick rope. Cut the rope into 7-8 cms long strips. Bring the 2 ends of the strip together and pinch its ends to form a tear drop shape. Alternatively, you can bring the either ends together and pinch them to seal, thus forming a round bangle shaped ring. Prep all of the dough and keep it ready for frying.

Meanwhile, as you prep the dough, heat up oil in a kadhai / wok to medium low heat. Test by dropping a small ball of dough. It should sink first and raise up to the surface. Once heated to this stage, drop the prepared kodubales into the hot oil and fry them in batches on medium low heat till they are golden brown in color. Do not clutter many in each batch as they need to be cooked through well. The temperature of the oil is key in making good kodubales as hotter oil will tend to crisp the kodubales faster, while the centers may still be uncooked. Remove from oil and drain on a kitchen paper. Allow them to cool completely and store them in dry airtight containers. They can be stored and stay fresh for about 2 weeks.

Kodubale_04