Besan Cheela

How to make BESAN CHEELA | VEGAN OMLETTE | BESAN PUDA Recipe
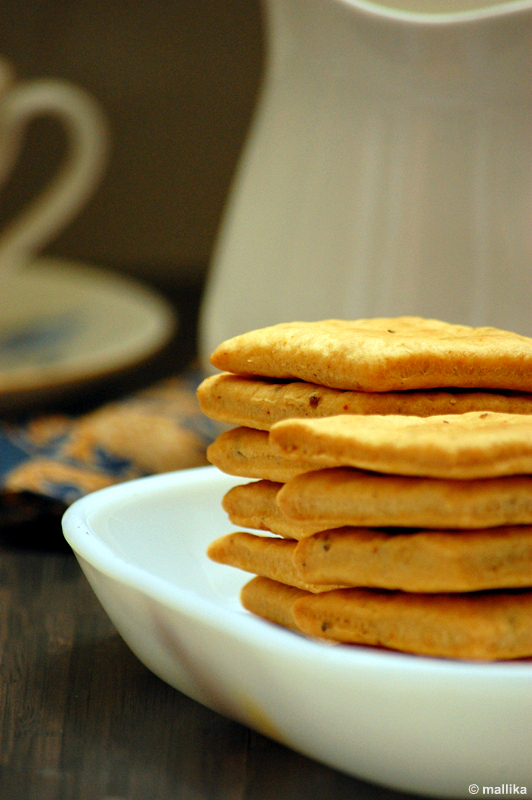
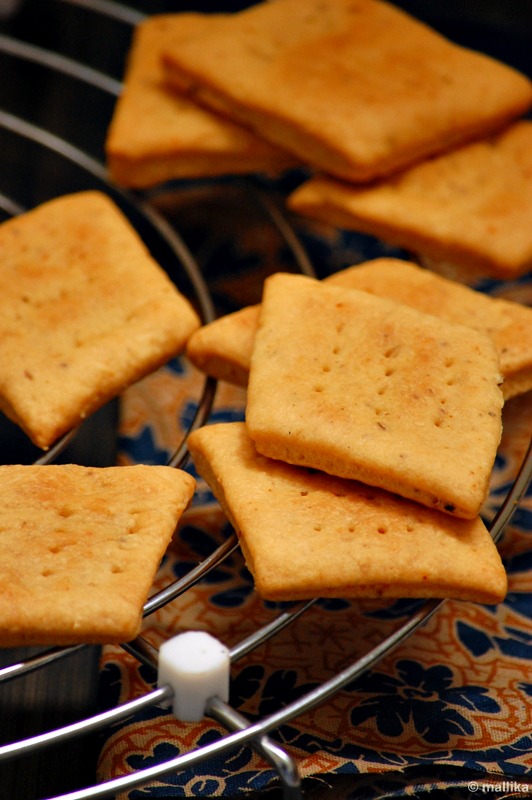
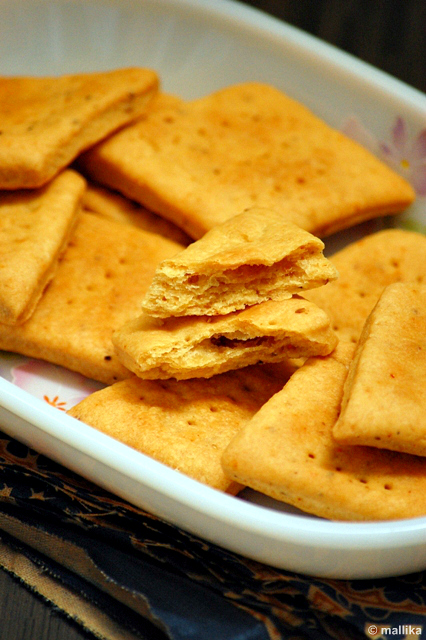
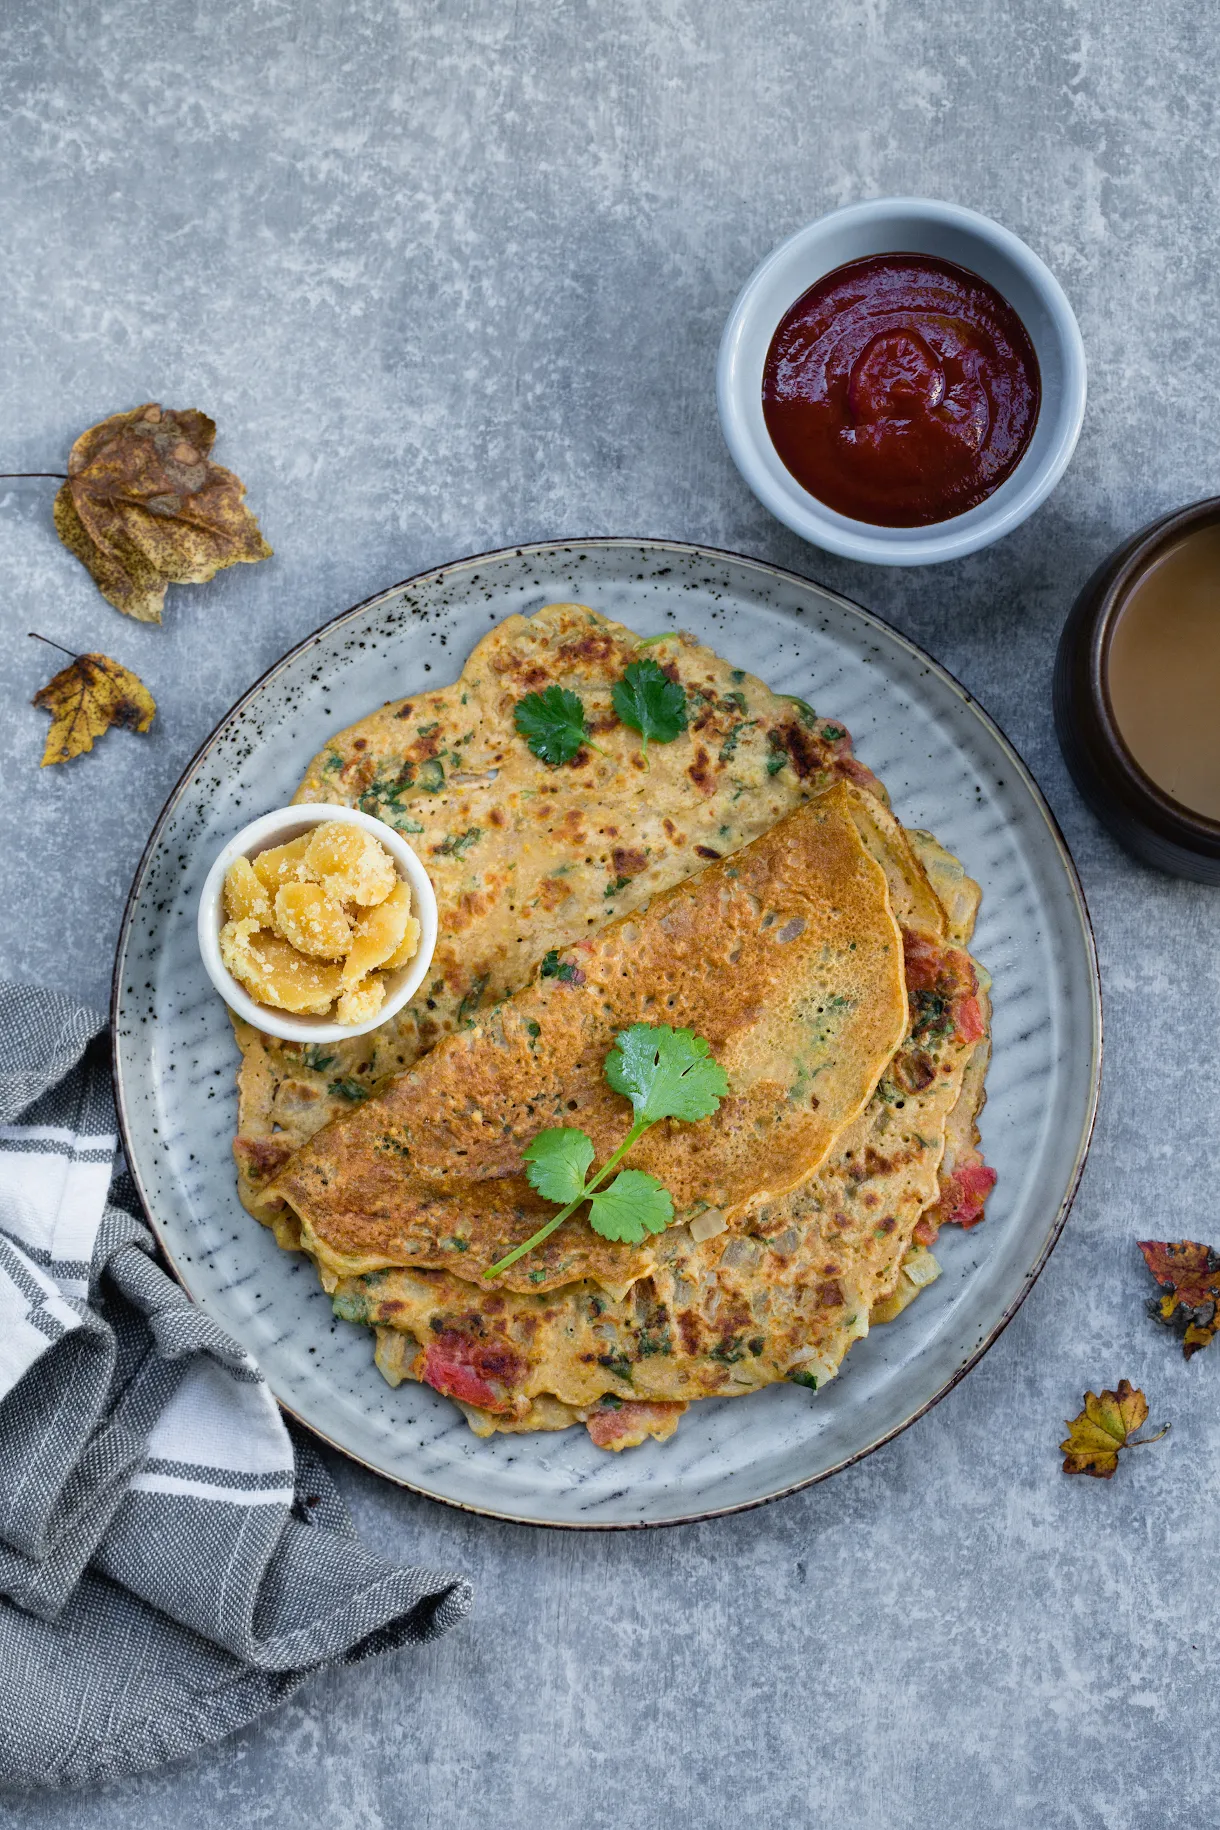
Besan ka Puda is what my mother-in-law calls them as. Vegetable Omelette or Tomato Omelette is what I have always known them back at my place. Besan Cheela is yet another name for the same. It's a protein loaded breakfast made with besan (chickpea flour) and water, whisked into a dosa batter like consistency. Turmeric, salt and coriander leaves are added. As with traditional egg based omlettes, lots of finely chopped onions, tomatoes and green chillies go into this batter. Or you can leave it plain if you prefer.

Add more health if you will with finely chopped veggies like grated carrots, beans, cabbage or spinach. I love adding tomatoes, but that's totally optional (above pictured has no tomatoes, and the below pictured was made with tomatoes in the batter). My mom would use thinned yogurt to whisk the batter. It makes these pancakes softer and more flavorsome. She'd also place slices of Amul cheese on one half, turn over the other half of the omlette and cook till gooey and molten. The gooey cheese does something magical that no kid can ever refuse!

It's a healthy protein-rich breakfast dish that can keep you full and nourished for a couple of hours. It's good as a healthy evening snack if you plan to skip dinner. It is sure to satisfy your rumbling appetite.

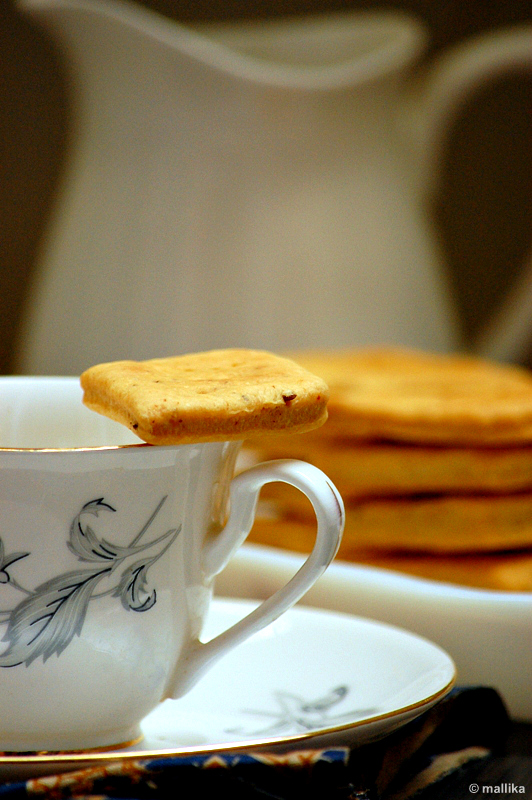
You can serve these with some green chutney, but we've always had them with ketchup and I stick by it 😅. Besan omlette and ketchup is quite a combination! Well, it's memories you see.

Tomato Omlette


Besan Cheela | Vegan, Gluten-free Omelette

INGREDIENTS

2 cups besan (also called as gram flour, chickpea flour, garbanzo flour)
1/2 cup chopped onions
1/2 cup chopped tomatoes
1 tsp chopped green chillies
1/2 cup chopped coriander (dhania)
1/2 tsp chilli powder
Salt to taste
1 cup water
Oil for cooking

DIRECTIONS


Combine all the ingredients in a bowl and gradually add a cup of water to get smooth, dropping consistency batter, similar to the one we get when an egg is whipped.


Heat a non-stick pan/tava on a medium flame. Grease it well with a teaspoon of oil. Pour a ladle full of batter and spread the batter evenly in the pan.


Cover it with the lid and allow to cook for 4 to 5 minutes on a medium flame or till it browns in colour and the edges crisp. Open the lid, drizzle some oil and turn it upside down and cook the other side till it turns to brown in colour and crispy. Repeat the same process with the remaining batter. Serve hot with tomato sauce.


Served hot with either green chutney or tomato ketchup, this Besan Cheela is a lip smacking dish that easily makes up for an excellent eggless, vegan and gluten-free omlette with similar textures and flavors to that of it's egg-y counterparts, ofcourse devoid of that awful smell or taste from eggs. Gram flour has relatively high proportions of protein in comparison to other flours, so you'll not miss out on that. Though this is quite satisfying for our breakfast, this is a fantastic tea-time snack too. Simple and easy to make, it can be put together in less than 5 mins and is a good rescue for bachelor cooking or to serve at-the-drop-of-hat guests.


To forget the real world outside and just being glued to the big screen for three hours, there’s something almost magical about the way movies can whisk you away to another place and time, all without leaving your seat. My husband and I are big movie buffs, that we are often found at the theater on weekends. And no, that does not account for watching a DVD at home. It has to be a theater. Period.

If there's something I miss the most, it's camping at a theater on the weekends. I can probably watch the same movie at home on a DVD, but it can't beat that theater experience. I am eagerly waiting for my daughter to grow up... with a hope that we can go back to watching movies, pick up those nachos and popcorn, sit back and relax to catch up movies in theater together as a family and revive that experience on 35 mm screen. For the moment, there's enough on my plate, that I can't seem to find enough time for movies or other entertainment.


Weekends have been catching on me like crazy, we did pretty much nothing but stayed back at home. Rest, rest, rest, that's all my body cries for... and weekend seems to be the only time I can catch a bit on my sleep, personal space and hobbies. I love it that I have so much in hand, hopping around like a bunny all the time with so much to complete that I have no time to think about anything.

Of-course, I missed baking through the week so much that I promised I would dedicate an entire afternoon doing just that. This Spinach and Mushroom Lasagna was my effort to make a gloomy weekend peppy. I think I was pretty much fruitful at that. :)


Spinach and Mushroom Lasagna

INGREDIENTS

Lasagna sheets, about 8-10 numbers
2 tablespoons butter
4 tablespoons all-purpose flour
3/4 ltr milk
A tsp of nutmeg powder
1/2 cup grated Cheddar cheese
1 pack Button mushroom (about 200 gm)
1 bunch spinach
Salt and freshly ground pepper to taste

DIRECTIONS

Prepare the lasagna sheets as per the instructions on the pack.

Bechamel Sauce

Melt the butter in a heavy saucepan over a low heat and stir in the flour and saute until the mixture darkens slightly (about 1/2 min). Gradually pour in the warm milk, stirring continuously until the sauce is smooth and begins to thicken. Add in a bay leaf. Reduce the heat and stir until it boils. Stir constantly as it tends to settle and burn at the bottom if unattended even for a minute. Heat until the sauce thickens to a thick-custard consistency (about 5 mins). Season with salt, pepper and nutmeg. Mix in generous tablespoons of grated cheddar cheese.


Prepare the vegetables

Pick, clean and wash the spinach and mushrooms. Chop them roughly. Heat some oil in a pan and throw in the spinach. Cook till they are wilted. Add in the mushrooms and saute them for 2 minutes. Do not over cook else they will turn soft and mushy. Season with salt and pepper.

Assembling the Lasagna

In an oven-proof dish, layer the lasagna sheets first, followed by a layer of spinach and mushroom mixture. Follow it up with white sauce and spread it well. Layer lasagna sheets again, another layer of the spinach mushroom mixture, followed by the cheese sauce, then another layer of lasagna sheets followed by the remaining veggies and then the remaining cheese sauce. Top with grated cheddar cheese. Bake in oven at 180 C for about 30 mins or till the top cheesy layer browns.


Cook the pasta a little less than done (al dante), since it absorbs liquid from the sauce and cooks further when you bake in oven. The amount of cheese to be used is your choice, reduce if you are on a diet. But I suggest you use a big helping of good cheese since the paste per se lacks spices, especially if it uses the white sauce (as against my comparison with Indian cuisine), it's only the cheese that offers a rich taste to this dish. The lasagna is a meal in itself. Pair it with salads and they'll make a complete meal for you.


I am bidding an adieu to November and giving a warm welcome to cold Decembers which I am eagerly looking forward to. While the Western countries have almost set foot into holiday season with Halloween, Thanksgiving and now Christmas to look forward to, my blog hopping takes me across to sites with numerous recipes posted marking the holiday season. Foodbuzz, Tastespotting and Foodgawk have been bubbling with tempting pictures of food ranging from pies, cookies, cakes, roasts, et al., all for the holiday season.


With Diwali going by the last month, I pulled down the lights and diyas only to put it aside for some time. On the back of my mind, I knew Christmas will be here soon and these would be put to use again. I have been scuffling through my cabinets to pull out the decorative baubles and tinkles which have not only left me fascinated over years, but also draw my daughter's attention these days. The vivid colors from wreaths and ornaments have caught her undue attention and the tinkling sound from bells seem to keep her engaged endlessly. Christmas has caught up with her and the lights fascinate her beyond anything. We'll soon put up the Christmas tree, light it and decorate our home. I don't think I even need a reason for celebration!


I decided upon the quintessential baking of fruit cake this year too, which may sound usual since I do it every year during Christmas. It's neither tradition nor a norm I follow, it just makes me feel good. For a long time now, I pushed burning my oven to Christmas, since baking needs precision in measurement of ingredients and with a baby on my arm most of the time, I can hardly imagine doing that.

The weather I guess has been a good motivator for these biscuits. And though the sun comes out occasionally beneath the silver lined clouds to warm up overcast skies, yet there's an exhilarating nip in the air which has been my real boost for these Cheddar Black Pepper Biscuits.


Cheddar Black Pepper Biscuits

INGREDIENTS

2 cups all-purpose flour
1/3 cup salted butter
3/4 cup buttermilk
1/4 teaspoon salt
1 tablespoon baking powder
1/4 cup grated cheddar cheese
1 teaspoon freshly ground black pepper
1 teaspoon red chilli flakes (optional)


DIRECTIONS

Preheat the oven to 450°F and grease the pan with a teaspoon of the melted butter.

Combine the flour, baking powder and salt in a bowl. Cut chilled butter to small cubes and add it into the dry ingredients. Rub using your fingertips until resembles bread crumbs. Add the buttermilk and mix briefly, just to incorporate it. Try to work gently, do not overwork the dough else the biscuits will not be delicate and light.

Gently mix in the cheddar and black pepper. The dough will be fairly sticky. Place the dough on a smooth, well-floured surface and pat with your hands to about 3/4 inch thick. At this stage you can either wrap them and place it in freezer or continue to bake. Roll and cut out the biscuits, using a cookie cutter. Dip the cutter into flour between cuts to keep from sticking. Place the biscuits on the prepared pan. Prick them with fork. The remaining dough may be gently gathered together and rolled out again for more biscuits. Brush the tops lightly with melted butter.

Place the biscuits in the oven and bake for about 10 minutes or until the tops are golden brown. Remove from the oven and allow them to cool a little. Lift them from the baking tray and serve warm.


The dough is fairly sticky, hence refrigerating it helps in better handling of the dough. Roll them thinner than I did and they will end in crisp, nibbling biscuits. Roll them thicker and they will make scones. Serve them with some sliced tomatoes and cheese and they make raving starters for any party.

I love my biscuits warm and spicy. Adding a dash of chilli flakes pepped up the biscuits and added warm notes to it. We paired them with a warm cup of tea and these spiced flaky biscuits made a great companion for a relaxed chill, rainy evening.

Nuchinunde


I am pitiful at authentic South Indian cuisine. I can make an excellent tove or saaru and whip up nearly good tamblis, rava idlis, dosas and few chutneys with ease. Then there are a few exceptions with our own Hulis, sasive, gojjus in which I fair just about okay, but I hardly dare to make anything 'South Indian' beyond that. We grew up eating traditional meals that included ,wide variety of huli, palya, sasime, gojjus, etc in our daily course. Bisi bele baath, Chitranna, Kadabu, Holige were meant for occasions. But then that's not where our cuisine is limited to. Karnataka cuisine is very diverse and if I had to gauge myself then I would feel terribly guilty where I stand.

In all honesty I would never dare to compete with the one who cooks South Indian food on a daily basis. Our cuisine uses very little oil and the fat mostly comes from the use of coconut. Even in recipes where coconut is not used, it is a blend of freshly ground spices used with a delicate balance that brings out the best from the dishes. To balance the spices, tang and sweet itself is a challenging act. To say, mastering them to bring out authentic flavors will take years. It's a fear that I would go through one of those catastrophic moments if I tried them in my own kitchen.


There are a several recipes out there that are confined to regions alone, those which rarely make to hotels and restaurants menu cards, and most of our non-Kannadiga pals may have never heard or known of them by taste. Our hotels restrict to publicizing Idli Sambhar, Dosa Chutney or Bisi Bele Bath, touting falsely for all to believe, this is what Kannadigas eat. Which isn't entirely true, really. Nucchinunde is one such breakfast dish I had not heard or eaten anywhere before. It was never made at my mom's place, so I don't know exactly what it tastes like. But on a quick google search for some traditional Karnataka recipes, I came across couple of sites citing Nucchinunde as one of the traditional recipes seen in Karnataka households.

I've tried the recipe from various sites, but the use of tuvar dal alone gives out a strong dal flavor which is not my favorites. So I tweaked the recipe a little by addition of rice flour to suit us. This is loved by all at home and is now this is a regular menu at my place.


Nucchinunde

INGREDIENTS

1 cup togari bele / tuvar dal / split pigeon peas
2 tbsp rice flour
1 inch ginger chopped
1/4th cup fresh grated coconut
2-3 green chillies
A pinch of hing
Salt to taste

DIRECTIONS

Soak split pigeon peas in water for an hour. Drain out the water completely and grind coarsely without adding water. Add green chillies, finely chopped ginger, fresh grated coconut, salt to taste, hing along with 2 tablespoons of rice flour while grinding.

Pinch balls from the dough and press them between the fingers and palms of your hands such that finger impressions are retained on the dough. Place them in a steamer/rice cooker and steam them for 10-15 mins. Serve hot with coconut chutney and laden with ghee.


Coconut Chutney

INGREDIENTS

1/2 cup grated coconut
2 green chillies
Salt to taste
1 tbsp sour yogurt

For Tempering:

1 tsp Oil
1 tsp Mustard seeds
1 tsp Urad dal

Grind the grated coconut with green chillies and salt to taste along with a tbsp of sour yogurt till smooth paste. Transfer this to a serving dish. To temper it, heat some oil, add in mustard and urad dal and let them splutter. Add this to prepared chutney.

The recipe may not be authentic, but is surely traditional. I tweaked the recipe to suit our palate, but you can omit the rice flour and use only tuvar dal if you want to keep it authentic. That way the Nucchinunde will be soft and perfect. Increase in rice flour beyond 2 tablespoons will make the resulting Nucchinunde stiff. Again, there is no hard and fast rule with spices too. It's one of those traditional recipes I make during our festivals and we have come to relish this with either simple coconut chutney, sambhar or vegetable kurma.


Late part of the year is when I love the most with the seasons changing pleasantly. Mornings get colder than it has been since through the year and it feels comforting to snuggle underneath the blanket a little longer to catch up a few extra mins of sleep. Thanks to the Eastern winds, the showers we had in the past couple of weeks from the Bay of Bengal have given a warm welcome to misty mornings and cold nights.

Winters are here and I get a feel of Decembers' already. And unintentionally though, I have stayed away from baking from past couple of weeks, my reservations have been to make full use of my oven for Christmas and I definitely intend to post a few baked goodies for the year end celebrations. At the moment my kitchen has been busy churning out simple hot meals, mostly to satisfy our cravings for comfort home food.


I love my Sundays, don't we all do? Being home with family and enjoying a humble home cooked meal with them is the best way I love to spend my day off. While hectic week at work goes at a slow pace, my weekends seem to breeze through like a blink of an eye. Before I realize the weekend is over, Monday is already in... and I hate being hit by Monday Blues... Don't mistake me, I love my work, my job is great and my company treats me well, no complaints at all. What I dislike are those tiny tit-bit tasks at home I need to rush at and complete ahead of time... boil milk, pack lunch, clean up the kitchen, dress up my baby, see her off, they sound simple as if they don't buy any time, but indeed they do and fairly lot.

And that's probably the reason why I have learnt to value my weekends lot more. Late breakfast and lunch on weekends are a usual trend these days. I do my best to feel relaxed and thoroughly enjoy my Sundays by soaking up some sun, a morning chai, a brisk walk that leaves me fresh with some quality time for myself. Lunch has becomes a simple affair ever since my baby started off with her solids, solely because our focus right now is her growth. She demands an unswerving attention and it gets tough on our nerves to multitask constantly. By all means, I still try to make a simple meal sound exotic, like infusing the aromatic Jeera Samba rice with lightly ghee roasted cumins to transform it to flavorsome Jeera Chawal. I paired this with the healthy Moong ki Dal and Grilled Paneer (Cottage Cheese) which is mildly spiced and flavored with hints of mint, after all weekends ought to be different than usual.


Jeera Chawal with Moong ki Dal and Grilled Pudina Paneer

Jeera Chawal

1 cup Jeera Sambha rice / Basmati rice
2 cups water
1 tbsp fresh clarified butter (ghee)
1 tbsp cumin seeds (jeera)
Salt to taste

Wash and clean the rice in flowing water and soak it in water for 15-30 mins. In a thick bottom pan, fry cumin seeds in a tablespoonful of ghee. Drain the water and add in soaked rice to this and fry lightly for about 3-4 minutes. Add in 2 portions liquid to every portion of rice. Add salt to taste. I use a rice cooker to cook my rice and in 20 minutes, the rice is perfectly done. Alternatively, you could use a heavy steel utensil and let the rice simmer for 20 minutes covered without disturbing it. Turn off the flame, keep it covered for sometime and use a fork to gently swirl the rice. Handle the rice gently, garnish with chopped coriander if required and serve hot.


Moong ki Dal

1 cup Moong dal
1 tsp turmeric powder
Salt to taste

For tempering

1 tbsp ghee (clarified butter)
1/2 tsp hing
1 tsp jeera / cumin powder
1 tsp coriander / dhania powder
1 tsp fenugreek / methi powder
1 tsp chilli powder

Cook one cup moong dal in three cups of water till mushy. Add turmeric to this for faster cooking. Once the dal is cooked well, add in salt to taste.

Prepare the tempering for the dal. Heat some ghee in a wok/pan and add in the dry masalas mentioned above. Fry for a quick 30 seconds till the spices turn aromatic. Do not let them burn. Add this to the prepared dal and garnish with coriander leaves and lime if preferred. Serve hot with rice.


Grilled Pudina Paneer

200 gm Paneer (Cottage cheese)
1 tbsp Tomato chilli sauce
Handful of fresh mint leaves
1 tsp cornflour

In a wide bowl, crush handful of fresh mint leaves in tomato chilli sauce along with a teaspoon on cornflour. Add cubes of diced paneer to the prepared sauce and allow it marinate for a few minutes. Drizzle a little oil over the marinated cubes and grill it for 10-12 minutes or till they brown. Flip the cubes and grill the side to golden brown. If you don't have a grill pan/oven, you may use the regular tava to do this. Serve hot with Jeera Chawal and Moong ki Dal.


Today, the November 14th is celebrated as Children's Day throughout India and I extend my hearty wishes to all the children a Happy Children's Day. May your childhood be filled with loads of fun, thrill and happiness and may you sail a smooth journey to a better bright future. After all childhood is all about innocence and playfulness, it's about joy and freedom to enjoy and have fun.

Coming to think of my childhood, I have had good share of fun in my childhood days. Thanks to my dad's job, we moved places and changed many schools. New place, new school, new friends, new uniforms, new teachers were common to us and we were quite open about accepting this change. In fact, in a way we were accustomed to this as our parents had tuned us to accept the fact that we would be loyal to a particular school only for sometime :) It was not until I reached my ninth grade that we decided to settle down and not change schools anymore as that would hamper our studies.


Like every other kid, I too have fond memories of my school. Infact there are so many that it would be hard to jot them all here. Children's day was always kind to us. The day meant no uniforms, no books, only loads of fun filled entertainment and games, all to compensate for the stress from competition we had taken from teachers, parents and society to prove ourselves better! Probably one of those days when going to school meant no burden to us. Our school would organize fun activities with teachers taking part actively to hold cultural performances followed by games, prizes and sweets that would make us kids a day to enjoy and remember. While through the year long we kids would carry bags that could easily be weighed in a couple of kilos, on Children's Day we were allowed to come hands free to have loads of fun. After all that celebration I probably looked forward to sweet distribution as my personal favorite part of the day. You'll know I was a foodie even as a kid :)

Nonetheless, how can an occasion be celebrated without any scrumptious food? Since it is a day for the kids, I made these easy and delicious muffins on this Children's Day to treat the kids. The recipe is egg-free and yet another adaptation from Nita Mehta's cookbook. Enjoy a scrumptious Children’s Day!


Chocolate Chip Muffins

INGREDIENTS

1 1/2 cups All purpose flour
1 cup Thick Curd/Yogurt
1 cup Sugar minus 1 tbsp
1/2 tsp Baking soda
1 1/4 tsp Baking powder
1/2 cup Butter
1 1/2 tsp Vanilla extract
A fist full of Chocolate Chips


DIRECTIONS

Preheat the oven to 200 deg C for 10 mins. Layer the muffin tin with muffin liners.

Sieve all purpose flour twice and keep aside. Cream the sugar and curd until sugar completely dissolves. Add baking powder, baking soda to the creamed mixture and mix well. Leave aside for 5 mins and till bubbles appear on the mixture. Now add in vanilla essence and softened butter and beat well. Next slowly add all purpose flour in portions at a time and blend with wet ingredients. Beat well with a till creamy and thick. Finally fold in the chocolate chips gently. Pour the batter to the prepared muffin liners and bake in the pre-heated oven for 15-20 mins (time depends on the oven you use). The top should be golden brown in color and centres cooked.


I used cooking dark chocolate chips in my cake batter which gave us gooey chocolate patches as we bite into the cake. You may also use chocolate chunks for the same effect. If you want firm chocolate bites, use regular chocolate chips (the ones we get in Nilgiris outlet, Bangalore) that don't melt easily. With addition of chocolate chips/chunks, this makes great tea-time goodies for the little ones. Every kid would love to sink his teeth into one and grab his second and third.


Festivities in the last week continued at my work place too and the ones who offered to work on these holidays were treated with food as a part of celebrations. To put it this way, I have been eating enough of store bought pizzas at my work place off late. The kind of pizzas offered aren't my best pick. Thick crusts of bread are not so fresh and all it feels is like biting into thick bread base with skeletal toppings. Eating pizzas and pastas at pizzerias with family and friends have diminished than ever before, more evidently since I have been making the base at home, albeit attempting their healthier counterparts. Seconding the reason that I have taken to liking thin crust pizzas than the deep pan ones.


If you've been through my previous posts on pizzas, you well know how much I love my pizzas loaded with toppings. Ironically, much against my liking, a vital element of a good pizza is not overloading the pie with toppings. Less is definitely more on pizza. And with thin, crisp crusts like this one, I can well assure that. :)

Pizza Margherita has been catching quite an attention from long. Every time I look up the pamphlet to place an order, Margherita calls out to me. But then, only tomato, basil loaded stuff doesn't appeal either, right? Is it just the name? I am not sure. I push the thoughts for a next time and go ahead for fancier toppings.


Something impelled me to make this classic pizza at home. First the recipe from the cookbook 'Vegetarian cookbook' said making this was a breeze and then Soma's blog compelled me further. I got down to making one of those classic recipes that's meant to stay the way it is. Did you know how Margherita Pizza got it's name? It is said that the Neapolitan chef, Raffaele Esposito created the Pizza Margherita, a pizza garnished with tomatoes, mozzarella cheese and basil, in honor of the Queen of Italy, Margherita of Savoy. It was created to represent the colors of the Italian flag. Now isn't that pretty interesting how a simple pizza, laden with tomatoes and cheese alone can get an exotic name?


Pizza Margherita with Thin crust Millet flour pizza base

INGREDIENTS:

Homemade Pizza dough

1 tsp dry yeast
1/4 cup warm water
A teaspoon of sugar
Salt to taste
1 cup flour mixture (Wheat Flour + Millet Flour in ratio of 3:1)
1 tsp Olive oil

Sauce/Toppings:

1 cup tomato puree
4-5 cloves of garlic, finely chopped
1 tbsp oregano flakes
1 tbsp fresh/dry basil leaves
1-2 tomatoes, chopped in rings (optional)
1/4 cup grated mozzarella cheese
Salt and Pepper to taste

DIRECTIONS

Prepare Thin crust Millet flour pizza base:

In a mixing bowl, blend yeast in lukewarm water along with a teaspoon of sugar. Allow this to rest for 10 mins. This should be frothy by now.

Heap the flour mixture into a large bowl and make a pit in the center. Pour the yeast mixture, salt and 1 tbsp of olive oil. Knead gently to form a smooth, soft, slightly sticky dough. Cover the dough with a kitchen towel and set aside in a warm place for an hour like an oven until almost double in size. About 20 minutes before baking, punch down, knead a minute or two and then form into a ball. Roll out thin crust pizza base.

Prepare the Sauce:

To prepare the sauce, heat a tablespoon of olive oil over medium heat. Sauté garlic and oregano for a few seconds. Do not let the garlic brown, they should only sweat. Add pureed tomatoes. Boil till the sauce is fairly thick. Adjust salt to taste.

Assemble the Pizza:

Spread sauce over thinly rolled out pizza crust, layer tomato rings (optional), sprinkle basil, good helpings of mozzarella cheese and finally a dash of olive oil. Finish with generous black pepper and a little salt. Bake in a pre-heated oven of 220 deg C for about 20-30 mins. Cut into wedges and serve hot.


The base follows a standard recipe with a substitution of millet flour instead of all purpose flour, making it a much healthier version. Count a few perks of home baking :) Millet flour is gluten-free, hence the dough would have less elasticity; don't expect it to behave the way all purpose flour would. I used a mix of whole wheat flour and millet flour in 3:1 ratio.

You can leave out the tomato rings, instead use roughly chopped tomatoes in the sauce. used dry basil leaves, however I suggest you use fresh basil if available. Basil and tomatoes marry well with each other and they are a combination made in heaven, making this pizza simple, yet bursting with fresh flavors.

What sounds like a tedious amount of work isn't actually any. It's wonderfully aromatic when you have the otherwise awful smelling yeast sitting in the oven converting a yeasty dough to a freshly baked crusty base topped with tangy cheesy tomato sauce and the entire house envelops with the charming smell of freshly baked rustic pizza. What an end to a Sunday evening!!!


Diwali celebrations just got over and we are still hanging on in festive mood. Lights put up for Diwali haven't come down yet, kandeels hanging up high in air are yet to be pulled down and diyas welcoming the door steps are to be removed. Flowers have lost their fragrance and Rangoli has faded into thin air and I am busy cleaning up the oil spill overs. Diwali may have been over, but it's spirit is still alive.

This Diwali was filled with loads of fun with lights, colors and lots of food on plate to eat. No crackers for me as the loud noise and pollution do not fascinate me much. But putting up lights and decorating home with diyas and kandeels is always on my to-do-lists. With all the festivities that went by and for the ones we have ahead, here I have a post festival treat to soothe your heavy tummies! And with sweet treats and spicy savories, what can be better if it is followed by some digestive candies to soothe your content tummies! I felt this post was apt for this season of festivities. :) So here's my version of digestive Tamarind Candies, aka Imli Heeng Goli.


The recipe comes from my dad where he uses minimalistic ingredients to make an extremely tasty, tongue tickling, lip smacking digestive candies, surely not something you can resist eating just one. I was craving for these some time ago and it brought back fond memories of my high school days when these candies were our favorite after meal treats to smack into. One of our school peons would sell these as tiny homemade candies wrapped cutely in thin transparent polythene sheets and sell them at a cheap price of 10 paisa. These candies will surely send your taste buds tingling.

Imli Heeng Goli

INGREDIENTS

1 tbsp tamarind
2 tbsp jaggery
1 tsp jeera powder/cumin seeds
1 tsp red chilli powder
1/4 tsp compounded asafeotida/hing
1 tsp salt
1 tbsp of castor sugar/powdered sugar for coating


DIRECTIONS

Dry roast cumin seeds till they darken lightly and turn aromatic. Pound the compounded asafeotida if in rock form. Add it to the roasted cumin. Add in the chilli powder and salt to taste. The spice mix is ready now.

Separate tamarind seeds, if any and discard them. Grate the jaggery and add it to the tamarind. Add the above spice mixture to this and start kneading it gently. Kneading it may call in a bit of your muscle effort as dry tamarind is stiff and working with it can be quite an ardent task. However, the tamarind, jaggery and spices will come together eventually to a dough like consistency. Taste and check for the spices. Increase jaggery according to taste. Your resultant dough should turn stiff and you can roll them just like a candy. Roll them to small logs or round candies using palms of your hands. Roll them in coarsely powdered sugar and store in clean air-tight containers free from moisture.


Just a handful of ingredients go into making this tongue tickling candy. It's hard to resist eating anything less than one. I made a good handful of these and before the end of day, they were all swiped clean. These candies stay for a month long since they have no moisture in them. Pack them in thin foodgrade plastic wraps and they make great travel companions too.

Rolling them in sugar helps these candies to prevent sticking to each other. There can be variations to this recipe. Add in pepper instead of red chilli powder. Omit asafeotida if that's not a flavor of your choice. If you love biting into those Hajmola candies, then this surely will tempt you to make your own at home. A melange of flavors, sweet and spice, salt and tangy, simple and easy, yet a winner recipe.


Here's wishing all my readers a very Happy Diwali. Sorry about being away from sometime. I am here, back again after a short hiatus. Work and personal life has been keeping me on my toes, to an extent blogging had to take a short backseat. I did intend to post something earlier, but time has been a bitter enemy! Now that Diwali is right here, I nudged myself to post this for my readers.

Indian sweets are comfort food for me, after all this is what I grew up eating all these years. Diwali or Deepawali is perhaps the most beautiful of Hindu festivals in India. Diwali signifies the victory of good over evil and is commonly celebrated across most states in India. Personally for me each festival brings hope, life, energy and happiness. This Diwali has been special to all of us, especially since it's our daughter's first one. Festivals for us are incomplete without sweets and delicious good food. It's true essence lies in enjoying the company of our loved ones and indulging in our favourite foods. Food that give us joy and comfort.


The store I hit often has been flooded with Diwali goodies. Supermarkets boast of Diwali festivity with neatly stacked gift boxes of dry fruits and sweet-meats beckoning every nook and corner. Ofcourse, then when you talk about Diwali, how can you not picture traditional Indian sweets? While traditional desserts may not be a part of daily Indian menu, they do feature on festivals making them an integral part of our festive celebrations.

I have been dreaming of making Kalakand since a long time now, ever since I saw the recipe in Nestle recipe book that came with Milkmaid. The book itself is named as Diwali special sweets with 9 traditional Indian recipes, all worth trying. I am glad I tried this out and was loved by all.


Kalakand

Recipe by Nestle's Milkmaid recipe booklet, also available on Nestle.com

INGREDIENTS

1 tin (400g) Sweetened Condensed Milk
2 heaped tbsps Milk powder
500 g Paneer (Cottage Cheese)
3-4 powdered Cardamom (Elaichi)

For Garnish

Silver leaf
Pistachio and Almond slivers

DIRECTIONS

Mash paneer coarsely and mix in milk powder and condensed milk. Heat the mixture in a thick bottom pan. Cook on medium heat with constant stirring till the mixture becomes thick and starts leaving the sides of the pan. Remove from the fire and spread onto a greased plate. Sprinkle elaichi powder & top with silver leaf or sprinkle kesar soaked in water & top with almond slivers. Cool and cut into squares.

Kalakand is expected to have a soft, crumbly texture with every bite. Don't be alarmed if you have some whey leaving from the edges while spreading the Kalakand. Good, soft Kalakand has some whey water seperating from it when it is spread on the tray. Most of it gets absorbed as the Kalakand cools. For this dessert in particular, I suggest it's best to make cottage cheese at home using fresh milk. However, if you are short on time, a store bought paneer works equally good. I have made this dessert a couple of times and it does feature on my favorites.


I used cardamom to flavor this dessert, but saffron flavored, Kesar Kalakand is definitely on my to-do list. Place each kalakand on paper cup and pack them to be shared with your family and friends. With subtle warm hints from cardamom, this dessert is rich and makes a great give away as gift.