You know Christmas is here when your eyes tune to seeing shades of reds and whites everywhere. I am eyeing at the holiday season which is all set to beckon us with some travel, which means loads of fun and excitement with family and friends, which I am eagerly looking forward to. To all my fellow readers, I extend my warm and hearty wishes for Merry Christmas and Happy New year.
Seriously, I can't imagine Christmas without a fruit cake of any kind. Christmas is already here and my fruits aren't soaked yet. I would probably settle for a store bought one. Sweet cravings of plum cakes and rose cookies flood my memories as I think of them. The deep amber cakes dotted with dry fruits and nuts lining the stretch of glass shelves in bakeries and cake shops tempt me further and the aromas linger, hanging on so strong and etched.
Last week my hubby and dad set out on a biking expedition to greener pastures to enjoy the serene country side. The nature lovers that they are put the two of us, mom and me into trouble! With their trip came additional responsibility of bag packing and baby sitting my daughter. And you know that with a nine month old baby at arm all the time, who craves for the best of our attention, it can't get any easy for us. With more in my hand than I can ask for this year, I doubted if I could really extend myself to bake for the Christmas course.
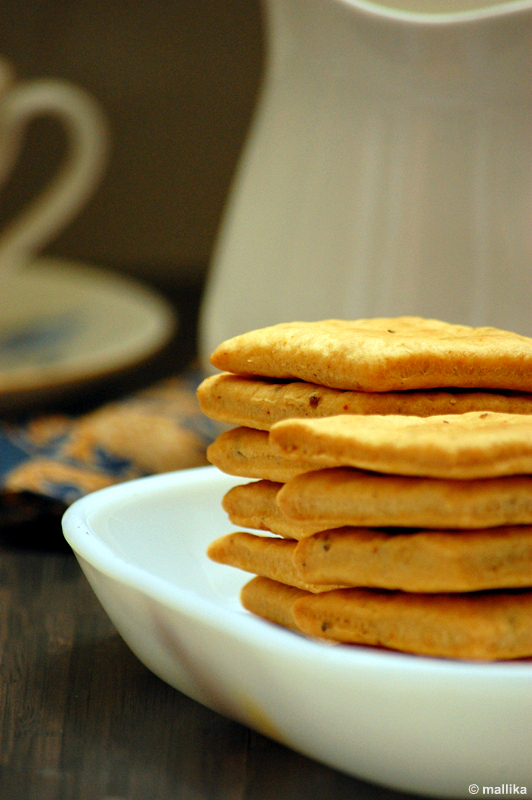
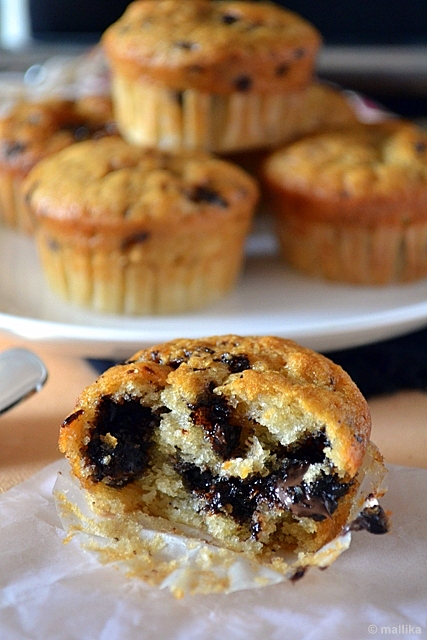
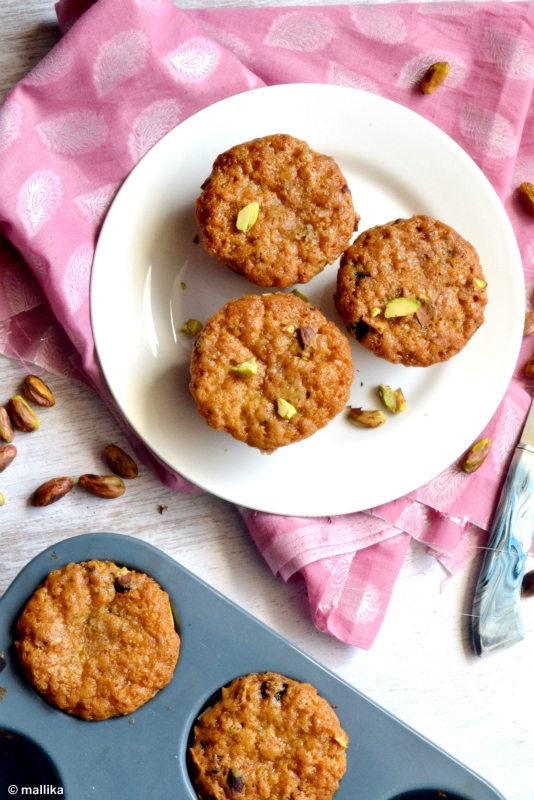
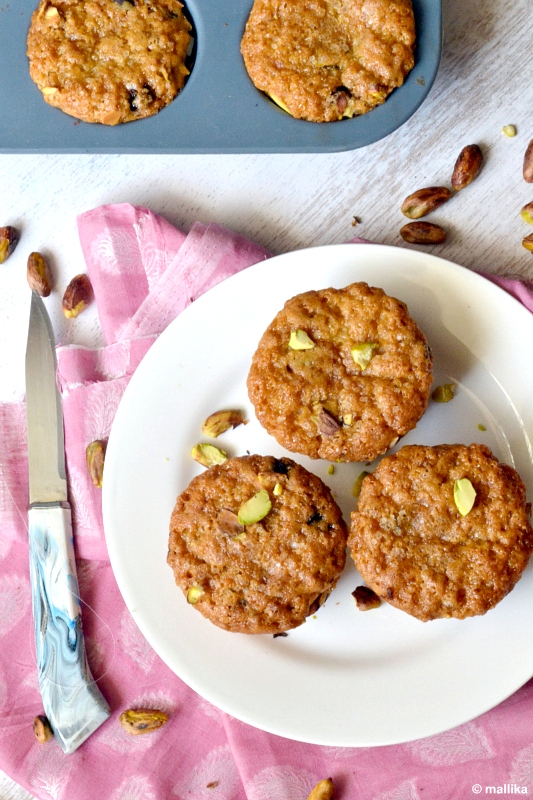
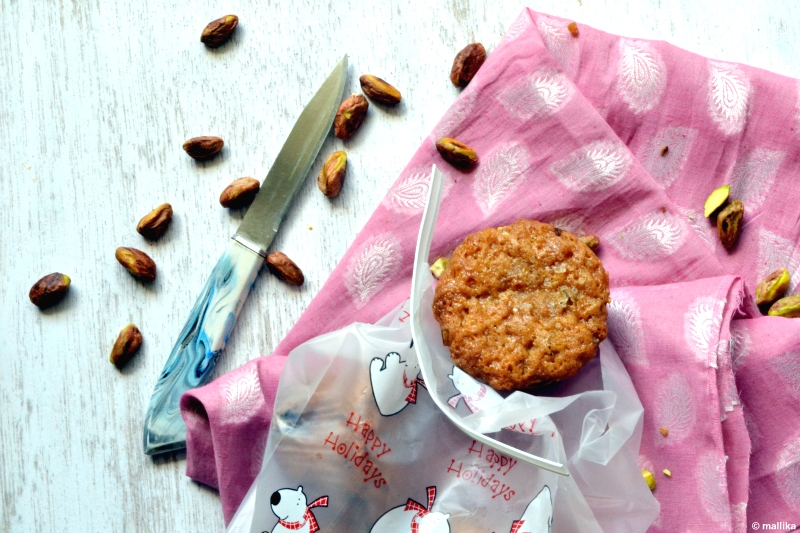
Right before the day they set out on their trip, I scuffled through my pantry to pull out packets of roasted pistachios fervently, all of which I have been zealous to put to use for long. I put together pistachios and chopped chocolate chunks to make half a dozen ultimate pistachio chocolate chunk muffins for the ultimate adventure biking trip! These muffins were not only eggless to boast for, but also rich and luxuriously decadent that with every bite their energy levels boosted to the zenith!
I draw inspiration from dozens of recipes I see flooding across the net, all hosted in style and glamor for the holiday season. Every click takes me to a new recipe and it tempts me further. As I bake a fruit cake of some sort every year, this year too plans weren't any different. I would have probably exhausted myself pondering hard what best I could do to revamp the traditional fruitcake I have been making since couple of years.
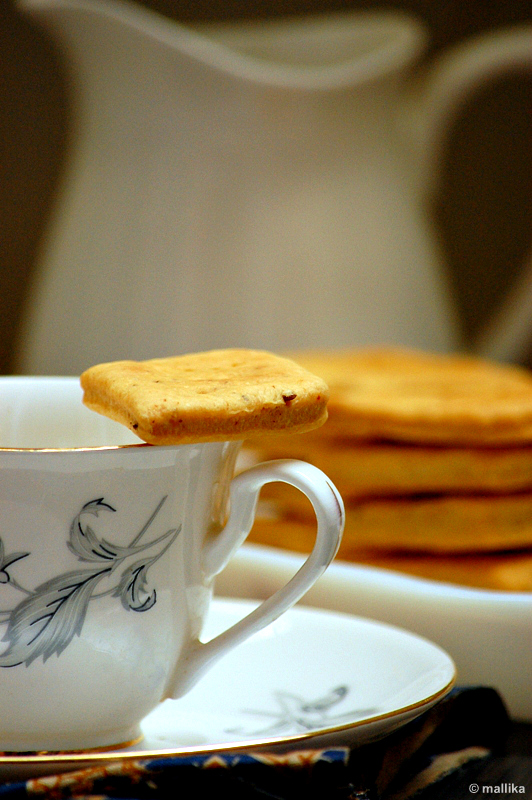
When I came up with these muffins, I was so glad the way they turned out, moist and crumbly, yet not utterly sweet and the buttery richness lent it a decadence which both the men enjoyed through their journey. Again, dad being particular about eggless cakes, these eggless muffins were enjoyed by him too without complaining. With pistachios and chocolate chunks you know they can't go wrong. Pack off to be given to your family and friends this holiday season!
Seriously, I can't imagine Christmas without a fruit cake of any kind. Christmas is already here and my fruits aren't soaked yet. I would probably settle for a store bought one. Sweet cravings of plum cakes and rose cookies flood my memories as I think of them. The deep amber cakes dotted with dry fruits and nuts lining the stretch of glass shelves in bakeries and cake shops tempt me further and the aromas linger, hanging on so strong and etched.
Last week my hubby and dad set out on a biking expedition to greener pastures to enjoy the serene country side. The nature lovers that they are put the two of us, mom and me into trouble! With their trip came additional responsibility of bag packing and baby sitting my daughter. And you know that with a nine month old baby at arm all the time, who craves for the best of our attention, it can't get any easy for us. With more in my hand than I can ask for this year, I doubted if I could really extend myself to bake for the Christmas course.

Right before the day they set out on their trip, I scuffled through my pantry to pull out packets of roasted pistachios fervently, all of which I have been zealous to put to use for long. I put together pistachios and chopped chocolate chunks to make half a dozen ultimate pistachio chocolate chunk muffins for the ultimate adventure biking trip! These muffins were not only eggless to boast for, but also rich and luxuriously decadent that with every bite their energy levels boosted to the zenith!
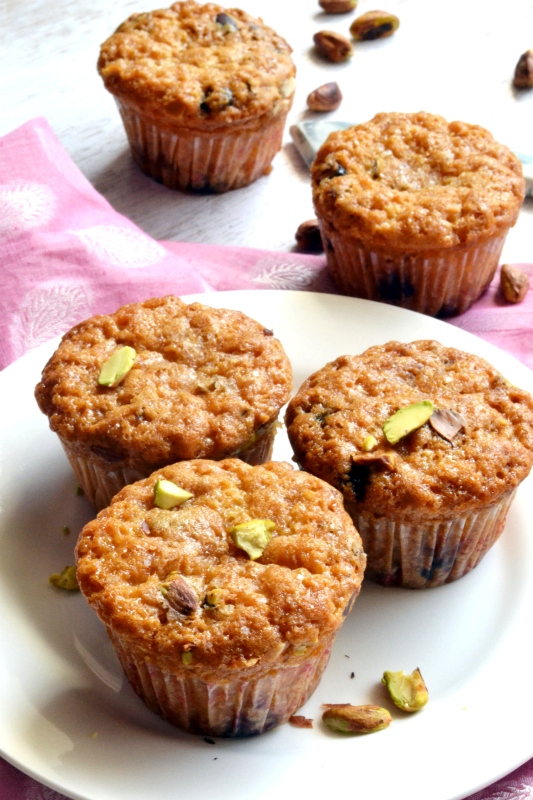
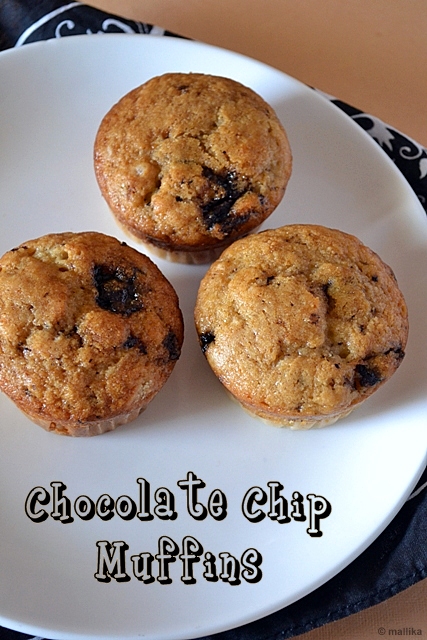
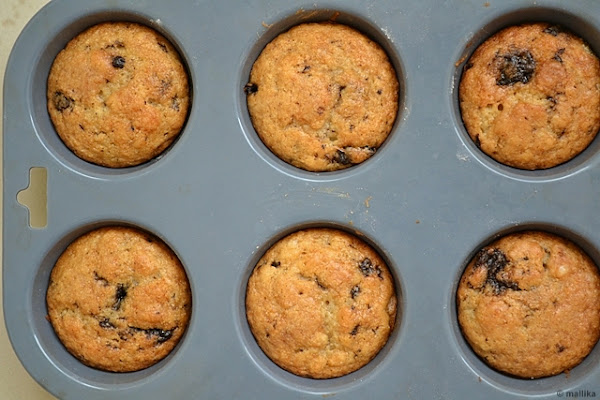
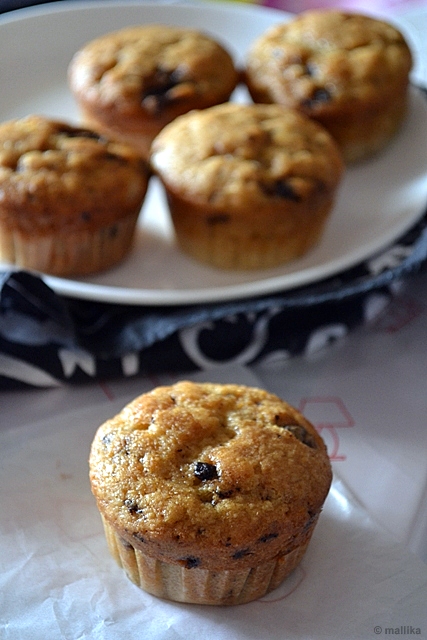
Pistachio Chocolate Chunk Muffins
INGREDIENTS
1 cup all purpose flour
1/2 cup whole wheat flour (or use 1/2 cups all purpose flour instead)
1 tbsp corn flour
1/4 cup milk
3/4 cup melted butter
1 cup minus a tbsp of sugar
1 tsp baking powder
1 tsp baking soda
1 tbsp chopped pistachios
Fistful of chocolate chunks
DIRECTION
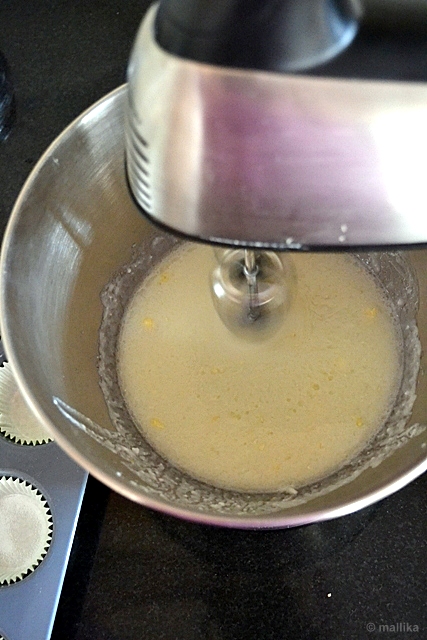
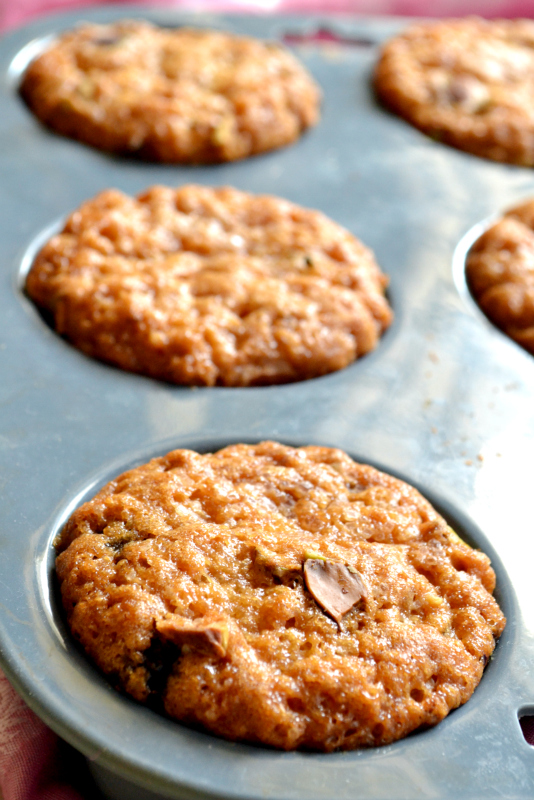
Pre-heat the oven to 180 degrees C. Line muffin liners on muffin pans. Sieve together all purpose flour, wheat flour, baking powder and baking soda. Keep aside. Beat the butter and sugar till it's light and frothy. To this add vanilla extract. Add the wet ingredients into the dry ingredients and toss gently till they are just combined. Finally add the chopped pistachios and chocolate chunks and give a final stir. Transfer the batter to the prepared muffin cups. Bake for 30-35 mins or till top looks golden brown done.

I draw inspiration from dozens of recipes I see flooding across the net, all hosted in style and glamor for the holiday season. Every click takes me to a new recipe and it tempts me further. As I bake a fruit cake of some sort every year, this year too plans weren't any different. I would have probably exhausted myself pondering hard what best I could do to revamp the traditional fruitcake I have been making since couple of years.
When I came up with these muffins, I was so glad the way they turned out, moist and crumbly, yet not utterly sweet and the buttery richness lent it a decadence which both the men enjoyed through their journey. Again, dad being particular about eggless cakes, these eggless muffins were enjoyed by him too without complaining. With pistachios and chocolate chunks you know they can't go wrong. Pack off to be given to your family and friends this holiday season!
Merry Christmas & a Happy New Year!!!