Hope you had a good weekend just like I did.
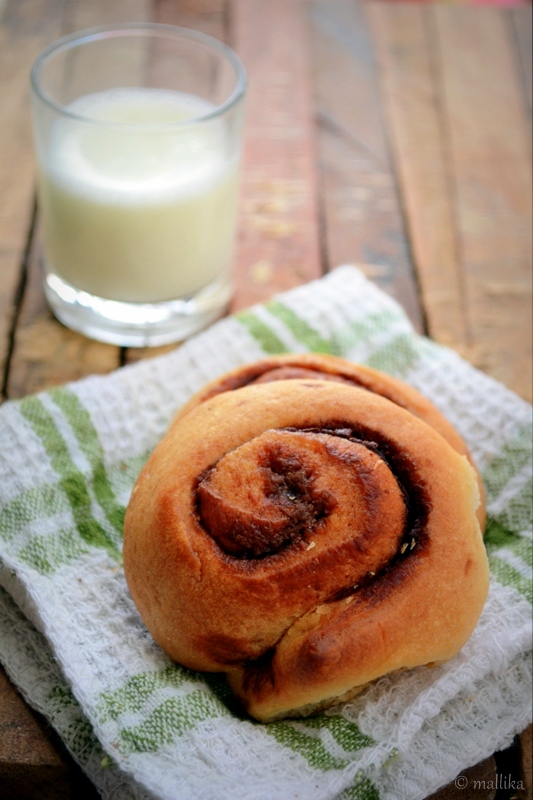
These sweet little buns made my weekend. It was fabulous.
Saturday was phenomenally good with a family outing to my workplace. What’s so good about being at workplace, where one spends 10 odd stressful hours slogging, that too on a weekend? Our org campus is massive, sprawling green, with pebble and stone laden pathways that wind beautifully into buildings that become our workspaces on our weekdays. Yeah, on a regular week day we probably would not take time out see this serene beauty surrounding us with the same eye, however over the weekend it was a completely different thing. No stress from work, no timelines to adhere, no brain racking meetings, no conference calls to answer to, no stressful last minute rush… simply a relaxed day out in the plush greenery with my family. It put a sense of pride in me to show my family my workplace, the place where I spend most part of the day.
I had plans to bake some cinnamon rolls for the weekend. I wished to proof the bread dough on Friday night, but pushed it for Saturday as other priorities consumed my energy. I had cinnamon rolls on my mind for quite some time and couldn’t get them off even in my sleep! Just managed to rush through the morning before leaving out from home to proof the dough. Put in the bit of muscle work (kneading) by multi-tasking between the breakfast and packing for the day out. Sneaked to click a few photographs too… here and there ;) Phew!
Back home, sun shone bright and nice in sky. Had left the dough on the balcony and it rose to doubles and triples. I was elated like a kid!
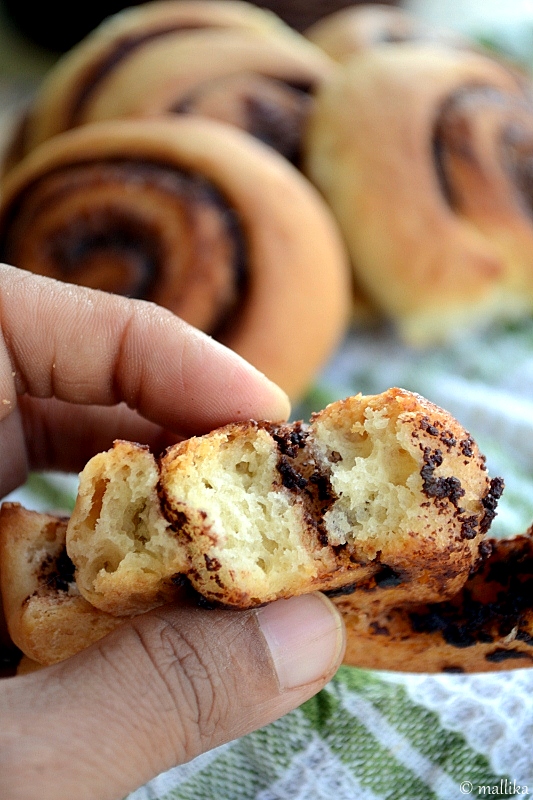
Initially, I had plans for cinnamon rolls. I almost put together brown sugar and cinnamon, when a jar of nutella put me into confusion! Felt too tempted for a chocolate version. Anyway, we are not too high on cinnamon in our desserts, so took a second opinion from my husband and he was too swift to vote for Nutella rolls. Chocolate seduction in a bread roll! Deliciously yum!
I rarely do step-by-steps, but this time around I succeeded, at least to an extent. You ought to thank me for that. I use regular tea cups for measurement, so you can be assured of its correctness.
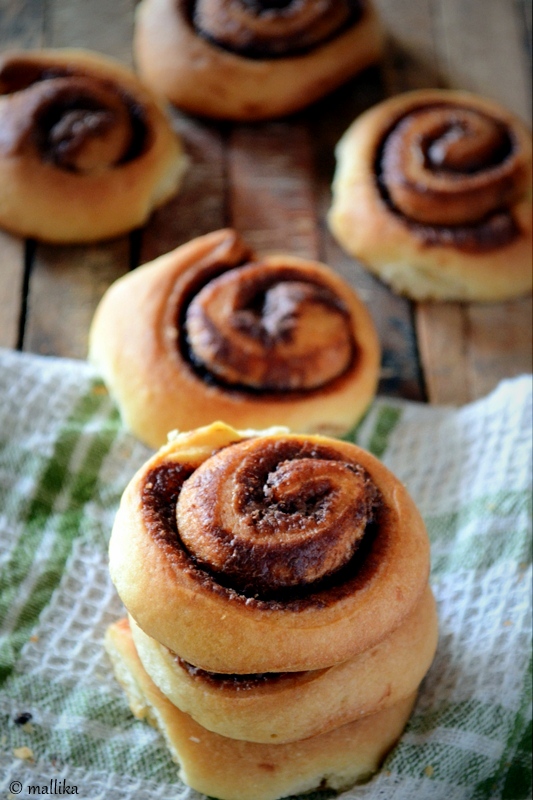
These nutella buns are rich and soft, and deliciously sweet. Complimenting them with a dollop of nutella frosting will make them absolutely irresistible.
These are quite easy to make. And honestly, there is nothing better than the smell of homemade buns fresh out of the oven. Heavenly!
Showing you a slice of what I eat is so typical of me! So here it goes...
These sweet little buns made my weekend. It was fabulous.
Saturday was phenomenally good with a family outing to my workplace. What’s so good about being at workplace, where one spends 10 odd stressful hours slogging, that too on a weekend? Our org campus is massive, sprawling green, with pebble and stone laden pathways that wind beautifully into buildings that become our workspaces on our weekdays. Yeah, on a regular week day we probably would not take time out see this serene beauty surrounding us with the same eye, however over the weekend it was a completely different thing. No stress from work, no timelines to adhere, no brain racking meetings, no conference calls to answer to, no stressful last minute rush… simply a relaxed day out in the plush greenery with my family. It put a sense of pride in me to show my family my workplace, the place where I spend most part of the day.

I had plans to bake some cinnamon rolls for the weekend. I wished to proof the bread dough on Friday night, but pushed it for Saturday as other priorities consumed my energy. I had cinnamon rolls on my mind for quite some time and couldn’t get them off even in my sleep! Just managed to rush through the morning before leaving out from home to proof the dough. Put in the bit of muscle work (kneading) by multi-tasking between the breakfast and packing for the day out. Sneaked to click a few photographs too… here and there ;) Phew!
Back home, sun shone bright and nice in sky. Had left the dough on the balcony and it rose to doubles and triples. I was elated like a kid!
Initially, I had plans for cinnamon rolls. I almost put together brown sugar and cinnamon, when a jar of nutella put me into confusion! Felt too tempted for a chocolate version. Anyway, we are not too high on cinnamon in our desserts, so took a second opinion from my husband and he was too swift to vote for Nutella rolls. Chocolate seduction in a bread roll! Deliciously yum!
Nutella Bread Rolls
INGREDIENTS
For the dough:
2 cups all-purpose flour
1 cup warm milk (maybe a little more or less)
2 tsp. active dry yeast (I used Baker’s here)
1/4th cup melted salted butter
1/4th cup powdered sugar
For the filling:
Nutella spread or any chocolate hazelnut spread
Sugar glaze or melted chocolate to drizzle (optional)
DIRECTIONS
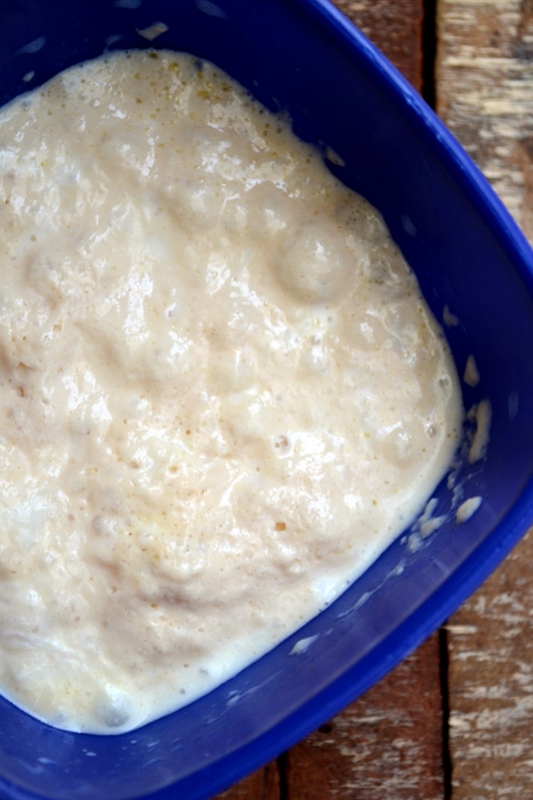
Dissolve 2 tsp. of active dry yeast in half a cup of warm milk and a teaspoon of sugar. Warmth helps yeast wake up from its sleep and sugar aids in providing food to the yeast. Keep it aside for 10 minutes till it turns active and frothy. This is how it should look.
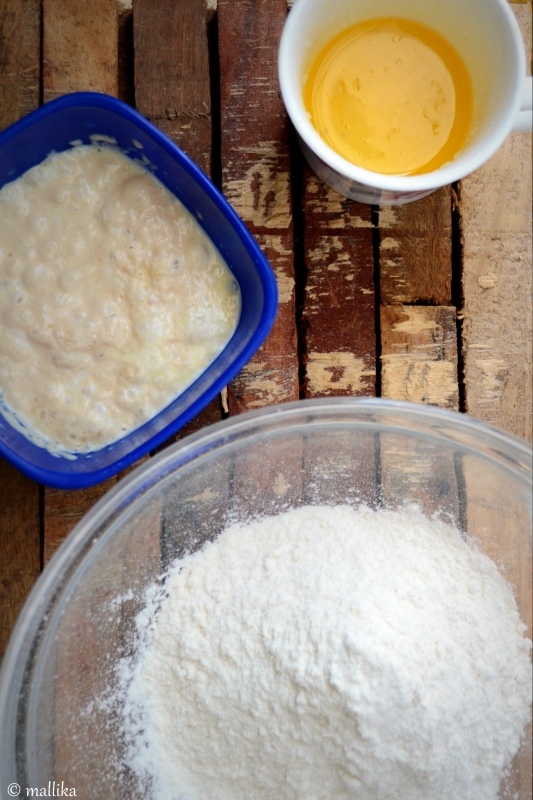
In a glass bowl, combine all the ingredients for the dough, the yeast milk, sugar, butter and flour, pouring just as much extra milk as necessary so as to form a sticky soft dough. I use a wooden spoon to mix the ingredients. As you beat the ingredients, the dough will initially tend to be sticky, but later will begin to leave itself from the sides of the bowl.
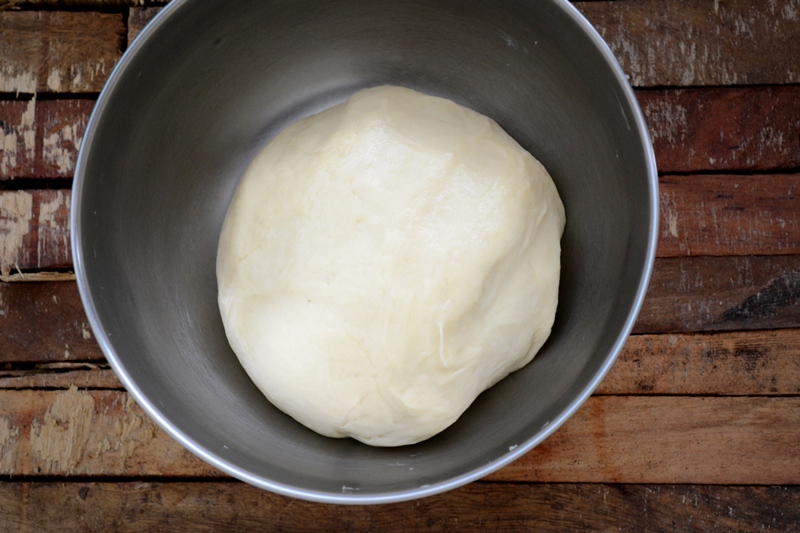
Knead into a smooth elastic dough with as little flour as possible. Stickier the dough, lighter will be the bread. Beat/knead the dough for atleast 5-7 minutes so as to release its gluten which helps in a nice, light bread.
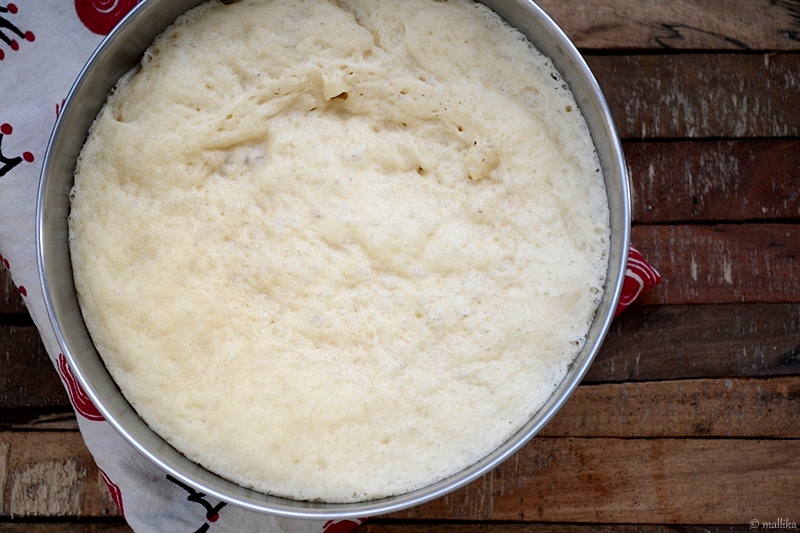
Place the dough in a bowl, cover it and allow the dough rise until it has doubled in size (should take about 90 minutes in warm condition).
This is how it would look after 90 minutes. Look at the texture when pulled apart.
Once risen, punch the dough down...
Knead it further for 5 more minutes.
Using a rolling pin, roll the dough out on a lightly floured surface to form a rough rectangular shape with uniform thickness.

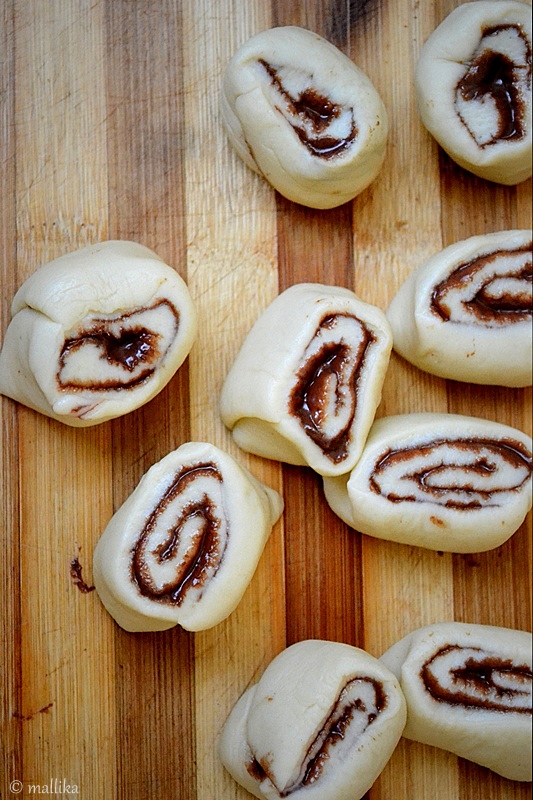
Spread the nutella paste all over the dough. Sprinkle with nuts if desired. Beginning with the long edge closest to you, begin rolling the dough into a tight roll.
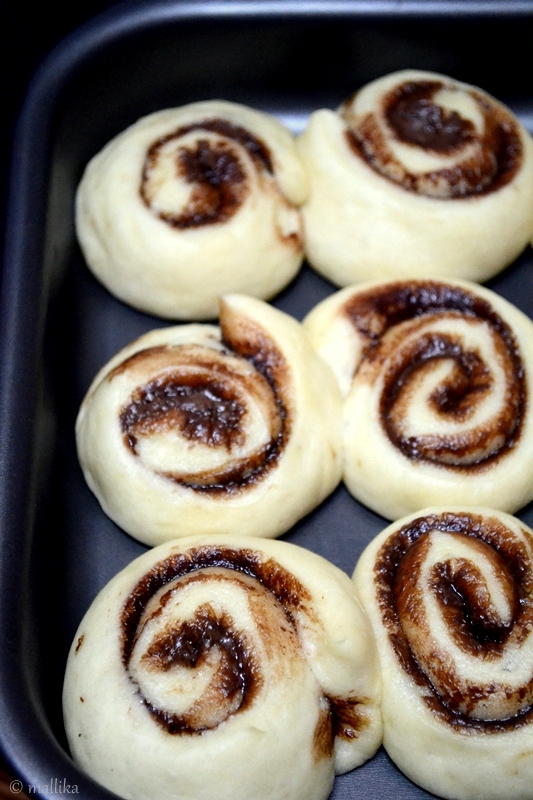
Slice the roll into 9 even pieces. Place them on the baking tray and keep them in a warm place (like an oven pre-heated to 40 deg C and turned off) for at least 1 hour, until they've roughly doubled in size. By now I had transitioned from evening to night, so you can see that by the time the rolls went to oven it was late! Bake them at 180 deg C for 30 to 35 minutes.


I rarely do step-by-steps, but this time around I succeeded, at least to an extent. You ought to thank me for that. I use regular tea cups for measurement, so you can be assured of its correctness.
These nutella buns are rich and soft, and deliciously sweet. Complimenting them with a dollop of nutella frosting will make them absolutely irresistible.
These are quite easy to make. And honestly, there is nothing better than the smell of homemade buns fresh out of the oven. Heavenly!
Showing you a slice of what I eat is so typical of me! So here it goes...