Showing posts with label Baby Food. Show all posts

Ragi Biscuits


There has been a long silence on my blog. But that's with a reason. There has been a lot going on in the past few days. Remember I told you how I was caught between making productive decisions, weighing out their pros and cons and hoping for the best. A lot got sorted and matters did get clearer with time. I feel a lot better. There was a lucrative offer that I turned down unwillingly for a good reason. Instead, the daughter and I planned an overseas travel to join my husband for a holiday. It seemed dicey initially, but all fell in right place, the right time and we did travel as intended. So there was packing and unpacking, unsettling and re-setting, the jet-lag and weather change, an adaptation to a new country, a new home and new kitchen.

Ragi Cookies


It's taken time to get into grooves of routine in a new place where I am vacationing for 3 long months. For these months, I am on a sabbatical from work, devoting my time wholly to the family; my husband and daughter. I had been looking forward to this personal time and space for a long time, particularly to spend some quality time with my growing daughter, hence this break was thoughtful one and a big welcome. Three months may be a too short period to justify the time spent, yet I wish to make every use of this and enjoy her company.

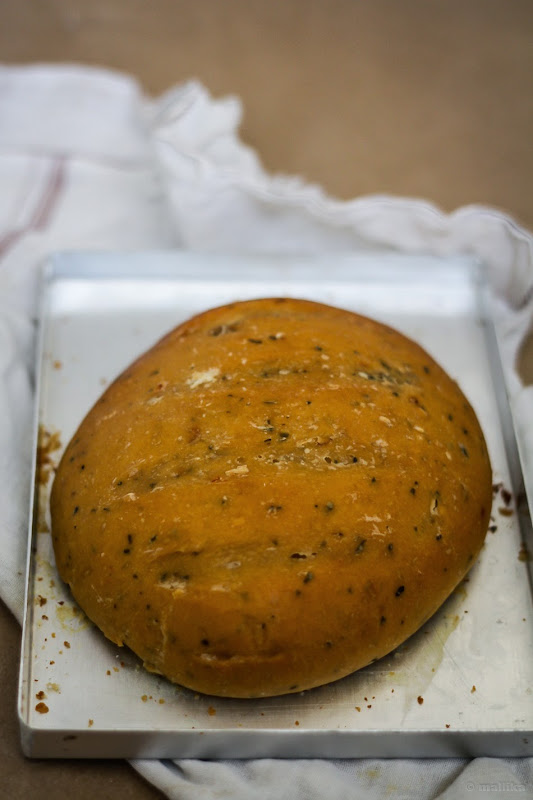
My recipe post for today and, may be, for next couple of weeks comes from my kitchen in India. In a bid to wrap up the pantry staples and close the kitchen before we moved out, I consumed the last batch of Ragi (Finger Millet Flour) to bake these biscuits. These Ragi biscuits (as they are commonly referred to in Indian bakeries) are gluten-free and delicious. If you are not gluten intolerant you may consider using equal qualities of millet and all purpose flour for easier handling. They are simple to make and easy to put together. I hope you enjoy them as much as I do.

Ragi Biscuits_1


Ragi Biscuits

2 cups finger millet flour (ragi flour)
1 cup powdered sugar
1 cup clarified butter (desi ghee)
1/2 tsp. cardamom powder
1 tsp. baking powder

DIRECTIONS

Preheat the oven at 180 C.

Roast ragi flour in a thick bottomed pan / kadai on a medium low heat, for about 5-10 mins till the raw smell goes away. Take off the heat and add the powdered sugar, melted ghee, baking powder and cardamom powder to it. Mix well.

Make small balls of the dough and keep it on a greased or (lined with parchment paper) baking tray. Poke an almond each into the biscuit dough. Bake at 180 C for 12 minutes. Allow them to cool completely. Store in a cool dry place.

Ragi Biscuits_1


Notes:

* Roasting Ragi is very essential, else you will end up with muddy tasting, flavourless biscuits.
* Instead of cardamom powder, you may flavor them with vanilla seed powder.
* These biscuits are quite delicate since ragi flour does not have gluten in them. If you are not particular about being gluten free, you can substitute half of the ragi flour with whole wheat flour and bake as suggested.
* These biscuits are quite nutrition and can be fed to kids as a snack box item.

_MG_5584


I have a recipe featuring nuts back to back and my apologies if they are not your take. It simply shows how much I have been nuts about nuts these days! Seriously, the fact is that despite my profound love for them, thanks to this appreciation towards dry fruits and nuts I have inherited from my dear dad, they've always remained in the hind of this blog. For no particular reason, I have been on nut binge off late, indulging in them more than warranted, though I have rarely felt guilty about them. To an extent, the other day, I added roasted walnuts in a typical south Indian styled beans stir fry and felt mighty good devouring them. These Honey Loops & Nuts Chikki made up our sweet treats during mid-day breaks and post meal snack the last week through. Yet, I say, it doesn't justify my love for these roasted treats, almonds and cashews in particular.

Indeed, I have my freezer loaded with them in kilos that should last me a year. Dates, raisins, figs, almonds, cashews, walnuts and handful of apricots. Handful, because dried apricots are tough and not really my favourites. But among the rest it's hard for me to make a choice.

_MG_5593


We are just back from a short vacation in Goa. A vacation to commemorate our wedding anniversary and his birthday. We basked in the serene beauty of Goa’s pristine beaches, green foliage and golden sand. Out there we soaked up the sun, got a massage in the spa and relaxed all day long. We discovered moments of togetherness with the sand castles we built together for our daughter as the frothy waves swept them gently, watched the sun go down the other side of the coast and took long strolls on the private beach. We revived our energies as we went swimming, biking and street hoping (Goan streets and markets never fail to amaze me). No vacation is worth the vacation without good food, so we certainly made our's worth as we binged on loads of delicious good food.

The trip though short (2 nights and 3 days) was packed with energy, fun and enthusiasm. Goa carries an ethereal realm of Portuguese culture that none other city in India has seen and it leaves me amazed each time. We are back home fresh and rejuvenated after this therapeutic vacation, much to an extent that we are craving for another trip soon. :)

Perfecting the holiday mood we were in, I decided not to bake or spend too much effort in the kitchen. Instead I made and carried these Dry Fruit Rolls for our trip. These rolls are not just healthy, but sugar free. They are well suited for toddlers and diabetics. Naturally sweetened with dates and figs, these have my coveted roasted nuts that make this a decadent anytime treat. Hope you'll enjoy them as much we did.

_MG_5597


Dry Fruit Rolls

INGREDIENTS

2 cups pitted and chopped dates
1/2 cup dry figs
3/4 cup roasted cashew nuts
3/4 cup roasted almonds
1/2 cup roasted walnuts
1 tsp. orange peel
2 tbsps. orange juice

DIRECTIONS

Chop dates and figs as finely as possible. This will help in easier blending of ingredients. Combine the chopped dates and figs along with orange juice in a pan and bring it to a boil for about 5 minutes on medium low flame. Using the back of a flat wooden spoon, mash them as much possible. Switch off the flame and allow it to cool. Medjool dates can be best used here. If not, use any moist date you have at hand. I used Lion seedless dates, which were moist enough for this recipe. Remember dried ones are tough and will not help here.

Pulse the dates-fig mixture along with chopped orange peels in a food process as much as possible with no additional liquid or orange juice. It should have a moist and sticky dough like consistency. Roughly chop the roasted cashews, almonds & walnuts and add it to the prepared date-fig dough. Scrape the entire mixture into a plastic food wrap (a butter greased aluminium foil will do alternatively). Roll the wrap over to encase into a roll. Chill for about an hour. Remove from refrigerator and using a serrated knife cut them into rolls of desired sizes.

_MG_5594

Velvet Beet Cake

How to make Velvet Beet Cake| Easy Velvet Beet Cakei
I have attempted to bake a Red Velvet cake on several occasions in the past. There’s a strong temptation to get the perfectly red one with beets and no fake colouring. Alas, I failed. So, I call this one a Velvet Beet cake and not a Red Velvet cake that I would have loved to call otherwise. It’s funny because, each time I got perfectly baked cake with pleasing results and good texture, it was sans that deep red colour that would qualify it to be called as a Red Velvet cake. It always ended up brown and chocolatey, often good to be christened as a nice Chocolate cake. Even the best of the beet cake recipes have not helped me.

So it stays to be a Beet cake, till I achieve the perfect palette of colours in them and share them with you here. :)

_MG_4667 _MG_4674


None can ever figure out that beets are sneaked in there. Not even the husband who saw me busy puree them late night and putting them together! He says he can’t imagine a cake out of beets. But why not, when we have cakes made from carrots? And you are sure to get a thumbs up. Don’t let the folks know there’s a vegetable in there. It makes them biased. Instead, let them enjoy, allow them to take second and third helpings and let the cat out of bag later. I bet you’ll get gawked looks like I did! It’s amusing.

_MG_4676


I say this one is extremely healthy. Because I use olive oil instead of butter, beet puree makes up for the eggs, organic vanilla powder and brown organic sugar add depth of flavors instead of the refined one. So it’s eggless, butterless and certainly healthy with vegetable sneaked it. I feel no guilt when I feed my daughter the slices of this cake as she despises beets in their true form. This way though I sneak them into her and I am a happy mother to a cheerful toddler.

_MG_4693


Velvet Beet Cake

Recipe minimally adapted from here

INGREDIENTS

1 medium sized, beetroot (boiled until tender, then puréed)
1/3 cup oil (I used Olive-Pomace oil)
1 1/4 cup organic brown sugar
1 1/2 tsp. organic vanilla powder
1 1/3 cup plain flour
1/4 tsp. salt
1/2 tbsp. cocoa powder
1 1/2 tsp. baking powder
1 cup milk (use any vegan milk of your choice, like soy or cashew milk for vegan option)

DIRECTIONS

Preheat oven to 180 deg C. Grease the bundt pan with oil and dust with plain flour.

Wash thoroughly and boil the beet until its soft and tender. Using a blender/mixer, purée it to a fine paste along with milk and brown sugar. Opt for regular sugar if you don't have brown sugar. Next add in oil and vanilla powder/ extract and blend further until incorporated. Set aside. In a separate bowl, sift together flour, cocoa powder, salt, and baking powder. Add the flour mixture to the beet milk mixture and stir gently until all is well incorporated into the batter. Bake for 40 minutes or till done. Insert a toothpick in the center of the cake and test for done. Remove and allow the cake to cool on a cooling rack. Serve as is or with dollops of cream or ice cream.

_MG_4695

IMG_4393


Hope you had a happy long weekend folks! And wish you a Happy Monday!

I often wish Sunday's don't go by so quickly and Monday's don't come by so soon. More often, I wake up to a thought of having yet another Sunday that is an extension of the previous day or a hope that the week passes by steadily, merrily and fruitfully, welcoming yet another weekend, and that too a happy, jolly one like the one we just had.

Last week with Eid on Friday, we had a long weekend. The week that went by, we had Independence day falling on Thursday and a quick Friday that that did not seem like a working day, so that counted for yet another lovely long weekend, or at least I like to think that we had one. :)

IMG_4402


To make this holiday worthy, we made a day's trek to the nearby outdoors and that was such a welcome break. This Dal ki roti, whipped up from the previous night leftovers made up for our outdoor brunch, just apt as a wrap-up-take-away for any time munch.

Dal ki roti is an excellent way to use up left over dal from the previous day and translate it to a delicious snack or a breakfast dish. Being a popular dish in the North, this was one of those recipes I learnt from my mother in law, who makes it extremely well and is often accoladed for the variety of delicious parathas she makes. Since I have come to learn this, it's been a regular at my home, way too often when I have left-overs of dal from the previous day. It's versatile, easy to put together, healthy and delicious. You may use any simple dal recipe for this one, either moong, tuvar or masoor dal. The one I used is here, however you can use the ones with onions in them or heavier seasoning. A thicker one makes softer and tastier parathas, so I suggest you drain off the excess water if the dal is thin. I like to pep up the seasoning a bit here with some chopped onions, a few hot chillies, garam masala, fresh coriander leaves, but it really up to your choice and taste.

IMG_4407


Dal ki Roti

INGREDIENTS

1 cup leftover dal
1 onion, finely chopped
2 to 3 green chillies, finely chopped
1 tsp. red chilli powder
1/2 tsp. cumin seeds
1 chopped onion
1 tsp. garam masala
1 tbsp. fresh coriander leaves
2 cups whole wheat flour (varies depending on thickness of the dal)
Salt to taste
Oil for cooking

DIRECTIONS

Drain the dal if there's excess water and combine the dal with onion, green chillies, red chilli powder, cumin seeds, garam masala, finely chopped coriander leaves and salt. Combine the wheat flour into this and knead into a soft dough. Set aside for 20-30 mins. Pinch out the dough into equal lime sized portions and with the help of wheat flour, roll out into a circle of 6"-8" using a rolling pin. Heat an iron griddle and cook each roti, flipping each side as they cook. Brush oil on each side of the roti and cook till golden brown on both the sides. Serve hot with onion rings, fresh curd and pickles.

IMG_4410


Hovering over government offices is one of the biggest nightmares one ever faces in India. Several round about trips to the officers cabins followed by incessant persuasion, pleading and bribing, yet the tasks often remain at the same state from where they started. The papers don't move ahead, the officers are unwilling to listen or answer and an even greater worry - the bribe.

My own experiences in the past have been fairly bitter. I battled to get through my replacement driving license for the lost one. My husband made several trips to the driving license offices going through those repetitive tests with the same officers, each time being refused to have cleared the test for lame excuses! He made it through the test finally by trailing a middleman by overpaying handsome charges for licenses and the bribe. A painful woe. We never got around to getting the ration card done, hence we have no subsidized gas connection. The saving grace is our local supplier from whom we buy cylinders at exorbitant prices. And so we've been carrying on that way for long.


On Thursday, last week when I took a day off from my work to get my passport renewed, I went to their offices with little hopes, or rather being optimistic about doing several rounds of visits to process my renewal. My preparedness was to witness the worst; a futile day, those chaotic queues, stampede of crowd running around like headless chicken from tables to tables into the noisy, rude officers, papers strewn all over, long waiting hours or to be even being sent back for more documents and paper work, almost admonishing the fact our government processes would ever change for good. Pocket full of cash in dire needs to fulfil any greedy officer and be my saving grace, I made my way well in time to the passport office.

Though managing a huge crowd is always a huge challenge I agree to, I was pleasantly surprised with the way the entire process was revamped to make it systematic and defined. Here I was mighty pleased that I conquered one such a battle, with no pleading, no bribing and fairly efficiently managed system that was automated and smooth, all conducted within 2 hours! 5 days post I have my passport in hand and that's a huge relief. Yes, I am all happy and elated the way it has been processed swiftly. My recent past experiences, be it getting the UIDAI or my passport have been pleasant one to say, though not entirely easy, yet it gives many hopes that our country is changing for good.

For the day I took off from work, and the day I had at hand all for myself, what best can a baker do other than bake a lovely cake to celebrate something that ended positively? Yes, I cooked up a storm in the kitchen and this Apple Raisin Cake was a result of one such celebration.


Apple Raisin Cake

INGREDIENTS

Dry Ingredients:

1 medium sized apple, cored and chopped
2 cups all purpose flour
1 tsp. baking powder
1/2 tsp. baking soda
A generous pinch of spice powder (cinnamon, cardamom and nutmeg powders)
3/4 cup powdered sugar (increase to 1 cup if you prefer sweeter)
2 tbsp. dry raisins

Wet ingredients:

1/3 cup salted butter, melted
1 cup yogurt / buttermilk
1 tsp. lemon juice
1 tsp. of vanilla extract

DIRECTIONS

Preheat the oven at 180 degrees C. Line a 9 inch baking tin or a fluted cake pan.

To prepare the cake batter, combine the flour, the baking powder and soda along with the spice powder and sieve them together. Add the sugar to this and mix well. Add in the chopped apples and raisins to these dry ingredients and toss well.

In a separate bowl, stir in all the wet ingredients. Add the wet to the dry ingredients and stir using a wooden spoon. Pour the batter to prepared cake tin. Bake in a preheated oven for 40-50 mins at 180 degrees C till a knife inserted in the center of the cake comes out clean.


It's frustrating when I have the urge to blog to keep my space brimming with recipes, yet I can't seem to make time to load my webpage even occasionally. That's how hectic the past couple of weeks have been. Crazy and way too swift to fuel this space aptly. I hope I'll be back to blogging routine soon, but till then I leave you with a nice Chilli herb bread for a lovely Sunday morning.


I have no talks for you today, but just the right recipe for this bread and some quick snaps clicked to share with you. This delicious herb bread with a dash of cheddar cheese is great served with flavoured butter and accompanies well with soups and dips. Even better toasted.


Chilli Herb Bread

1 tbsp. yeast
1 cup warm water
2 1/2 cups bread flour
2 tbsp. olive oil
1 tsp. chopped red chilli / chilli flakes
1 tablespoon dried Italian herbs
2 tbps. grated cheddar cheese* (optional)
Salt to taste

Dissolve yeast in half a cup of warm water and sugar and set aside for five minutes. The mixture will become frothy.

Stir in olive oil, salt, chilli flakes, cheese, dried Italian herbs and flour into the yeast mixture. Gradually mix in the next half cup of water. Using a wooden spoon, stir to form the dough. Bring the dough together and knead for roughly 10 minutes. If the dough is loose and sticky, add in more flour and knead further. The dough should become elastic. Place the dough in an oiled bowl, and turn to cover the surface of the dough with oil. Cover with a damp dish towel and let it rise for an hour, or until the dough has doubled in size.

Once the dough has doubled, punch it down to release all the air. Shape into an oval shaped loaf or a free form as you prefer. Place the loaf on a greased baking tray and let it rise until it's doubled in size again, about a 30 minutes.

Bake at 180 degrees C for 35 minutes. Remove and let cool on baking rack. Slice and serve with dollops of butter and cheesy dip to accompany.


*For a Vegan option, skip the grated cheese totally.


I was nine when I first learnt swimming. Well, nothing really one should boast about, but then I remember the day so well that I can’t help but bring in reflections of that day here.

My magenta pink swimsuit, the matching swim cap and those bright hues in shades of sky blue and baby pink swimming tube without which we would never enter the pool. Dad would wake us up as early as 5.30 am, hand over a tall glass of milk each that the three of us would gulp down, get us ready and drive us down to the pool. As we took our showers and came out to step into the pool, dad would help us float our swimming tubes around our waist. My sister and I spent couple of months that way with those fluorescent plastic tubes balancing us on water and that clearly meant we would never learn swimming with those tubes on. Dad decided one day that we should forsake the tubes and on the pretext of having forgotten them at home, he coaxed us to throw our arms and beat legs to learn swimming. In a week’s time or so, with good coaching and motivation from dad and the coach, I managed to swim my first 20 meter stretch, that stretch of the pool I can recall well even till date. Back home, my mom was a happy lady. She needed a reason to celebrate and my learning for the day became a reason to cheer and so this vermicelli kheer was made to revel my first swim.


To say, that wasn’t the first time I had semiya kheer or shavige payasa, since we’ve grown up eating them regularly at home, to an extent one could simply abhor them even by the word of it. In ceremonies, at weddings, to offer guests or to enrich simple Sunday lunches. Shavige payasa made a hushed, humble manifestation between chirpy talks, deepened family bonding times, boosted celebrations or even merely uplifted spirits. So you’ll know there are several memories etched over bowls of this kheer or payasa, or whatever you choose to call which makes this dish unforgettable. There are cheerful moments of frolic and laughter we’ve breathed with our family and friends over meals that ended with this kheer. Those tiny blissful moments of celebrations made by mom on topping the class exams or lugging the first swim, a medal won at a school competition or dad’s promotions, we’ve reveled all those moments of simple pleasures with this kheer. That ceremonial food I would love to relish on endless occasions, sitting obverse the traditional banana leaf in long rows, awaiting patiently for the first dollop of the delicious payasa to be served on the designated bottom left corner of the leaf, and as it trickled down, saving the part of it by carefully lifting the edges of the leaf and licking it off the first thing the moment we chorused Hara Hara Mahadeva, Goooovinda! Those simple joys filled with nostalgia and memories that makes every little mouthful of this payasa utterly blissful.


But the fact is that vermicelli kheer is so damn easy to make, that it’s hardly any effort and can be whipped up in minutes on demand to celebrate any occasion and that’s what makes this dessert so special. Be it a celebration, an occasion, or drop of the hat guests visiting you or no-clue-dessert-on-the-whim, Shavige Payasa or Vermicelli Pudding is just the right kind of dessert you would fall back upon. If you are an Indian, then this probably is one of those first desserts you learn by heart, by instincts and not by lessons imparted by the older generations.

And a well-made vermicelli pudding is too delicious to ignore. It’s means subtly creamy, marginally condensed, not cloying sweet, with a touch of ochre goodness from saffron and earthy affection from cardamom that make up a bowl of deliciously perfect kheer. And those generous helpings of ghee-fried raisins and cashewnuts will only embellish this bowl of divine goodness. So if you are feeling lonely today or you just want to celebrate, conjure up your memories with this bowl of kheer.


Seviya Kheer / Shavige Payasa / Vermicelli Pudding

INGREDIENTS

1 cup Vermicelli / Shavige, pre-roasted or lightly roasted to golden brown
3 cups Milk
2 tbsp. Milk powder, optional
3/4 cup Sugar
A generous pinch of Cardamom Powder
1 tbsp. Cashew nuts
1 tbsp. Raisins
1 tbsp. Ghee
4-6 strands Saffron strands dissolved in a tbsp. of warm milk

DIRECTIONS:

Heat milk in a pot till just warm. Dissolve the milk powder in it and bring it to a boil. Reduce the flame and add in roasted vermicelli / seviya to the milk and stir well. Stir gently and allow the seviya to cook through. When its al dente, add sugar to taste and cook further till the vermicelli is just soft. Do not overcook as it may end up being too mushy. Pour the saffron strands along with its milk, bring to boil and switch off the flame. Add fresh cardamom powder and stir well.

In a separate pan, fry the cashew nuts & raisins in ghee till cashews turn golden brown and the raisins begin to swell. Pour the fried dry fruits along with ghee to the prepared payasa / kheer. Serve the payasa / kheer hot, warm or cold.

Notes:

* Use the thicker variety of vermicelli, like MTR or Bambino since it holds shape after cooking.
* Pre-roasting is a must, else you will end up with a clumped, sticky pudding which is not very pleasing and palatable.
* I always have a stock of milk powder in my pantry, hence I have used it in this recipe. Milk powder is a cheat version to avoid slaving over for the milk to condense. Though using diluted condensed milk here will also work, milk powder does the same job equally well.
* Milk powder / Condensed milk is optional and gives the kheer a richer, creamier taste, though traditionally it’s not used and you may skip it altogether by using only plain full fat milk.

Coconut cream, Vanilla Bean & Roasted Almond Ice cream

Do you have any specific flavour of ice cream you love and always prefer to go back to?

More than a decade ago, before several flavours in unusual range flooded Indian markets, I remember each of us in our family had ice cream flavor of choice. As a kid, I was addicted to classic vanilla or occasionally the vanilla-chocolate combo (a scoop of each) just the way my little sister was. Dad’s huge fetish for dry fruits and nuts in his scoop of ice cream always left us amused, while for mom it was undoubtedly the butterscotch that made it to her plate.

Dining out on Sunday nights wasn't a rule on the book, but whenever we did, which was often once a month, it was followed for sure by an ice cream for our dessert. As we tucked ourselves comfortably onto the rattling chairs waiting for the orders, dad would head over to the ice cream kiosk, crane his neck to take a peek over the glass counter displaying their varieties in vivid colours and flavors to order the scoops speckled with roasted nuts and dry fruits. I guess his choice was often pistachio or badam pista ice cream. Of sheer joy each of us would proclaim our choice of ice cream and happily dig into them as they were served. Choices in terms of flavourings were limited to vanilla, chocolate, butterscotch, pista badam that ruled the roost. For the more exotic ones, there was anjeer, shahi kulfi, casatta… but then that’s about it.

Back in 80s and early 90s, ice cream came served in small paper cups with a tiny wooden spoon to scoop them from. We would fish out scoops of ice cream much larger than the spoon, only to fill our mouthfuls, more often spilling out the melting ice cream. The candid moments of the ice cream dripping off the tiny spoon on to our pretty frilled frocks, followed by mom’s howl deliberating the pain she took to rub the stains off while washing still taunt my memories! We had personal choices of flavours. And we always stuck by those choices. By 90s, chocolate coated vanilla ice candies, aka the Choco-bars entered Indian market a huge way and made way into our preferences too. I still admire Choco-bars.

Coconut cream, Vanilla Bean & Roasted Almond Ice cream

The boom in Western market and their brands in early 2000 have brought out huge assortment and today, and as I walk into a Baskin Robin’s or Swensen's outlet, I am astounded by the variety they have to offer. I am elated by the choices, but at times I step back thinking there is too much to choose from, fearing the ones across the counter may be more delicious than the one on my plate, that I am unable to make a convincing choice. The guys over the counter are often generous enough to help me with a few scoops of flavors to try from, but by the end of test tasting session I run in to flurry of complete confusion. Somehow the test tasting session seems more stimulating exercise than the choice of ice cream itself. My taste buds can’t relate to a winning choice. Mint, Oreo, Chocolate chip, Berry, Cookie dough, Peanut butter, Belgium chocolate and so much more… I am spoilt for choice and that confusion happens way too often!

Honey and Roasted Almond Ice cream stands out of all. My love for Honey and Roasted Almond Ice cream dates back a few years ago when I tasted its first scoop from a BR outlet at namma Bengaluru airport. While waiting at the lounge, my husband made a random pick on my behalf and got me a waffle cone loaded with a big dollop of this BR’s Honey and Roasted Almond Ice cream. It was an instant love since that first bite. It’s brilliant taste still lingers strong.

Remember I made some Honey ice cream a while ago with flavours so similar to the BR one? That was a small batch good enough for two servings, so I promised I would make them again, not to disappoint anyone who requested a second or third helping. In a bid to experiment a little more, this time around, I played a slight variation using Coconut cream instead of milk or cream and the resulting ice cream was extremely creamy and delicious with a hint of coconut flavour. This is one of those ice creams that is simple to make and uses barely few ingredients and for sure needs no ice cream maker because the fat in coconut cream will help in whipping it to soft peaks, making the ice cream light and creamy. Honey will further curb freezing the ice cream into a rock solid stage.

Coconut cream, Vanilla Bean & Roasted Almond Ice cream

Coconut cream, Vanilla Bean and Roasted Almond Ice cream

INGREDIENTS

200 ml coconut cream* (I used 1 pack of first pressed Dabur Homemade coconut milk)
1 pod vanilla, split and seeds scraped
½ cup roasted chopped almonds
80 gm / ¾ cup honey* (replace with maple syrup or agave syrup or vanilla sugar for a vegan version of this ice cream)

DIRECTIONS

Roast ½ cup almonds on a medium low heat till they begin to change their color and turn aromatic. Switch off the flame and keep aside. Once they cool down, chop them roughly.

Chill the coconut cream along with the bowl and beaters overnight or at least for 6-8 hours. To prepare the ice cream, take the chilled coconut cream in a chilled bowl. Connect the beaters and whip the cream till it fluffs up and holds soft peaks. Add in vanilla honey and whip further till it's all well combined. Split a vanilla bean and scrape the seeds off them into the prepared ice cream. You can skip this, however I used it for an intense vanilla flavor. It’s optional.

Whip the cold cream till it begins to form soft peaks. Taste your ice-cream at this stage. Commercially available honey tends to be sweeter and thicker as compared to the organic fetch. Hence I suggest you taste the ice cream batter and add more honey if preferred. Transfer to a freezer proof bowl/loaf and freeze it for an hour till it just begins to set. Once it's almost set on the edges, remove and churn it briefly. Repeat a couple of times. This helps ice-cream to be creamy. After the final churn, add in the roasted almonds (or almond pralines) and freeze till it's completely set. Remove from the freezer and place the ice cream in the refrigerator compartment for 15-20 minutes before serving. This way the ice cream should have softened a tad bit and will make it easier to scoop out.

Coconut cream, Vanilla Bean & Roasted Almond Ice cream

Notes:

*For a vegan version replace the honey with maple syrup or agave syrup or vanilla sugar.
*Similarly, you can replace vanilla beans with vanilla extract. I used slit beans for an intense vanilla flavor and for that million-dollar speckled look. Again, it’s optional.
*If coconut cream is not your flavor of choice, replace it with regular milk cream, however it will no longer be vegan. It works fabulous!

Coconut cream, Vanilla Bean & Roasted Almond Ice cream

That's my little toddler's tiny fingers sneaking in to grab some more scoops of ice cream!


Tucked into our mom’s saree pallu, our little hands twirled into hers, carrying jute bags that we could fit ourselves in, we would often accompany our mom to do the weekly grocery shopping. Tip toeing into the busy streets of the weekly vegetable market, the lookout was always for the freshest of the produce they had to offer. The street side vendors, some on carts and others lining the pavements would sit with heaps of greens, fruits, vegetables and other kitchen staples, often calling us out loudly in the best of their voices, inviting the passing buyers with their heaps of sale. Quite a chaotic scene if I had to recall, where the street vendors would literally pull us into bargaining till we gave in, and even as one got busy perusing the vegetables and fruits, the neighbouring vegetable vendor would try to drag the buyer into his attention. Negotiating for a handful of free curry leaves or a bunch of coriander leaves was a common affair and that brought profound happiness to our hearts. And in odd occasions where the vendor refused to be considerate, mom would grump on her way back, complaining she would never go back to him again.


Those memories of market hopping and raasta shopping will stay with us for long. Shopping was quite a stimulating affair we loved. Yet it came with its rules of pros and cons. Bargaining was the tool and while it brought some joy, somewhere it would leave us dissatisfied with a sinking feeling that probably the vendor down the street sold better produce at lower prices than we bought. Then there were ploys with the traditional weighing scales, with the vegetables often weighing lesser than they should. While most of the fruits and vegetables were picked from the weekly vegetable market, we would heavily depend on the nearby kiraana shops for other kitchen staples, which meant another trip to the kiraana store.

For long now, since the supermarket culture and online shopping trends kicked in, I moved out to a more comfortable zone of shopping in a supermarket where I get my entire pantry staples at a single place. For the modern day working woman like me, it saves me time, energy and more importantly the hassle of weighing and bargaining. I ensure I pick my vegetables and pantry staples, but at times get the luxury of home deliveries too and that’s a bonus. I get to know their manufacturing date, their expiries and the ingredients. More importantly I like to return the product if I am dissatisfied.


Some time ago, I got hooked to online shopping. My first camera was bought online more than 10 years ago. Ever since then I bought several things online and got hooked to it. I browse online shopping websites very often, sometimes out of seriousness to buy, at times out of curiosity, or even to kill boredom. My husband and net savvy dad too appreciate this culture. They’ve bought electronics, tees, books, gifts, sports gears and many other stuffs online. I like the fact you save on time and effort when you need things on demand and its home delivered for free. Then there are sites like Cuponation that give crazy discounts on the products you would buy in market at higher rates and that’s really a bargain.


I wonder how many of you know, but I thought this would interest many. Cuponation has a broad collection of coupon codes with deals and offers from top online retailers like Flipkart, eBay.in, FabFurnish, Future bazaar, Jabong, Naaptol, Myntra, Home shop 18, Pepperfry and many more. I have bought several items from these retailers in the past, however ever since I got to know of Cuponation, I like using their coupons to get those added discounts on my purchases. I am eyeing at some kitchen cutleries and bakewares and these discount coupons will just be perfect. I am excited and hope you’ll too!


For times while you spend surfing the net, buying online or just couching in front of the television, these ginger lime pops will give you a perfect company. Tart, tangy, a spicy gingery twist with hint of cardamom, does that ring bells to you? Yes, its our very own nimbu sherbet in pops.

Ginger Lime Pops

INGREDIENTS

2 large limes
3 cups of water
1/2 cup sugar
1 tsp. cardamom powder
1 tsp. ginger paste

DIRECTIONS

Squeeze lime juice out of the 2 limes. Snip off the lime zest for some intense lemony flavor.

Stir the sugar in water till completely dissolved. Extract juice from ginger. Alternatively, you may also use ginger powder. Add in ginger, cardamom powder, lime zest along with the freshly squeezed lime
juice to the prepared sugary water and stir well.

Pour into pop moulds and freeze overnight or for at least 5-6 hours till set. Enjoy!

Note:

Check for sugar and adjust according to your taste. You may replace with honey if you like. These lime pops are a little tart, so reduce if you like a milder taste.


My house help has been off for a week long leaving me in a state of utter dismay. I am without my her for the past 5 days and the next 2 days to come. And then, just yesterday I almost fainted when she called me testifying her extension of 2 more days. Life at home has sprung into chaotic scene devoid her presence. Several tasks that seized unattended adherence seemed to require vital attention. I almost broke my back giving bath to my baby, washing her clothes (no, we don’t use the washing machine for my baby’s clothes, they are hand washed and sanitized), followed by dusting and mopping the floor yesterday. Thankfully, dear husband vouched in to help me with the vessels.

Heck. Right from cleaning the chimney, the stove top to lobbing garbage, the chores seem unending. I end up exploiting 2 hours of what my maid does in less than hour. Suddenly, it seemed she was the most important person to me.


Between all these chores, there are some things that give a lot of solace, like food. Something quick and simple, yet so satisfying and immensely comforting. Leftovers of rotis made for our breakfast, carried over for the evening and transformed into a quick snack to go along with that coveted cup of desi chai. As kids we relished this to an extent that my mom would often cook a few extra rotis at breakfast to make these for our evening snack for her hungry kids back from school. It had no name, we would simply call it sihi roti (sweet roti in Kannada). She makes them for my daughter now. While she fries the entire roti on tava with ghee till crisp and then scatters sugar or honey till it caramelizes, I like to tear it into strips and do it in a wok instead, saving the extras in an air-tight container for a couple of days. This crisp sweet treat is delicious, made with whole wheat flour and sans butter it's healthier made with ghee. Hope you'll enjoy it too.


Caramelized Roti Crisps

INGREDIENTS

1 roti/wheat tortilla
1 tbsp. ghee / clarified butter
1 tbsp. sugar / honey
1/2 tsp. cardamom powder

DIRECTION

Tear the roti / wheat tortilla into rough bite sized pieces or into neat long strips as I did. Heat a wok / fry pan and add in a tbsp of ghee. Add in the torn roti and stir well so that all the pieces fry well. Stir for 2-3 minutes till the roti strips begin to get crisp. Sprinkle the sugar over and stir gently on low flame to coat all the strips, taking care you don't break them. The sugar will begin to melt and caramelize in a few minutes. Switch off the flame as they caramelize and turn golden brown. Sprinkle the cardamom powder and mix well. Serve with hot cup of tea.


I have always admitted my love for Italian food. And I will always. My love for pastas is profound. We make our way out to binge over them at least once a week. And that needs no excuse. And with my little one adding to that bandwagon of cheese and pasta lovers, I deliberate we are growing big as a group.

My little toddler exhibits her fondness for cheese and tang flavors and relishes them exceptionally well. Over the past few weeks, I have sworn by the arrabiata sauce recipe for most of my pastas so much that I safely hang on to it. We kind of ran over boredom with this however. I mean how much of same stuff can you eat over and over again? In a bid to experiment a little more than the usual, I played around with totally different flavors this time.

BTW, I got a pretty bottle of Balsamic Vinegar that looks nothing less than wine and tastes closely similar too. Sort of like vinegar in wine, I guess it’s that. Aged grapes were meant to be wines, weren’t they?


How much I love these BBC GoodFood magazines that I am a regular subscriber of them. As the month end draws closer, I eagerly wait for their monthly edition, couriered and hand delivered, saving me from the menacing task of hunting them down in supermarkets. The magazine is par excellence, with good write-ups, strikingly drool-worthy photographs and wide variety of tried and tested recipes to try out, I am totally convinced it will be my best bed side reading for several nights to come. For 75 odd tried and tested recipes in one book for 100 bucks a magazine, isn’t that cheap? Now that’s what I call a clean deal! All these years I was hooked to their website, now I am glad they are finally in India, I have them my hands on!

I worked with Balsamic flavors in savory for the first time, wondering really how much of body it would render to the vinaigrette, considering pasta itself is bland and void of any flavor. While I am quite confident with a tomato sauce or white sauce that’s thick enough to hold the pasta, I speculated if the pasta would go loose in this recipe. Boy! I was wrong. I’ve known what magic Balsamic does when roasted with strawberries, but to contemplate in dressings, they just make the dish exotic and top notch.

I toyed around the recipe for Spaghetti with Tomatoes and Mozzarella Sauce from the Pasta edition (March month) of the GoodFood magazine (I love owning my copy), making a few subtle changes to the original recipe. Instead of cherry tomatoes I chopped 1 plump tomato, used Balsamic instead of rice vinegar, jalapenos instead of capers, which I did not have at hand and worked with basil instead of mint it called for. Also added olives for more flavor. The outcome was fabulous with burst of fresh tongue tickling flavors from Balsamic, olives, tomatoes and herbs. The Vinaigrette itself was appetizing and delicious. Do anticipate them to be commendable in salads too.

Spaghetti with Honey Balsamic Tomatoes and Mozzarella

Inspired by BBC GoodFood Magazine

INGREDIENTS

A fist full of Spaghettis
2 tbsp. extra virgin olive oil (I used Colevita extra virgin olive oil)
1 Red onion, finely chopped
4-5 cherry tomatoes, chopped to two (I used 1 plump tomato chopped instead)
4-5 pitted black olives, halved
1 jalapenos, chopped
Juice and zest of 1 lemon
1 tbsp. Balsamic Vinegar (I used Colevita)
1 tsp. Honey / Sugar
Salt and Pepper to taste
1 tsp. Fresh/Dried Basil leaves
Generous sprinkle of mozzarella cheese


DIRECTIONS

Bring a large vessel of water to rolling boil along with a teaspoon of salt added. Add the pasta, taking care to handle them gently to avoid any breakage. Spaghettis have lovely noodle lengths and look pretty when swirled around and served. Boil the pasta till al dante. Drain the water completely, drizzle some olive oil over the pasta and toss gently. Set aside to cool.

In a separate bowl, soak the chopped red onions in a mixture of balsamic vinegar, lemon juice and honey. Season liberally with salt and pepper. Allow the onions to soak and soften for at least 5 minutes. Then add in the olives, jalapenos and chopped tomatoes. Season liberally with fresh/dried herbs (basil or mint) to taste.

Toss this vinaigrette to the cooked pasta. Throw in some mozzarella and toss well gently. To serve, swirl the pasta around the fork and using a second fork transfer it to the serving plate gently so that it holds up nicely. Scatter over the veggies and dressing and serve with fresh gratings of mozzarella cheese.


I don’t actually arm myself in measuring out and following a recipe to the tee where no baking is involved. It doesn’t matter much when you vary ingredients and mess around here and there, it actually brings out your signature taste. Unlike while baking desserts, for savory and spiced dishes I think it’s best to believe in your intuition rather than exactness of the recipe. If you still think exact measurements matter, you can find the recipe here. To make a vegan dish, substitute honey with sugar and skip mozzarella all together.

If sun shines high and you’re looking for a light summer dish that screams for some flavoursome summer time meal, you have to try this. Call it a salad, a main course or just a one pot dish, it’s fresh, light and refreshing with a summery feel.