Showing posts with label Indian sweets. Show all posts

Kaju Katli

How to make Kaju Katli | Cashew Burfi | Cashew Fudge Recipe
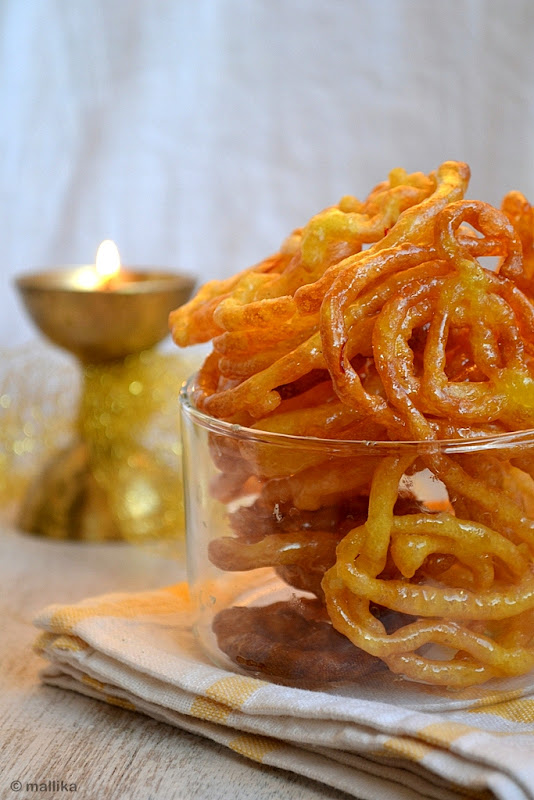
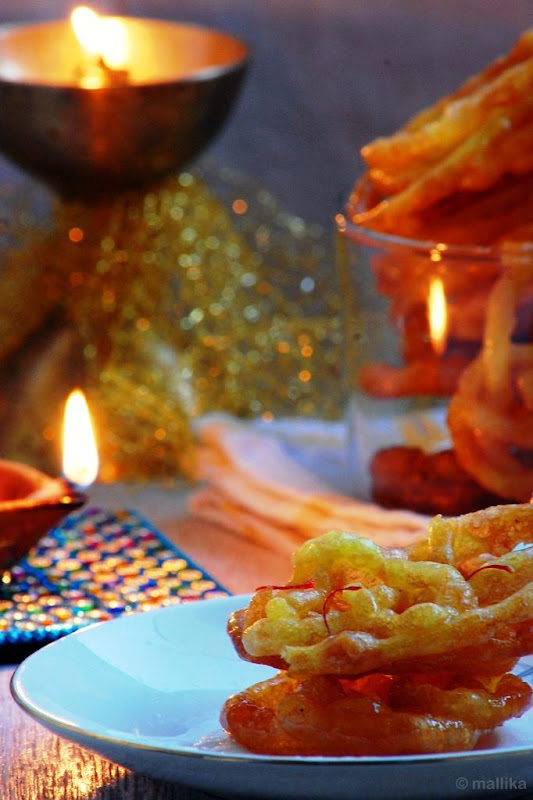
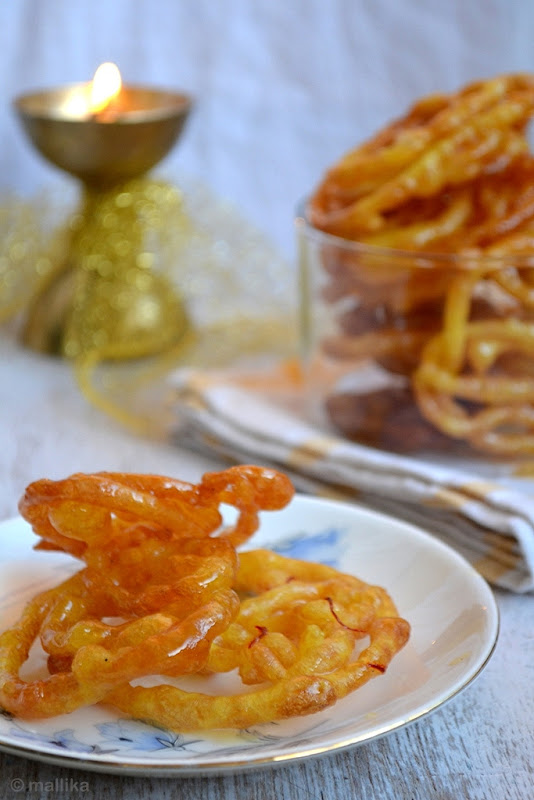
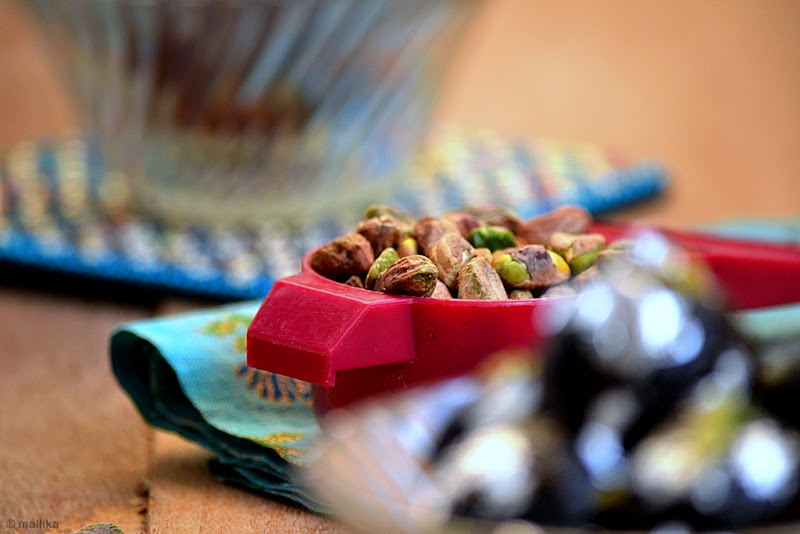
Sometime in October last year, just ahead of Diwali, we bumped into my husband's close family friend at a mall one evening. After a brief chat, Mr. S and his wife headed to shop in the mall, while his mom and young daughter hung around us, continuing the talk. My mother and I spent nearly an hour chatting with aunty while the kids were engrossed playing in the ball pit. We spoke at length about the upcoming Diwali preparations, the new dress that aunty had sewn on occasion of Diwali for her grand-daughter, the small disparities in our cultures and the celebrations (they being Tamilans), sharing our favorite family recipes that made the festive celebrations more special.

One of the recipes that aunty shared with us that evening was the recipe for this Kaju Katli, a popular cashew based sweet that's a popular family favorite in many homes, especially in the North, where gifting boxes of sweets is customary to their traditions. Although we are past Diwali now, I don't think this requires any occasion for celebration. You can make them at home, at your convenience anytime and feel pleased with this indulgence. If you have a weakness for Kaju Katlis, then I am afraid you may not be able to resist eating just one.

Kaju Katli_1


Making these burfis at home may sound intimidating, but it isn't. This was the first time I attempted making them at home and they came out delicious. I started off nervously even as I measured the amounts suggested by aunty, but she had assured that the recipe would work even for the most novice, immature cook, and that assurance itself wanted me to try this recipe in the first place. The end result ofcourse was smooth, melt-in-mouth goodness of cashew fudges.

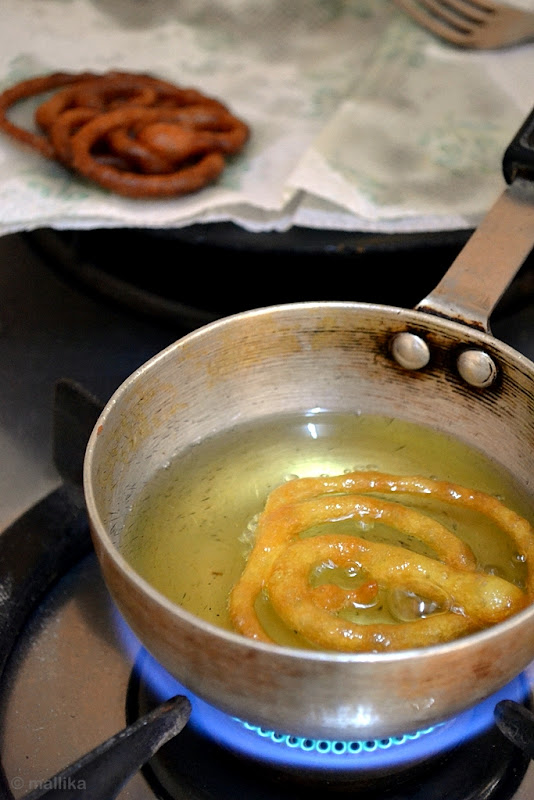
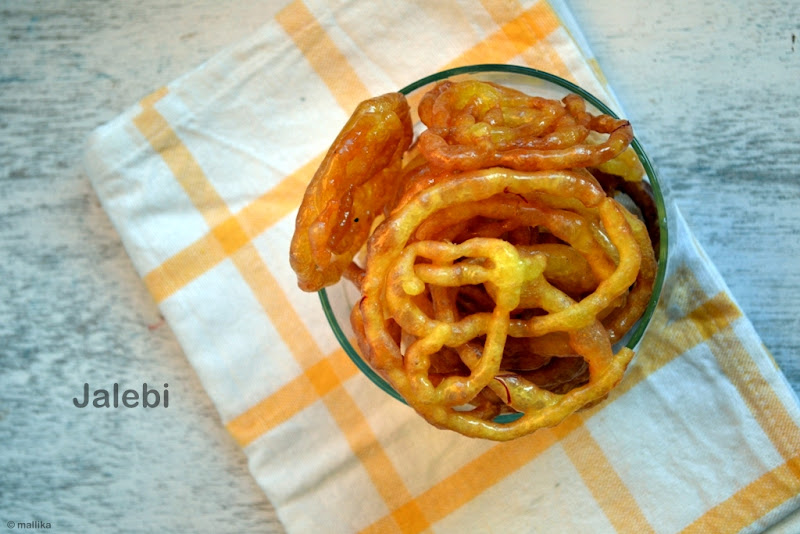
There are many ways to prepare this dessert. A common one being where the cashew nuts are soaked in water overnight and ground the next day, then cooked in single-strand sugar syrup till it comes together to form a dough. As an alternate, easier method, you can grind the cashews to a fine powder and mix with sugar syrup, cooking it on a low flame to form a soft dough. The dough is then spread and flattened on a plate and cut into thin diamonds. Commercially sold katlis have a layer to silver wark on them, however, for a home version you can skip them totally. This version of kaju katli is an easier where you do not have to worry about sugar syrup or its accurate consistency. Hence, time saving and easier which gives you the burfis of same quality as bought at a store.

Kaju Katli_2


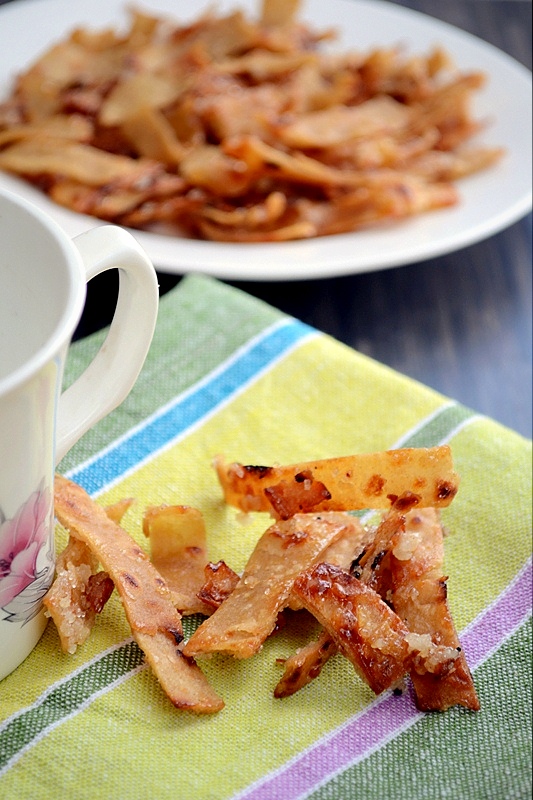
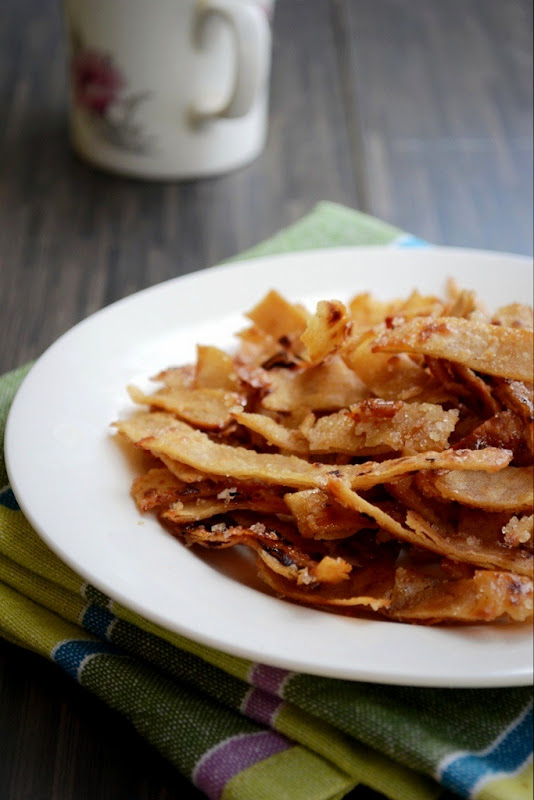
Kaju Katli | Cashew Fudge

INGREDIENTS

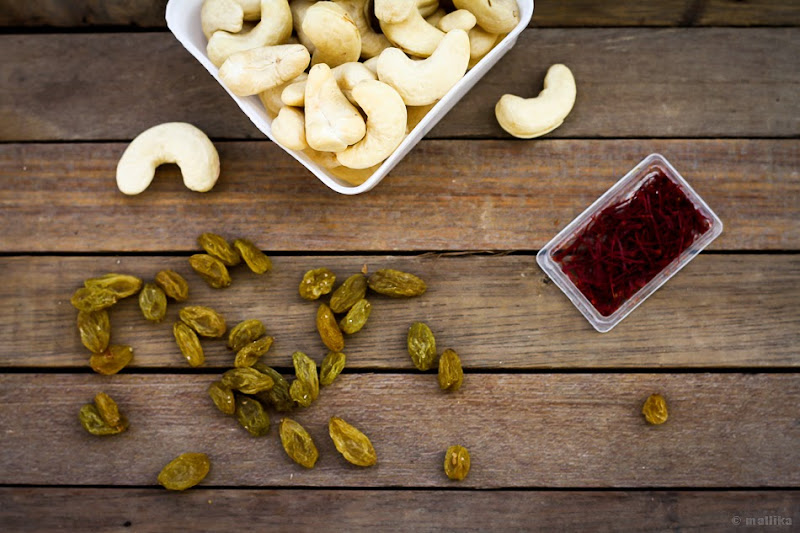
2 cups cashewnuts, heaped
1 cup sugar
1/2 cup water
1 tbsp. ghee (approx. 3 tsp.)

DIRECTIONS

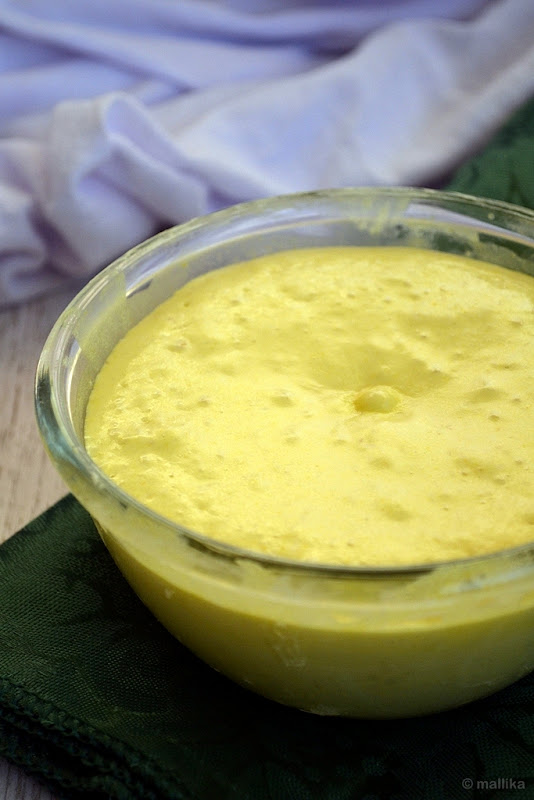
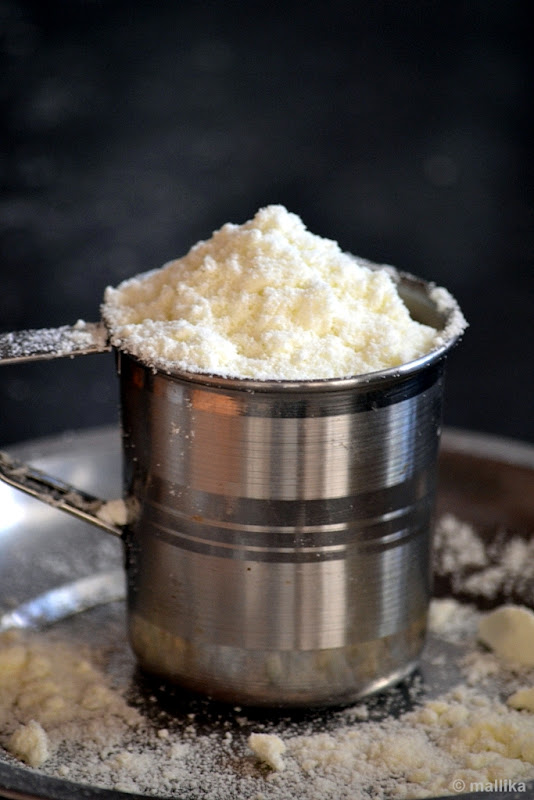
Grind the cashews to a fine powder in a mixie. I used the chutney jar as the whiz option on my mixie helps me control how fine I want the cashews to be powdered. Ensure that the cashews are not powdered to an extent that they begin to leave oils.

Heat the sugar and water in a thick bottomed pan and stir well till all of the sugar is dissolved in the water. Just as it comes to a rolling boil, add the cashew powder and stir well on a low flame.

The cashew mixture will soon come together and begin to thicken. Once it thickens enough to form a mass / sticky dough / lump, add a teaspoon of ghee. Remove the whole of the mixture from the pan.

Transfer the prepared mixture on to an upturned greased plate or a butter paper. I used a marble chakla. Allow it cool a little. When its cool enough to be handled, knead it gently to form a smooth dough. If the dough is too stiff and find it hard to knead, add another teaspoon of ghee. This is optional though.

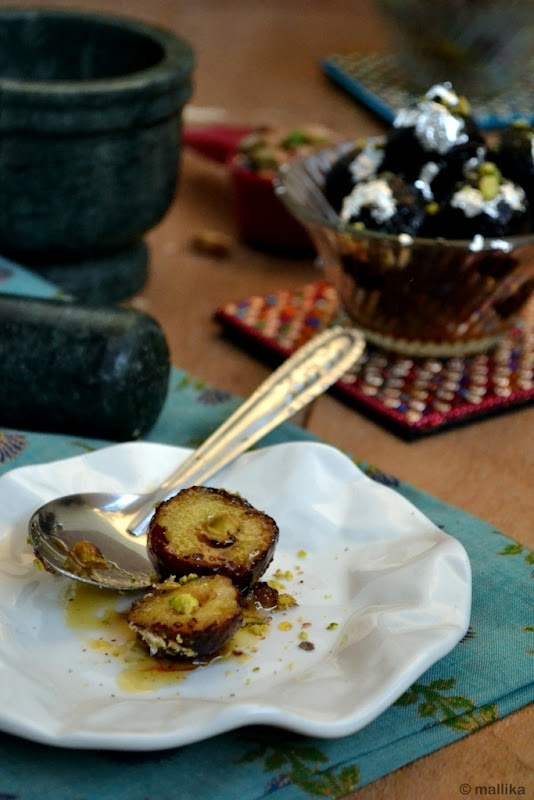
Using a greased rolling pin, roll the dough gently and evenly till its about 4-5 mm thick in height. Allow to cool. When cooled completely, use a sharp knife to cut the cashew fudge into diamond shapes. Gently transfer the kaju katli to serving plate or store in an air tight container.
How to make Mawa Gujiya, Karanji, Karjikai, Kajjkayalu
I did intend to post this recipe for Diwali, ideally 2 days before the festival when I made them at home. I sat down to jot this post too, all to be published in time, but soon had to leave it partially done since I got busy at many other things that demanded time and attention. There was unpacking from the last trip, and packing for another trip to come. Setting up the diya and lights at home, cooking for Diwali, a bit of photography to post here left little time for me to bring this here on time. Yet, considering the 5-day long festivity that Diwali is known for, I guess its still okay to post it here today. :)

Diwali, 'The Festival of Lights' is a huge festival in India. It's the best time of the year where every household in India is seen busy preparing for the festivities. It's the most coveted festival that we look forward to. Months before Diwali, preparations begin at home. There's excitement about celebrations, profound joy in wishing all, of taking time off to visit family and friends, of spending evenings lighting up the home with diyas and kandeels, and of sharing loads of sweets and savouries to all who visit home. It's mesmerizing to see how homes are transformed beautifully this season.


This Diwali has been quite special and a very busy one to all of us. Just as we crossed 2 weeks since my brother-in-law's wedding, we were at my in-law's place to celebrate the newly wed's first Diwali in full spirits. Such a joyous occasion it was to be with all and celebrate as one family.

No celebration in India is complete without traditional sweets. It makes it more special when the joy of celebration is shared with family and friends. Before leaving home, I made a batch of these Mawa Gujiayas to be shared with my family and friends. The mawa/khoya was home made from a large batch of left over milk powder. Some went into making these jamuns. The large part of the rest made it to these Mawa Gujiyas. Thanks to Suma, her recipe for homemade low-fat mava/khoya is fab and perfect that I will not bother to buy mawa from stores for any recipe in future. I wouldn't bother to detail it out here, rather I suggest you hop over to her site where she details the process very well. If you don't consider making mawa at home, then store-bought mawa do good too.

As they went into this recipe, they made the most delicious gujiyas ever. As a first timer, I do think there is scope for bettering my techniques for frying these. The oil, the heat moderation and all of that. The fact is that I hate slaving over the wok full of oil. Second, I always underestimate the amount of oil required for frying, as obvious to the fact that I don't fry often. It's only during Diwali or Navrathris do these traditional sweets make a part of my kitchen activities.

Making gujiyas are really simple, much unlike of what they seem to be. In case you have store bought mawa, then most of the effort in my opinion goes into frying these. Don't attempt to bake them. They will flop. Here's a small attempt to show how to shape them. Either in form of purses or like empanadas, whatever you choose to like. But be careful as you seal them, since one imperfectly closed gujiya is good to ruin the oil totally. I hope that helps all.


I hope you had a safe and fabulous Diwali.

Here's Veg Bowl wishing all the readers a Happy Diwali!!! Belated ofcourse!


Mawa Gujiya

INGREDIENTS

For the Outer cover:

2 cups Plain flour / maida
2 tbsp. Ghee
Oil to deep fry

For the Filling:

2 1/2 cups Homemde Khoya/Mawa or Store-bought Khoya/Mawa
3 tsp. Desiccated coconut
1/4 cup Cashewnuts
1/4 cup Almonds
1/4 cup Walnuts
Handful of Raisins
1 tsp. Cardamom powder
2 1/4 cups sugar

DIRECTIONS

For preparing the covering, rub in 2 tablespoons of ghee into the flour till they resemble like coarse sand. Be gentle and use light hands. Add water and knead gently into a stiff dough. Cover with a towel and set aside to rest till you make the filling. For the filling, pulse the cashewnuts, almonds, walnuts, dessicated coconut till they have a coarse texture. Don't grind it finely. You will love to bite into them. Lightly roast the nut mixture over low heat till they change their colour. This is an optional step though and you may rule out if you are short of time. Add the grated mawa and sugar into these nuts and stir further on low heat for a minute. Switch off the flame and add the cardamom powder. Oil your hands and divide dough into small lemon sized balls. Flour the surface and roll out the dough into small rounds of 7-8 cms in diameter, similar to puris. Alternatively, you may use an inverted cup with sharp rims to get a nice round shape. Place about 1-2 tsps. of stuffing on one half, lightly dampen edges with water and fold the other half over the stuffing like a moon. Press the edges firmly and pinch them as shown in the picture above, similar to momos. This will help in sealing the gujiyas well and ensure the filling doesn't spill out while deep frying. Heat sufficient oil in a kadai and deep fry gujias on medium heat till golden brown. Allow to cool and serve.

_MG_5700


I almost feel stupid when I say this each time, but I have to say it again. It’s nearing October already! Time has been flying way too swiftly and I feel out of control in the whirlwind of life. Where did it go and how so soon? What have I been doing? We’ve crossed major part of the year and are heading closer to the ends. In less than 2 months, we’ll have November and December. And I before I know, we would have crossed yet another year.

I checked the spiral-bound table-top calendar the other day that sits on my fridge top; dusty and untouched, with spiders spinning webs around its edges. I realized, I hadn’t shifted pages on it for months. It read March, with scribbles around dates marking the liters of milk we got delivered each day and encircling dates when my maid took leaves. Oh, was that the last time I even glanced it? May be yes.

_MG_5683 _MG_5681 _MG_5707


Yes, I recall that was the last time we had a milkman deliver us milk at doorstep since he eloped with the advance money cheating on us. It’s been far too long we have been doing away without a replacement for him. And also, probably the reason why I never flipped pages on my calendar and moved dates, since I stopped tracking them. I feel sheepishly low about the passing time. Because I am unable to recollect anything worthy I may have achieved this year.

_MG_5689


On a positive note, the later part of the year brings immense joy to my heart. Loads of festivities, several holidays, family get-togethers and festive food is something I have always enjoyed and looked forward to. October, this year will be hectic, yet fun-filled. We have a calendar packed with activities. Together I hope, we will weave wonderful memories with our family and friends. We have some important birthdays and anniversaries to celebrate. Then there’s a family destination wedding we have been looking forward to. Between these preparations, while cooking has been regular, I have lost the mojo to pursue food photography or blogging simply because 24 hours a day does not suffice my schedule. Alas, if only I had more time to pack in more things I love to do, while the others take the priority.

_MG_5723


Yet in all say, for recipes like this one I have for you today, it takes hardly any effort and time. From start to end, Honey Loops & Nuts Chikkis are done in a matter of few minutes, assuming you have the roasted nuts handy. Even if not, it's no greater effort. Chikkis or Caramelized Nut Bars are my all time favourite pass time snacks. I have made them on several occasions in the past and posted some here and here too.

The key to getting a good chikki is the right level of caramelization of sugar, a golden amber stage where it sets well with the perfect delectable crunch. Honey Loops are just my substitution for Indian puffed rice (a.k.a. murmurra) in a bid to wipe off the last few handfuls that I had in stock. You may as well use the Indian puffed rice with same ease. They lend a lightness and crispness that sets well again crunch of roasted nuts.

_MG_5719


Honey Loops & Nuts Chikki

INGREDIENTS

1 cup mix of roasted almonds & walnuts
1 1/4 cup Kellog's Honey Loops / Cheerios (substitute Indian puffed rice instead)
2 tsp. golden raisins
1 cup regular sugar
1 tbsp. ghee/ clarified butter
1 tsp. cardamom powder

DIRECTIONS

Grease a flat steel plate with some ghee / clarified butter and set aside.

Roast the almonds and walnut on a medium low flame, stirring frequently till they change their color to golden brown and become aromatic. Melt a tbsp. of ghee (clarified butter) on medium low flame in a heavy-bottomed pan. As it melts, add sugar stirring continuously till the sugar melts and begins to turn golden brown. At this stage we need to keep a constant eye on the sugar syrup. When all of the sugar melts completely, switch off the flame and add in the nuts and raisins, followed by honey loops quickly. You need to be swift and quick here. Sprinkle the cardamom powder. Quickly stir all the ingredients and mix well with a wooden spoon. Transfer it to the greased plate. Smooth the prepared chikki with the back of a flat wooden spoon. If you prefer neat squares, use the tip of a knife, drag lines across to form square/bite sized pieces. Allow to cool then break them off.

_MG_5712


I was nine when I first learnt swimming. Well, nothing really one should boast about, but then I remember the day so well that I can’t help but bring in reflections of that day here.

My magenta pink swimsuit, the matching swim cap and those bright hues in shades of sky blue and baby pink swimming tube without which we would never enter the pool. Dad would wake us up as early as 5.30 am, hand over a tall glass of milk each that the three of us would gulp down, get us ready and drive us down to the pool. As we took our showers and came out to step into the pool, dad would help us float our swimming tubes around our waist. My sister and I spent couple of months that way with those fluorescent plastic tubes balancing us on water and that clearly meant we would never learn swimming with those tubes on. Dad decided one day that we should forsake the tubes and on the pretext of having forgotten them at home, he coaxed us to throw our arms and beat legs to learn swimming. In a week’s time or so, with good coaching and motivation from dad and the coach, I managed to swim my first 20 meter stretch, that stretch of the pool I can recall well even till date. Back home, my mom was a happy lady. She needed a reason to celebrate and my learning for the day became a reason to cheer and so this vermicelli kheer was made to revel my first swim.


To say, that wasn’t the first time I had semiya kheer or shavige payasa, since we’ve grown up eating them regularly at home, to an extent one could simply abhor them even by the word of it. In ceremonies, at weddings, to offer guests or to enrich simple Sunday lunches. Shavige payasa made a hushed, humble manifestation between chirpy talks, deepened family bonding times, boosted celebrations or even merely uplifted spirits. So you’ll know there are several memories etched over bowls of this kheer or payasa, or whatever you choose to call which makes this dish unforgettable. There are cheerful moments of frolic and laughter we’ve breathed with our family and friends over meals that ended with this kheer. Those tiny blissful moments of celebrations made by mom on topping the class exams or lugging the first swim, a medal won at a school competition or dad’s promotions, we’ve reveled all those moments of simple pleasures with this kheer. That ceremonial food I would love to relish on endless occasions, sitting obverse the traditional banana leaf in long rows, awaiting patiently for the first dollop of the delicious payasa to be served on the designated bottom left corner of the leaf, and as it trickled down, saving the part of it by carefully lifting the edges of the leaf and licking it off the first thing the moment we chorused Hara Hara Mahadeva, Goooovinda! Those simple joys filled with nostalgia and memories that makes every little mouthful of this payasa utterly blissful.


But the fact is that vermicelli kheer is so damn easy to make, that it’s hardly any effort and can be whipped up in minutes on demand to celebrate any occasion and that’s what makes this dessert so special. Be it a celebration, an occasion, or drop of the hat guests visiting you or no-clue-dessert-on-the-whim, Shavige Payasa or Vermicelli Pudding is just the right kind of dessert you would fall back upon. If you are an Indian, then this probably is one of those first desserts you learn by heart, by instincts and not by lessons imparted by the older generations.

And a well-made vermicelli pudding is too delicious to ignore. It’s means subtly creamy, marginally condensed, not cloying sweet, with a touch of ochre goodness from saffron and earthy affection from cardamom that make up a bowl of deliciously perfect kheer. And those generous helpings of ghee-fried raisins and cashewnuts will only embellish this bowl of divine goodness. So if you are feeling lonely today or you just want to celebrate, conjure up your memories with this bowl of kheer.


Seviya Kheer / Shavige Payasa / Vermicelli Pudding

INGREDIENTS

1 cup Vermicelli / Shavige, pre-roasted or lightly roasted to golden brown
3 cups Milk
2 tbsp. Milk powder, optional
3/4 cup Sugar
A generous pinch of Cardamom Powder
1 tbsp. Cashew nuts
1 tbsp. Raisins
1 tbsp. Ghee
4-6 strands Saffron strands dissolved in a tbsp. of warm milk

DIRECTIONS:

Heat milk in a pot till just warm. Dissolve the milk powder in it and bring it to a boil. Reduce the flame and add in roasted vermicelli / seviya to the milk and stir well. Stir gently and allow the seviya to cook through. When its al dente, add sugar to taste and cook further till the vermicelli is just soft. Do not overcook as it may end up being too mushy. Pour the saffron strands along with its milk, bring to boil and switch off the flame. Add fresh cardamom powder and stir well.

In a separate pan, fry the cashew nuts & raisins in ghee till cashews turn golden brown and the raisins begin to swell. Pour the fried dry fruits along with ghee to the prepared payasa / kheer. Serve the payasa / kheer hot, warm or cold.

Notes:

* Use the thicker variety of vermicelli, like MTR or Bambino since it holds shape after cooking.
* Pre-roasting is a must, else you will end up with a clumped, sticky pudding which is not very pleasing and palatable.
* I always have a stock of milk powder in my pantry, hence I have used it in this recipe. Milk powder is a cheat version to avoid slaving over for the milk to condense. Though using diluted condensed milk here will also work, milk powder does the same job equally well.
* Milk powder / Condensed milk is optional and gives the kheer a richer, creamier taste, though traditionally it’s not used and you may skip it altogether by using only plain full fat milk.


So what do you think is life like for a toddler mom food blogger? Fun, thrilling, stressful, exciting, uncertain, adventurous, tough, entertaining, or may be all of these??? Interesting! Let me give you a glimpse of me as a food blogger.

Just about 2 days ago I decided Sankranthi, the festival for harvest is here and I need to have a post signifying it for the 14th. I rustle up my calculations and cross upon Huggi, a traditional Havyaka household dish, and an apt one that can make it right for the day and the festival. Perfect, I think.

So to be able to post it a day in advance that will benefit my readers, I decide I will cook the recipe a day before, photograph them and publish here. I almost put things together, when I simply get a feeling that I am cheating. Would that justify me celebrating the festival? It made more sense to cook them the first thing in the morning of the festival while my family is around, finish the pooja, offer God and relish them fresh. So I push the entire thought of cooking Huggi for the day of Sankranthi, in a hope I will be able to quickly grab some clicks and post them here, hopefully the same morning. Hopelessly, that rarely happens!


The morning of Sankranthi dawns and the baths are over. I head over to the kitchen to make both versions of Huggi, the sweet and the spicy one, both equally delicious and my favourites too. My cooking is done on time, pooja is over, little one is to be fed and I am to decide if the oggarne/tadka needs to be added then or saved for the photographs. A tic-tac-toe and I add a part of the oggarne/tadka, saving some of it for the grace. I almost finish feeding my hungry toddler, put her to play in my kitchen and keep a keen check on her from the corner of my eye. Often she hangs around me for my attention, so a huge effort goes into distracting her with piles of kitchen utensils and cutleries to amuse her. By now my kitchen is in a huge mess with utensils, dolls and toys lying on the floor and on counters too. Adding to this, hazaar utensils lay around to be cleared and washed. I clear a part of these to make some space for the props to be fitted into the existing clutter, as obvious to make my dish look a little appealing. By now my little toddler begins to get anxious, seeking my consideration to play with her, so she's up on the kitchen counter, least I can keep her busy with my constant talks and her plays. I begin to place up my props, lay the dishes, top the garnishes, neat my background, foot the tripod and almost begin to shoot when a tiny hand hovers over to dish, pulling the props, the background and at times the camera lens too! Again, in an attempt to distract, I hand over unforeseen kitchen items for her to play. Her hands go deep into the jar of my precious ghee, the onion and garlics are off their peels, things helter-skelter and a glass or two ends up cracking on the floor. Though by now she is bored and there comes the shrill cry, more mess and my woe! Then there are agony moments when my garnish ends up in a mess, spoons are thrown into the dish, splattering on to the table cloth and I throw up my hands in anguish! Did I say life of a blogger mom was stressful? Phew!


I come back to square one of laying things on the dining table instead, let her on her foot to play, hand over a spoon and bag of chickpeas for her to fiddle with, foot the tripod and almost begin to shoot a photograph or two when my little one spills over all the chickpeas, gives up on them instantly and hovers over to tripod, attempts a climb, almost tumbling over it. I tip toe over the scattered chickpeas, just managing to balance the falling camera on a single foot and my toddler on another! Again, I give up, shove aside the tripod and shoot by hand with a few shaky shots and some good angles. Did I say life of a blogger mom was adventurous? True!

Okay, so by now I somehow manage a few shots here and there and then sit down to processing the files, generally when my baby is off to her sleep. And today she decides not to sleep. I sit her till the noon, simply hoping I can make through this post today! She's off to sleep and I sit to blog about it, my thoughts are totally empty. Heck! Where do I start? Every blogger's foe, that blogger's block! I try to start, then just let it go. Instead I manage to do my processing and editing. Of the hazaar photos I click randomly I short-list to the chosen few. By then my little one is awake. Here I go off again, almost being sure this will have to wait another day, may be next year too...??? Yeah, I did say life of a blogger mom was uncertain.

With all that said and done, I finally have my post here, though not exactly on time as I would have preferred it earlier in the day. I sat at a stretch, almost 3 hours and managed to crack a good long write up too! And as it gets published, its fun and exciting. As the comments pour in, it gets entertaining too :) That's life being a food blogger and toddler's mom too!


Sihi Huggi

INGREDIENTS

1/2 cup moong daal
1 cup rice
3 cups milk
1 cup water
2 tbsp. clarified butter / ghee
1 1/2 - 2 cups sugar or jaggery (adjust as per taste)
1-2 cardamom pods, crushed
A handful cashew nuts & raisins
A pinch of saffron

DIRECTIONS

Wash and clean the moong daal and rice and keep it aside for about 10 minutes. In a pressure cooker, add the moong daal, the washed rice. Cook them in 2 cups of milk and 1 cup of water to 3 whistles. If you do not have a pressure cooker at hand, use a regular cooking pan and cook the daal and rice till they turn soft and mushy. Once cooled, lightly mash them using the back of the ladle once cooked. Add the sugar to taste and adjust the thickness of the huggi by adding remaining milk, if necessary. Add in the saffron and stir well. Heat it till it comes to a boil. I've used sugar here since I ran out of jaggery, but I suggest you try the jaggery version as it tastes great too!

Next, heat three tbsp. of ghee in a wide mouthed pan. Add cashews and fry till they turn golden brown. Switch of the flame and quickly toss in the raisins and cardamoms. Allow them to plump in the heat. Garnish the prepared sihi huggi with the fried cashews and raisins and serve hot.


Khara Huggi

INGREDIENTS

1/2 cup moong daal
1 cup rice
2 tbsp. clarified butter / ghee
1 tsp. turmeric powder
1 tsp. cumin seeds
1 tsp. chopped ginger
2 chopped green chillies
1 tsp. whole & broken peppercorns
A sprig of curry leaves
Salt to taste
A handful cashew nuts

DIRECTIONS

Wash and clean the moong daal and rice and keep it aside for about 10 minutes. In a pressure cooker, add the moong daal, the washed rice along with chopped ginger and green chillies. Cook them in sufficient water (about twice to three times the quantity of rice and dal) to 3 whistles. If you do not have a pressure cooker at hand, use a regular cooking pan and cook the daal and rice till they turn soft and mushy. Once cooled, lightly mash them using the back of the ladle once cooked. Add turmeric and salt to taste. Adjust water to your desired thickness as necessary.

Next, for the oggarne, heat three tbsp. of ghee in a kadai. Add the cumin seeds. When the cumin seeds turn fragrant, add torn curry leaves, the whole and broken pepper and cashew in the ghee till the cashews turn golden brown. Garnish the prepared huggi with this oggarne and top with more roasted cashews before serving.

Wishing you all a Happy Sankranthi this season!


Hope you had a fabulous Diwali! We did and continue to do so over a couple of days. We came together, lit up the evening, met up family and friends, shared wishes, had fun the eco-friendly way, celebrated minus the crackers, snacked well (of course should I even mention that???) and had a great evening in all. Food becomes an integral part of our celebrations and is rooted to our traditions, so this Diwali wasn't any different for us in terms of feasting.

You do remember I spoke about making sweets and savouries like, Kala Jamuns and Boondi on my previous post for this Diwali? Oh I forgot to mention using boondi in Chiwda and frying up some delicious crisp, thin Jalebis to make our evening warm and memorable.


Making Jalebis have always been on my mind. I had my inhibitions, probably the process of making sugar syrup and frying them made me nervous. However, with my little one around and in an attempt to satisfy her food cravings, I am tempted these days to experiment with dishes that I hesitated in the past. My tiny tot is an average eater, but she enjoys a good deal of variety on her plate. She takes me to surprise with her food habits and likings, her uniqueness with tastes, which can get quite unpredictable!

I pulled my sleeves up well with the art of making jalebis which aren't as difficult as they sound or seem like. The video by Manjula's kitchen did boost my confidence quite a bit and I set out to fry a small batch (measured half the quantity of tea cups), yet they seemed like a lot. Easily made up close to 20 odd jalebis. I chose an instant recipe using yeast, trust me it works beautifully. My grandma is an expert in making these the traditional way by soaking flours in curd and leaving them to ferment overnight. Every Diwali, way back in her kitchen, she would slave for hours, to carefully break open the eye of an empty coconut shell to pipe out perfectly round jalebi batter over a large wok filled with oil, fry them gently and dunk them into delicately flavoured sugar syrup, an appealing dessert that could easily serve a huge crowd and satisfy many taste buds. She was quite surprised knowing the fact that I hardly slaved over these. I replaced the besan to equal amount of rice flour as per my grandma's suggestion and the resulting jalebis were very crisp and sinful.

To be honest, I wasn't sure if the photographs here were good enough to post. So I apologize since the eve was hectic and with all that I had at hand I shot them in a hurry. But then its Diwali season and jalebis should be here hence.


Crisp Jalebis

INGREDIENTS

Batter:

1/2 cup All Purpose flour
1 teaspoon rice flour
1/2 teaspoon yeast
1/2 teaspoon oil
1/2 teaspoon sugar
A pinch of turmeric for color (optional)
About 1/3 cup of lukewarm water (as needed)

Oil to fry

Syrup:

1 cup sugar
1/2 cup water
Pinch of cardamom powder
Few strands of saffron
1 teaspoon of lemon juice

DIRECTIONS

Dissolve the yeast in warm water and allow it to sit for about five minutes. Mix the flour, rice flour, turmeric, oil and sugar together. Add the yeast solution and mix well, making sure that there are no lumps and the batter is smooth. Set the batter aside and let it sit in a warm place for one hour. Make sure the batter is fermented. After fermenting batter will rise high and look frothy like the above picture.

Boil the sugar and water together. Add the lemon juice and saffron and close the heat.

Heat the oil in a kadhai or a frying pan. Check if the oil is ready by dropping dots of batter in the oil. If batter sizzles and comes up without changing color its ready. Fill the Jalebi batter into a piping bag with a plain round nozzle. Squeeze the Jalebi batter out in the hot oil in a pretzel shapes and fry them until golden-brown on both sides. Transfer into the warm syrup. Let jalebi soak in the hot syrup for a few seconds and take out. Serve hot.

Note: Having the oil at right temperature is the key to good jalebis. Fry jalebis on a low flame till they are golden in colour. I got a hang of this after my first 2 jalebis turned brown. Switch off the flame if the oil is too hot and the jalebi burn.


Iss diwali pe hamari dua hai ki, Apka har sapnna pura ho, Duniya ke unche mukam apke ho, Shoharat ki bulandiyon par naam apka ho! Deepawali ki dher saari shubh kamanayen!

On this Diwali we wish, May every dream of yours come true, Hope you achieve success in all endeavours, Hope your name shines on the pinnacle of fame and success. Wishing you a Happy Diwali!


As a kid or an adult, I have always loved the sight that Diwali brings to my eyes. It’s cheerful and welcoming, bright and seasonal in all vivid colors boasting the festivity. And beyond everything it makes time for us to remember our family and friends; take a while out of our busy schedules to unite with our pals, wish them and celebrate as one.


October-November is the blissful of all months as they are packed with festivities, feat and buzz. True, it’s not even weeks since Dusherra got over and we’ve already begun waking up to sounds of crackers; that reminds me Diwali is here. The makeshift tents that sold clay dolls of Gowri and Ganesha have now replaced themselves with mounds of clay diyas in all varieties. As I cross the market in my vicinity on my walk back home, the usual scenes of the day have changed to being busier and more crowded than any other day of the year. Street vendors have made their presence felt, occupying their spaces on either sides of the pavement, frisking their business with piles of Diwali goodies; diyas in all sizes and shapes, variety of colourful kandeels hanging high in the air, heaps of flowers making their way out of the wicker basket, neatly stacked mounds of rangolis in bright, bold colours being scraped out to be wrapped in newspaper pouches; make shift tents selling crackers of all kinds, with the crowd hovering over them in lure of obsessive shopping and celebrations. It’s a sight I love to watch, cheerful and happy people all around, carrying huge smiles as they walk back, their hands full, weighed down by the bulk of items they've shopped for the season. Almost every shop in the town is decorated with rice bulbs, tinsels and festoons, very glamorous and festive, calling out for attention, and their massive discounts are inviting enough to loot your money on all that’s on sale. It’s seriously tempting and I have been a part of that bargain, doing away with my old clothes and revamping my wardrobe with new clothes, sandals and accessories!


We’ll wake up to the dawn of Deepawali tomorrow morning. Since a week, I have been busy mopping our home clean, the cobwebs dusted, the kandeel has been put up to light the evening, oil lamps have been washed and the kitchen has been a busy bee. We’ll have the ritualistic oil bath tomorrow before sunrise, followed by donning new clothes and then the pooja, trailed by busy activities in kitchen for an elaborate feast. Our families will come together in the evening when sweetmeats will be out, the diyas will glow, the rice bulbs will sparkle, the kandeels will light our balconies, swaying high in the air, the sound of crackers will fill the atmosphere, and neighbours and friends will pitch by to pour in wishes.

With all this I realized that my post for Diwali is not published yet! Panic attacks me. Wasn't I prepared yet??? I pause, scan my drafts, but don’t find any that fits the occasion for traditional sweets and savouries. But then, I know my kitchen has been busy this entire week because I had promised myself I will cook them all in my kitchen, this Diwali. The Khara boondi has been made and stored in steel dabbas and they’ll be brought out tomorrow. The Kala Jamuns I prepared yesterday are soaking in their saffron syrup, absorbing all the succulent juices and they shall be ready to be served to all who’ll visit us. We’ll have some more sweets and savouries coming out of our kitchen, so I am pressed on time, which is little at hand, and have nudged myself to steal some time out to photograph a couple of decadent jamuns and post them here so that all of you can enjoy as much as we will.


Kala Jamun, as the name signifies is black in color, a color that comes from caramelization of sugar or re-frying of the jamuns. I’ve been an ardent lover of Gulab jamuns, but stayed much away from Kala jamuns till a couple of years ago when I first tasted them at Hotel Majorda in Goa. I mean how appealing can a sweet that’s black in color be to our eyes? I believe I was a convert because of the presentation. The silver wark topping the jamuns, lusciously absorbed in saffron syrup and pistachios dotting them did all the justice to these little treats as much as they deserved. In my attempt to make these kala jamuns from basis, I've used skimmed milk powder instead of Khoya (milk solids), an easier option and equally delicious. The nonfat milk powder we get in India is sweetened, hence frying the jamuns will inevitably lead to darker coloured jamuns than the store bought mixes, hence making kala jamuns is a breeze. Hope you’ll love them and will not fail to leave a lasting impression on your taste buds.


Kala Jamun

Inspired by Manjula’s kitchen

INGREDIENTS

For the Syrup:

1 3/4 cup sugar
1 1/2 cup water
4 coarsely grounded cardamom seeds
Couple of saffron strands
1 tablespoon sliced almonds and pistachio
Silver wark, optional

For the Jamuns:

2 cups nonfat milk powder
1/2 cup plain flour
3 tablespoons soft unsalted butter
1/4 cup whole milk
Pinch of baking soda
Oil for deep-frying

DIRECTIONS

Syrup:

In a large pan, add water, sugar and saffron strands and bring it to a rolling boil. Let the syrup boil for a minute then remove it from the heat. Ensure the sugar is dissolved. Add the ground cardamom seeds. Set the syrup aside.

In a bowl, mix milk powder, flour and baking soda. Add the butter and mix well. Now add milk to make soft, sticky dough. Allow the dough sit for a few minutes. Milk powder will absorb the extra milk. If the dough is dry, add more milk, as the dough should be soft. Knead the dough lightly. Divide the dough into about 20 equal portions and roll them into round balls. Stick a pistachio in the center of each jamun and roll well to round balls. Heat the oil in a frying pan on medium heat. Fry the jamuns till they turn brown. Continue frying till they turn darker in shade. Transfer the fried jamuns to the hot sugar syrup. Allow them to soak in the syrup for at least 30 minutes prior to serving. Top each jamun with silver wark and sliced almonds and pistachio and serve warm or at room temperature.


Like every year, this year too we shall look forward to the dawn of Diwali to celebrate the festival of lights in full life and spirits. Wishing you all a Happy, safe Diwali and a Prosperous New Year!


Ganpati Bappa Moriya!!!! Pudhchya varshi laukar ya!!!
Happy Ganeshotsav to everyone!!!!

Ganesh Chaturthi, the birthday of Lord Ganesh (Ganesha), the god of wisdom and prosperity was celebrated with full pomp and splendour across the country yesterday. As I walked down the street to our market place to pick up flowers and fruits for our Ganesha, the elaborate arrangements with lot of glamour, lighting, decoration made for Ganesha statues installed in street corners and the sight of people flocking in huge numbers to pay due love and respect to the Lord invoked that feeling of unity and revived spirit and faith in Ganesha.

History has it that that Ganesha loved sweets and had his weakness for modaks that he simply could not stop himself from eating them. Undoubtedly, on this day most homes make variety of sweets including the coveted modaks and laddus to please Ganesha. Unlike some of the other Indian festivals, Ganesha’s birthday is indeed an occasion for feasting and not for fasting.

I have been busy on my toes a week ahead of the festival to make sweets and savouries for my Ganesha too. Apart from the regulars of Modak, Nippattus, this year saw me making some delicious Besan Laddu and Kai Holige. While the tedious and daring first attempt at Kai Holige for me was not so easy, making the Besan Laddu was a breeze.

I would probably have this recipe posted yesterday, but then I badly wanted to stay away from being hooked to the system, internet and blogging. It's the quality time to be spent with my family and friends that mattered the most. Blogging can wait yet another day.


Besan Laddu

INGREDIENTS

1 cup besan (Bengal gram flour)
1 tsp. rava / semolina (optional)
3/4 cup powdered sugar
1/3 cup ghee
1/4 tsp cardamom (elaichi) powder
Fistful of chopped cashewnuts and raisins

DIRECTIONS

Melt the ghee in a kadhai, add the gram flour, semolina along with chopped cashewnuts and cook over a low flame stirring continuously till it is golden brown in colour. Turn off the flame and add the sugar, the cardamom powder and raisins to the roasted gram flour and mix well. Allow to cool slightly. While still warm, divide the mixture to roughly equal portions and shape into laddus. Allow to cool completely and store in air-tight containers. These stay well for couple of weeks, but I can't promise if your family will let you keep them so long!

Ganesh Chaturthi is a special occasion and so should be Ganesh Chaturthi recipes. Bring good luck and prosperity home this festival and celebrate the occasion with your family and friends. May ganesh bring you and your family tots of good luck and happiness.


My house help has been off for a week long leaving me in a state of utter dismay. I am without my her for the past 5 days and the next 2 days to come. And then, just yesterday I almost fainted when she called me testifying her extension of 2 more days. Life at home has sprung into chaotic scene devoid her presence. Several tasks that seized unattended adherence seemed to require vital attention. I almost broke my back giving bath to my baby, washing her clothes (no, we don’t use the washing machine for my baby’s clothes, they are hand washed and sanitized), followed by dusting and mopping the floor yesterday. Thankfully, dear husband vouched in to help me with the vessels.

Heck. Right from cleaning the chimney, the stove top to lobbing garbage, the chores seem unending. I end up exploiting 2 hours of what my maid does in less than hour. Suddenly, it seemed she was the most important person to me.


Between all these chores, there are some things that give a lot of solace, like food. Something quick and simple, yet so satisfying and immensely comforting. Leftovers of rotis made for our breakfast, carried over for the evening and transformed into a quick snack to go along with that coveted cup of desi chai. As kids we relished this to an extent that my mom would often cook a few extra rotis at breakfast to make these for our evening snack for her hungry kids back from school. It had no name, we would simply call it sihi roti (sweet roti in Kannada). She makes them for my daughter now. While she fries the entire roti on tava with ghee till crisp and then scatters sugar or honey till it caramelizes, I like to tear it into strips and do it in a wok instead, saving the extras in an air-tight container for a couple of days. This crisp sweet treat is delicious, made with whole wheat flour and sans butter it's healthier made with ghee. Hope you'll enjoy it too.


Caramelized Roti Crisps

INGREDIENTS

1 roti/wheat tortilla
1 tbsp. ghee / clarified butter
1 tbsp. sugar / honey
1/2 tsp. cardamom powder

DIRECTION

Tear the roti / wheat tortilla into rough bite sized pieces or into neat long strips as I did. Heat a wok / fry pan and add in a tbsp of ghee. Add in the torn roti and stir well so that all the pieces fry well. Stir for 2-3 minutes till the roti strips begin to get crisp. Sprinkle the sugar over and stir gently on low flame to coat all the strips, taking care you don't break them. The sugar will begin to melt and caramelize in a few minutes. Switch off the flame as they caramelize and turn golden brown. Sprinkle the cardamom powder and mix well. Serve with hot cup of tea.