Showing posts with label No Onion-Garlic. Show all posts

Besanwali Simla Mirch

How to make Besan wali Simla Mirch | Simla Mirch ki Subzi | Capsicum Recipe
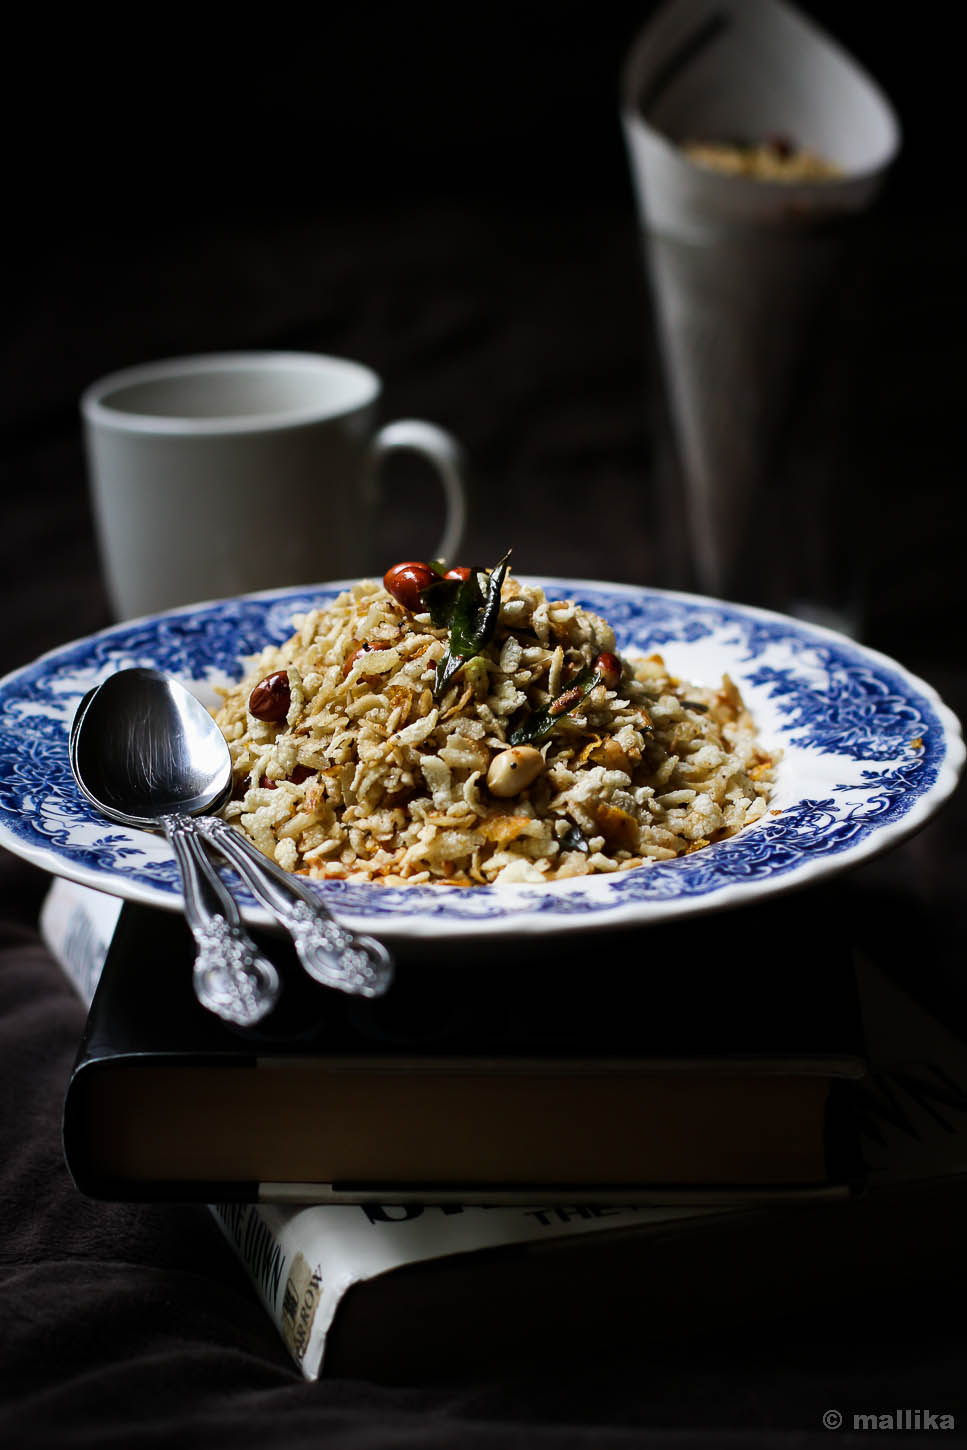
When the weather plunged low, it brought along bouts of cold, incessant sneezing and coughs that plagued our home. We fell sick in a row, taking turns to seize the bed and blanket. The bedside table saw our favorite magazines being replaced with a spread of ayurvedic tonics, amrutanjan and all kinds of inhalers for the most desired relief. What good were those magazines when our eyes threatened to water in a stream and our nose constantly bled phlegm? It seemed like a trending viral infection as each of us made our way in and out of the bed, and nearly all of whom I knew were suffering the way I did. I nearly survived each day of that heavy headiness with glasses of warm water, hot kashaayas and dozens of handkerchiefs by my side. Days have finally passed by, recuperating and feeling much better, apparently much slower than we had liked. Coughing and sneezing are showing signs of receding, though the chest is still heavy with congestion. I hate fighting the dreaded infection, but alas!

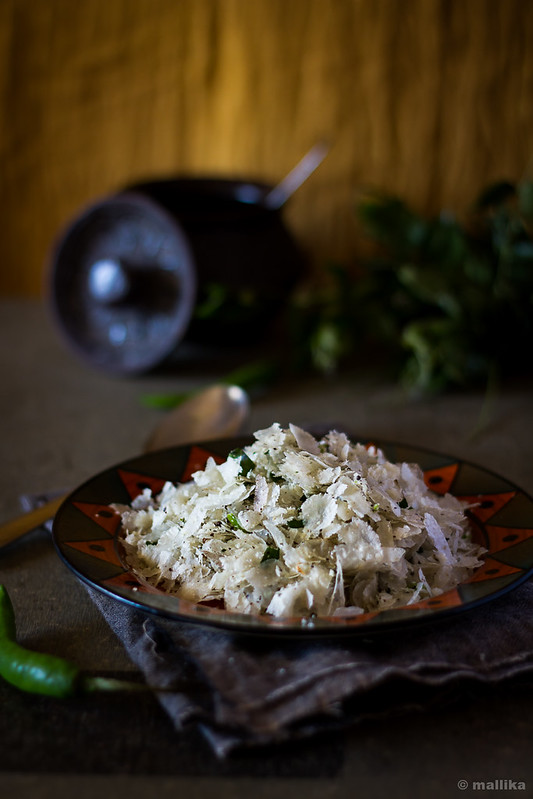
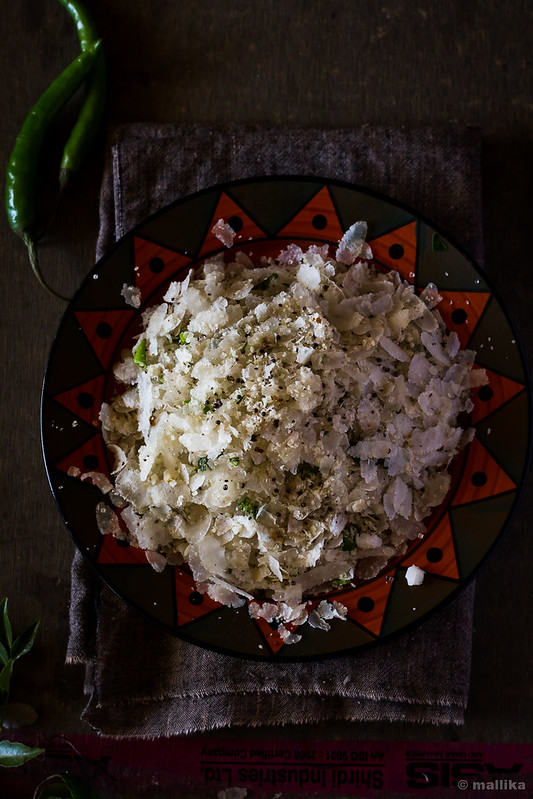
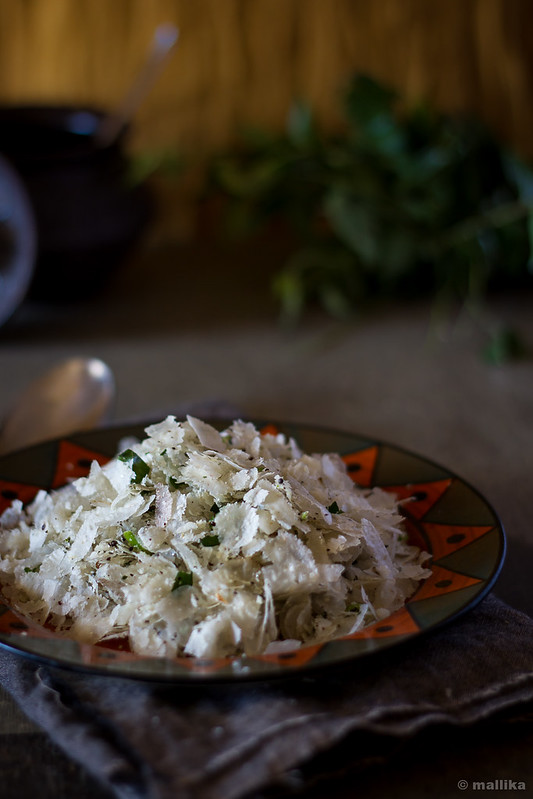
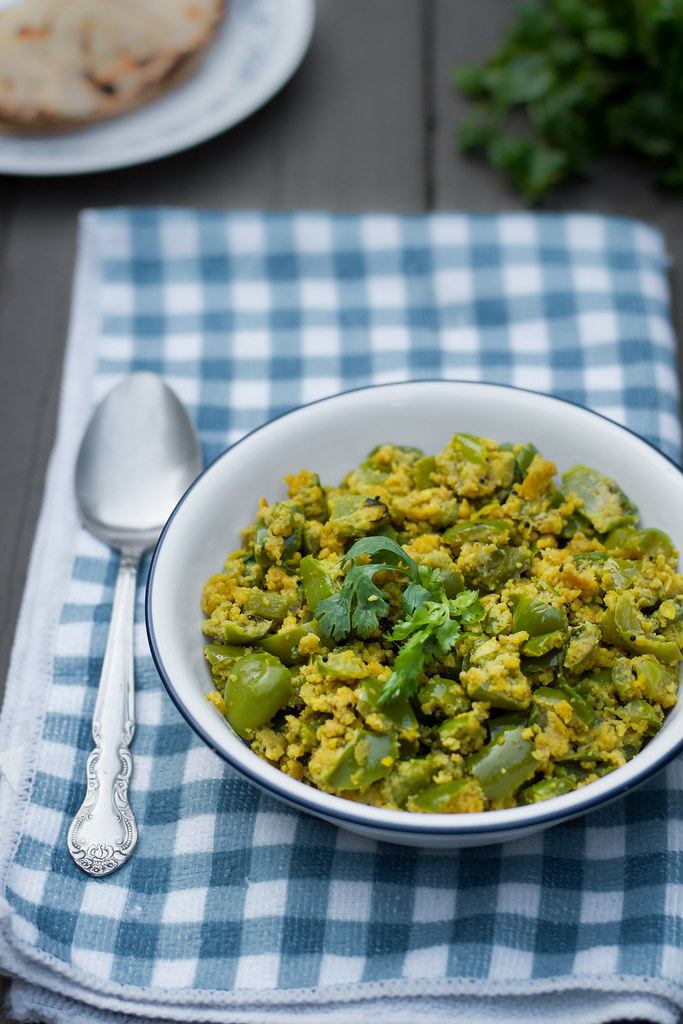
On my way to recovery, with spurs of intermittent coughs and an inhaler constantly plugged into my nostrils, I am back to blogging with this recipe for Besan wali Simla Mirch that has been my favorite for long. I have been looking forward to share this with you for a while, however each time we make it, it's wiped clean till the last bit. It was hard to save this portion for this post! That gives you an idea of how much we love it. It's a simple dish where green bell peppers are paired with roasted gram flour and other spices bringing out amazing flavors. On days when I am time pressed to make a simple dal to pair along, this recipe comes a savior as it takes care of both the vegetable and dal in a single dish. We usually serve this as a side dish for chapatis / phulkas along with salads. I hope you enjoy it as much as we do.

Besanwali Simla Mirch 1


Besan wali Simla Mirch

INGREDIENTS

1/2 cup gram flour / besan
3 medium sized capsicums, diced
1 inch Ginger, grated
1 tbsp. Oil
1 tsp. Mustard seeds
1 tsp. Red chili powder
1 tbsp. Coriander powder
1 tsp. Turmeric powder
3-4 tsp. Water
A generous pinch of asafoetida (hing)
1 tsp. sugar
Salt to taste

DIRECTIONS

In a wide mouthed pan, dry roast the gram flour (besan) it till it changes color slightly. The flour should smell fragrant as it is being roasted. Remove from the pan and set aside to cool.

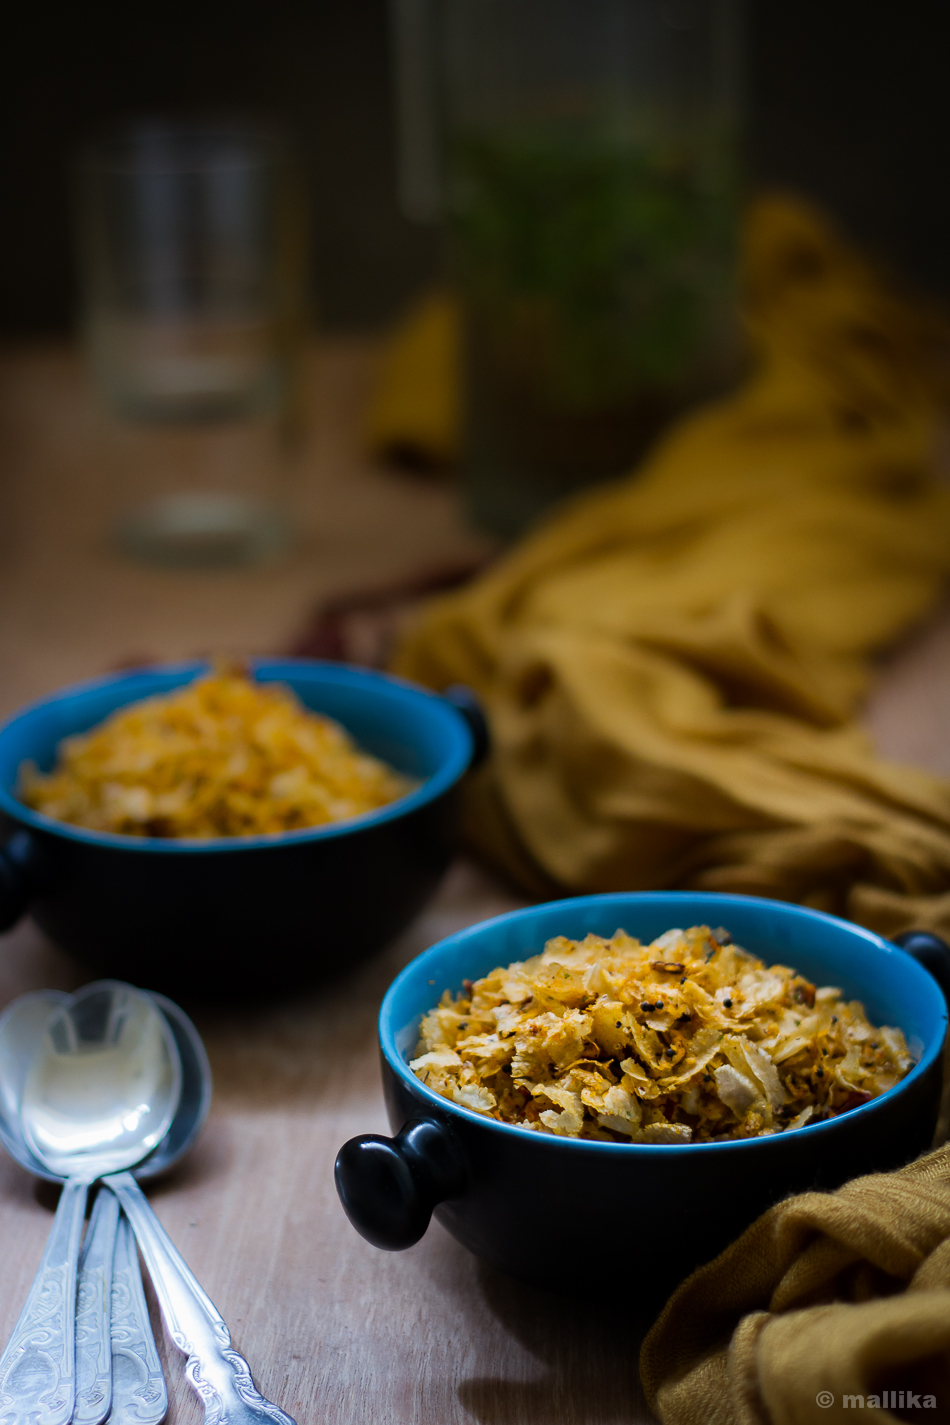
Heat oil in a pan. Add mustard seeds and fry till the seeds crackle. Add hing and chopped ginger and fry for a minute. Then add the diced capsicum along with turmeric powder and saute it for few minutes till it's cooked, yet has a nice crunch. Add chilli powder, coriander powder, salt and sugar to taste and saute further on a low flame.

Add the roasted gram flour, sprinkling a couple of teaspoons of water into it. Cook on low flame for 10 mins. Transfer to a serving dish and garnish with coriander leaves. Serve hot with rotis or as sides with steaming hot rice.

Poha Chiwda

How to make Poha Chiwda | Avalakki Chiwda | Namkeen | Indian Snacks
With a vacation gone by, now that I am back in India, kind of jostled into a routine, placed our daughter in school and have resumed work full time, you would probably expect this to be sort of a travelogue post walking you though dozens of photographs from places far known and unknown, painting a picturesque comprehension for each. Let me put all guesses to rest. I may have been back here, but my mind is still in the roving. It wanders back and forth to the good time we spent with D. I would love to do a short walk through of the places we visited, which was in plenty. We spent good moments doing things together in threesome, but I feel simply unwilling to dig into those photographs and bring those moments into words here. Some things are best left that way. Imprinted in memories. When mere words cannot do justice.

Poha Chiwda


So as it goes, this is no travelogue kind-a post, but a recipe for an Indian savory snack I made in huge batches during our time in the US. We savored it by bowls on several evenings sitting by the wooden porch that overlooked the thick woods in our backyard. The moments slipped away without notice as we sipped into hot chocolate and tea, scooping spoonfuls of chivda into our palms, slowly savoring its crunch, while we tended to the young tomato plants that bloomed tender yellow buds in our garden.

On weekdays when D was away at work, the chivda became my sole savior as I flipped through light reads under the wraps of summer and streaks of golden sunlight. As the afternoons tranced into early evenings, there were days when our little girl kept herself busy dressing up her dolls, setting up the table and putting up a pretend birthday party for them. I would briefly give her company in the initial part of the play, pretending to be her helper, then, slowly whisk away to make time for myself, to play with real pots and pans in my kitchen that belonged to me.

Then, there were other days when she would get busy soaking up her fingers and clothes in spectrum of colors as Elsa and Sofia got painted in colorful attire in a way only she would fantasize. Their frills and veils were painted in reds, greens, blues, browns and whatnot, smudged in uneven tones and stressed outside the lines meant to define these beautiful damsels. That's the time I borrowed for myself in the kitchen, to dish out some delectable savory snacks that made us through those evenings till we waited for D to return from work.

Poha Chiwda


This Poha Chivda may remind you of your childhood spent visiting your relatives or friends, or of festivals like Diwali and Navrathri, when aunts brought in bowls of savory snacks served along with piping hot tea. Poha Chivda was and probably is still a common tea time savory dish in many Indian homes, served mid-noon along with tea or coffee, often store-bought and rampantly available in transparent polythene packets in every bakery and grocery store possible. Almost every house probably has had some version of it. At home, we call them all just 'chivda', which simply means an assortment of fried and seasoned ingredients usually with a base of flattened rice or cornflakes. Chivdas come in varieties, but there is no hard and fast rule on how you wish to make and what you wish to season them with. The store-bought ones are usually heavily seasoned and spicy, but I like to break rules and keep it simple, light and flavorsome.

My version here is quick with minimal ingredients. Its quite common to use fried cashews, raisins and sesame seeds for a more assorted rich taste. It takes about 15-20 minutes to put all of this together from start to finish. You could use fried whole red chillies instead of red chilli powder to reduce heat further. If you wish to try a low fat version and bake the poha, let me know how it works for you. For once, when I tried a baking attempt at this, it failed miserably. Try this and let me know how you like it.

Poha Chiwda


Poha Chivda | Namkeen Chivda | Avalakki Chiwda | Seasoned Flattened Rice

INGREDIENTS

3 cups poha / flattened rice (use thick variety)
1/2 cup peanuts
1/2 cup roasted gram bengal dal / channa dal / huri kadale
2 sprig curry leaves
1 tsp. oil for tempering
1 tsp mustard seeds
1/4 tsp red chili powder
1 tbsp. sugar or as required
Salt to taste
Oil for deep frying

DIRECTIONS

Heat enough oil for deep frying in a wide mouth pan or kadai or wok. Using a wide mouth strainer or a slotted spoon, deep fry the poha in hot oil. Do this in batches so that you fry them evenly till they swell up and become crisp. Remove and drain over a plate lined with kitchen paper. Fry all of the poha and set aside. Into the same oil, fry the roasted bengal gram dal till its golden brown. Remove and drain again on a kitchen paper. Next, fry the peanuts in this oil till reddish brown in color and drain on a kitchen paper. Fry the curry leaves till they crisp up. Drain and set aside.

Heat a teaspoon of oil in a separate pan. Fry mustard seeds till they pop. Add the red chili powder and mix in all the fried ingredients. Sprinkle sugar and salt to taste. Roast this for 2-3 minutes on a low flame to ensure all the spice, salt and sugar is well combined into the poha mixture. Adjust the spice according to your taste by adding more red chili powder if required.

Allow the chivda mixture cool completely. You can store this in an air-tight container at room temperature for couple of weeks.

Poha Chiwda

TonDekayi HuLi_1


I had a craving last noon. It was a serious one to say. A craving that cracked me crazy. In a long time I reminded myself and yearned for a morsel of it. Just a morsel that would satisfy me and feel at peace. May be it was the dreary weather or miss of my daily dose of conversation over phone with amma-appa, ever since they whisked far away to explore the greener pastures of Europe for their annual holiday. But it kicked me hard in my stomach. So hard, that I reached out to my husband on a frantic phone call to make a trip down to Indian stores that very evening, in every sense of urgency. 'Twenty-eight miles just for a coconut? Can it not wait? Wasn't it two days ago we had been there?', he zapped in midst of Monday morning chaos at work, composing his thoughts over matters more important than a mere coconut. Damn! Who knew I would hanker so much for a simple bowl of huli! For a craving that has least sense of timing or inventory (could I just not do with the leftover sweetened coconut I used here?), but had to be appeased.

TonDekayi HuLi_prep1 TonDekayi HuLi_prep2 TonDekayi HuLi_prep3


Truth to be told, the past three months never saw a day with fresh coconut. We never bought one here. The Indian store we shop at barely stocks one or two sad looking coconuts, often sleeping on the verge of their expiry bed. The packaged grated coconut is a bigger risk to buy. What if it tuned out to be rancid? After all, with no packaging date on it whatsoever, I wonder for how long it has been sitting there. The brand new blender I bought, advertised it could churn blocks of ice to granita in seconds. It broke out within days with a nasty burnt smell while attempting a simple fruit-date smoothie. That, enough was a hint for me. It could not stand the heavy duty grinding of Indian spices and coconut.

TonDekayi HuLi_2


Coconut chutney, tambli, gojju, paladhya, menskai did not feature in our menus. Otherwise the usual course of tip-toeing and balancing myself between Northern and Southern cooking, here I was, survived mostly by chopping copious batches of onions, brewing gallons of tomatoes to broth, throwing mounts of red chillies and garam masalas in almost every fare I made, cooking basic Northern dishes much to my husband's delight and satisfaction. I did make occasional saar that didn't call for coconuts, served dosas with coconut-less-chutneys and palyas that went without the mellowed sweetness from the much-desired-generous-garnish of fresh coconut. The pre-packed coconut I had bought long ago assuming would be good for curries was so sweetened, that it was consumed in desserts and occasionally bitter-gourd stews.

The little Southerner in me craved for the real deal.

So it had to be. A day I called for huli. Made the way my mother makes it, smashing whole tondekayi (known as tindora in hindi / ivy gourd in English) and tossing them in a delicate coconut based curry infused with garlic tempering. Little toiling and more satisfaction of finally accomplishing it - done, served and relished. In feeling of worth and delirious joy like none other. Of clinching rice between fingers, mashing them through huli and drawing morsel by morsel of it with fingers to satisfy the insatiable desire of being home. Of savoring comfort food that reminds me of my mother. Of swaddling in spices that brings aromas of her kitchen into mine. Deep satisfaction. Simple joys.

TonDekayi HuLi


TonDekayi MeNasina HuLi | Ivy Gourd in Spiced Coconut Curry

INGREDIENTS

20-24 ivy gourds( also known as tondekayi/ tindla/ tindora)
1/2 tsp. turmeric powder
Salt to taste

Grind to Paste:

1 cup grated fresh coconut
1 tbsp. thick tamarind pulp
5-6 red chillies
1 tsp. jaggery

For Tempering:

2 tsp. coconut oil
1 tsp. mustard seeds
3-4 garlic pods, smashed
A twig of curry leaves

DIRECTIONS

Wash the ivy gourds in running water and clean them on a kitchen towel. Snip off the tips at both the ends (as shown in the pic above). Using the wide bladed knife, smash the ivy gourd down against the blade, putting just enough pressure using the palms of your hand to smash it. We generally use a pestle to do this. A heavy rolling pin works fine too. What you get is a rough smash of ivy gourds that is still in tact and not broken apart. Transfer the smashed ivy gourds into a pressure cooker along with turmeric powder and salt and just enough water to cover the vegetable. Pressure cook it for 2-3 whistles. Meanwhile, while ivy gourds are being cooked, proceed to making the coconut curry.

Grind to paste the grated fresh coconut along with tamarind pulp, red chillies, jaggery. Add little water to enable smooth grinding. Set aside.

Release the pressure off the cooker and transfer the cooked ivy gourds along with the water into a steel vessel. Add the ground coconut paste, stir well and bring to a rolling boil. Adjust salt and more water depending on your preferred consistency. Simmer and let it boil for 5-7 mins for the spices to be absorbed.

Prepare the tempering by heating coconut oil in a small kadhai / wok. Add mustard seeds to it. As it begins to splutter, add smashed garlic and curry leaves. Fry them till the garlic turns golden brown. Add this to the prepared huLi. Serve hot with steamed rice.

TonDekayi HuLi


Its cliché that I call myself a diehard foodie, because there are many encounters I make from time to time when I tell myself “oh! I dislike that” or “it tastes gross…. this is yuck!”. I hated papaya always but ate them with no favour because my parents reminded me how much good they would do. I could never stand the sight of jalebis and jahangiris from the time I can remember. I dislike the smell of flax and eggs in my bakes. The smell of strong coffee nauseates me even today. Breads, doughnuts and croissants were never my favourites. Several years now, I still despise samosas. My tummy aches each time I relish the street-side Indian chat. Bread Puddings at restaurants always taste gross. I could go on with this list.


Those exceptions apart, I still assert that I am a foodie at heart. As a kid, my parents did not face problems feeding me with whatever was made in our kitchen. My mom quotes often that even as a toddler I relished bitter gourd juice with as much penchant I did with any other fruit juice. I loved vegetables and fruits with far little exceptions. I was known to sneak peek into the kitchen in mom’s absence at odd hours and do furtive tasting of what was cooked for lunch and dinners. Frivolous memories of digging spoons into the prepared palya, skimming off the spiced watery part that floated on top of the huli saaru, sipping tumbler full of tamblis much ahead of lunch time, and flicking the roasted cashews and raisins that dotted the prepared halwas, till mom worried where they had disappeared still stay fresh and warm.

There were some dishes that could not be made ahead of time. They were meant to be made instantly and served immediately. One that attests my love for our cuisine is this paper-thin beaten rice spiced with green chillies and coconut. It’s really simplicity at its best and revokes fond memories of my school days when mom would whip this up in minutes to forage our hunger with such easy evening snacks. So dead simple and tastes great!


Hasi MeNasina Kayi Avalakki

INGREDIENTS

1 cup beaten rice (paper-thin variety)
1 tsp. coconut oil
1 tsp. mustard seeds
4-5 green chillies, finely crushed
1/4 cup fresh grated coconut
1 sprig curry leaves (optional)
1 tbsp. sugar
Salt to taste

DIRECTIONS

Crush the green chillies in a mortar and pestle or by hand. It's a common tradition to crush the chillies by hand, however to avoid the heat getting to your fingers, you may use mortar and pestle for the same. Crush these chillies into the fresh grated coconut so that they release all their flavors.

In a small kadai / wok, heat the coconut oil. Add mustard seeds and allow it to splutter. Add the curry leaves if using. Switch off the gas and allow it to cool. Add the crushed chillies and coconut along with the tempered oil into the beaten rice, followed by salt and sugar to taste. Toss everything well so that the beaten rice takes in the flavour and spices. Serve immediately. Accompanies well with upma for breakfast or evening snack with tea.

_MG_7299


Happy New Year 2014 folks! Welcome to the New Year with revived energies and new hopes for more dreams to fulfil. Hope you had a fabulous holiday time with your family and friends. I hope this new year brings good health, happiness, positivity, strength and peace to all.

We are getting over the holiday season and slowly bringing ourselves back into a routine. This year too, we headed to our home-town like we do every year during Christmas time. A short stay there with my parents and I was back home just before the new year eve. With work and office, this new year eve was a silent one for me. No frolicking, no partying. Just a retrospection.

_MG_7287


While I have rarely listed down resolutions for new year in the past, simply because I find it too imposing to live with, I hope to make small promises that will help me bring about some basic changes to my lifestyle. The idea is to make our life more simpler and healthier at every possible step. To control and eliminate processed food to every extent possible, to cut down on sugar and salt intake, to relish more fruits and vegetables in organic and raw, to bring in variety to our palate of food, above all to consider physical well-being as a priority. I shall indulge judiciously, not resist, yet with a tab on them. I would love to learn more, cook a lot good. I am yearning for that healthy rustic food that is comforting at heart. I wake up early and sleep quite late, a not so healthy habit that I need to bring a change to. I need more sleep and I wish to take that up seriously. It is not a diet regime, but the motto is to eat good to feel good. And to feel good is to bring happiness and positivity to mind and body.

_MG_7293


The recipe I share with you today is a rustic one that comes from the kitchens of my mother and grandmother. Kalasida Kempu Avalakki simply translates to Crushed Red Spices in Beaten Rice, where the whole red chillies are fried with mustard and curry leaves and then crushed by hand to a coarse texture. This releases all the spices from red chillies into the oil. Yum! I insist a good helping of sugar here as its the sweet, spice and salty flavour that makes this dish flavoursome. It's common to add chopped onions before serving, but I prefer it this way. Serve and consume this immediately as you make, since the paper-thin variety of beaten rice will lose its flakiness as it tends to absorb the moisture from the fresh grated coconut. This dish been there for ages in our traditional Havyaka homes, been loved by many for being so humble, often served as a snack with a cup of tea or an accompaniment to a breakfast. It takes just 5 minutes to put together, is gluten-free, easy on stomach, yet lip-smacking. It's a great tea-time snack, but is commonly served in breakfast as a side with uppittu. With all that partying and indulgent food you had over these holidays, this is an ideal recipe you will love to make. With just few everyday staple ingredients, its simplicity at it's best.

_MG_7305


Kalasida Kempu Avalakki

INGREDIENTS

1 cup beaten rice (paper-thin variety)
1 tsp. coconut oil
1 tsp. mustard seeds
4-5 whole red chillies (I've used Byaadgi variety)
1/4 cup fresh grated coconut
1 sprig curry leaves (optional)
1 tbsp. sugar
Salt to taste

DIRECTIONS

In a small kadai / wok, heat the coconut oil. Add mustard seeds and allow it to splutter. Add the red chillies along with curry leaves and fry them till the chillies swell and change their colour. Switch off the gas and allow it to cool. Crush the chillies well in their oil. I like to use my fingers for this, however if you worry about the heat getting to your hand use a mortar and pestle for the same. Once you see coarse flakes of chillies, add this spicy oil into the beaten rice, followed by fresh grated coconut, salt and sugar to taste. Toss everything well so that the beaten rice takes in the colour, flavour and spices. Serve immediately.

_MG_7310

HuLi Avalakki

Gojju Avalakki recipe, HuLi Avalakki recipe, Havyaka recipes
I have been busy lately. We’ve had lot of travel on our cards this month and have been really enjoying all of it. Earlier this month, we were off to Goa to celebrate our anniversary. Then we headed to Lucknow last week for my brother-in-law’s wedding. Next week, we'll be off travelling to Chennai to celebrate Diwali with the newly-weds. We are just back from the wedding, beginning to unpack and trying to settle our life into normalcy. After all those pre-nuptial sacraments and wedding ceremonies, the late night partying, lot of gluttony gourmandizing, home coming feels good and we are craving simplicity. Weddings like these bring about gastronomical feast and when it spans over a couple of days, over several meals, you know you’ve had excess of it. Here’s when we are in need of a serious post-holiday diet detox. To settle into something homely and comforting like this one.

Gojju Avalakki


As much as I wish, not on all days do I have the luxury of making a full-fledged breakfast at home. Most weekdays, we hugely depend on office cafeteria for our breakfast due to lack of time to make one, much unlike of what I have grown up being to. Infact back home at my parents place, breakfast was a 3 course affair and it still continues to be. Being the most enjoyable meal of the day, this is when the family comes together seated at the table and grows over healthy conversations. Starting with a coveted cup of morning tea, seldom a biscuit or rusk to accompany, it’s followed by a main course of either idli, dosa, upma, poha, roti subzi or anything solid and nutritious to fill the stomach, and always ends with a variety of fresh cut fruits to wrap the meal. It’s a norm to have homemade pickles, chutney powders, jams, honey, ghee, jaggery syrup within hands reach on the table to accompany our breakfast dish. Between my hectic routine, I may have gone away from those traditions of enjoying daily breakfast leisurely, but on weekends and days where mornings are at my luxury, I ascertain to make a breakfast that is filling and wholesome and boasts of my family traditions.

HuLi Avalakki


Gojju Avalakki, also commonly known as Huli Avalakki is a delicious Karnataka breakfast delicacy made from beaten rice (called as poha / avalakki). I wonder what took me so long to make this breakfast dish at home considering how much I love this dish. This is yet another dish that comes from the realms of our traditional kitchens. A dish that I have grown up eating and evokes strong memories and wonderful nostalgias. My mother made this effortlessly, particularly on special occasions like Shivrathri, Navarathi and Ganesh Chaturthi, where use of onion and garlic are forbidden. It often makes a prominent presence during festivities such as weddings, poojas and Hindu festivals. With a delectable combination of spicy, sour and sweet, this dish is so traditional that you would hardly find them in hotels and restaurants anywhere.

HuLi Avalakki


Gojju Avalakki / HuLi Avalakki

INGREDIENTS

1 cup Beaten rice (called as flattened rice / avalakki / poha – thick variety)
1 tbsp. Thick tamarind pulp
2 tsp. Sambhar powder
1 tbsp. Grated Jaggery
1 tsp. Turmeric Powder
½ cup Grated Coconut
Salt to taste
1 tbsp. Coconut Oil (highly recommended)
1 tsp. Mustard seeds
2 Broken Dry red chillies
1 tbsp. Groundnuts
A Sprig of Curry leaves
A pinch Asafoetida / Hing

DIRECTIONS

Wash the beaten rice / avalakki in a couple of washes of water. Drain off the water and allow the beaten rice to absorb little water retained during washing. It should swell and soften in 15 minutes, yet maintain it's shape and texture. Once softened, add a tsp. of coconut oil (optional, but helps in keeping the avalakki separate), salt to taste and a pinch of turmeric.

As the rice soaks, prepare the gojju / huLi masala for the avalakki. In a small chutney grinder, finely pulse the fresh grated coconut along with thick tamarind pulp, sambhar powder and grated jaggery. Do not add any additional water while grinding. Set aside.

For seasoning, heat a tbsp. of coconut oil in a thick bottomed pan and add mustard seeds. As they begin to crackle add the peanuts. Fry them for few minutes till the peanuts change their color. Add the red chillies, asafoetida / hing powder and fresh curry leaves. Fry further for few seconds. Next add the avalakki to this and mix well. Add in the prepared gojju / huLi masala to the avalakki and gently stir the entire mixture further for a few minutes. You may cover and cook also. However, I like to cook open to ensure there is no excess water trapped that may make the avalakki soggy. When cooked, turn off the fire and serve hot. Gojju Avalakki goes well with yoghurt/curd, chutney powder or plain jaggery.

HuLi Avalakki