It was 10 years ago that I made Bangalore my home. I was introduced to this city by my dad who moved here on course of his transferable job. Back then, I was a young girl in my teens who had just completed 12th grade, having given Common Entrance Test (CET), I was on an ambitious lookout for an engineering seat in a prestigious college.

Those were the days when dad was staying alone in Bangalore, before we moved with him later. It was post the CET exams during the holidays that dad would take us around the fairly novel city, showing us the city with passionate enthusiasm. Malls were limited, but we had stretches of Brigade and MGs to stroll, Cubbons and Lalbaugs for weekends, Bannerghatta zoos to spend the entire day... Coming to this city, it was with high hopes and ambitions to build a good education and career. Both happened and succeeded.

I loved the city the very first instance for a few reasons which I still hold close to my heart. One of the best weathers throughout the year, which no other city in this country enjoys as much we do. The tranquility and sereneness is truly a paradise which makes it called as 'the pensioner's city'. This is also a city of youngsters with a lot of life, enthusiasm, energy and spirit.

Those were the days when Bangalore was on the brink of development. IT was springing to boom. Today it's a different scene all together. Bangalore has changed and is seeing changes at a galloping pace. Weather is changing steadily and it's alarming to see the rate at which the city is massively growing. With the decrease in number of trees and the invariable increase in traffic, noise and pollution, we really need to ponder where we are heading to. Bangalore is my home. It pains to see the city and the lifestyle changing rapidly. It's just a hope that this change would decelerate in unhurried and dawdling manner.


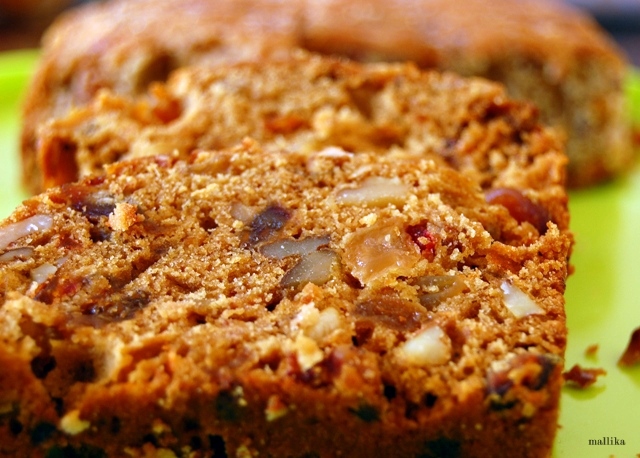
These were a few heavy words from my grave thoughts. The weather these days is very foggy and chill and I love to cozy myself in the warmth of the quilt. As I wake up every morning, the first thing I look forward to is a cup of steaming hot tea to warm up ourselves. These Raisin n' Walnut Cookies were made for these mornings and evenings to sip with the hot tea. They are just lovely with good crunch on the crust and chewy centers. You'll like them too.

Raisin n' Walnut Cookies

Dry Ingredients:

1 cup whole wheat flour (150 g)
1/2 cups all purpose flour (50 g)
1/2 tsp baking powder
1/2 cup brown sugar (50 gm)
A pinch of salt

Wet Ingredients:

1/2 cup unsalted cold butter (100 g)
1/2 tbsp ground flax seeds
3 tbsp warm water
1 tsp vanilla extract

Add in:

1/2 cup raisins (50 g)
1/2 cup chopped walnut kernels (50 g)


DIRECTIONS

First grind the flax seeds with warm water till they become a mushy egg-like paste. Set aside for later use.

Mix in all the dry ingredients, both the flours, baking powder, salt and sugar in a mixing bowl. Add in cold butter. Using your fingers, work the flour–sugar mixture into butter until dough resembles coarse breadcrumbs.

Next, add the ground flax meal paste along with vanilla extract to this. Fold in gently. Add the raisins and walnuts. Knead gently to form a smooth dough. Chill in fridge. Unlike last time where I was impatient to wait, I allowed the dough to chill for an hour in the fridge. Shape the cookies to rounds and flatten them a little. Place them on the baking tray and bake them a 180 deg C for about 10-15 minutes or till they brown. Remove and allow to cool before serving.

The nutty whole wheat flour combined with all purpose flour is a healthy permutation. Flax seeds have nutty flavors too. Raisins have a tangy sweetness and paired with these deeply wrinkled walnuts, all combined together bring out the best in them in form of these cookies. I have made these a little plumper this time, but the next time I may try to flatten them more for solely crispy baked cookies.


Indian curries are not as difficult to make as it is often assumed. There are few basic and common ingredients which you may have to stock in your pantry, like the coriander powder, cumin powder, garam masala (mélange of different spices), turmeric powder and chilli powder. You can win a crowd with just these basic stuffs. If one is a spice lover, then do not hesitate to extend yourself to add whole spices like cinnamon, cloves and cardamom, which can further add piquancy to the dishes.

Mutter Paneer is one such aromatic, spicy Punjabi curry made from Indian cottage. Paneer is just a simple homemade Indian cottage cheese which made without any aging. It's also a good alternative to use left over milk. Simple method to prepare it is by curdling heated milk with lemon juice or other food acids like vinegar. Curd and whey are allowed to stand and separate after which it is strained and squeezed from whey to form a colloidal solid curd mass.

This dish is probably one of the most frequently ordered dish in Indian restaurants. Most restaurants use full cream and mono-sodium glutamate, making the dish creamy and heavy. Although the taste would differ a little when made at home, it is still adorable and endearing delectable.


Mutter Paneer

INGREDIENTS

200 gms paneer cubed
250 gms shelled peas
3 medium tomatoes, pureed

Whole Spices:

1 tsp cumin seeds
2 bay leaves
A stick of cinammon
2 cloves
2 cardamoms

Dry spice powders:

1 tsps coriander powder
1 tsp cumin powder
1/2 tsp garam masala
1/2 tsp turmeric powder
1 tsp chilli powder

2 tbsps of oil
1 1/2 cups water
Salt to taste
Coriander leaves chopped fine to garnish

Grind to paste:

2 medium onions
1 tbsp ginger
1 tsps garlic
1 green chilli


DIRECTIONS

Fry or roast the cottage cheese (paneer) for few minutes till it has browned lightly on both sides. Drain and keep aside.

Heat the oil and fry the cumin seeds, bay leaves, stick of cinammon, cardamoms and cloves for few mins. Next add the ground onions paste for a minute or two till lightly brown. Now add the tomato puree and fry for a little while till you see oil leaving on the sides. Add in the dry powders, the salt and fresh cream (if required) and let it simmer for a few minutes. Now add the green peas and the fried paneer. Garnish mutter paneer with freshly chopped coriander leaves.

This recipe may look complicated, but it is not at all. It is just about having a stock of all the right ingredients. As I mentioned, since we love spices, I tend to use whole spices to add more spicy flavors to the dish. You may avoid them if preferred. In case you do not have the whole spices, increase the quantity of garam masala for spice. They would still be good. Addition of about 2 tbsps of heavy cream to this dish makes it rich and creamy. I skip on fresh cream and only use it occasionally. This dish is good with roti or basmati rice.


I recently made a batch of Strawberry Muffins again. A pot of strawberry preserve was almost seeing it's end and what could have been a better way for me than using them in muffins? Well, this time it wasn't butter-less, but yet low in fat as I substituted butter to vegetable oil. A kind of an experiment with cooking, which worked good. Blame it on my fridge which had no stock of butter as we used them all for breakfast breads! I had made quite a lot, which seemed to be lasting for a few days.

I don't generally enjoy eating the same over a period of days. As we usually get bored, it was the same case with these muffins as well. We loved them for a day or two, but then it seemed to last in the fridge for longer this time. So instead of discarding these precious sweet treats, I made muffin biscottis out of these.


I removed them from the fridge during the mid-day. Allowed them to come to room temperature and baked them early evening for our tea. As these were being baked, we could smell the warmth coming from the soft scented vanilla and fruity strawberry, gently drifting through the house, ditto like freshly baked biscuits right out of oven. As they cooled, they crisped well. Every gentle bite into these were wonderfully crusty, fresh and invigorating. Perfect to enjoy during our tea time.

No one can say these were made from left over muffins. Why don't you give them a try too?


Strawberry Muffin Biscotti

INGREDIENTS:

About 4-5 strawberry muffins
A little oil or butter to wax the baking tray

DIRECTIONS:

Gently remove the muffins from their paper cover base. Slice them thinly to about 1/2 cm or 0.2 inches thins if you prefer crisp biscotti, or about 1 cm thick if you want chewy treats.

Lightly oil the base of baking tray. You may avoid this step if required. Spread the muffin wafers on the tray. You can place them close and side by side as these won't rise any further. Bake them for 10 mins, more or less (depending on your oven) till the biscotti have browned lightly.


These simple and easy biscotti go really well with tea or evening coffee. Crisp and light, so easy that they can be done in less than 10 mins.


I am hell bent on not trying the Indian cuisine when we dine out at restaurants. Although most Indian restaurants expertise in good Indian food, I opine that we dine out for a change in the regular food we eat. It doesn't make sense to me to eat Tadka dal or Chole or Palak Paneer, unless if the hotel offers great Indian food and is known for that... On the other hand, I have come across people who just love to stick on to the same menu every time they eat out. I wonder how one never gets bored! For me it's a BIG NO NO! I love my life and food with a difference... be it Chinese, Italian, Mexican or even Middle Eastern food... Since we do not make them home very often, it's a pleasant change to dine outside once a while. And whenever we do, we love to explore different cuisines.

Being vegetarian does not limit our options. And that does not stop us from eating good food either. We even love and enjoy even basic stuffs like salads! One common kind of food that Indians often love to eat out is Indo-Chinese food. I am not sure where and how this concept evolved, but it definitely is a hit in this country with a large population of people loving street side food. Though I have never been hooked by street food considering cleanliness factors, most people would beg to disagree me on that.

Whenever we have such cravings, I make them home with much lesser oil and salt than what we get outside. One such food favorite of mine is simple flavorsome Chinese Hakka Noodles. I adore them truly. I made them over the weekend and they tasted wonderfully good.


Chinese Hakka Noodles

INGREDIENTS

2 cups Hakka Noodles, boiled and strained
2 tsp Garlic, finely chopped
1 tsp Red chilly flakes
1 small bunch Spring Onion
1 onion, diced
1 small capsicum, diced
1 tbsp shredded cabbage
1-2 green chilly, slit vertically
1 tsp soy sauce
1 tbsp tomato sauce
1 1/2 tbsp Oil
Salt to taste

DIRECTIONS

Cook noodles in boiling water as per the instructions on the pack.

In a wide mouthed pan/kadai, heat oil. Add garlic and green chillies and fry for a minute. Add onions and fry till transparent Now add capsicum and fry till it tenders. Next add shredded cabbage and fry for another minute. Add spring onions and continue frying for 2-3 minutes more. Now add boiled and strained noodles and salt (to taste) and mix well. Add soy sauce and tomato and mix it well. Top with red chilly flakes for spice. Hakka Noodles is ready to be served hot.


Making pizzas have never been tedious task. In fact, they are one of the simplest and the easiest to make, especially if you have the base ready. They make a complete meal by themselves. We love indulging in pizzas quite often. And I ensure I make them all home, including the base.

I generally use whole wheat flour crust base to give them a healthy touch. For me pizza is all about the toppings! So with loads of toppings on them, one can hardly identify the difference in taste between the wheat flour crust against the all purpose flour crust. I am a huge fan of thin crust pizzas, but for a change I decided to go for a deep pan pizza this time. They were actually good for the heavy topping that I use often as they hold them very well. The thick base against the heavy toppings. Perfect to hold the toppings even after they are cut to pieces. I consider to continue making deep pan pizzas again in future for sure.

I realize that I have been loving thin crusts, because pizzas from restaurants offer with light toppings and sauce on a heavy crust. Feels as if we are biting into bread more than the mild sauce and light toppings they come with. My pizzas hold loads of vegetables and good dose of cheese to complete them.


To make the pizza crust at home follow my previous post here. Just double the quantity of ingredients to be used. Infact I used three times the amount mentioned as I made a bigger batch. Also substitute the all purpose flour to whole wheat flour if you want to go the healthier way.

Roll the dough and transfer it to a pizza pan. A deep dish pizza would mean the dough is about 3/4 inch thick in height which would rise a little more on baking.

Tomato Basil Pizza Sauce

INGREDIENTS

8-10 pods of garlic, finely chopped
1 onion, finely chopped
1 1/2 cup tomato puree
1/4 cup tomato sauce, optional
Salt and paprika to taste
1/4 cup of fresh basil leaves, torn
Italian herbs, such as oregano / basil (optional)
2 tbsp olive oil

DIRECTIONS

Saute finely chopped garlic and onions in oil for 2 mins till they turn transparent. Add the tomato puree and stir well. Cook for atleast 15-20 minutes till it reduces and leaves oil from the sides of the pan. Add in the tomato sauce and stir well. Cook for another 5 minutes. Add in the freshly torn basil leaves, herbs (optional) and spices. Stir well. Turn off the flame and set aside to cool. Use this sauce to spread over the pizza base.


Deep Dish Pizza

Ingredients for Toppings:

50 gm mushrooms
50 gm onions
50 gm baby corn
50 gm yellow capsicum
50 gm red capsicum
50 gm cherry tomatoes
20 gm jalapenos

All the vegetables were chopped to small-medium sized chunks. Spread them on the sauce on the pizza base. You may choose vegetables of your choice. I did not have olives at hand, else they can be added too. If you dislike vegetables, then skip them and go for a Classic Margherita style pizza with just the sauce and cheese toppings.

For the cheese topping:

100 gm cheddar cheese
100 gm mozzarella cheese

No pizza is complete without cheese!!! Load your pizzas with dollops of cheese. I like my pizzas low on cheese. But if you are a cheese lover and calories don't bother you much, then don't stop your self to add more cheese. Pizzas can take them and they taste best when loaded with good amounts of cheese.


Bake them in oven for 20 minutes or till the crust has baked well and the cheese turns golden brown. Remove and garnish the top with oregano and chilli flakes. Using a pizza cutter, slice to pieces and serve hot.

This pizza was a delight to our afternoon lunch. Served with simple coleslaw, every bite into the pizza was flavored with combination of healthy vegetables sandwiched between the crusty whole wheat base and the baked cheesy top. A delight to a pizza lover's heart.


I bake cakes and cookies with no eggs or no butter with a lot of hesitation. You see, I have not had convincing results without these in the past. So my hesitation is valid. I do not have eggs at hand most often. I buy them only with an intention of making a dessert which I have planned in advance on my mind. Else, I never extend myself to cooking anything with eggs apart from desserts.

I am a perfectionist. I love my bakes to be perfect... rich in flavors and heavenly in mouth. When I follow a recipe, I ensure I stick to what measurements and ingredients the recipe asks for. I am always in dilemma when cooking with alternatives as they may not result to what they should be.

My search for alternatives to eggs haven't yielded good results either. Most common alternatives being agave nectar, unsweetened apple sauce, soy yogurt, silken tofu, flax seed powder, ener-g egg replacer, etc.. etc... etc... Most of these, or must I say, none of these are even available easily in Bangalore. Though off late, a few supermarkets have these imported stuffs on their racks, but the prices of imported goods are way too sky-rocketing that purchasing them at exorbitant prices makes no sense. I would rather enjoy them eating outside with no efforts at all!

Flax seeds were hardly available earlier. But they seem to be getting a little popular in bigger super markets. On one occasion when I had seen them in stock in the nearby Foodworld, I got my hands on them. I had been using them in muesli and granola, but never used them as an egg replacer. So when I came across reviews that flax seed can make good alternatives to eggs, I decided to use them in my chocolate-chip cookie recipe.


Chocolate-Chip Cookies

Dry Ingredients:

1 1/2 cups all purpose flour (200 g)
1/2 tsp baking powder
1/4 cup brown sugar (50 gm)
1/4 cup white sugar (50 gm)
A pinch of salt

Wet Ingredients:

1/2 cup unsalted cold butter (100 g)
1/2 tbsp ground flax seeds
1 tbsp warm water
1 tsp vanilla extract

Add-ons:

1 cup semi-sweet chocolate chips (100 g)

First grind the flax seeds with warm water till they become a mushy egg-like paste. Set aside for later use.

Mix in all the dry ingredients from the list above in a mixing bowl. Add in cold butter. Using your fingers, work the flour–sugar mixture into butter until dough resembles breadcrumbs.

Next, add the ground flax meal paste along with vanilla extract to this. Fold in gently. Add the chocolate chips. Knead gently to form a smooth dough. Chill in fridge if necessary. I was impatient to wait though. So I headed to bake them. Shape the cookies to rounds and flatten them a little. Place them on the baking tray and bake them a 180 deg C for about 10-15 minutes or till they brown. Remove and allow to cool before serving.


I am glad I tried this. The flax seed can hardly be noticed or even tasted. One would never imagine that the cookies contained them. They were great. Loved and enjoyed by all. Every bite into the freshly baked warm cookie was decadent and heavenly. It just made our day complete.

It's hard to believe that these are truly eggless! They were crunchy on the outside and chewy in the center. Way to go for a perfect cookie to be mastered!


I have a simple post today. Nothing much on my thoughts to pen down. I am back from a short, but adventurous holiday break and it feels great to unwind and refresh during the trip. Wish to have more of these often. Some simple pleasures are truly adorable!

Pumpkins have never worked well with me. Neither as a dessert nor in a curry. Apart from the Pumpkin Walnut Bread, which was certainly loved and adored by all, they haven't suited our tastes much though. I rarely bring them and whenever I do, they last for months in my freezer, finally ending to throw away half of it. I have almost stopped bringing them home. It's like a resolution. Pains to see so much of it being wasted.

One recent occasion saw me bringing pumpkin home again. Don't blame me - it's a temptation to buy when the prices hit low! The nearby store has a routine Wednesday sale on vegetables and fruits. So I ensure that I fill my crates and baskets to the brim every time I shop here on Wednesdays. As I unpacked the stuffs back home, I could see the dire look on my husband's face as he stared at that yellow vegetable as an evil thing.

I hoped to use them in pumpkin pies or make muffins, but even this time we were not in a mood for pumpkins. We need to kind of mentally prepare ourselves to enjoy yellow pumpkins. Wondering why! I doubt these can ever be my good friend! I ended up discarding a lot of it this time too and have resolved never to bring them again. Well, not even for an attempt!

Although, I did enjoy this simple roasted pumpkin seeds which I made a couple of days ago. Simple and nutty. Good for a lazy evening or a simple snack to munch on.


Simple Roasted Pumpkin Seeds

INGREDIENTS

Seeds from one pumpkin
Salt to taste
Chilli powder to taste

DIRECTIONS

Cut the yellow pumpkin to half. De-seed the pumpkin carefully. It can be very slimy to hold. So scoop them to a bowl. Tender seeds taste the best. Remove aged seeds if possible. They may be hard and too nutty to chew on.

Next, wash them thoroughly in running water till the slimy flesh on the seeds are removed. It may take some time, but it is worth the effort. Allow them to dry.

On a roasting pan, spread the pumpkin seeds and roast them on medium-low flame till they are lightly golden brown and crisp. Remove from heat and allow to cool. Season with salt and chilli powder to taste. You may also bake them in oven on 180 deg C for about 15 mins, tossing them on between.

They make a great healthy snack to munch on. Enjoy a healthy treat!


"Firstly, wishing all a Happy and Prosperous New Year 2010"

Initially, the sole purpose of this blog was to publish simple, easy, home cooked vegetarian recipes. However, I have been cooking and posting more desserts and bakes than what the blog originally called for. I see myself deviating from what was meant to be a simple Veg Bowl, love for life and simple good food... going the vegetarian way. I think I should reconsider renaming this blog for another one. Probably a Dessert Bowl or a Bake Bowl, yeah?

This blog has unfolded new facets of cooking to me and I am enjoying it thoroughly with every passing day. It has been fun working in kitchen trying new stuffs which were tried and tested by my mum long back but not by me. She is taken by surprise the way I have been evolving into a daring baker! I ought to continue with the bouquet of surprises for her :)

Recently, we were craving for some simple food. The Christmas gala and the New Year bash must have seen most of us diving into an array of heavy fat loaded food and creamy, fancy desserts, that now we ought to give rest to our tummies. So I made these simple yet, flavorsome ginger tambli/tambuli to accompany rice for our afternoon meal today.


Tambli or Tambulis are supposedly coolants and are commonly made in summers to beat the South Indian heat. They are best had with steaming hot rice. They are had as starters over steaming hot rice accompanied with pickles and papads. Varieties of these tamblis can be made from different ingredients ranging from ginger, garlic, various herbs, asafeotida or even methi seeds (fenugreek seeds). They are simple and easy to prepare and are generally coconut and yogurt based.

These were very common at home. Amma makes varieties of these. I am an ardent lover of these and can have them as is, even as a refreshing drink. Amma generally makes another gravy curry and a dry subzi whenever she makes tambli. They make great food for patients suffering from fever as they are very easily digestible. This will make you hungry within few hours if not accompanied by side dishes.


Shunti Tambli

INGREDIENTS

3/4 inch ginger pod
1 tsp cumin seeds
1 cup thin yogurt/buttermilk
2 Green chillies
1 tbsp Grated Coconut
Salt to taste

For tempering:

1 tsp oil
1 tsp Mustard Seeds
2 Red chillies
A pinch of asafoetida

DIRECTIONS

Grind the ginger, green chilli, coconut & cumin seeds to a smooth paste. Add thin curd or buttermilk along with salt to this & mix it well. Adjust the consistency by adding more water to this. Tamblis have a thin consistency. So add water if preferred.

For tempering, heat oil in a temper pan. Add mustard Seeds, 2 whole red chillies and a pinch of asafoetida. Fry till it begins to splutter. Add this tempering over the prepared tambli and close immediately.

Serve with steaming hot rice, papads and pickles. Enjoy!


We recently had a team pot luck lunch at our office. I am thrown into a flurry of confusion when it comes to cooking for a huge crowd... as huge as about 25 odd people. It gets a tough task then. Our pot luck lunch had too many varieties and the food palette was huge. To make a choice, either a vegetarian dish that complimented the main course or a dessert which I consider I am better at, put me into a shudder fit!

To opt for just another curry which would get lost in the already wide variety of dishes (yep, about 15 odds dishes) was not what I wanted. I definitely wanted mine to stand out of the crowd. So I settled for a dessert. Since I was the only one bringing dessert, I knew it was a not-so-easy task for me. A true challenge posed.

Baking was not a good option, as I would have to go through rounds of baking back to back to suffice the crowd. Since the luncheon was organized on a weekday, I had barely any time at hand to spare for an elaborate fancy dessert. I had to work at something that can be quick to whip up, looked worth tons of effort, grand to serve and tasted a connoisseur's delight.

When I brought out this Trifle Pudding post lunch, I was deluged with compliments. Most of them could not stop at just one helping. They came back for some more. Not just the overwhelming adulation, but the satisfied expressions on everyone's faces while devouring these was so comforting, that I was assured it was indeed a winner.


I have been repeatedly asked by my colleagues to make and bring these again! So I ought to share these here. This dessert is quick and easy. It takes less efforts to make this, but it does require some sitting time in the refrigerator. So plan a little ahead as it can't be made in a jiffy. Yet, it tastes heavenly and is great for a big gathering.

Trifle Pudding

Prepare the custard:

1 packet vanilla flavored custard
1/2 litre milk
1/2 cup sugar

Prepare the vanilla custard following the instructions from the custard pack. Dissolve the custard powder in milk. Add sugar. Heat it on low flame it it thickens and is cooked. Stir constantly to prevent from burning. Keep it in the refrigerator for an hour to cool.

Layer the cake:

1 loaf sponge cake
1 tbsp rum
1/2 cup coffee decoction
Fresh fruits, chopped (bananas, apples, peeled oranges, grapes, melons, pineapples, strawberries)
Dried fruits (Raisins, walnuts, dates, prunes)
Nuts (Cashews, almonds, pistachios)

Layer the base of the trifle bowl with a layer of sponge cake. Prepare a mixture of rum in coffee decoction. Sprinkle it gently over the sponge cake so that it absorbs it.


Next layer the cake with freshly chopped fruits. Use as much variety as possible. It tastes best. Top the fruits with dry fruits and nuts. Next spread a good helping of the prepared custard over this.

Repeat with another layer of sponge cake, topped with fruits and nuts and another layer of vanilla custard. Place it in the fridge for few hours (about 4-5 hrs). If you plan to serve it for lunch, prepare it the overnight and let if refrigerate. Remove from the fridge about 5-10 minutes before serving. Garnish with nuts or butterscotch nuts before serving.

This year too unfolded new challenges and we have dared to confront it. With the year ending on a good note, I wish everyone a Happy New Year.


Like every year, this year too I was in my hometown during the Christmas Eve. There is something mystical about being in Mangalore during this time of the year. With the Churches lit magnificently, carols sung, chimes ringing and the cribs bedecking, it takes me back to my fond memories of just being there, making merry and enjoying every moment.

Though Christmas was never celebrated at home, it always held a special space in my heart. After all it roots me back to my Catholic school where every year this season would be celebrated in utmost fiesta fashion. Infact, our parents encouraged us to celebrate in the ways we could. Bringing home plum cakes or wishing neighbors was never ruled out.

I love the spirit that Christmas brings. It fills the air with a lot of fun and merry everywhere. We love the walk into malls and shops where the Christmas trees are adorned with tiny tinsels, bells and stars. The glitter that these bring to the shops and malls makes the entire place look like we have walked into a fairy land from a fairy tale book. During this time of the year, there is laughter and fun and all are in holiday spirits. Uncork the champagne.... It's another year end. Amazing how a Christmas can infuse so much life into people.

On this occasion, I made the traditional Christmas cake. It's commonly called as Plum cake, though it doesn't contain any plums in it. It has fruits soaked in rum for close to a month. Loads of raisins, sultanas, apricots, tuti-fruities, fruit peels, dates, cashews, pistachios, almonds, etc. with the warm earthy spices infusing this cake with rich aromatic fruit and rum flavors.


Christmas Fruit Cake

INGREDIENTS

50 gms raisins
50 gms sultanas
50 gms apricots
50 gms cashews
50 gms almonds
25 gms dates
25 gms pistachios
1 tsp fruit peels (lemon & orange)
2 tbsp rum
1 tbsp orange juice
1 egg
100 gms butter
250 gms all purpose flour
50 gms granulated white sugar
50 gms brown sugar
A tbsp of water
1/4 tsp baking powder
1/2 tsp baking soda
1/2 tsp cinnamon powder
1/2 tsp cardamom powder
1/2 tsp clove powder
1/2 tsp salt


DIRECTIONS

Making the Fruit cake would require some preparations ahead of time. So plan in advance. Soak the raisins, sultanas, apricots and fruit peels in rum a few days ahead. Allow it to absorb all of it. Let it rest. Probably refrigerate it. That's how I left my fruits to soak. On the day of bake, bring them out to room temperature. Add the rest of the fruits, dried fruits and tuti-fruties (colored papaya bits) to it. Dust these with a little all purpose flour so as to prevent sinking in the cake batter.

In a pan, add the granulated white sugar with a tbsp of water. Bring it to a boil gently. Allow to bubble through till the sugar syrup turns golden brown. It burns very quickly if unattended. So take care that the sugar is deep golden brown in colour, but not burnt, else it will taste bitter. Add the butter and brown sugar to this and combine well for a minute. Turn off the flame and set this aside to cool a little. This is how the cake gets its golden brown colour. Next add a tbsp of orange juice.

In another bowl, beat an egg. Add this to the above mixture and combine well.

In a mixing bowl, mix all the dry ingredients like the all purpose flour, baking powder, baking soda, salt and the spices. Make a well in the centre of this, add the prepared wet mixture into this. Add in the dry fruits and nuts and fold gently till it's combined.


Spread the batter on a greased baking dish and bake it gently on 180 degrees for about 45 mins till a toothpick inserted comes out clean. Allow it to cool on cooling rack.

This may look like a lot of work, but this is what makes the fruit cake so different and special from the others. Fruit cake is allowed to mature a day or two before consuming. This allows the fruit flavors to infuse well into the cake, making it moist and richer with time. You may also wet a kitchen towel with rum and cover the cake in the rum soaked towel as I did. This makes it better and helps it last longer. This cake is lavish with fruits and nuts with every bite making you feel rich and heavenly!