When the city turned to shades of bright greens and pompous reds everywhere, the charm of Christmas played tunes over us too. The baubles, tinkles, Santa, Christmas tree and the twinkle lights hanging over our balcony sill still continue to charm and glow our house. My Chocolate Fruit Cake has seen it's end as my share of baked goodies have been distributed among family and friends and all are still relishing in the solace of home baked goodies. I am not done with the hangover yet and it feels nice to be soaked in the comfort of holiday opulence.

It's amazing to see people all around, all soaked in festive mood, mostly partying, shopping, exchanging greetings and sweet treats. I am having my share of gala time and as usual, I too can't stop myself from feeling excited about all this pomp and year end festivity. That's the real charm December month end is all about. And how I wish I could hold time in my fist and never let it go!

The year 2010 has been pretty good for us, in all aspects. It was fulfilling, bringing us joy and a year filled with contentment. Leaving behind year 2010 does bring a gloom on me for having to part with it, however heading towards the New Year 2011 brings more hope and joy as I look forward to a better year filled with excitement, new ventures, fulfilled dreams and ambitions, good luck and fortune. And to end this remarkable year and begin yet another adventurous year afresh, what can be better than to have a simple, yet delightful fruity dessert as my last post for this year.


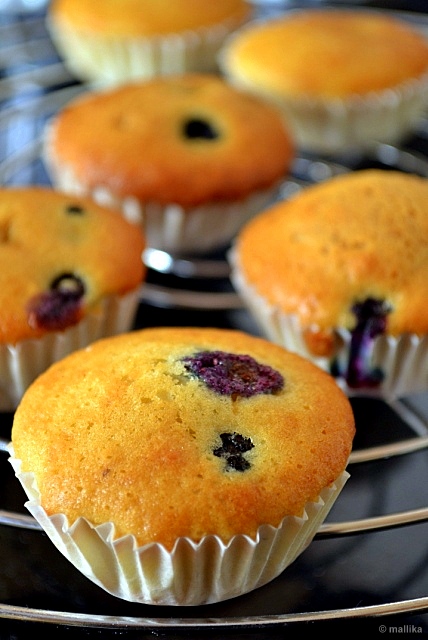
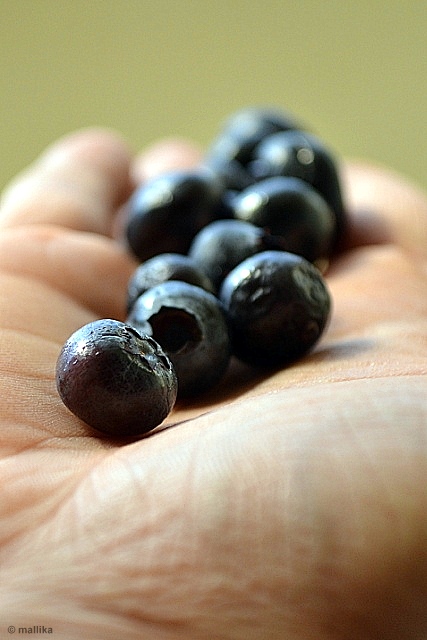
I was lucky to have a batch of fresh Blueberries at hand my husband brought from US recently. These berries are fragile and tend to catch fungus easily. A good amount of these Blueberries and Blackberries went into our daily cereal breakfast and we loved them. Before the last few could be wiped off completely, I decided I should reserve the last few to bake a batch of Blueberry Cupcakes, least to satiate my baking desire before the year ends. The cupcakes turned out fabulous and went to make good treats for our evening snack.

Blueberry Cupcakes

(Adapted from The Big Book of Baking)

INGREDIENTS

225 g plain flour
1 tsp baking soda
A pinch of salt
115 g caster sugar
80 g fresh blueberries
150 ml thick yogurt
2 eggs
3 tbsp low fat butter or margarine
1/2 tsp vanilla extract


DIRECTIONS

Pre-heat the oven to 375 deg F. Line 12 paper muffin cases in the muffin pan.

Sift the flour, bicarbonate of soda and salt into a large mixing bowl.

In a separate bowl, beat the eggs with sugar, butter and vanilla extract. Then stir in the yogurt and blueberries until thoroughly mixed. Add this fruit mixture to the dry ingredients and then stir them all together gently.

Divide the mixture equally between the paper cases about two third full. Bake in the pre-heated oven for 20-25 mins, or until risen and golden brown. Remove from oven and allow to cool. Frost them with choice of your topping as desired.


I tweaked the recipe a bit to suit us. The Big book of baking says 3 large eggs while I used just 2 small ones. I somehow felt that with 3 eggs, the egg-y flavors would get prominent and I am glad I stuck to 2. To compensate, I increased the quantity of baking soda by a bit. The taste was perfect with absolutely no compromise on it's texture.

An attempt to frost these cupcakes turned disastrous. I used whip cream powder and the whip cream just couldn't hold it's shape. Addition of more cream powder made it taste shoddy. Despite all possible workarounds, I had to give up on it. Anyways, I am not a big fan of cupcakes with heavy frostings, unless it was a pastry. The cake itself was so soft and spongy that I didn't see the need to frost it. The fruitiness from the berries complimented it well. I love the speckles of dotted blues in between the cake. Pretty, simple, yet cute!


I am sending these to Bakeomania hosted by Suma Rowjee of Cakes and More.

Yet another day to go and the year has come to an end. A New year is here to welcome. Bring out your dancing shoes, put on your best attire and head out for a wicked night out to have the best moments with your family and friends. Here's wishing everyone a Happy and a Prosperous New Year!


Christmas is in air and there is no escape from the charms of reds and greens that have taken over everywhere. Most malls and shops have massive Christmas trees laden with tantalizing gifts, trinket and baubles and the eye-catching year end sales is definitely gripping most of us. My shopping is done. Though the weather is chill and crisp outside, our Christmas tree glow has warmed up our living space.


My baking pans are out. Oven has been heating up and the warmth from the oven has kept my kitchen space cozy and comfortable. Though baking had taken a relative backseat in the past few weeks, with the summon of Christmas and New Year season, I am all set to don my baking cap in bid to bake the traditional Christmas cake at home.


Every year, Christmas season brings back fond memories from Mangalore when we as teens would eagerly look forward to those cakes and baked goodies sent by our neighbors. I can well remember the plates filled with baked goodies, neatly wrapped in a kitchen paper and beneath it unveiled beautifully adorned rose cookies, plum cakes, candies, biscuits, cashew macaroons and many other stuffs, names of which I can't even recall. Though there wasn't much festivity at our home per se, mom surely made it a point to get freshly baked fruit cakes (commonly called as Plum cakes in Mangalore and most parts of Southern India) which most bakeries in Mangalore excel in during this season. It was her way in calling for a celebration. One can't help but soak up in Yuletide feel as Mangalore gears up to transform to a tantalizing carnival city.


Christmas baking is not an essential ritual at home, but somehow the entire spirit of Christmas takes over me and I feel enthusiastic to celebrate this way. While my husband was away in US recently, I put aside thoughts of baking a cake this year. But as DH returned home, I was curiously questioned by him on what I would be baking this Christmas. Looks like he had absorbed the Christmas spirits well abroad. A little push again and I asked him what he would love to have for this Christmas and I instantly got a reply from him without any forethought saying "Fruit Cake please!". Last year I baked this Christmas Fruit cake which has been our favorites. This year however, I had no fruits soaking and hence sought for an instant solution. A bottle of coffee liquor perched on my kitchen shelf has been looking for my due attention since long and this time again it was Nigella for my rescue.


Chocolate Fruit Cake

(Adapted from Nigella’s book Feast: Food to Celebrate Life)

INGREDIENTS

350 grams dried soft prunes, chopped
250 grams raisins
125 grams currants
175 grams unsalted butter, softened
175 grams dark muscovado sugar
175 ml honey
125 ml coffee liqueur
2 oranges, zested and juiced
1 tsp homemade spice mix
2 tbsp good quality cocoa
2 eggs, beaten
150 grams plain flour
75 grams coarsely ground almonds
1 tsp baking powder
1 tsp baking soda


DIRECTIONS

Preheat the oven to 300 degrees F (150 degrees C).

Line the sides and bottom of a 9 inch spring-form pan with a layer of baking parchment paper. Cut the parchment material into strips that are twice as high as the tin itself. The height of the strips will protect the cake from catching on the outside of the cake tin and prevent over baking of the cake edges.

Place the fruit, butter, sugar, honey, coffee liqueur, orange zest and juice, mixed spice and cocoa into a large wide saucepan. Heat the mixture until it reaches a gentle boil, stirring the mixture gently as the butter melts. Simmer the mixture for 10 minutes. Remove the saucepan from the heat and leave to cool for 30 minutes.


After the mixture has cooled, add the beaten eggs, flour, ground almonds, baking powder and baking soda. Mix well with a wooden spoon until the ingredients have combined.

Carefully pour the fruitcake mixture into the lined cake tin. Transfer the cake tin to the oven and bake for 1 1/2 to 2 hours or until the top of the cake is firm, yet with a shiny and sticky look. At this point, insert a sharp knife into the middle of the cake and test for done. Remove and place the cake on a cooling rack. Once the cake has cooled, remove it from the tin. Top the cake with a glaze of your choice or candied fruits or simply place a few chocolate coated berries in the center and sprinkle some icing sugar on top of the cake.


I am inspired by Nigella’s book Feast: Food to Celebrate Life. You just can't go wrong with this recipe. I love the way Nigella decorates her cakes. Simple and homely, yet tastefully elegant. Using prunes in baking is fairly new to me. So I stuck to the recipe by words and the only change I made was to use 2 eggs instead of the 3 mentioned. To compensate, I increased the quantity of baking powder and soda from 1/2 tsp to 1 tsp. My mixed spice was homemade and freshly ground with cinnamon, cloves, cardamom and nutmeg going into it. This recipe fetches approximately a kilo of the cake.

The cake is rich, dark, moist and absolutely delicious... laden with goodness from fruits with strong notes from prunes, fruity richness from raisins, nuttiness from almonds, subtly spiced with earthy flavors from honey and muscovado sugar. If you love fruits in your cakes, you bet this will hit you with the right tones. Heavenly!


The festive spirit of Christmas embraces one and all as it spreads joy and happiness everywhere. Here's wishing everyone a Merry Christmas and a Happy New Year!

I am sending these to Bakeomania hosted by Suma Rowjee of Cakes and More. Also sending them to the Chocolate Extravaganza - Monthly Mingle hosted by Ria. Sarah of Maison Cupcake is hosting a new blogging challenge 'Forever Nigella' and here goes my entry for the same.


Time flies real fast and it’s hard to believe that an entire year has gone by and is steadily coming to an end. December is here and though I don't see much festivity beckoning the air at the moment, I am sure the latter part of month will be filled with lot more sight to behold as it comes alive with tinsel world lighting, fireworks and merriment. And I am eagerly looking forward to it.

Desserts haven't been ruling my kitchen off late for sometime now. DH has been away for a while and I am currently enveloped in the wings of mom's cooking, enjoying my stay at parent's place. I am not surprised if I end up with ounces of added extra weight, despite the slash in the desserts made and consumed. All courtesy, home cooked food by mummy! While I am thoroughly missing my kitchen, cooking, cutlery, gadgets, photography, along with the freedom of doing what my mind presides over, I am currently enjoying the bounty treats churned by mom lovingly on a daily basis.


It amazing how good cooks our moms turn out to be. I mean, it seems perfect when my mom throws in the spices judged by experience to create that aromatic dish with well balanced flavors, hitting the right flavors. It may be a simple dish, whether it's salt or spice, sweet or tang, there's a right balance. It's then I realize that I have a long long way to go. While my mother used to make exotic western desserts and bakes long while ago, these days she prefers to stick by traditional Indian meals. At times, it's a fusion food. But by and large, it's the Indian food that dominates her kitchen. I am taking the privilege of learning some traditional recipes which I hope to re-create in my kitchen soon and post here as well. But for the moment, I am posting this Blueberry Crumble that I made for DH before his departure.


Blueberry Crumble

INGREDIENTS

1/2 cup Blueberry Pie Filling
50 gm unsalted butter
100 gm plain flour
50 gm cup confectioner's sugar

DIRECTIONS

Pre-heat the oven first. Into a pie dish / tart mould or ramekins, spoon the blueberry pie filling and level the base. Fetching fresh blueberries was not an option for me, so I settled to use Mother Maid's Blueberry Pie Filling. Fresh Blueberries would probably give out more flavors. In case you are using Keep it aside till we prepare the crumbs.

Combine the confectioner's sugar and flour in a wide mouth bowl. Quickly cut in the butter into this mixture using your fingers till the entire mixture resembles like coarse bread crumbs. Transfer these crumbs to top the blueberry filling till it's completely covered. Bake in a pre-heated oven to 180 deg C for approximately 20-30 minutes till the top is baked golden brown. Remove and allow to cool for 10 mins. Serve warm with a dollop of vanilla ice cream.


If you love the biscuit base, you can spread a handful of the crumble mixture on the tart base, then follow it with fruit on this, ending with the crumble for the topping. This Blueberry Crumble is totally effortless and can be put in matter of few mins.

I have about 3 tartlet moulds which are almost 30 years old. They were owned by my mother earlier and then handed down to me. I made one batch in these cute small tartlet mould and next in a medium sized pie dish. Fabulous for single helpings. The gooey, fruity tart blueberry base offsets well with the biscuit crumble topping. Served warm with a generous dollop of ice cream, they are absolutely heavenly!


I am without my camera from past few days and I feel totally handicapped. With it becoming a part of my routine life, just like any other day to day activity like cooking, serving and then photographing the cooked :). Just being left alone without it pushes me to be impulsive and is driving me crazy. It's one of those essentials without which I am not at ease. For the moment, I am left with my Sony Ericsson C510 which I hardly use and most definitely not when it comes to food photography!

I feel almost guilty posting this here. This one comes from my drafts that's been sitting idle for long. With the day being fairly warm and sunny, what followed was a very simple South Indian lunch. And to end it's simplicity, we treated ourselves with this gorgeous Indian beverage dessert, Falooda. I am not sure if I would call this a beverage or a dessert! Either ways, they are great for sure!

Falooda, a popular chilled beverage dessert is served in tall glasses, filled to the brim and topped with dollops of ice cream is made primarily by mixing delicately flavored rose milk with vermicelli and tapioca seeds. What a perfect way to cool off the summer heat! With the addition of vermicelli, tapioca seeds and rose milk, this can get quite filling. So make sure you have your hunger pangs on, else this can get too stodgy.


This is one such treats that brings reminiscence of my childhood. Those evening hangouts on Mumbai streets or Pabbas Ice cream parlors in Mangalore, where shopping craze were endless and when hunger pangs meddled us through those moments, a dash into these ice cream parlors with family and friends meant time spent over good food, chit chat talks and stress unwound.

Falooda

INGREDIENTS

1/2 cup falooda sev (fine roasted vermicelli)
1 cup chilled milk
Sugar, to taste
Few almonds and pistachios, chopped
2 tbsps sabza, (basil seeds, tukmaria)
1/4 tsp rose essence
2 scoops ice cream of your choice


DIRECTIONS

Into the chilled milk, add the sugar and rose essence to taste and mix well. Add one scoop of vanilla ice cream to this and churn well. This gives it a nice thick texture. Chill this in refrigerator till it's needed.

Next, boil the vermicelli in water till cooked al dente. Strain the cooked vermicelli and keep them aside to cool. Discard the water. Chill this as well in refrigerator till needed.

In a bowl, submerge the sabza seeds (also known as Basis seeds) in sufficient water for about 20-30 mins. These seeds swell up beautifully and will look transparent with an eye at the center. Strain and discard the excess water. Reserve the puffed up subza for assembling the falooda.

Assemble the Falooda:

I chose shot glasses to assemble the Falooda. Traditionally, this is done in tall glasses. So make your choice. In each glass, place the vermicelli till it reaches 1/5th the glass height. Top this with a tablespoon or more of soaked sabza seeds.

Pour in the chilled rose milk till just below the rim. Add the chopped nuts and top it a scoop of ice cream of your choice. Garnish with candied cherries. Serve chilled.


Most ice cream parlors add jelly cubes to this. I opted to leave it as I am not very fond of them. You may add them as per your preference. Also care for how much of rose essence you use. The one I used was pretty strong, just a few drops were sufficient to bring deep flavors and colors. You may opt for rose syrup too. But judge how much of it you would need.

Instead of serving these in tall glasses, I chose for smaller treats in shot glasses since it was our post lunch dessert. We loved this thought. They were neither too filling nor heavy, just right. This pot of falooda gorgeously topped with ice cream went on a melting spree and it played a spoilt sport for my photography that sunny day. Rose is one of my favorite flavors and least exploited one too, so that gives me another excuse to make these more often. Nevertheless, this is something I will make more often, not just for us, but for future get-together parties too.


I am not sure where I first saw Fro yo, but I do remember hoping on to David Lebovitz's site long time ago to understand the basics of ice cream making at home. Nevertheless, he did inspired me to make ice cream after drooling over those gorgeous treats on his website to revive my long lost desire to make ice cream at home.

Being an Indian, yogurt comes as an inseparable part of our daily meals. Our beloved yogurt is mostly set at home using fresh milk. Yogurt in dessert may not be as common, but not so uncommon too. Off late, flavored yogurt, which is a fairly new thing is scoring in Indian markets and many people, including me have been buying couple of them from our neighboring outlet which has a host of brands and flavors. There's nothing strikingly different about flavored yogurt since I find them in close association to our very own Indian dessert, Srikhand when it comes to flavors and texture. Yeah, almost.

While we have pro-biotic ice creams, I am not sure why the frozen yogurt (frozen yogurt is different from flavored yogurt) concept hasn't evolved yet in India. We hardly find them anywhere in stores here, atleast I have never come across any. Do hope we soon have companies coming up with this concept, terming it tasty and healthier than ice-creams.

On a trip back home to India, my brother in law was kind enough to get a tin of blueberries which is not an Indian fruit, nor available anywhere here. I am glad to experiment this Blueberry Fro Yo or Frozen yogurt, which is a refreshing, tangy dessert that combines the flavors and textures of ice cream and sherbet. It is slightly more tart than ice cream, as well as lower in fat (due to the use of pure milk yogurt instead of cream).


Blueberry Fro Yo

INGREDIENTS

1 cup thick hung yogurt
1/2 tsp vanilla extract
1/4 cup frozen blueberries
1/2 cup powdered sugar

DIRECTIONS

Transfer the blueberries and their juice to a blender. Add the yogurt and rest of the ingredients and blend until the mixture is smooth and homogeneous. Keep a handful of blueberries aside if you like those fruity bites in the fro yo. Since I used frozen berries, my best option was to blend them all till smooth. You may also add in a teaspoon of fresh lemon juice, however since my yogurt was mature and tangy I did not add any.

Transfer to an air tight container and chill for an hour. If you own an ice cream maker, freeze in your ice cream maker according to the manufacturer’s instructions. Else, remove from freezer and beat the fro yo to reduce crystallization. Use a hand blender or a fork to beat it vigorously. Freeze again for another 30-40 mins. As it begins to set, beat it again to break all the ice crystals. Repeat a couple of times. This can be a tedious task, but this is what results in a smoother fro yo. When ready to serve, remove and allow it to sit for 2-3 mins and scoop to serve.


Mine did have a bit of crystallization which you can notice in the picture, owing to the fact that my hung yogurt did have considerable amount of water content in it. I just let it hang for 30 mins and went off with the recipe. Probably a real thick yogurt in which the water is allowed to drain off for a few hours may result in a more creamier, less crystallized dessert. It had a texture like ice cream with candy like feel which we totally loved, light and healthy :)

It's best to serve this dessert fresh, within a day. Homemade ice creams and frozen yogurt do not stay well for long. It is important to cover the yogurt with cling film or freeze it in an air tight container, so that other flavors avoid getting into the dessert. Top with fresh berries or berry sauce before serving if you like. Very tart, damn refreshing! Enjoy!


"May the festival of lights enlighten your home and heart with peace and serenity. Wishing you all loads of joy and happiness on Diwali." Hope you guys are having a blast with your family and friends this Diwali season. Wishing you all a Happy Diwali and a fabulous year ahead. Do hope you indulged in those special and traditional sweets and savories!

Our Diwali was safe and environmental friendly with no cracker burst. Of course the traditional affair of waking up early for the ritual oil bath, followed by drawing rangoli in front of our house, prayers, distributing sweets to family and friends, lighting of diyas in the evening, followed by puja and prayers made our day totally festive. Our lunch was heavy so were snacks and the dinner. After all that festivity, we had to settle for a simple breakfast the next day to escape from the heavy treats we enjoyed the previous day. This rice semiya upma is my perfect solution to an easy, simple breakfast. It's quick and requires bare minimum ingredients. Also being wholesome and healthy, yet it is completely satisfying. I make semiya upma often in different ways, but this method is easy and one of our favorites, especially with my DH.


Simple Rice Semiya Upma

INGREDIENTS

1 cup rice semiya
1 tbsp oil
1 tsp mustard seeds
1 tsp urad dal
1 tsp channa dal
Few curry leaves
1-2 green chillies, slit vertically
Few roasted peanuts
Salt to taste
1 tsp lemon juice


DIRECTIONS

Cook the rice semiya as per the instructions on the pack. I like to use Dragon Rice Semiya since it retains good texture even after steaming. Traditionally making rice vermicelli was a tedious task, which involved making it from scratch. The cooked dough would be run through the semiya press device and then strands of steamed rice semiya are tempered. Thankfully, life is now easy with ready to cook packets. Cook the semiya in water till just done. Drain the water completely and cover it so that it cooks further in its own steam.

Heat a tbsp of oil. Add mustard seeds, urad dal and channa dal. Fry it on medium high till the dals turn golden brown. Next add in the curry leaves, the roasted peanuts and green chillies and stir fry. Add the cooked rice semiya and cook for another 5 minutes till all the spices are mixed well. Adjust the salt to taste. Turn off the flame and add the lemon juice in the end. Mix well and serve hot. Simple Rice Semiya Upma is ready to serve.

This dish is not just good for breakfast, but makes for an evening snack too. This upma is spiced with simple flavors. Lemon adds to the tanginess against the spice from green chillies.

Posting a sweet dish would have been apt for Diwali, but with most blogs hosting sweets and desserts for this season, I decided to post something different. Hop on to see and make terrific sweet preparations this festive season. You make like to try these Indian sweets to brighten up your Diwali. Hope you have a bright and prosperous Diwali.


My dad is a good cook, except for the fact that he rarely ventures into kitchen and cooking :D. There are a few dishes however he does attempt occasionally to keep his culinary skills at bay. He has a good understanding of salt and spices, one of the key factors to being a good cook. He can make a simple tomato tava fry or even our traditional affair of his beloved Huli with simplicity, yet perfection. One of his favorite always remains this urad dal vada or the fried lentil dumplings. And if you ever expressed a craving for these, just the word is enough for him to don the cooks cap and please you with these vadas. One wouldn't disagree that he indeed is a good cook.

When we recently got a chance to taste the fresh hot vadas, right out of the frying pan to the salver, pairing them with freshly ground spicy coconut chutney, we couldn't stop ourselves from savoring each of these endlessly. These were surely the best treat we could ask for that evening. His vadas are no doubt excellent and I do admit men do make great cooks ;). Each of us must have served ourselves several helpings back to back, to an extent that by the end, almost none were left for dad himself. I am not a fan of fried stuffs, but a few days later, I felt too tempted to try them myself at home. And my temptation was beyond just vadas, I was keen on making these chat-pata Dahi vadas. One call away to dad to get the exact recipe and the next moment these vadas were all ready, some to eaten and rest to be drowned in yogurt dressing.


Dahi Vada

INGREDIENTS

Urad dal Vada

1 cup urad dal
1 tsp grated ginger
8-10 peppercorns
3 green chillies, well chopped
1 sprig curry leaves, finely chopped
Salt to taste
Oil, for deep frying

For the Dahi/Yogurt Dressing

3 cups of yogurt
Salt and sugar to taste
1 tsp red chilli powder
1 tsp Jeera/Cumin powder
1 tsp chaat masala
1-2 tbsps of tamarind dates chutney
Finely chopped coriander leaves, to garnish

DIRECTIONS

Wash and soak the urad dal in water for about 4hrs. Drain all the water out and grind it to a paste with little or no water. Add in the rest of the ingredients. Heat oil in a frying pan. When the oil is hot enough, drop blobs of the batter. Use a spoon and with the help of your fingers, tip the thick batter gently into the hot oil. Fry gently on all sides on medium low heat till it's golden brown. Remove and allow the excess oil to drain on a kitchen paper. The vadas are ready to be served.


To make dahi vadas, add in salt and sugar to the yogurt. If you like sweeter version, add in more sugar. Also consider that tamarind chutney has a hint of sweetness in it too.

Dip the vadas in warm water and gently squeeze out the water from it. Lay the vadas in a serving dish. Top it well with yogurt till it's covered completely. For best results, soak the vadas for at least a couple of hours before serving.

To add body and flavor, top them with tamarind chutney. Sprinkle chili powder, cumin powder and chaat masala evenly over it. Garnish with coriander leaves.

I am particular about the tamarind chutney in my dahi vadas, since they have the power to elevate your fourth senses to a greater level! This dish is a burst of varied flavors - salt and sweet, spicy and tangy flavors over these lentil dumplings can send a tickling sensation down your taste buds. I bet you will love them too. They make an excellent dish for large gatherings and parties too.


Amaranth greens, also called the Chinese spinach is a common leafy vegetable available in India. It's popularly known as dantina soppu or harive soppu in Kannada and is more commonly used in South Indian cuisine. They come in two varieties, the green leaves and the reddish tint leaves. Amaranth leaves are coarser and denser than spinach and fenugreek leaves when cooked.

There aren't many recipes that I make with amaranth leaves, neither do I get them home as often as spinach or fenugreek leaves. If you have any recipe for these leaves, do share with me. I am always on the lookout for new recipes which make our lunch different from the usual. My recipe here is using the red amaranth leaves.

These leaves are an excellent source of vitamins and minerals, however due to considerably higher content of oxalic acid in them, it interferes in the absorption of calcium and zinc in the body. Hence, it is also suggested that people with kidney disorders, gout or arthritis, should consume it in smaller quantities. Reheating of cooked amaranth greens is also discouraged, due to nitrate conversion in the leaves. One of the best methods to consume these leaves without having to recook them is in form of this chutney and we love it this way.

This Chutney is very simple and takes a matter of hardly few minutes to prepare. It is extremely tasty and easy to make. What's best is it requires no coconut, hence reducing your job too!


Amaranth/Dantina Soppu Chutney

INGREDIENTS:

1 bunch Amaranth leaves
3 green chillies
2 tsp tamarind pulp
1/2 tsp jaggery (optional)
Salt to taste
1 tsp oil

Seasoning:

1 tsp oil
Mustard seeds-1 tsp
Urad dal- 2 tsp
Red chillies- 2-3
Hing-a pinch

DIRECTIONS

Wash the Amaranth leaves a couple of times in running water and keep them aside. In a kadai/pan, pour little oil and fry green chillies for a few seconds. Once the green chillies have blisters on then, add the cut amaranth leaves and fry them for 2-3 mins till the leaves get wilted and cooked. Turn off the flame and allow it to cool down.

Once cooled, add the tamarind pulp, jaggery (optional) and salt to taste. Grind this coarsely with little or no water.

To season this chutney, heat little oil in a pan. Add in the mustard seeds, urad dal, hing and broken red chillies. Fry them till the mustard begins to splutter. I love the aromas that rise from the seasoning, they are heavenly! Add this seasoning to the chutney and mix well. Serve with hot rice or rotis.
Another variation to this chutney is to exclude urad dal and add crushed garlic cloves instead to the seasoning. They add a lot of flavor and health factor. The oil that is released from the red chillies while frying them for seasoning adds an amazing aroma to this dish, making this chutney extremely tasty and flavorsome. This tangy amaranth chutney not only tastes yummy, but goes very well with hot rice, rotis or even dosa.

Lauki Malai Kofta

Make Lauki Malai Kofta | Lauki Malai Kofta Recipe
Apologies guys! It's been some time since I have been away from blogging and the blog world. I did take a month's break from blogging to wrap up other important work on my list, but extended it to two months! Also, my health took a toll, which took longer for me to be back here. I am sure I have missed a lot on other spaces, but I will soon resume to catch up with you guys.

During my absence, I received lot of responses from my readers and followers. I was often complimented for my bakes and desserts, while was also requested why common everyday cooking hardly saw the space. I had to ponder. Somehow, I wondered if everyday cooking needs to be mentioned here. There are hundreds of recipes and I know it would be great to jot them here. But, I put up this space as a repository for my own future reference too, so I can come back to view those recipes.

There have been many requests for Indian recipes, breakfast dishes, main course meals, quick bites, savories and much more beyond just desserts, no matter how common they may sound to us. So with my comeback, I promise to bring more of these.

One of the main course recipes I had seen a while ago was this Makhani Masala from ecurry. I totally fell in love with this Malai Kofta recipe. The rich dumplings in creamy gravy looked so perfect and tempting, as if they were taken off a restaurant menu. I had to try them to convince myself that they could replicate the flavors too. I followed Soma's Makhani Masala recipe exactly the same way. For the dumpling however, I used Lauki koftas instead of paneer, just to put in some health and reduce on guilt of eating this rich gravy ;). I have made Lauki koftas in the regular low fat gravy way on many occasions, but this creamy version is surely the one you will crave for those occasional treats. And yes, do reserve this for those special occasions... where you want to be showered with compliments of being a Master Chef!

The recipe may seem long and intimidating, but I promise you, it's worth every bit.

Lauki Malai Kofta

For the Lauki Koftas

INGREDIENTS

1 big bottle gourd/lauki, grated and water squeezed
1 green chili, finely chopped
1 tsp garam masala
1 tsp red chili powder
Cornflour to bind
Salt to taste

DIRECTIONS:

Bind all the above ingredients with cornflour to form a dough. Bottle gourd has a lot of water content, hence it's best to add salt to the grated bottle gourd and leave it aside for 10 mins before squeezing all the water away. Reserve this water for the gravy to be made later. You may use cornflour or chickpea flour to bind the ingredients. Make lemon sized balls and deep fry in oil on low flame till the koftas are cooked and turn golden brown in color. Keep aside till the gravy is made.

Lauki Koftas are delicious by themselves and served with hari chutney, they make good party appetizers too. When I make these, I always make more, because by the time they are out of the fry pan, they are grabbed and gone within few minutes. Proceed below to make the makhani masala, which you can make ahead in time and freeze/refrigerate till ready to use.

Makhani Masala

INGREDIENTS

1/2 tbsp ginger garlic paste
1/2 cup onion paste
2 bay leaves
2 black cardamoms
2 green cardamoms
1 tsp fenugreek/methi seeds
1/2 tbsp kasuri methi (dried fenugreek leaves)
5 cups pureed fresh tomato
1 teaspoon red chili powder
1/2 teaspoon cinnamon powder
Salt to taste
3 hot green chillies slit (optional)
1/2 cup melted butter/ghee
1.5 cups heavy cream (I used Amul cream)
4 cups whole milk
1 tablespoon cashews, soaked and ground into a paste
3 teaspoons kasoori methi (dried fenugreek leaves available at the Indian groceries)

DIRECTIONS:

Heat butter/ghee/oil in a pan. Add bay leaves, cardamoms and fenugreek seeds. As the seeds begin to sizzle, add in the ginger garlic paste, onion paste, chili powder and stir fry till the fat separates. Add tomato paste, green chillies, cinnamon powder and crushed kasuri methi. Simmer to cook and reduce the gravy till the oil separates.

Add the milk & cream, cashew paste, crushed kasoori methi and simmer for about 10 minutes. Adjust the salt to taste.

Add the koftas into the gravy one at a time carefully. Turn the flame off the moment you add in the koftas and serve immediately. The koftas will soften in the gravy. Hence, add the koftas only when you are ready to serve. You may reserve some koftas aside and serve it fresh with the gravy on top of it. Garnish with chopped coriander leaves and fresh cream before serving.


This is a rich indulgence and not an everyday food you can have. A low fat cheat version is by reducing the cream and using yogurt instead. But the flavors would differ and that's a compromise for health. If you are looking for that authentic restaurant flavor, I wouldn't recommend you to use substitutes. After all, there's no harm if you indulge in these once a while. Sometimes, it's fun to break rules, may be diet rules too!


Halwa is one of the most popular traditional Indian dessert, made from rich and fresh ingredients by cooking in milk, simmering till it reduces along with clarified butter/ghee and adorned with nuts and raisins. They are rich in taste and flavors and can be served warm or cold. Various kinds of halwa can be made, depending on the ingredients they are prepared from. The commonly loved Gajar ka Halwa is best tasted warm with a dollop of ice-cream. My version with beetroot is no different.

The story goes this way. We had an over dose of beet roots a few weeks ago and I had to finish them off with hitting boredom or seeing them end up in the trash. A few stir fries and curries had already made us see enough of the fiery deep crimson red color that it's hang over would last for months! I used the final batch of 4 beetroots to make this halwa and it was worth every effort.


Beet is a popular tropical reddish purple rooted vegetable liked or disliked for it's odd color. I know many who don't like beets, don't cook them or even eat them. I guess it's probably due to it's intense color. I have less liking for it as a vegetable, but still cook them once a while. But this dessert is one which you shouldn't stop from giving a try. If you admire carrot halwa, then you will surely love these too. Except the color, there it isn't much different.

Here are a few tips that can help you. You can use canned condensed milk or khova for this recipe instead of reducing the milk over the stove. Low fat milk with few tbsp of milk powder would work equally good. Take care not to grate the beets too fine, they may dissolve while cooking. Squeeze as much juice as possible from the grated beet and use it to make red velvet cake.


Beetroot Halwa

INGREDIENTS

1/2 kg beetroot, grated
1/2 litre Milk
225 gm Sugar
1 tbsp clarified butter
1/2 tsp cardamom powder
Nuts and Raisins for garnish


DIRECTIONS

Wash and grate the beetroots. Sauté the beetroot on a pan till it softens a little, approximately for about 5 minutes. Add in the milk. It will bubble up as it boils. Cook on a gentle flame for about 20 minutes stirring every 5 minutes. Add in the sugar, stir well and cook till the sugar melts and dissolves well. Cook until all the milk is reduced and has been absorbed. It will result in a mushy mass. That's how we want it.

Add a tbsp of clarified butter/ghee and cook further for 2 minutes. Add in plump raisins and freshly crushed cardamom seeds.

Fry the cashew nuts in a tsp of ghee. When it turns golden, transfer it to the halwa. Set a few aside to garnish the halwa while serving. Serve warm.


My parents visited us the day I made this and they throughly enjoyed it. Warm servings of this halwa, freshly seasoned with cardamom and nuts made an exotic treat for all. A dollop of vanilla ice cream would elevate this dessert to a greater extent.

Do not leave the cardamom out. It has an impeccable luxurious flavor that it imparts to this dessert making it warm, rich and endearingly good. A single bite of this simple looking, yet rich, sweet and calorific dessert will leave you craving for more.

Note: Apologies readers! I shall take a month's break from blogging as I am tied with work and personal needs to cater to. But I promise I shall be back soon. Till then, happy reading and cooking! Chio!