The past few weeks have seen newspapers and media flooding with speculations of the wedding of the century. Did you witness the Royal wedding of William and Kate? I was glued to the television set through the entire afternoon witnessing the ceremony as they celebrated their wedding in pomp and style. And with all that media hype, Britain's royal wedding did capture the attention of billions of viewers all over the world, including me.

Princess Diana was a style icon on the fashion circuit who graced thousands of magazine covers around the world. She was paparazzi's delight for her style and controversial reasons before her death. Now that Kate Middleton is called upon as the Dutchess of Cambridge, it is inevitable that Kate will become a fashion icon who will often be compared to Diana.

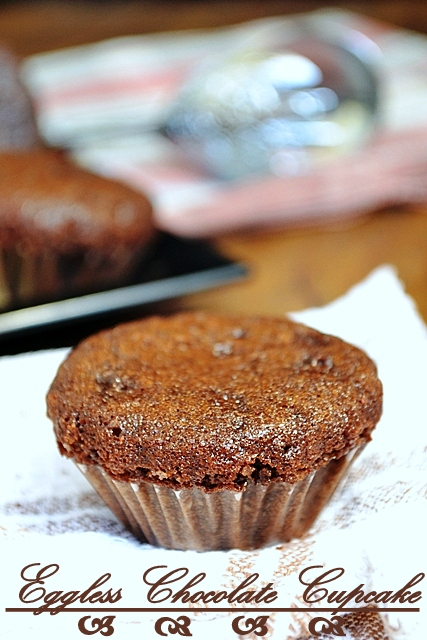
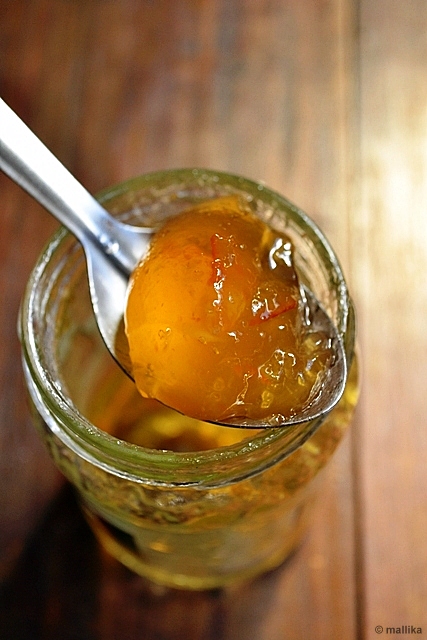
I sat through the noon watching the royal wedding live on TV. Prince William is known to have fondness for chocolate biscuit cake. Biscuit cakes happen to be one of my favorites too. On any given day I would love to make this cake. Craving hit me hard as I watched the royal wedding cake brought out for the occasion. I had no cooking chocolate at hand, so making a Chocolate Biscuit cake was out of question. Instead a jar of country Marmalade, imported from Scotland called out to be used, hence sought out for traditional English dessert fit for the occasion. I settled to use a recipe inspired by Nigella's book 'How to be a Domestic Goddess' with certain modifications to the original recipe.


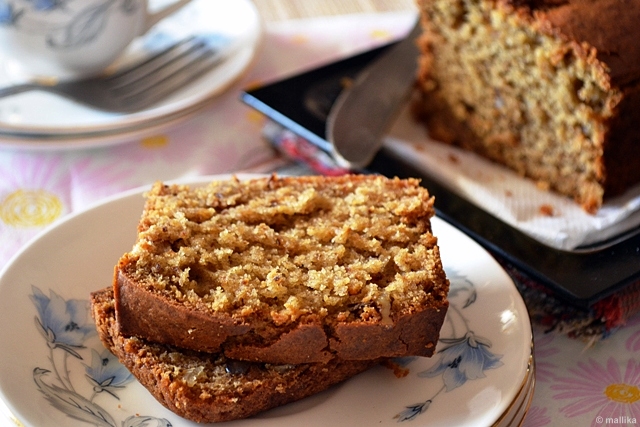
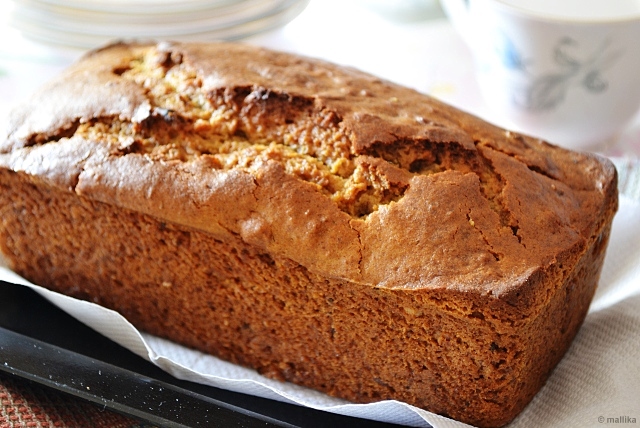
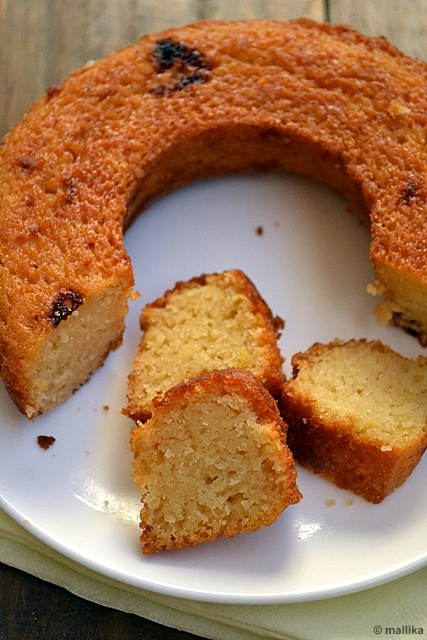
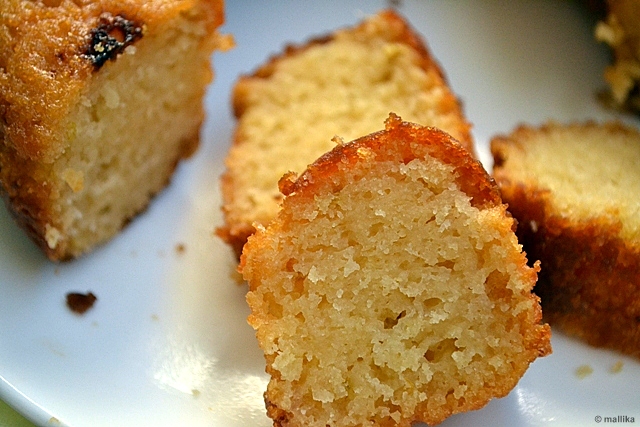
Marmalade Bundt Cake

Inspired by Nigella's book 'How to be a Domestic Goddess'

INGREDIENTS

250 gm self-raising flour*
100 gms caster sugar
125 gms butter (I used low salt butter)
1 drop vanilla extract
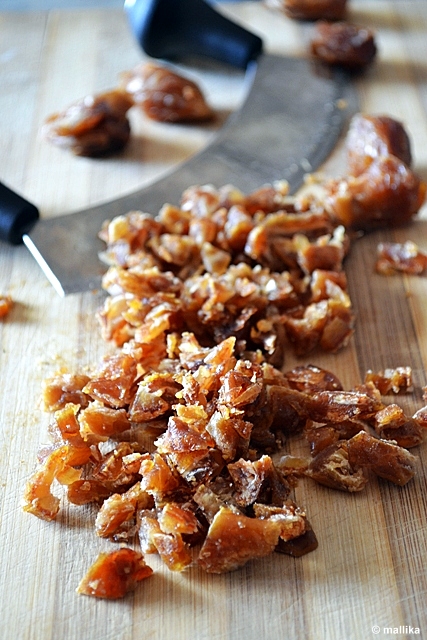
100 gms orange marmalade
2 beaten eggs
Zest of 1 orange


DIRECTIONS

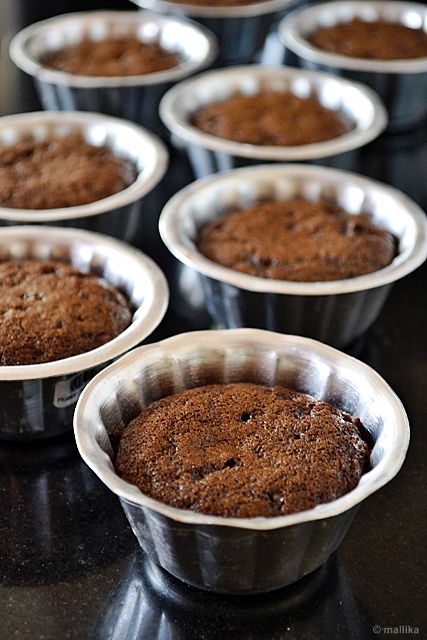
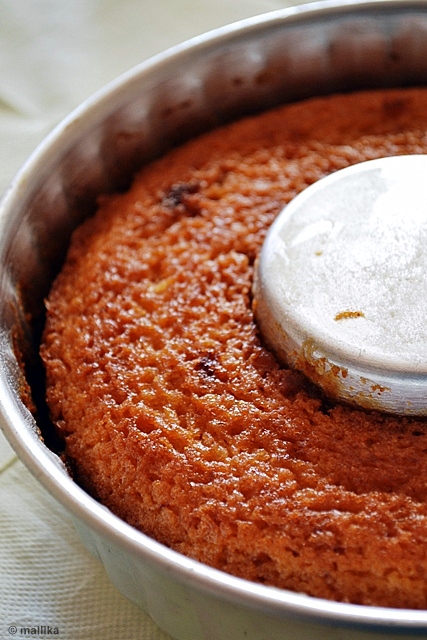
Pre-heat the oven at 180˚C oven. Grease with butter and flour a bundt cake tin and keep it aside.

Beat the butter and sugar together till it's fluffy. Add the marmalade and vanilla and stir thoroughly. Add the sifted flour and zest of 1 orange. Stir to combine well and pour the cake batter into a bundt cake tin. Bake in a pre-heated oven for around forty five minutes until golden brown. Test with a skewer. Allow to cool on rack for few mins.

Note: If your recipe calls for self-rising flour and you only have all-purpose, here's how you can make one at home.

Measure the desired amount of flour into a container. For each cup of all-purpose flour, add 1 1/2 teaspoons of baking powder. Mix to combine.


Notes: If your marmalade has less zesty flavor you may increase the amount of orange rind used. The marmalade I used was of excellent quality, had loads of citrus peel, was low on sugar and high on fruit preserves with no added flavors or preservatives. In case you do not have marmalade at hand, you may try the same recipe with any other fruit jam. I suggest you taste your cake batter for sweetness since marmalades and jams have pre-added sugar.

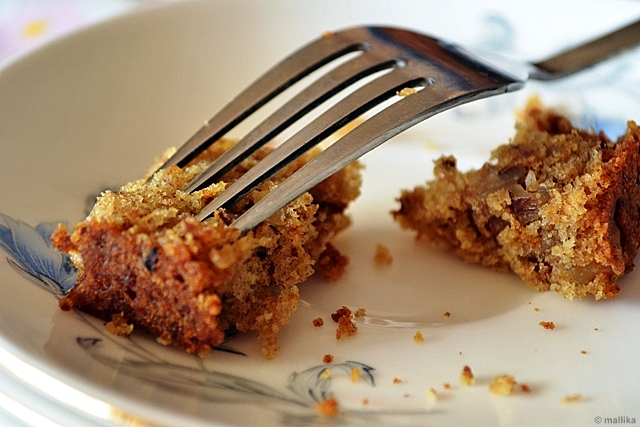
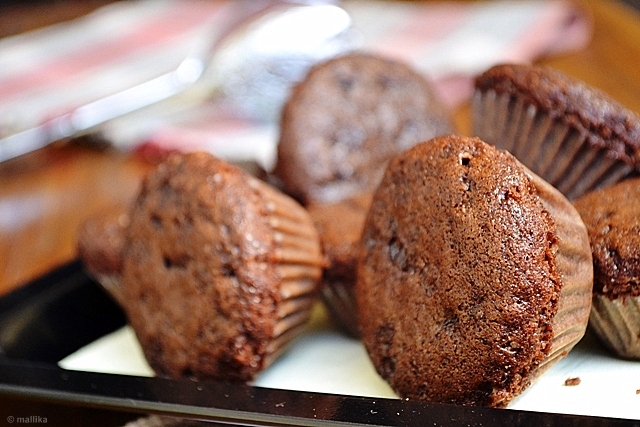
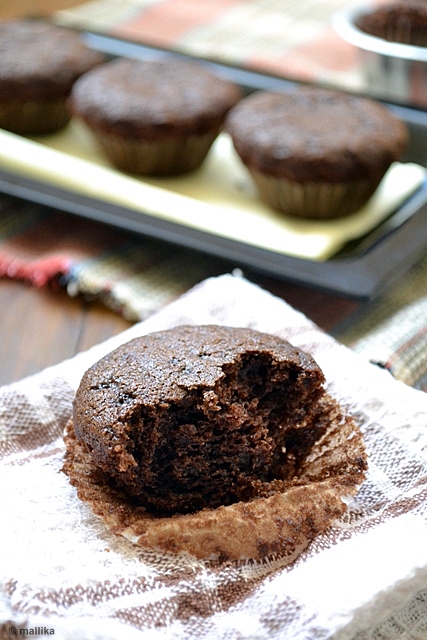
The cake can be served warm and compliments well with tea. The cake turned out excellent with the perfect texture and crumb. The orange rind gives a zesty, refreshing flavor which I highly recommend. This is a rich tea cake with balanced zesty flavors from orange and vanilla tones.


Deep frying and I don't always go well. Side line the health factors, just the intimidating thought of keeping a wok filled with sizzling hot oil and having to work with it sounds a very daunting job. Stir fries and shallow fries are common in my household and are done on a day to day basis, but loading a skillet full of oil for deep frying is a reserved feat, also something I prefer to push for the weekends.

I read a snippet from newspaper not long ago that consuming oil reheated at high temperatures can be harmful and carcinogenic to health. Since then, eating deep fried items outside home has reduced considerably. We proactively avoid it fearing ill effects on health. I despise discarding a wok full of used oil down the drain post frying, since it's an utter waste :( That's another reason that whenever I do fry, I ensure all my frying is done in the same batch of oil in one go, instead of reheating the same. That saves time and wastage too.


Cravings for spicy fries don't always haunt me, but when they do, they can be pretty bad! Not long ago, an afternoon, as I sat down to blog, browse and blog hop, post our lunch around 4 pm, I stumbled over this crispy fried snack Gobi 65, by Pavithra. This was etched in my mind. I could hardly hold my temptations longer. Her step by step photography through the recipe motivated me further. It was a sudden urge to have something hot and spicy that evening. Lucky enough, I had a huge cauliflower already cut into florets sitting my fridge, thus making the daunting task of cleaning and chopping even more simpler.

Gobi 65 is a very popular snack available in most Indian street food stalls and restaurants, with versions of this snack in Paneer, Chicken, Mushroom, etc. which are equally popular. It's more commonly found in outlets which cater to Indo-Chinese food. The ingredients are simple and readily available in most kitchens at any hour. Hence no fuss too.


Gobi 65

INGREDIENTS

1 medium sized cauliflower, cut into florets
1 cup thick sour yogurt / Indian set curd (use thick curd)
1 tbsp fresh minced ginger garlic paste
1-2 tsp garam masala
3 tsp Kashmiri red chilli powder
Salt, to taste
Cornflour, about 3 tbsp for each batch of florets
Oil for deep frying
Curry leaves, green chillies, lime wedges - for garnishing


DIRECTIONS

Grind garlic and ginger to paste. Wash the curry leaves thoroughly and pat it dry. Cut and clean the cauliflower, drain out all the water.

In a separate bowl, take some thick curd. I used thick sour curd, hence omitted the lime juice mentioned in original recipe. Add the fresh minced ginger garlic paste, Kashmiri chilli powder, garam masala and salt. Check for salt, sourness and spice levels in this stage. Whisk the batter, add the florets and mix well.

Meanwhile, heat oil in the deep pan. Now take handful of the florets in a small bowl add 3 tbsp of cornflour mix well. Allow the florets to be nicely coated with flour, dusting out excess flour. Cornflour gives a good crispness and crunch on frying. Drop each floret into the sizzling hot oil one by one and fry them. As they fry, add in few curry leaves. Remove from the oil and drain them on a kitchen towel. You can sprinkle some chaat masala if you like. Serve hot with ketchup.


Most restaurants use red food color to bring out brightness in food on plate. I somehow dislike that artificial redness from food colors. I refrain from using any color, instead use Kashmiri lal mirch (Kashmiri chilli powder) which brings out a good deal of color. Pretty decent, if not for the blood red. For more heat, you may fry a green chilli in the same oil briefly till they blister and serve along with these fritters. I served them with freshly chopped onions, lemon wedges and tomato ketchup. A yum treat for an evening snack. This crispy, tongue tickling appetizer is not just great for an evening snack, but serves as a great starter too.


The SCS group contacted me recently to dispatch a pack of Apple goodies. The courier arrived last month a day before I went into labor. I have to apologize SCS for this delayed post. As I eagerly unwrapped the sturdy, sexily packaged box, beneath it held beautiful plum red and green Washington apples, each unique in its variety, kind, color and character. As I unpacked the box, I could appreciate the sweet tart essence wafting from these apples. We could barely resist these.

The box came with an information pamphlet and about 7 varieties of apples: Red Delicious, Granny Smith, Gala, Braeburn, Golden Delicious, Fuji, Honeycrisp. It spoke about the significance and characteristic feature of each apple. A few tart ones, making them perfect for bakes, crisps and cooking and few sweet ones to snack on anytime. You can find the same information on their website 'Washington Apples'.


Recently on a television show, it was shown that most of the imported apples come dipped in a polymer chemical solution which prolongs the life and gives it that glossy healthy shine, also posing a health hazard. These apples did have a glossy shine on them, however I am unable to comment if they went through the same process. Since I did not want to risk, I peeled their skin for the recipe.

We enjoyed most of these. The tart ones were well used in a few recipes to suit our meal and they were well appreciated. The idea came from my mom as she has attempted the same chutney a couple of times with the Indian rural apples which are smaller and tart too. I made an appetizing, tongue-tickling chutney from the Granny Smith Apple which had a good amount of tartness, making it perfect for this lip smacking chutney.


Apple Chutney

INGREDIENTS

1 Granny Smith apple
1 tbsp vegetable oil
1 tsp nigella seeds (kalonji)
1 tsp fenugreek seeds (methi seeds)
1 tsp fennel seeds (saunf)
1 tsp cumin powder (jeera powder)
1 tsp coriander powder (dhaniya powder)
1 tsp asafeotida (hing)
1 tsp chilli powder
1 tbsp jaggery/brown sugar
Juice squeezed from 1/2 a lime
Salt to taste


DIRECTIONS

Clean and core the apple. Peel the skin if required. Dice it to small chunks or bite sized pieces. Marinate with salt and lemon juice and keep them aside till we use them for cooking. This will prevent them from darkening.

Heat a tbsp of vegetable oil in a kadai/frying pan. Add a teaspoon each of nigella seeds, fenugreek seeds and fennel seeds and fry briefly till you get a nice aroma from them. If the oil is very hot, it takes about 15-20 seconds. Turn off the flame and quickly stir in the dry powders, the asafeotida, cumin powder, coriander powder and chilli powder. As you do this an amazing aroma from these spices will hit you. Turn off the flame to avoid the spices from burning.

Add in the chopped apple pieces and stir well to coat all spices. Switch on the flame and cook the apples covered on medium low heat for about 15 minutes or till the apples are soft. Add the jaggery/brown sugar to taste. Mash a few pieces so that you get a thick chutney. Cook further for another 5-10 mins. Adjust the salt to taste. You may serve this warm or at room temperature.


You may grate the apples for a finer chutney. We loved those bites from fruit chunks in our chutney. This sweet and tangy chutney goes well with rotis and rice too. It complimented our lunch well and we enjoyed this apple treat. One can hardly identify that this dish is made from a fruit. Thanks to the SCS group for this wonderful gift. We enjoyed the varieties and look forward to more of these in Indian markets.


If you folks hopped on to this space and wondered why there's been no update, then there's a reason. In the past few weeks you may have noticed a lag in my posts and responses to mails and comments. Blog has been muted for sometime now. Our near and dear ones are aware of the recent happenings in our lives. Cooking, blogging and similar tasks have taken a transient backseat as we've headed towards accepting new duties in life. Life has been hectic and far more busy than ever.


I have been eagerly looking forward to share the good news with all of you. We are pleased to inform that we were recently blessed with a little princess on March 15th 2011. Our lives have changed forever and we are currently enjoying the ardent task of parenthood. Primarily for me, as motherhood beckons, I am actively engaged through the night and day with my little one who has currently captured our sole attention to herself :). I have been losing sleep through the night to wake up at wee hours, catering to all her needs.

Motherhood has been most challenging and beyond what I thought. But every time I see my little princess it gives me utmost joy and every minute spent with my little one has been duly rewarding. It's been the most blessed moment for us and many thanks to all our family, friends and well wishers for their hearty wishes and prayers. I shall be back soon, may be a couple of posts from my drafts... till then be hooked to this space!


Happy Birthday my dear bloggy... ! Veg Bowl! turned another year older this month. And that's another milestone crossed with two years complete. I can't believe time is swiftly speeding away. It's like a blink of an eye, feels yesterday when I initiated this blog. It's crossed two years now, real fast. The blog's been on bloom, growing through the journey positively and it's been a pleasant one.

Change is constant and with this change is a ceaseless effort to improve my posts, photos, content, outlook and more importantly a balance in the variety of recipes I post. Along this journey, I have grown too and bettered as a cook. I have constantly drawn inspiration from many sources through this journey. Blog hops, magazines, cut outs, pamphlets and newspapers did not cease me any less to be inspired. A stroll into a book store or crossing a magazine stand in a supermarket would grab a second glance, my eyes peeking around eagerly looking out for cookbooks, that pick and flip through the magazine for an arbitrary hunt for recipes, capturing them to reserve in a corner of my mind so that I can replicate it back home.


I have received an unabated support and constant inspiration from my peer bloggers, friends and readers who have been kind enough to drop their suggestions, feedback and comments, either on blog or through emails or word of mouth. The response I have received has been over-whelming. Thanks guys for all the support and encouragement I have received from you. It has been motivating indeed.

For the second anniversary, I wanted a sweet treat, something that's simple, easy, yet signifying the celebration called for. I picked this Date and Walnut Loaf inspired by the recipe I chose from my Big Book of Baking. The book says use of an egg, however I have made an eggless version of the same, substituting the same with a teaspoon of baking soda and powder each.


Date & Walnut Loaf

Minimally adapted from Big Book of Baking

INGREDIENTS

1 1/2 cup plain flour
1 cup sugar
3/4 cup pitted dates, chopped
1 cup hot milk (substitute for non-dairy milk of your choice for vegan version)
1/3rd cup butter (substitute for non-dairy butter like earth balance / vegetable oil of your choice for vegan version)
1 tsp baking soda
1/2 tsp baking powder
1/2 cup chopped walnuts


DIRECTIONS

Preheat oven to 180ºC. Grease and prepare the loaf tin by smoothing some butter on all the sides.

Place dates and hot milk / vegan milk in bowl and allow it to stand for 10 mins so that the dates soften. Pulse this in a mixer till the dates combine with milk and resemble a smoothie texture. You may leave it coarsely ground if you like those few fruity pieces coming through the cake as you bite into them.

Beat the softened butter / vegan butter and sugar together till it's fluffy. Add vanilla. Stir well again. Add the dates milk mix to this and stir well again.

Sieve the flour in another bowl. Add in sugar, baking powder, soda into it. Mix them well.

Make a well into the dry ingredients. Pour in the wet ingredients and mix till they just combine. Finally add in walnuts. Spoon mixture into the loaf pan, bake for 30-40 minutes until done.


Pardon me for my infrequent blogging and response. I know it has been sluggish than ever these days. I may not be able to give my due attention to blogging. I shall soon take a break from blogging to embrace tasks that will take priority in my life in the months to come. I am soon stepping into motherhood and this promotion comes with a lot of anxiety, joy, nervousness, tension and excitement. After going through months of emotional and physical upheaval, as we step into parenthood, we look forward to a brighter life with the little new one to come. Our lives will change forever, for the good. We need your prayers, best wishes and loads of good luck. Thank you for all the constant support and encouragement, I hope you guys still stand by.


Recipes that are super quick and take barely few minutes are always on my menu list. As a working woman, these recipes are a great rescue, real time savers. Mondays through Fridays are time when I breeze through my kitchen, washing, cleaning, cooking as fast as I can, to make time for packing lunch or dinner for both of us and rush to work. You can imagine our mornings like a movie played in a fast forward mode! Sometimes, it's a crazy rush we deal with!


Cooking has to be full fledged, be it any day. Especially if it's lunch... rice or rotis, a dal, a vegetable subzi, papad, pickle, yogurt... yes I love all of it on my plate. And it's only when I see my plate full in it's standard fashion, would I be completely satisfied.

With such routine that's streamlined by me, I don't like to bend my schedule when it comes to food. For those days when I am in hurry, I have a few recipes which are boon to me. They are quick, easy, require the basic ingredients off the shelf. A few ingredients I always have in stock are masala powders like fenugreek, cumin and coriander powder which add great flavor and body to recipes which are simple and basic, yet extremely flavorsome. Potatoes, though not my favorites, are always in my stock for their good shelf life, also a great rescue on days when I run out of greens and vegetables in my kitchen.


One such recipe which I humbly learnt from my mother is this Sukhe Aloo or simply translated to Dry Spiced Potatoes have always been our favorites.

Sukhe Aloo

INGREDIENTS

2 large potatoes, chopped to cubes
1 tsp good quality asafeotida/hing powder
1 tsp fenugreek/methi powder
1 tbsp coriander/dhaniya powder
1 tsp jeera/cumin powder
1 tsp red chilli powder
1 tbsp vegetable oil
Salt to taste
Coriander leaves & lime to garnish


DIRECTIONS

You may either use pre-boiled and diced potatoes or freshly cut potatoes. If you use boiled potatoes, the oil consume is lesser compared to the latter. If you have boiled potatoes at hand, this makes the recipe much faster, taking less than 5 mins to complete the recipe.

In a frying pan, heat a tbsp of oil. When the oil is hot, add in all the dry spice powders, the hing, methi powder, coriander powder, cumin powder, red chili powder and quickly stir fry for 15-20 sec. Don't let the spices burn, else they will turn bitter and lose their flavors. Add in the potatoes and coat them well with these spices. In case you use boiled potatoes, stir fry everything for about 2-3 minutes till the potatoes heat through and the spices coat the potatoes well. If using freshly cut potatoes, you may add another teaspoon of oil. Cover and cook for few minutes till they are done. Add a dash of lime and garnish with coriander leaves.

Just a few dry spice powders go into making this dish exotic and flavorsome. Do not miss on hing and coriander powder, it's such a perfect medley of flavors. The spice coating on the potatoes take a matter of 2 minutes to be put together, creating an aromatic dish which you will love for sure. Pair with any simple dal and these go great with rotis and rice likewise. Enjoy!


Yet another time of the year when spirits soar high and love is in the nip of air. Town is painted red, roses and hearts have flooded markets in bounty.

Here we have the coveted Valentine’s Day! And here's me wishing everyone a Happy Valentine's Day!

It's Monday and my workplace has been painted in colors of red to keep the Valentine spirits alive. Been asked to dress in shades of reds, a walk into the office and red and white heart shaped balloons tucked into AC vents, hanging from the ceiling have surely got us into a mood. Roses distributed by the Fun club committee at my workplace sit adorning my bay. This helped trigger a gossip amongst colleagues, who's seeing whom, where, what, blah, blah, blah, a great way to boost energy and lighten the Monday blues! Who doesn't love gossip anyways? ;)

My DH loves surprising me. I am a spoilt sport at it. Earlier the day, DH did surprise me with a bouquet of roses, something I had least expected, considering both hardly discussed if we would indeed celebrate the day together in anyway. Both had to rush off to work for a busy day we had to look ahead to. An unexpected me stood bare handed only to receive them. None to return :(


Color red amazes my eyes, it's bright and peppy. Fiery as it is, it has a calmer effect on thy self. The color brings in life, passion, energy... perfectly right for the significance of love. If not a celebration for the day, I am happy to be soaked in it's colors for the moment.

Last year I had the time at hand to bake a cake for two. This year was different. I had in mind to bake something special, but couldn't make the time called for it. Hence these simple Eggless Chocolate Cupcakes are great for sudden rescue. A decadent solace!


Eggless Chocolate Cupcakes

INGREDIENTS:

1 1/2 cups plain flour
1/2 cup unsalted butter
3/4 cup cocoa powder
1 cup powdered sugar (plus or minus a tbsp depending on your taste)
1 cup milk/soy milk
1/2 tsp vanilla extract
1 tsp baking powder
1/2 tsp baking soda

DIRECTIONS:

Pre-heat the oven to 180 degree C. Arrange the paper liner into the muffin cups.

Sieve the flour, cocoa powder, powdered sugar, baking powder, baking soda in one bowl. Mix well.

In a separate bowl, add in all the wet ingredients like the unsalted butter, milk and vanilla extract.

The recipe is fairly simple. Add the wet ingredients into dry ingredients and gently fold till its well combined. Transfer the cake mix into the prepared muffin cups. Bake approximately for 20 mins or till done.


The cake is not too sweet, just right for our tastes. Taste the batter and add in more sugar if preferred. The cake almost has a texture of sponge cake. Moist, yet extremely soft and chocolaty. Add in a few chocolate chips to the batter and it will leave you totally amazed. Probably a topping would have made these more sinful. But who cares? These were decadent as is. Small bites, yet absolutely heavenly!

I am almost mastering the art of eggless baking. A few flip flops, a few successful attempts, I am getting to know the knick knacks of a successful eggless baking. It's been fun and I am enjoying it thoroughly for sure. I hope this makes a great treat for your Valentine and you too. Enjoy!

I am sending these to the Monthly Mingle theme "Small Bites – Soul Food for your Loved Ones”, hosted this month by Astrid @Paulchen’s Food Blog.


Cooking at home is mostly Indian, a mix of both North Indian and South Indian cuisines. There's little scope to experiment with recipes on week days, since I owe time outside home and kitchen too. It may vary depending on what's on stock in my pantry... from being Rajma Chawal one day to Anna Saaru the next day. My weekends however are reserved to extensive work outs in kitchen... experimenting with more diverse flavors, cuisines that go beyond our comfort cooking, it's an attempt to recreate my favorite cuisines in my own kitchen, be it Indian or international.

Italian cuisine is such a favorite with us that I inevitable end up either making my beloved pasta, lasagna or pizzas at home over the weekends. Be it picking the right ingredients from the store, making pizza dough from scratch or putting together the herbs and spices for ragu, I love it all.

Ever since I first tasted Pasta with Arrabiata sauce, I have been hooked to it. Also, been incessantly on look out for good recipes to replicate them at home. I haven't understood exactly what an authentic Arrabiata sauce is like, since most Arrabiatas that we have had in restaurants have slight variations in flavors. I guess it comes from the herbs used. But yes, arrabiatas have a thing in common and that's the heavy tang from tomatoes, which I totally adore.


While I am a spaghetti person and love the noodle strands, my husband loves pastas in every other form, be it penne, fusilli, macaronis. Give me a choice and I would pick spaghetti. My Mr. finds it too clumsy to swivel the fork around the noodle and pick them. Probably a sound reason why he chooses Chinese Fried rice over Hakka noodles. Anything, other than the noodle shape. Period. Astonishingly, his evergreen love for Maggie noodles still hold strong roots. There's something in there which hooks men to their beloved Maggie!

A few months ago, I lay my hands on the cookbook 'Vegetarian Cookbook', picked from Crossword. A hard-bound book with some good vegetarian recipes from all over the world, some good photography to accompany it, this undoubtedly would you leave you with cravings and hunger pangs. The book has been with me for a couple of months and the recipes are simple, yet worth the attempt. Pasta all'arrabiata was a winner recipe for me, pretty close to perfecting the flavors we get in an Italian restaurant. A little modification was required in terms of ingredients like dry wine and pecorino cheese which is far from my reach here. May be, you should give an attempt to agree to this.


Penne al'arrabiata (pasta in tomato chilli sauce)

(Adapted from Vegetarian Cookbook)

INGREDIENTS

150 ml dry white wine (I skipped this)
2 tbsp sun-dried tomato paste
1 aubergine, chopped to squares
2 red chillies, finely chopped
2 pod garlic cloves, finely chopped
350 gm penne pasta
4 tbsp chopped fresh parsley
Salt & pepper
Fresh pecorino cheese, to garnish (I used grated cheddar cheese)

Sugocasa

4-5 tbsp extra virgin olive oil
1/2 kg ripe tomatoes, finely chopped
Salt and pepper


DIRECTIONS

First make the Sugocasa, the sauce. Heat a tbsp of oil in a fry pan over high heat until smoking. Add the chopped aubergines and cook till tender. Set aside. Again heat the remaining oil in a fry pan over high heat until smoking. Add in the tomatoes and cook stirring frequently for a few minutes. Reduce the heat and cook gently for about 20 minutes, or till very soft. Season to taste with salt and pepper. Press through a sieve and strain to a saucepan.

Add the tomato paste, the red chillies and garlic to the sugocasa and bring it to a boil. Simmer gently. Add the stir fried aubergines. Taste the sauce. If you like hotter flavor, add more chillies. Adjust the seasoning and stir in half of the parsley.

Meanwhile, bring a large saucepan of lightly salted water to a boil. Add the penne pasta and cook for 8-10 minutes till tender, yet firm to bite. Drain the pasta and transfer to a warmed bowl. Add the sauce and toss well to coat. Sprinkle remaining herbs and garnish with cheese shavings.


Addition of aubergine was not a part of the original recipe. You may add mushrooms, courgette, zucchini or other vegetables of your choice. In case you don't like the bite from chillies, use chilly powder instead like I did. Also, sun-dried tomato paste may not be an easy access to all, hence substitute with thick tomato paste. My pastas are doused in sauce and that's how I like my pasta saucy, so I tend to make a little excess of the pasta sauce always. That's explains why my pasta has a rich red color.

I love to toss my pastas with a dash of mixed Italian herbs, imparting it a nice flavor. While the basic recipe for the pasta remains the same, I have tried the pasta with basil instead of parsley. That too renders awesome flavors with a slight variation in the herbal notes. Serve the pasta hot with garlic bread. This recipe is a keeper for sure and since pastas so often appear on my kitchen counters, I am sure to make this again and again.


Mind you, I am not a pudding person. Neither do I much like the bread pudding combination, unless it were perfectly made and presented to me camouflaged. Clichéd as it may sound, I have a huge fetish for a perfect Crème Caramel or a Crème brûlée. Hardly do people who know me know that one of my deepest craving comes for those dreamy, creamy custards which are rich, thick and delicious, yet silky light in texture. I can pretty much surrender myself to neat caramel flavors, succumb my teeth into such creamy delights and eat it to my hearts content!


Crème caramel is a variant of plain custard (crème) where some sugar syrup, cooked to caramel stage, is poured into the mold before adding the custard base. It is usually cooked in a bain-marie on a stove top or in the oven. It is turned out like crème renversée and served with the caramel sauce on top. (Source: Wikipedia)

I have made Caramel Custard a couple of times and that was only method I learnt from my mom. She graced her well chalked meals with desserts like these for parties and get-together when we were kids. That was a thing of the past. That apart, the regular custard is so common in Indian homes, that it needs no mention here. I always have a stock of pudding mix for those uncalled occasions of sweet tooth tantrums, when I like to whip up some simple fruit salad or may be just plain custard to accompany a scoop of ice cream. A craving again for some Crème Caramel hit hard on me recently and out of the blue, I decided to attempt an eggless version of Crème Caramel.


Eggless Crème Caramel

INGREDIENTS

30 gms of sugar
1 tbsp water
Store bought custard/pudding mix or homemade custard base as per the procedure mentioned here
1 tbsp agar agar
25 ml cream

DIRECTIONS

Make the Caramel base:

Sprinkle about 25-30 gm of sugar along with a tablespoon of water and heat it on a pan. Swirl the pan across the heat gently and let the sugar just begin to melt. Do not stir it. Keep an eye on the sugar as it begins to melt and change the color to amber. There's a thin line of difference between caramelizing and charring. Once the sugar gets a nice golden amber color, it's close to caramelization. It will soon take over a deeper golder brown glow. Remove from the flame immediately as the heat will make it darker further. If it darkens too much, it will take over a bitter taste. So be careful and quick with this. You can prepare this caramel either in the custard mould or transfer the prepared caramel to moulds and allow to set. Transfer it quickly as it will harden in no time. In case it hardens before you transfer to the moulds, you warm up the caramel again which will liquefy the syrup. Do not touch as it will be hot enough to burn your hand.

Prepare the custard:

Prepare the custard as per the procedure mentioned here. If using a store bought pack, follow the instructions as on the pack and prepare the custard/pudding adjusting the sweetness to your taste. Dissolve a tablespoon of agar agar in 25 ml of cream and bring it to a boil. When the flakes dissolve, add this to the prepared custard and whisk well. Once prepared pour the hot custard into the caramel prepared moulds. Cover with a cling film and allow it to set well in the refrigerator for a couple of hours. It's best to leave it overnight.


Prepare Pralines:

The procedure to make pralines is similar to preparing the caramel base mentioned above. Heat a tbsp of sugar with half a tbsp of water and swirl the pan gently, till it reaches caramelization point. Once it turns to thick golden amber color remove it from heat immediately and spread on a greased plate. Allow it cool completely. Using a mortar pestle, crush the praline roughly. You can use nuts like roughly broken almonds and cashews to make nutty pralines.

Pralines give nice crunch to desserts and can be used to top ice creams too. Pralines tend to absorb moisture, hence should be served fresh on desserts.

I adore vanilla flavors and as traditionally claimed my Crème Caramel has it's custard base flavored with vanilla. I may probably want to try more flavors in future, but I leave that to my mood. This dessert consisting of a rich custard base topped with a contrasting layer of hard caramel is normally served cold. I topped this with some homemade crunchy pralines before serving them, just a sprinkle of pralines for a light crunch, also to keep it low on sweet.

I am sending this dessert to Ally where she's hosting Delicious Desserts which comes with a yummy dessert book as a giveaway!


While December 2010 saw cold waves through the country, January, this winter continues to be a chilling season for us, but with a reduced intensity. The weather has been chill and crisp in the dawns and early mornings, while it gets very hot in the noons. Nights turn to be colder again with winter breeze hitting and foggy mornings greeting us again. It's comforting however to wake up and enjoy a cup of hot tea, envelop ourselves in warm winter clothes and head towards chill morning walks to the nearby layout where beautiful flowering trees adorn the streets and birds sing in their full glory.


We love being the nature lovers and this walk amidst the beauty of nature helps us begin our day on a positive note, to unwind ourselves, preparing us for the hectic, tumultuous work packed day that lies ahead of us. As we walk through the foggy mornings, geared with binocs, which happens to be my husband's favorite gadget off late, we pause at the chirp by the birds we hear. DH takes his time and pleasure in bird watching, a hobby that keeps him active and going through the day. I am clueless on what species they belong to, but I do get a regular dose of knowledge from him in this aspect. An excitement on his face is worth capturing a hundred clicks when he spots rare species!

While that keeps him occupied, I spend my time to see the beauty of nature through greenery, flowering trees, fruits, cactus, even weeds, in various shapes, forms, bounty colors that leave me amazed on how God has made this world such a beautiful place. I love these walks through trees lining the layout streets, be it the banyans, the almond trees or the floral beauty of bougainvilleas which adorn the fences of the villas, the withering leaves in different shades of greens and browns make me happy and the time spent worthwhile.


Back home, this creates a mood for me to make dishes that are comforting and immensely satisfying. Warm dishes which compliment the cold weather that we have now. Dishes which are traditionally simple, infused with flavors from earthy spices like ginger and pepper which create an aromatic breakfast when served on the table. The spices are naive and basic, making the dish humble. An addition of a dollop of ghee or clarified butter creates a magic and adds steep exotic flavors in this dish.


Broken Wheat Pongal

INGREDIENTS

1 cup moong daal
1 cup broken wheat
2 tbsp clarified butter/ghee
1 tsp cumin seeds
1 tsp chopped ginger
3 chopped green chilli
1 tsp whole peppercorns
A sprig of curry leaves
Salt to taste
A handful cashew nuts


DIRECTIONS

Wash and clean the moong daal and broken wheat and keep it aside. Lightly crush the whole peppercorns and keep them aside.

Next, heat two tbsp of ghee in a wide mouthed pressure cooker pan. Add cumin seeds. When the cumin seeds turn fragrant, add chopped ginger, green chillis, torn curry leaves and whole and broken pepper. Stir and fry them for a few seconds.

Now, add the moong daal and the washed broken wheat to the above spices. Add sufficient water to this. Add salt to taste. Close the cooker and allow it to whistle thrice. If you do not have a pressure cooker at hand, use a regular cooking pan and cook the daal and wheat till they turn soft and mushy.

Meanwhile, roast cashew in the ghee and keep aside. Once the cooker cools down, add and garnish with the roasted cashews.


Traditionally, rice is paired along with moong dal to make this Pongal. However, I made an attempt to use broken wheat as a substitution for rice. It barely makes any difference. This dish is best served hot with tomato raita or any chutney of your choice. I like to call it our 'South Indian Khichdi' which does good when one is ill and down with poor health.

Subtly flavored earthy spices complement each other so perfectly. We are at the fag end of the winter season and this is such a comfort dish I love to binge on, a dish that brings out warmth with every bite, perfectly suited to bid goodbyes to the winters, welcoming the sunshine that the summer will bring along.