Showing posts with label Havyaka Recipes. Show all posts

TonDekayi HuLi_1


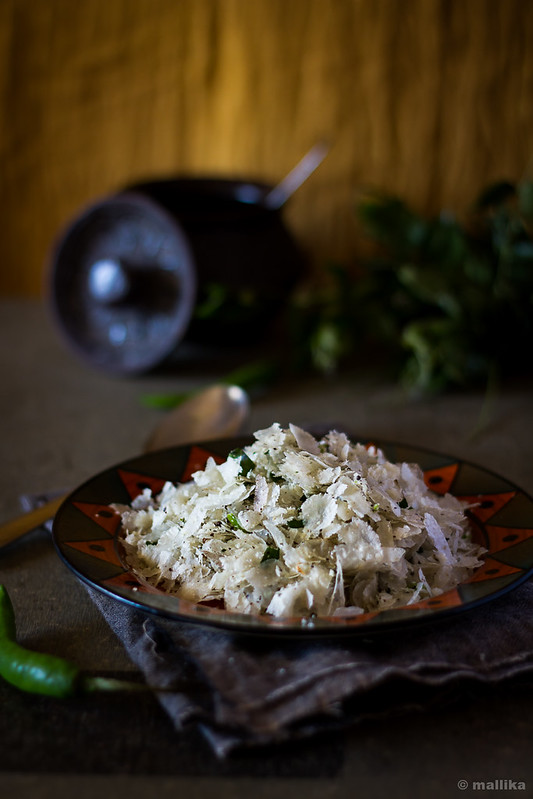
I had a craving last noon. It was a serious one to say. A craving that cracked me crazy. In a long time I reminded myself and yearned for a morsel of it. Just a morsel that would satisfy me and feel at peace. May be it was the dreary weather or miss of my daily dose of conversation over phone with amma-appa, ever since they whisked far away to explore the greener pastures of Europe for their annual holiday. But it kicked me hard in my stomach. So hard, that I reached out to my husband on a frantic phone call to make a trip down to Indian stores that very evening, in every sense of urgency. 'Twenty-eight miles just for a coconut? Can it not wait? Wasn't it two days ago we had been there?', he zapped in midst of Monday morning chaos at work, composing his thoughts over matters more important than a mere coconut. Damn! Who knew I would hanker so much for a simple bowl of huli! For a craving that has least sense of timing or inventory (could I just not do with the leftover sweetened coconut I used here?), but had to be appeased.

TonDekayi HuLi_prep1 TonDekayi HuLi_prep2 TonDekayi HuLi_prep3


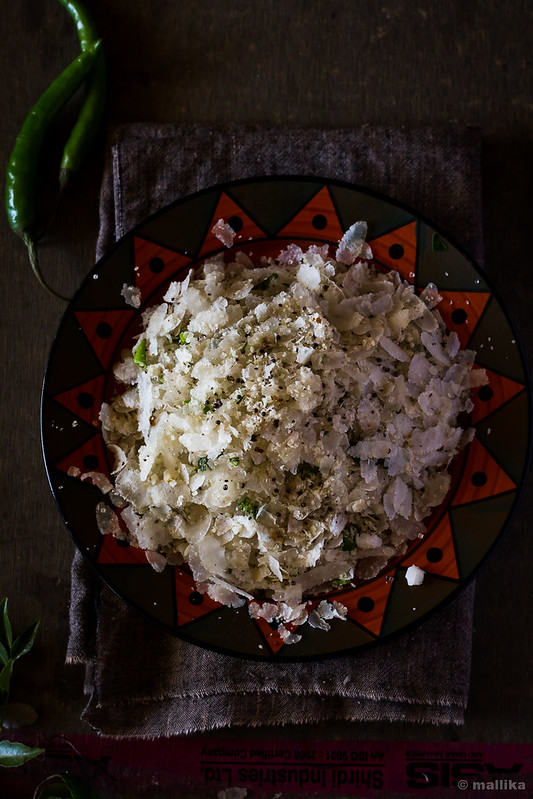
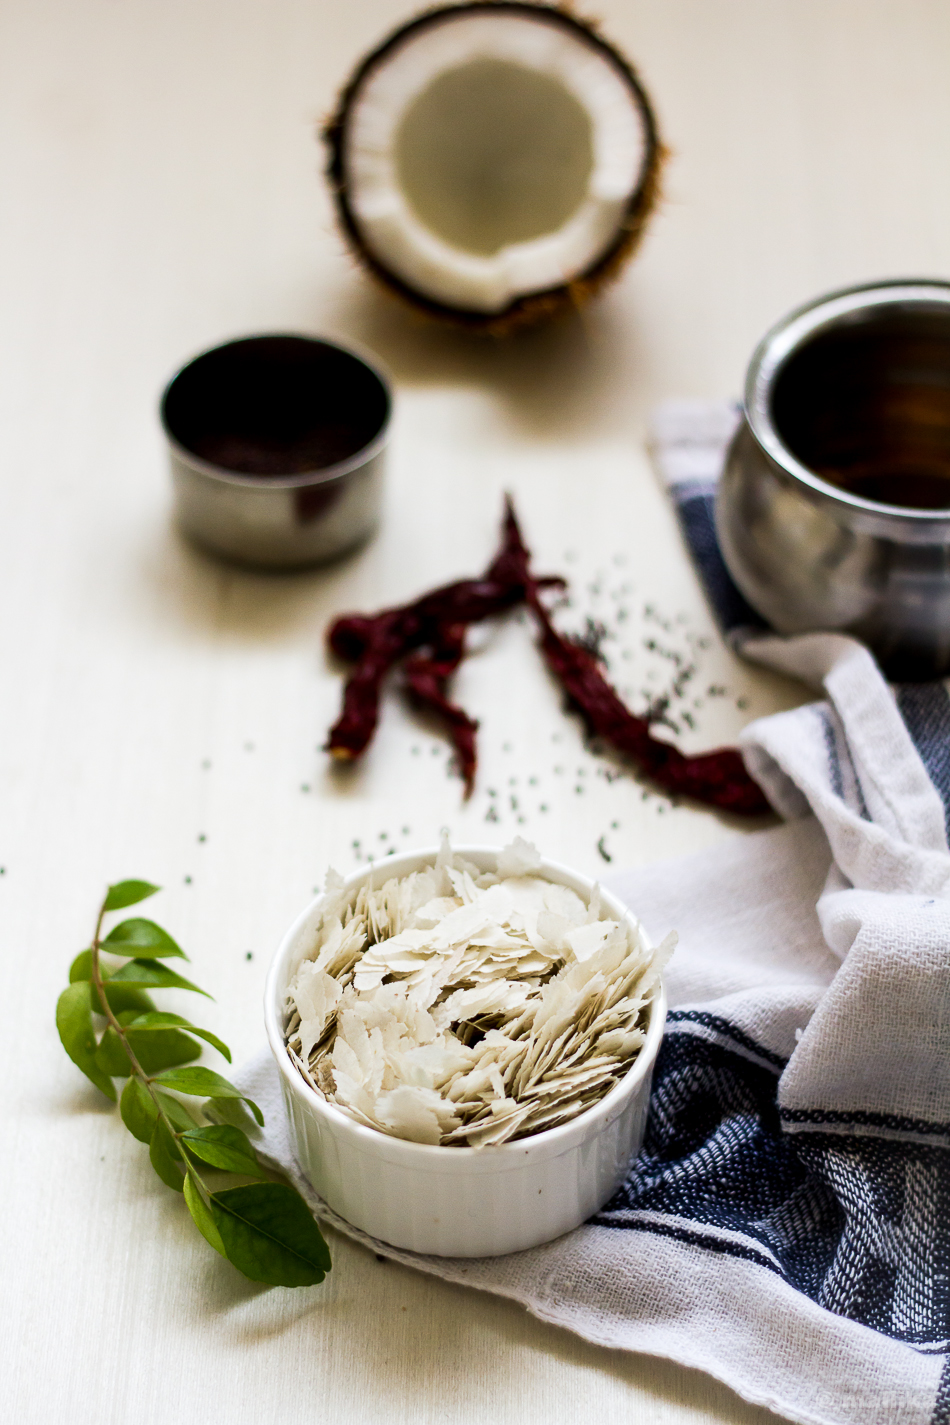
Truth to be told, the past three months never saw a day with fresh coconut. We never bought one here. The Indian store we shop at barely stocks one or two sad looking coconuts, often sleeping on the verge of their expiry bed. The packaged grated coconut is a bigger risk to buy. What if it tuned out to be rancid? After all, with no packaging date on it whatsoever, I wonder for how long it has been sitting there. The brand new blender I bought, advertised it could churn blocks of ice to granita in seconds. It broke out within days with a nasty burnt smell while attempting a simple fruit-date smoothie. That, enough was a hint for me. It could not stand the heavy duty grinding of Indian spices and coconut.

TonDekayi HuLi_2


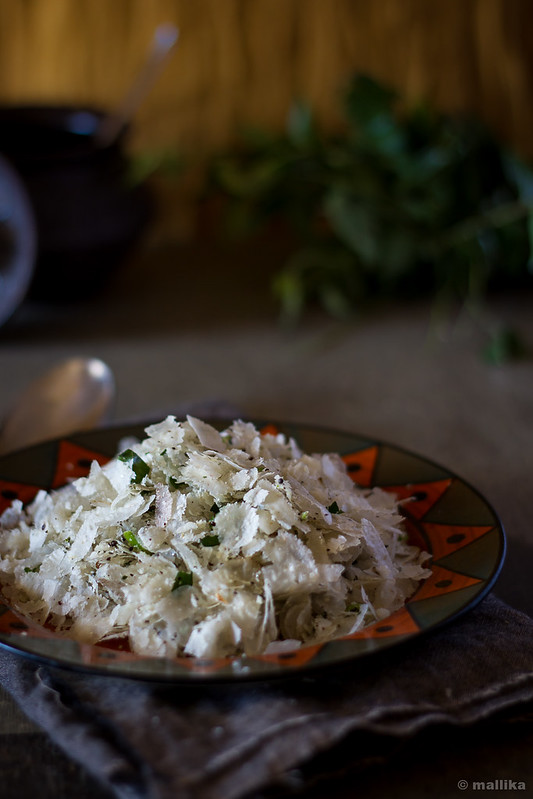
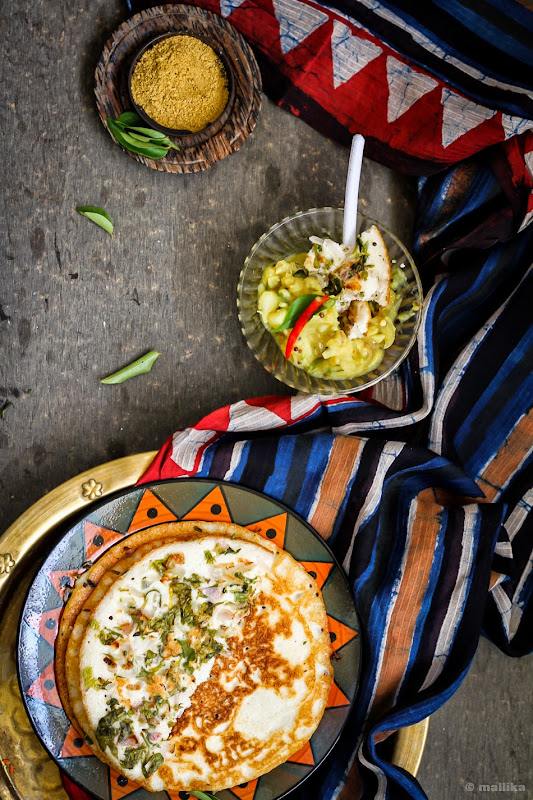
Coconut chutney, tambli, gojju, paladhya, menskai did not feature in our menus. Otherwise the usual course of tip-toeing and balancing myself between Northern and Southern cooking, here I was, survived mostly by chopping copious batches of onions, brewing gallons of tomatoes to broth, throwing mounts of red chillies and garam masalas in almost every fare I made, cooking basic Northern dishes much to my husband's delight and satisfaction. I did make occasional saar that didn't call for coconuts, served dosas with coconut-less-chutneys and palyas that went without the mellowed sweetness from the much-desired-generous-garnish of fresh coconut. The pre-packed coconut I had bought long ago assuming would be good for curries was so sweetened, that it was consumed in desserts and occasionally bitter-gourd stews.

The little Southerner in me craved for the real deal.

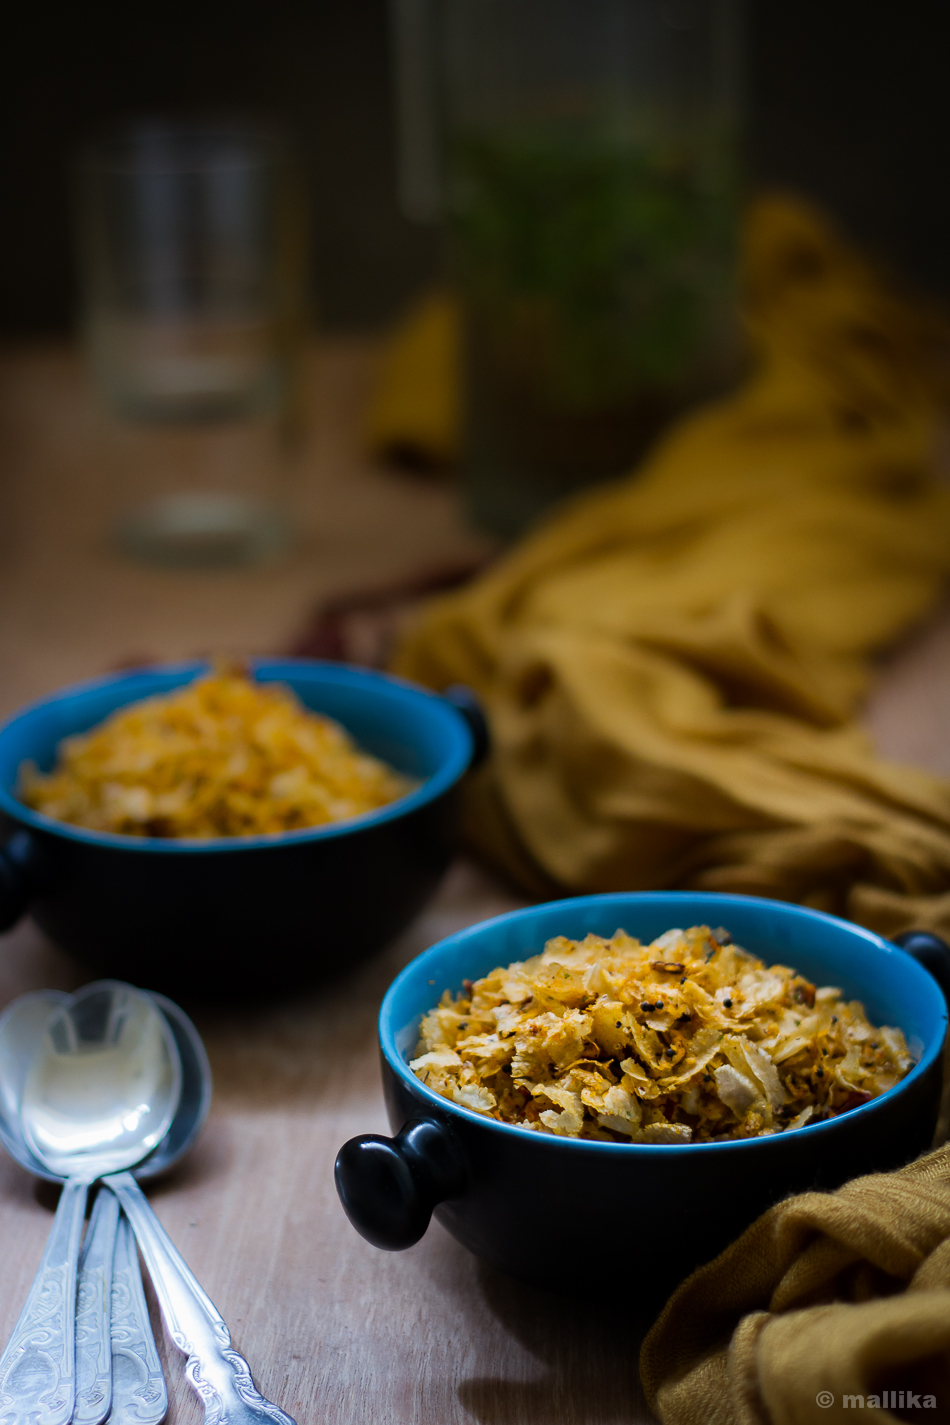
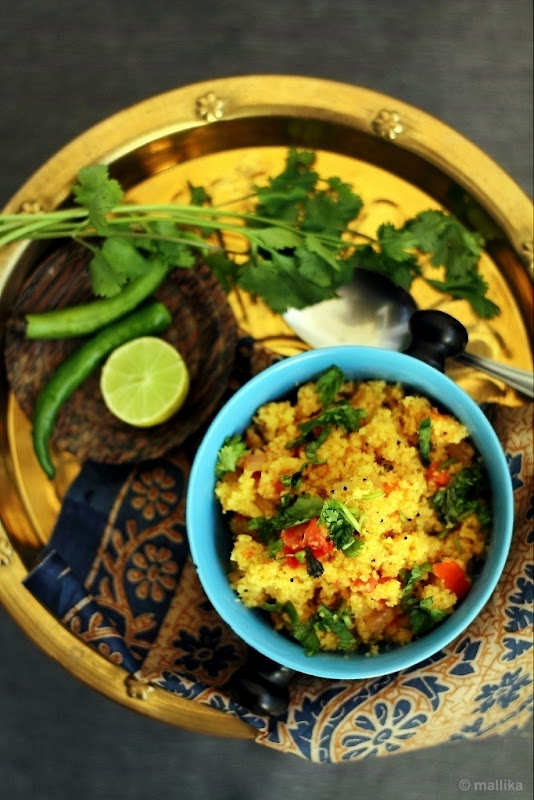
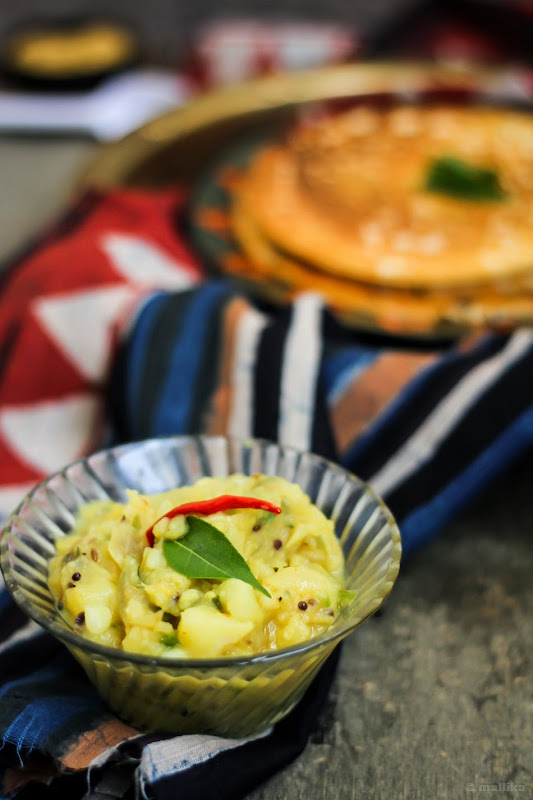
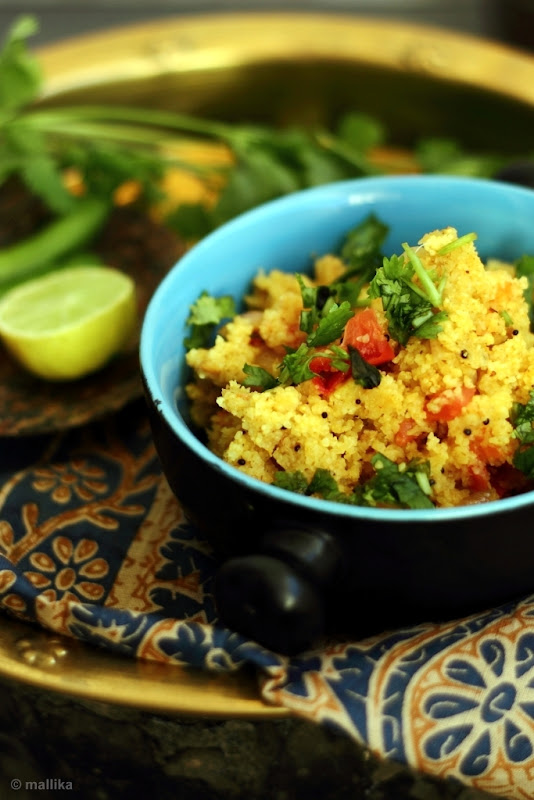
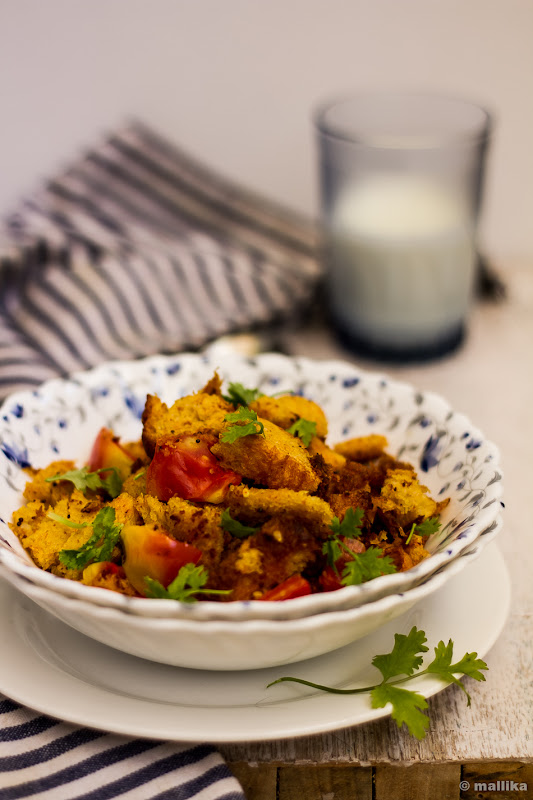
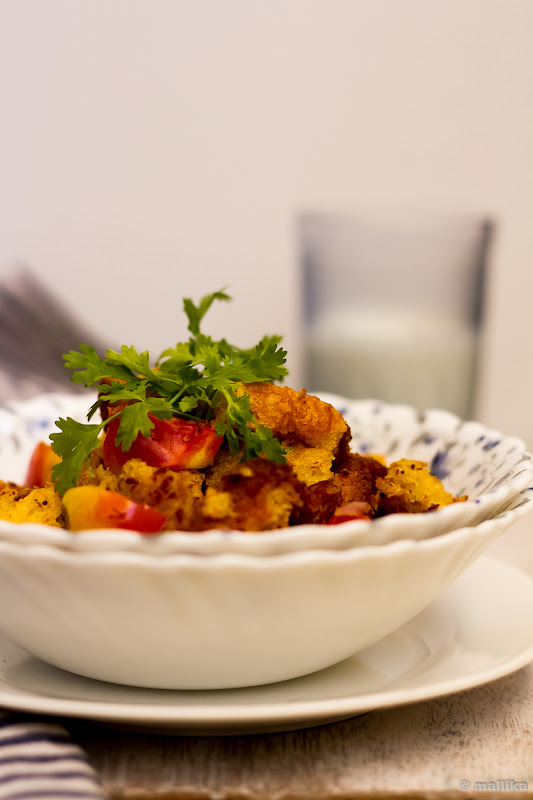
So it had to be. A day I called for huli. Made the way my mother makes it, smashing whole tondekayi (known as tindora in hindi / ivy gourd in English) and tossing them in a delicate coconut based curry infused with garlic tempering. Little toiling and more satisfaction of finally accomplishing it - done, served and relished. In feeling of worth and delirious joy like none other. Of clinching rice between fingers, mashing them through huli and drawing morsel by morsel of it with fingers to satisfy the insatiable desire of being home. Of savoring comfort food that reminds me of my mother. Of swaddling in spices that brings aromas of her kitchen into mine. Deep satisfaction. Simple joys.

TonDekayi HuLi


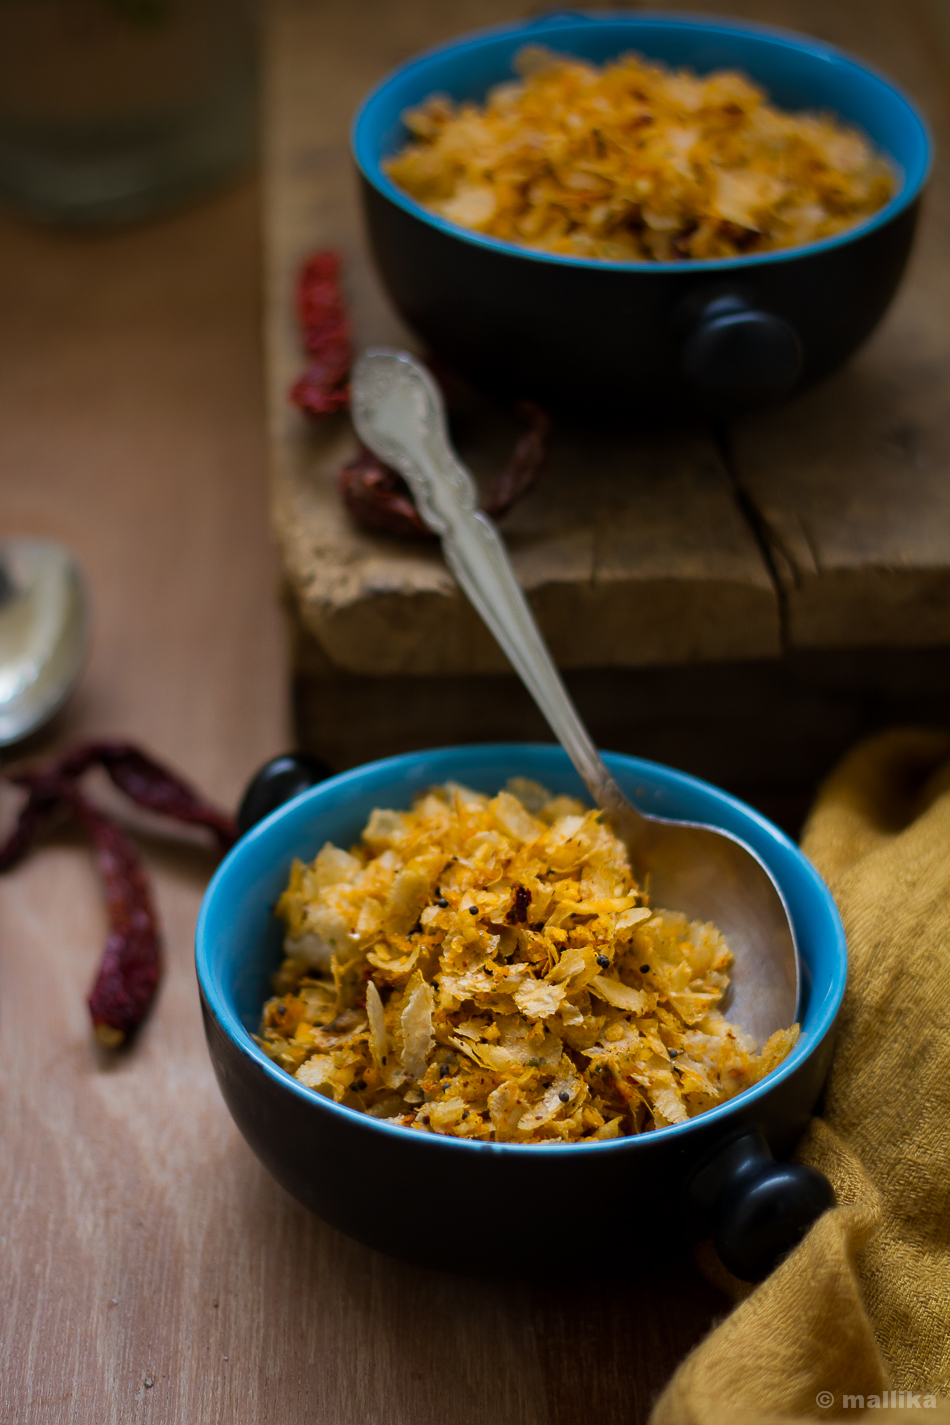
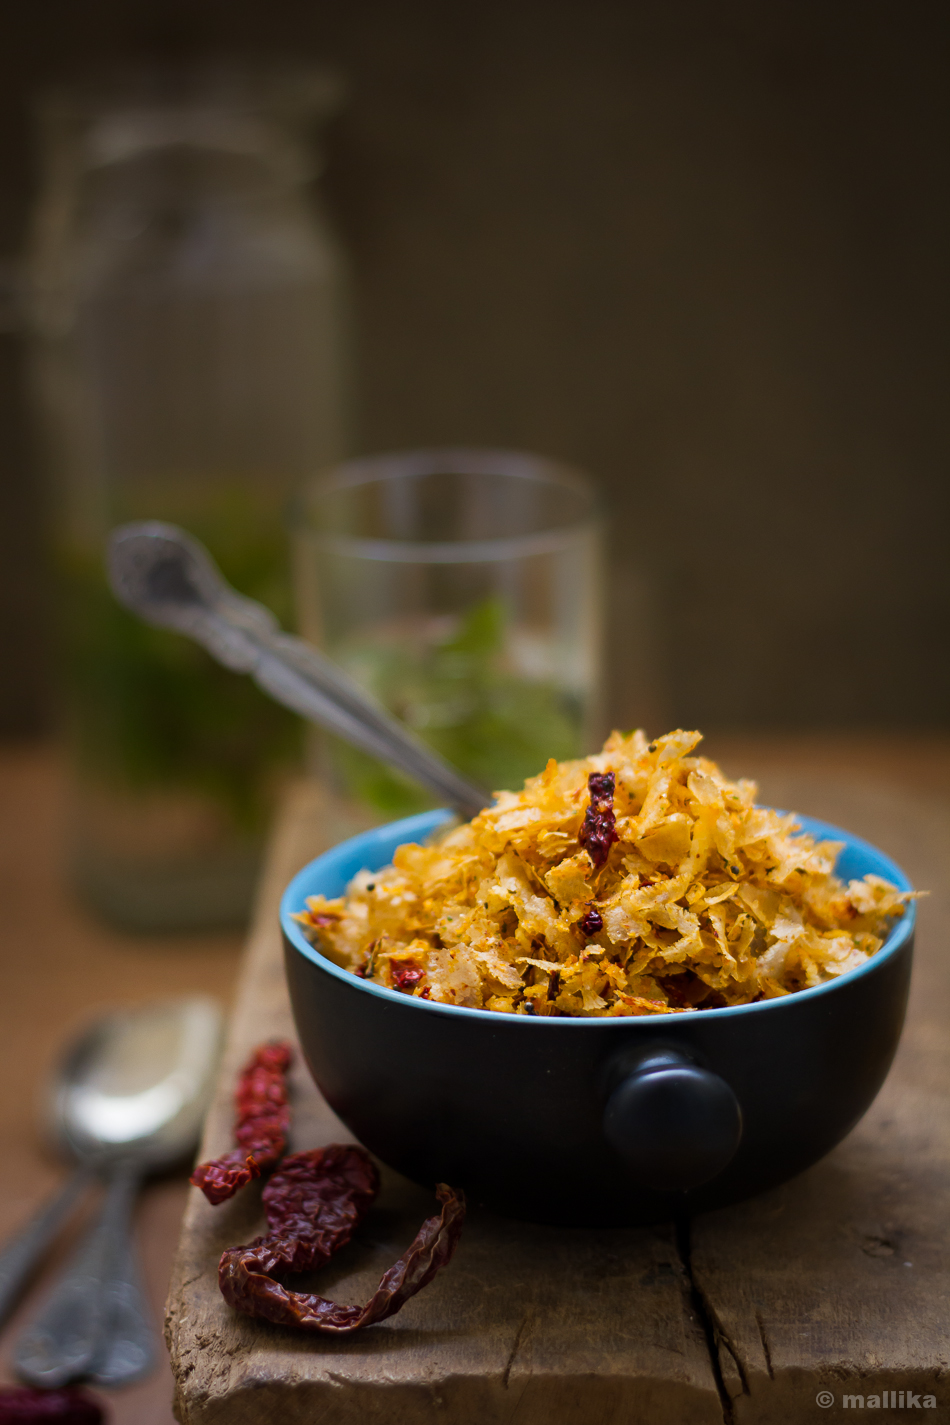
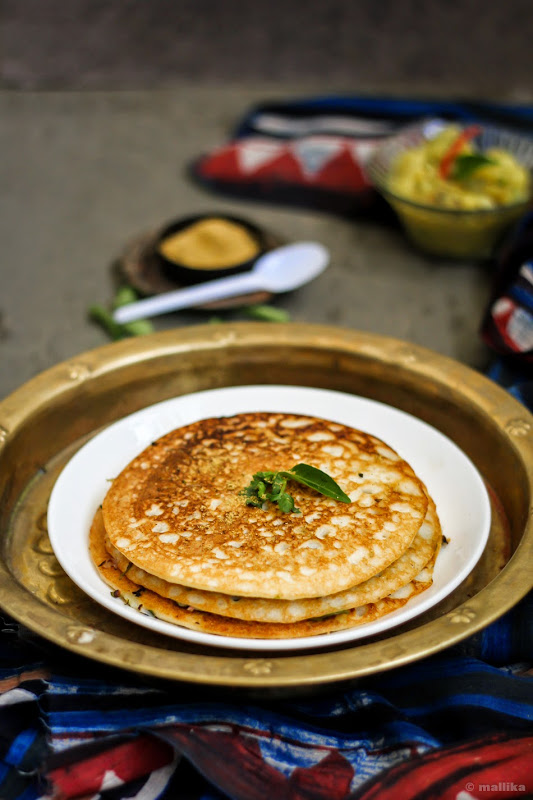
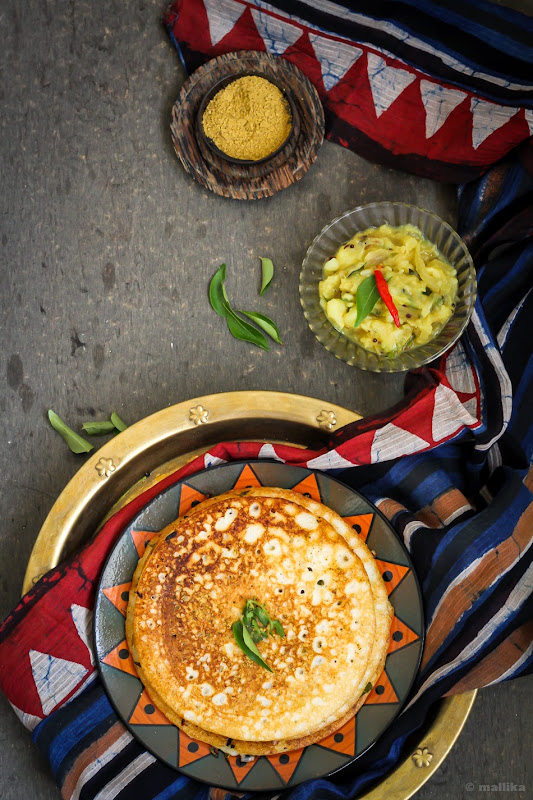
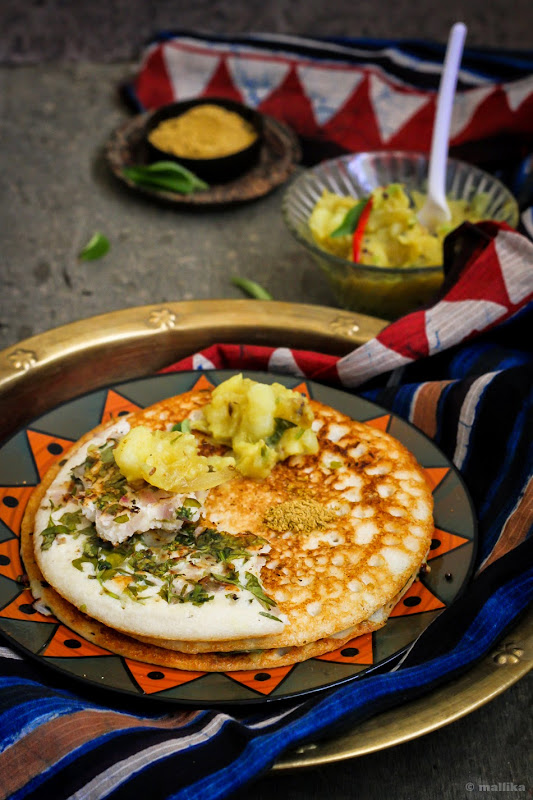
TonDekayi MeNasina HuLi | Ivy Gourd in Spiced Coconut Curry

INGREDIENTS

20-24 ivy gourds( also known as tondekayi/ tindla/ tindora)
1/2 tsp. turmeric powder
Salt to taste

Grind to Paste:

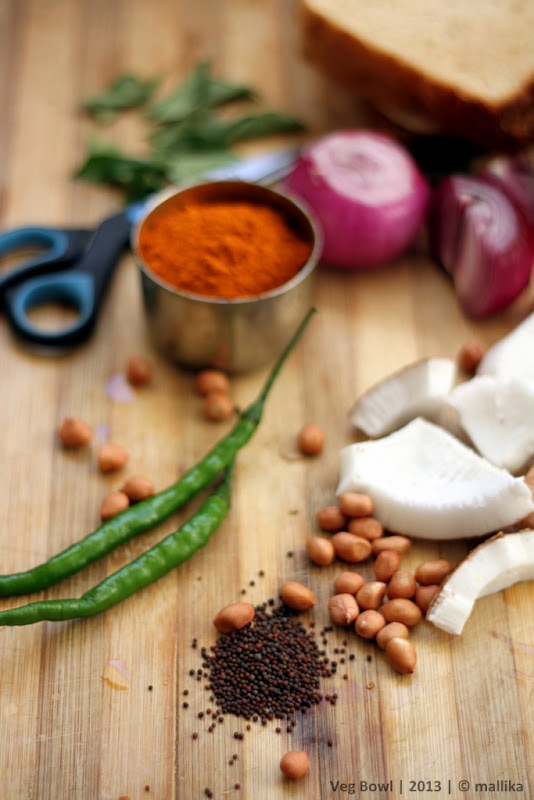
1 cup grated fresh coconut
1 tbsp. thick tamarind pulp
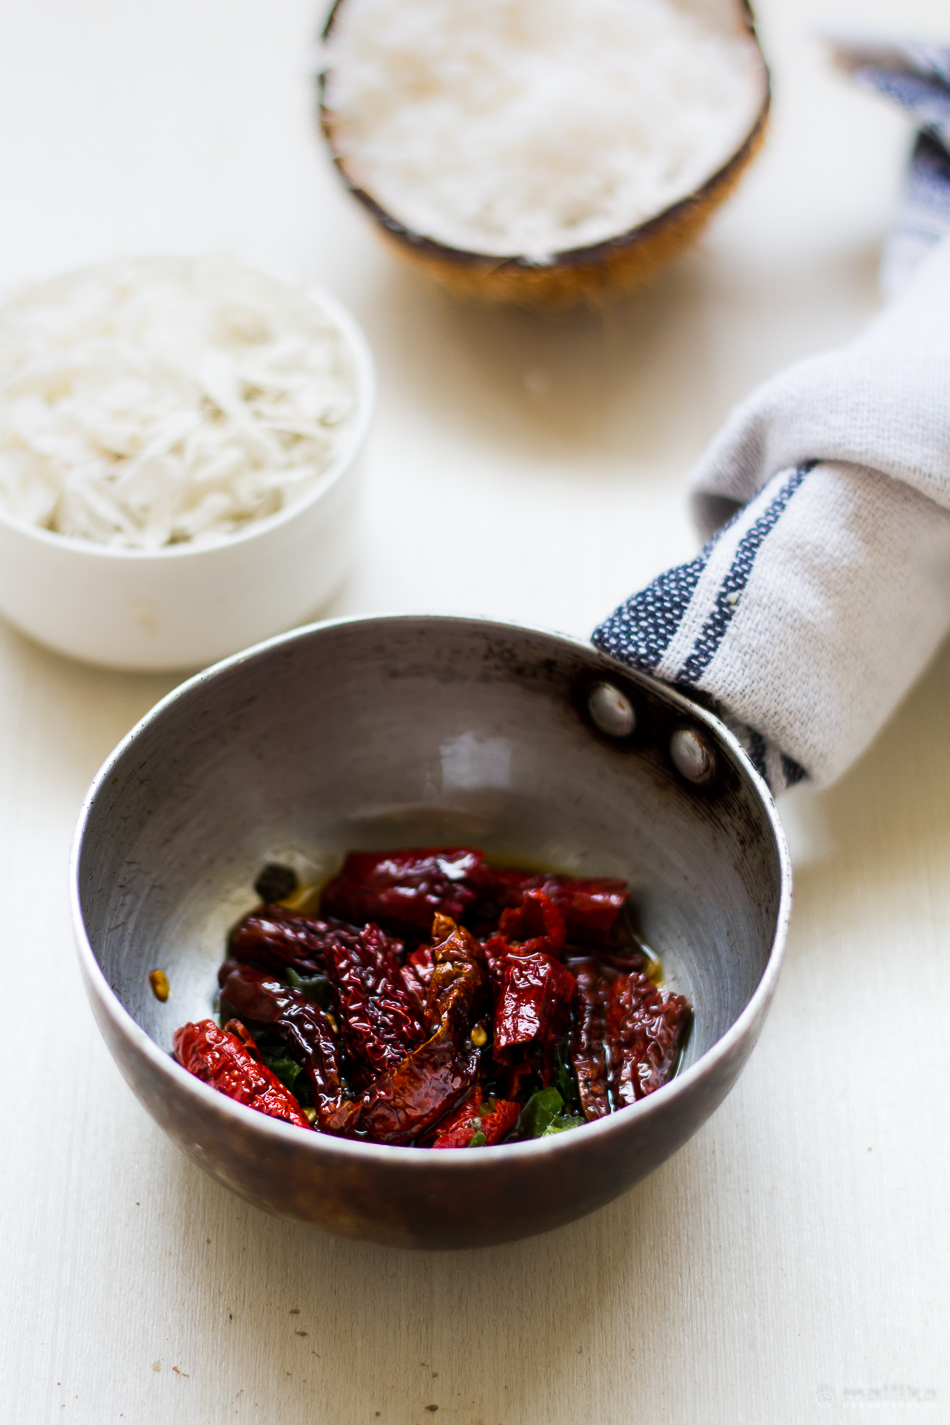
5-6 red chillies
1 tsp. jaggery

For Tempering:

2 tsp. coconut oil
1 tsp. mustard seeds
3-4 garlic pods, smashed
A twig of curry leaves

DIRECTIONS

Wash the ivy gourds in running water and clean them on a kitchen towel. Snip off the tips at both the ends (as shown in the pic above). Using the wide bladed knife, smash the ivy gourd down against the blade, putting just enough pressure using the palms of your hand to smash it. We generally use a pestle to do this. A heavy rolling pin works fine too. What you get is a rough smash of ivy gourds that is still in tact and not broken apart. Transfer the smashed ivy gourds into a pressure cooker along with turmeric powder and salt and just enough water to cover the vegetable. Pressure cook it for 2-3 whistles. Meanwhile, while ivy gourds are being cooked, proceed to making the coconut curry.

Grind to paste the grated fresh coconut along with tamarind pulp, red chillies, jaggery. Add little water to enable smooth grinding. Set aside.

Release the pressure off the cooker and transfer the cooked ivy gourds along with the water into a steel vessel. Add the ground coconut paste, stir well and bring to a rolling boil. Adjust salt and more water depending on your preferred consistency. Simmer and let it boil for 5-7 mins for the spices to be absorbed.

Prepare the tempering by heating coconut oil in a small kadhai / wok. Add mustard seeds to it. As it begins to splutter, add smashed garlic and curry leaves. Fry them till the garlic turns golden brown. Add this to the prepared huLi. Serve hot with steamed rice.

TonDekayi HuLi


Its cliché that I call myself a diehard foodie, because there are many encounters I make from time to time when I tell myself “oh! I dislike that” or “it tastes gross…. this is yuck!”. I hated papaya always but ate them with no favour because my parents reminded me how much good they would do. I could never stand the sight of jalebis and jahangiris from the time I can remember. I dislike the smell of flax and eggs in my bakes. The smell of strong coffee nauseates me even today. Breads, doughnuts and croissants were never my favourites. Several years now, I still despise samosas. My tummy aches each time I relish the street-side Indian chat. Bread Puddings at restaurants always taste gross. I could go on with this list.


Those exceptions apart, I still assert that I am a foodie at heart. As a kid, my parents did not face problems feeding me with whatever was made in our kitchen. My mom quotes often that even as a toddler I relished bitter gourd juice with as much penchant I did with any other fruit juice. I loved vegetables and fruits with far little exceptions. I was known to sneak peek into the kitchen in mom’s absence at odd hours and do furtive tasting of what was cooked for lunch and dinners. Frivolous memories of digging spoons into the prepared palya, skimming off the spiced watery part that floated on top of the huli saaru, sipping tumbler full of tamblis much ahead of lunch time, and flicking the roasted cashews and raisins that dotted the prepared halwas, till mom worried where they had disappeared still stay fresh and warm.

There were some dishes that could not be made ahead of time. They were meant to be made instantly and served immediately. One that attests my love for our cuisine is this paper-thin beaten rice spiced with green chillies and coconut. It’s really simplicity at its best and revokes fond memories of my school days when mom would whip this up in minutes to forage our hunger with such easy evening snacks. So dead simple and tastes great!


Hasi MeNasina Kayi Avalakki

INGREDIENTS

1 cup beaten rice (paper-thin variety)
1 tsp. coconut oil
1 tsp. mustard seeds
4-5 green chillies, finely crushed
1/4 cup fresh grated coconut
1 sprig curry leaves (optional)
1 tbsp. sugar
Salt to taste

DIRECTIONS

Crush the green chillies in a mortar and pestle or by hand. It's a common tradition to crush the chillies by hand, however to avoid the heat getting to your fingers, you may use mortar and pestle for the same. Crush these chillies into the fresh grated coconut so that they release all their flavors.

In a small kadai / wok, heat the coconut oil. Add mustard seeds and allow it to splutter. Add the curry leaves if using. Switch off the gas and allow it to cool. Add the crushed chillies and coconut along with the tempered oil into the beaten rice, followed by salt and sugar to taste. Toss everything well so that the beaten rice takes in the flavour and spices. Serve immediately. Accompanies well with upma for breakfast or evening snack with tea.

_MG_7299


Happy New Year 2014 folks! Welcome to the New Year with revived energies and new hopes for more dreams to fulfil. Hope you had a fabulous holiday time with your family and friends. I hope this new year brings good health, happiness, positivity, strength and peace to all.

We are getting over the holiday season and slowly bringing ourselves back into a routine. This year too, we headed to our home-town like we do every year during Christmas time. A short stay there with my parents and I was back home just before the new year eve. With work and office, this new year eve was a silent one for me. No frolicking, no partying. Just a retrospection.

_MG_7287


While I have rarely listed down resolutions for new year in the past, simply because I find it too imposing to live with, I hope to make small promises that will help me bring about some basic changes to my lifestyle. The idea is to make our life more simpler and healthier at every possible step. To control and eliminate processed food to every extent possible, to cut down on sugar and salt intake, to relish more fruits and vegetables in organic and raw, to bring in variety to our palate of food, above all to consider physical well-being as a priority. I shall indulge judiciously, not resist, yet with a tab on them. I would love to learn more, cook a lot good. I am yearning for that healthy rustic food that is comforting at heart. I wake up early and sleep quite late, a not so healthy habit that I need to bring a change to. I need more sleep and I wish to take that up seriously. It is not a diet regime, but the motto is to eat good to feel good. And to feel good is to bring happiness and positivity to mind and body.

_MG_7293


The recipe I share with you today is a rustic one that comes from the kitchens of my mother and grandmother. Kalasida Kempu Avalakki simply translates to Crushed Red Spices in Beaten Rice, where the whole red chillies are fried with mustard and curry leaves and then crushed by hand to a coarse texture. This releases all the spices from red chillies into the oil. Yum! I insist a good helping of sugar here as its the sweet, spice and salty flavour that makes this dish flavoursome. It's common to add chopped onions before serving, but I prefer it this way. Serve and consume this immediately as you make, since the paper-thin variety of beaten rice will lose its flakiness as it tends to absorb the moisture from the fresh grated coconut. This dish been there for ages in our traditional Havyaka homes, been loved by many for being so humble, often served as a snack with a cup of tea or an accompaniment to a breakfast. It takes just 5 minutes to put together, is gluten-free, easy on stomach, yet lip-smacking. It's a great tea-time snack, but is commonly served in breakfast as a side with uppittu. With all that partying and indulgent food you had over these holidays, this is an ideal recipe you will love to make. With just few everyday staple ingredients, its simplicity at it's best.

_MG_7305


Kalasida Kempu Avalakki

INGREDIENTS

1 cup beaten rice (paper-thin variety)
1 tsp. coconut oil
1 tsp. mustard seeds
4-5 whole red chillies (I've used Byaadgi variety)
1/4 cup fresh grated coconut
1 sprig curry leaves (optional)
1 tbsp. sugar
Salt to taste

DIRECTIONS

In a small kadai / wok, heat the coconut oil. Add mustard seeds and allow it to splutter. Add the red chillies along with curry leaves and fry them till the chillies swell and change their colour. Switch off the gas and allow it to cool. Crush the chillies well in their oil. I like to use my fingers for this, however if you worry about the heat getting to your hand use a mortar and pestle for the same. Once you see coarse flakes of chillies, add this spicy oil into the beaten rice, followed by fresh grated coconut, salt and sugar to taste. Toss everything well so that the beaten rice takes in the colour, flavour and spices. Serve immediately.

_MG_7310

_MG_5757


Uddina ambade, Medu wade or uddina wade are all practically the same. Its all about the shapes. Uddina wade / medu wade are round, donut like with a hole in the center to ensure even cooking of these fried fritters and are often served with idlis or enjoyed as is for breakfast. Uddina ambade are smaller, round shaped fried fritters made with the same ingredients, often served as a tea time snack or as an accompaniment to an elaborate meal. In Mangalore, these very popular evening snacks are also sold as Biscuit ambades in konkani outlets and are relished with a spicy coconut chutney and tea or coffee.

Frying is not my forte. I panic, fumble and get fussy. While anything that is fried always tastes sinfully good, I hate the preparatory and the after work of cleaning oil and vessels that accompany it, also the fact that frying needs constant attention and hand work at the wok at all times. It's occasionally I get into those adventurous shoes when I think my husband and daughter deserve these treats atleast once a while!

These ambades are traditionally served with simple white coconut chutney. But for a spicy twist, I made a Tomato Peanut Chutney that my husband absolutely adores. I have made this chutney on several occasions and they go quite well with idlis, wadas, dosas and akki pundi. I reserve to post the chutney recipe for another day as they do deserve a dedicated post. Do try these ambades and let me know how you loved them.

_MG_5759


Uddina Ambade | Black Gram Fritters

INGREDIENTS

1 cup urad dal / black gram
5-6 whole black pepper, broken roughly in a mortar and pestle
2 green chillies, finely chopped
1 sprig curry leaves
1 tsp. finely chopped ginger
2 tsp. grated fresh coconut
Salt to taste
Oil for deep frying

DIRECTIONS

Wash the urad dal thoroughly and soak it in water for atleast 3-4 hours. This will help to soften the dal. Drain all the water out and grind the dal to a fine paste adding as little water as possible. The batter should be thick, but not stiff. Stiffer batter will result in dense ambades, while runny batter will soak in a lot of oil while frying. Incase the batter seems runny than thick, then you may add in a tablespoon of rice flour. Rice flour also makes the ambade crisp, so a teaspoon of it helps. The key to getting good ambades are in having the right consistency of the batter. Transfer the batter to a bowl and add in the finely chopped green chillies, ginger, grated coconut, peppercorns and salt to the ground batter. Beat the batter well with a wooden spoon and set aside.

Heat a wok-full of oil till its medium hot. Test the oil by dropping a pea sized batter to the oil. If it sizzles and rises to the top then the oil is ready. Lower the temperature and using a spoon, drop small dollops of batter into the oil side by side till they have just covered the oil. Do not overcrowd them, else they will be undone in center. Fry them on slow flame till they are golden brown. Remove and drain on a kitchen paper. Serve hot with chutney of your choice.

_MG_5755

BasaLe Soppu HuLi

How to make BasaLe Soppu HuLi| BasaLe Soppu Kodhel | BasaLe Soppu Sambhar
Homely, rustic and vastly organic. This is the kind of comfort food we grew up eating, often made from easily available farm grown wilds and greens fetched from aunt's estate, grandma's gardens and at times home-grown. I made this dish to bring back fond memories of a part of my childhood spent in the serene small town where convenience to such wild greens was in sheer abundance and was often subjected to lack of appreciation. And so much more to apologize myself for hating this dish through my growing up years. I remember disliking these greens in particular, eating them with puckered brows every time they made an appearance on the table, because my mom never spared cooking even those thick stalks of these creepers every time she lay her hands on them. I have seen dad relish them with relentless penchant. They were probably their favourites, rest assured they were not mine.

But now, it seems like ages since I had a chance to taste BasaLe Soppu or commonly called Malabar Spinach. The Malabar Spinach, also known as Red Vine Spinach grows abundantly in humid weather conditions. It has wide heart shaped leaves with soft-stems that grow into creepers. Despite my dislike for them through my growing up years, I missed them ever since I moved to Bangalore. I have never seen them around here where we live. If someone offered me this dish now, I would probably tag them 'exotic'. As kids, we were told these are healthy and have a great source of nutrition. But it's only now that I have learnt to appreciate those thick stalk-y chews of these wild creepers.

Homegrown BasaLe Soppu

(Pictured above, a lone creeper of Kempu BasaLe Soppu in midst of home-grown mint leaves)

A while ago, I grabbed a budding Malabar Spinach plant from a nursery on our trip back home. A handful of budding leaves on a stalk is all it stood with. Before I could let them grow and spread their wings, my impatience to revive my childhood memories with this dish took control over me and I went on a chopping spree. What remains now is a single barren short stalk that is making its way to climbing, twining, and creeping along another stem. As I patiently watch it grow to nurture new leaves, which will probably take a couple of months, I have a strong sense of excitement of using these home grown leaves in this home styled traditional recipe today. I hope you enjoy them as much as we did.

BasaLe Soppu Kodhel_1


Basale HuLi

INGREDIENTS:

1/2 cup Basale soppu (Malabar spinach / Red Vine Spinach)
1/2 cup togaribeLe / tuvar dal (pigeon peas)
1/2 tsp. turmeric powder
3 tbsp. kottambari beeja (coriander seeds)
10 + 2 Byadagi red chillies
1 tsp. hing (asafoetida)
1 tsp. jeerige (cumin seeds)
1 tbsp. kadale bele (split bengal gram)
1/2 tsp. menthya (fenugreek seeds)
1/2 cup grated raw coconut
Lemon sized tamarind
1 tsp. coconut oil
1 tsp. jaggery
1 tsp. mustard seeds
A sprig of curry leaves
Salt to taste

DIRECTIONS:

Wash and cook the togaribeLe/pigeon peas in pressure cooker along with turmeric till they are soft and mushy.

In a thick bottomed pan, dry-roast the coriander seeds, cumin seeds, methi seeds, split bengal gram, hing with about 7-10 red chillies till they are fragrant. Remove from heat and allow them to cool. Grind them to a fine paste with a handful of grated fresh coconut and tamarind. Set aside.

Wash the Basale leaves, along with their tender stalks. Chop them into small pieces. In a wide mouthed pan, cook the leaves and stalk in some water. As the leaves wilt and the stalks are cooked, add the cooked dal to this along with the freshly ground paste, a cup of water and bring to a rolling boil. Add a tsp. of grated jaggery along with salt to taste. Adjust the consistency of this huLi by adding more water to your taste and preference.

For the seasoning, heat a tsp of coconut oil in a wok. Fry the mustard seeds till they splutter. Add in torn curry leaves, hing and 2 broken red chillies. Fry for 30 sec and turn off the flame. Add this seasoning to the prepared huLi. Serve hot with steaming hot rice.

BasaLe Soppu HuLi_1

HuLi Avalakki

Gojju Avalakki recipe, HuLi Avalakki recipe, Havyaka recipes
I have been busy lately. We’ve had lot of travel on our cards this month and have been really enjoying all of it. Earlier this month, we were off to Goa to celebrate our anniversary. Then we headed to Lucknow last week for my brother-in-law’s wedding. Next week, we'll be off travelling to Chennai to celebrate Diwali with the newly-weds. We are just back from the wedding, beginning to unpack and trying to settle our life into normalcy. After all those pre-nuptial sacraments and wedding ceremonies, the late night partying, lot of gluttony gourmandizing, home coming feels good and we are craving simplicity. Weddings like these bring about gastronomical feast and when it spans over a couple of days, over several meals, you know you’ve had excess of it. Here’s when we are in need of a serious post-holiday diet detox. To settle into something homely and comforting like this one.

Gojju Avalakki


As much as I wish, not on all days do I have the luxury of making a full-fledged breakfast at home. Most weekdays, we hugely depend on office cafeteria for our breakfast due to lack of time to make one, much unlike of what I have grown up being to. Infact back home at my parents place, breakfast was a 3 course affair and it still continues to be. Being the most enjoyable meal of the day, this is when the family comes together seated at the table and grows over healthy conversations. Starting with a coveted cup of morning tea, seldom a biscuit or rusk to accompany, it’s followed by a main course of either idli, dosa, upma, poha, roti subzi or anything solid and nutritious to fill the stomach, and always ends with a variety of fresh cut fruits to wrap the meal. It’s a norm to have homemade pickles, chutney powders, jams, honey, ghee, jaggery syrup within hands reach on the table to accompany our breakfast dish. Between my hectic routine, I may have gone away from those traditions of enjoying daily breakfast leisurely, but on weekends and days where mornings are at my luxury, I ascertain to make a breakfast that is filling and wholesome and boasts of my family traditions.

HuLi Avalakki


Gojju Avalakki, also commonly known as Huli Avalakki is a delicious Karnataka breakfast delicacy made from beaten rice (called as poha / avalakki). I wonder what took me so long to make this breakfast dish at home considering how much I love this dish. This is yet another dish that comes from the realms of our traditional kitchens. A dish that I have grown up eating and evokes strong memories and wonderful nostalgias. My mother made this effortlessly, particularly on special occasions like Shivrathri, Navarathi and Ganesh Chaturthi, where use of onion and garlic are forbidden. It often makes a prominent presence during festivities such as weddings, poojas and Hindu festivals. With a delectable combination of spicy, sour and sweet, this dish is so traditional that you would hardly find them in hotels and restaurants anywhere.

HuLi Avalakki


Gojju Avalakki / HuLi Avalakki

INGREDIENTS

1 cup Beaten rice (called as flattened rice / avalakki / poha – thick variety)
1 tbsp. Thick tamarind pulp
2 tsp. Sambhar powder
1 tbsp. Grated Jaggery
1 tsp. Turmeric Powder
½ cup Grated Coconut
Salt to taste
1 tbsp. Coconut Oil (highly recommended)
1 tsp. Mustard seeds
2 Broken Dry red chillies
1 tbsp. Groundnuts
A Sprig of Curry leaves
A pinch Asafoetida / Hing

DIRECTIONS

Wash the beaten rice / avalakki in a couple of washes of water. Drain off the water and allow the beaten rice to absorb little water retained during washing. It should swell and soften in 15 minutes, yet maintain it's shape and texture. Once softened, add a tsp. of coconut oil (optional, but helps in keeping the avalakki separate), salt to taste and a pinch of turmeric.

As the rice soaks, prepare the gojju / huLi masala for the avalakki. In a small chutney grinder, finely pulse the fresh grated coconut along with thick tamarind pulp, sambhar powder and grated jaggery. Do not add any additional water while grinding. Set aside.

For seasoning, heat a tbsp. of coconut oil in a thick bottomed pan and add mustard seeds. As they begin to crackle add the peanuts. Fry them for few minutes till the peanuts change their color. Add the red chillies, asafoetida / hing powder and fresh curry leaves. Fry further for few seconds. Next add the avalakki to this and mix well. Add in the prepared gojju / huLi masala to the avalakki and gently stir the entire mixture further for a few minutes. You may cover and cook also. However, I like to cook open to ensure there is no excess water trapped that may make the avalakki soggy. When cooked, turn off the fire and serve hot. Gojju Avalakki goes well with yoghurt/curd, chutney powder or plain jaggery.

HuLi Avalakki


It’s been far too long since I’ve put my thoughts into words and at times I think my pressures at work harass me so much that my creative side is fast dying out, a fear I live by because my blog survives a lot on this passion to write and share. And to blow that creative whistle out of me and bring my best here, I am of the sorts who needs to sit down, compose myself, cut off from all the chaos, and bring in positive verve that facilitates my artistic freedom. Least to say, I can never bring a good write up out here if my mind is stressed or has hazaar things running on it, which is how chaotic the past couple of weeks have been.

Work pressures aside, the dear husband has been away for another extended business trip. Well, his 3rd one in the past 6 months. Okay, it was meant to be a short quick one with a promise that he’ll be back soon and I bid him a happy bye. But as destined, things never get easy my way, and, to my dismay it has ended in a month long business tryst. In his absence, life as usual is never the same. I am living life of a super duper woman balancing several tasks over my shoulders. Or at least I like to think that way. Like, I dangerously tread on the 2 wheeler, zooming against time (the least I would want is not to miss my office bus and end up taking local over crowded buses at 3 stop-overs to reach my workplace) in high traffic zones and cross roads balancing the little 2 year old between my thighs to pick and drop her daily. Hardly do I realize that I could have just missed a near possible accident, a fatal one that too. The little one too thinks it’s fun to take her hands off the bike holders and wave in full swing to strangers on road or turn her head around by 120 degrees to watch a stray dog pass by! Kind of masochism yeah? Indeed.


The last week, the awry me broke a few basic rules too. The evening was pretty hectic, besides the fact that I was late from work. Adding the woes of traffic, my never ending rant on that, I was racing against time to pick my toddler. With an empty kitchen at home, a heavy headed mind, and a couple of constant calls from work, I thought skipping long queues at groceries should be okay once a while. After all living by rules isn’t always fun, right? So I crossed lines, avoided the folks ahead of me and headed straight to the billing counter. What followed was a series of heated uproar and mayhem. Worst, the embarrassment of getting annoyed looks and derogatory comments from folks around, especially if you are not the one used to it. A lesson learnt, don't break rules once a while if you've never done in the past. It makes the battered you feel battered further!

As if there was not enough on my plate already, the last week I had been pacing really fast trying to sort out things in my head and out. Every time I cleared the disarrayed state of interiors, put things back to where they belonged to, my toddler brought them back to square one from where I had started. Mayhem! Though that's an everyday story to say, when you are juggling through a hundred things, even the tiniest disruption is good to cause distress. In nutshell, for real, my frenzied current state of life seems like a fast reel action movie. For one, I am glad I wrapped up the most important to-do tasks on my list, even if that meant getting albeit a little stressed. With so many things going around, I haven’t really been able to sit down and compose or collectively bring myself to a humdrum. I missed blogging every bit. Every draft I put down ended as another draft. Next week, I’ll make a trip to the passport office, yet another ardent task I’ll cross my fingers at. Honestly, cooking has been my last priority between this commotion, since the little time or energy leaves me with hardly any gusto to bake or cook fancy. Thumbs up to those baby meals, quick fixes, one pot meals and odd indulgences in store-bought ice creams for a treat that we’ve been surviving on.

This week though I see things settling for better. The husband will be back too. Today, I made time for cleaning job, swapping bed sheet covers and paying off bills. I took my little one out to collect the laundry and do grocery shopping that didn’t seem too intimidating. This morning, I made a complete breakfast of this Onion Uttappa with Potato subzi. And more importantly, I finally got down to writing this post that will hopefully not end in another draft. Indeed that’s a good sign.


Onion Uttappa with Stir-fried Potatoes

INGREDIENTS

For the Dosa batter:

1 cup Urad dal
2 cups rice
½ tsp. Fenugreek seeds
Water, as required
Salt, to taste

For the Onion Uttappa:

2 large Onions, finely chopped
2 green chillies, chopped
Handful of coriander leaves, chopped
A sprig of curry leaves, chopped

DIRECTIONS

Soak the dal, rice and fenugreek seeds in sufficient water to ensure they are submerged for atleast 6 hours. Grind them to a fine paste with water that is sufficient to make it a thick flowing batter. Allow them to ferment for atleast 8-10 hours. For the Uttappa, mix all the said ingredients and set aside separately.

Heat a non-stick pan or a greased iron pan by smearing little oil. Drop a dollop of dosa batter in the center of the pan and swirl it in circular directions using the spatula to spread the batter uniformly. Spread the onion mixture on top of this batter. Grease the edges and cover the pan, allowing it to cook on the bottom till golden brown. Flip over and cook on the other side as well. Serve hot with potato stir-fry and chutney of your choice.


South Indian Stir-fried Potatoes

INGREDIENTS

4 large potatoes, boiled and skinned
1 tbsp. vegetable oil
1 tsp. mustard seeds
A sprig of curry leaves
1 large onion chopped fine
1 tsp. grated ginger
1/2 tsp turmeric powder
2 green chillies finely chopped
Salt to taste
1 tsp. lemon juice, optional

DIRECTIONS

Mash the potatoes roughly between your fingers. Heat the vegetable oil in a pan /kadhi on a medium flame. Add the mustard seeds and curry leaves and fry till the seeds splutter. Next fry the ginger and onions till translucent. Add the boiled, mashed potatoes, green chillies and turmeric powder. Add salt to taste and stir well till all is combined. Cook for 5 minutes. Turn off the flame and add lemon juice to taste. Serve hot with dosa or uttappa.

To make homemade peanut powder, refer the recipe here.

Vegetable Huli

How to make Mum’s Cheat Vegetable Huli | Easy Vegetable Huli
In the small town where I grew up majorly, life was simple, time had a hold and things were slow. I had a blissful childhood in safe shelter of love, care and freedom. It was indeed the small town charm that made life simple and modest in a community replete of love and affection from all in the neighbourhood. Life there had an advantage and as kids, we enjoyed the proximity of our school to home, which brought us the perks of walking down home during the lunch time. As the clock stuck 12:30 PM, the school bells would ring for lunch break that spanned over an hour, which meant we had ample time to walk home, relish hot, home cooked meal, watch our favourite comedy series that we were hooked to (oh yes, we were hooked to Hum Paanch back then, to an extent that I could have given exams on it and topped them!) and get back to school on time for the noon classes.

Every afternoon as the school bell rang for lunch hour, we would walk back home midst the humid summer heat, soaking sweat in the navy blue pinafores that we wore for our uniform. Plonking ourselves under the comfort of fans and beating the blazing heat with tall glasses of chilled water, mum in all ears would serve us steaming hot rice, topped with either tove, saaru or huli and dollops of ghee on some days or tamblis with stir fried vegetables on other days. Happalas (paapads) and salivating homemade uppinakais (pickles) were a ritualistic part of our menu and always stayed on the table. I cannot ignore the joy of biting into crisp, fried, spicy sandiges served on days when tamblis showed up on the table. Mum was a strict believer in healthy, nutritious food and she ensured that the food she cooked with love balanced in taste, health and nutrition very well.

Vegetable Huli


Our meals always ended with fruits for desserts. She would coax us to eat lots of vegetables and fruits as she does even today. She had a reasoning for what was cooked and she believed in them firmly. Like when greens were cooked, she would top them with freshly squeezed lime, because the vitamin C in lime aids in the digestion of iron in greens. Similarly, if a gravy was cooked with red chillies for the heat, the stir fry would then be cooked with green chillies, or vice versa to kill the monotony of flavours. Fresh vegetables and greens were a part of our daily diet, either in form of stir fries, or in huli, else in tamblis. And her love for organic food ran in her genes. Rustic vegetables like banana stems and flowers, drumsticks, raw jackfruits, gujje, basale soppu and doddapatre (brahmi) leaves that grow abundantly in wild during monsoons, produces that do not require intensive care, manure or added pesticides made up her favourites. On several other days, she broke the regime of traditional South Indian cooking with her delightful North Indian delicacies. On odd occasions, dessert during mid-week was in treat for us too. I was fortunate to have enjoyed the liberty of coming home to relish fresh home cooked meals for my lunches. It meant a lot – fresh, healthy, clean and nutritious. That was probably why I enjoyed food thoroughly even as a child, because it was simple, fresh and tasty.

Vegetable Huli


With time as I grew up to being a mother myself, I realized that care and affection towards healthy food comes by instinct for your family. It means nurturing the tradition of cooking healthy, wholesome meals that can balance in taste and nutrition. Someone reading this blog may probably think that the recipes, mainly desserts shared here are all what we eat. But truth to be told, we do not eat banana breads every day, nor do we have tea cakes every evening. There’s a lot more healthier we eat than I can share here. But I don’t feature them here, least I dread this space would become tad boring.

Like I said, we grew up eating huli, that is quite traditional to our cuisine. I don’t make huli often because I never attempted to make a good one that tastes like what my mum or grandmom make. While in my teens, my mum would often chuckle saying “A good Havyaka bride is known by the Huli she makes!” If I had to go by that saying, I would never fit that bill! One of the reasons why I featured this recipe here is because the version I share today is much simpler, the cheat kinds as taught by my mum.

Huli is a traditional Havyaka dish from the famed Mangalore-Udupi region, made from lentils, cooked often with vegetables, roasted spices and ground liberally with coconut and tamarind, balancing off the tang with a hint of jaggery. It’s the balance of spices, coconut and tamarind that make up a good huli, an art that takes years to master. While there are several names (also called Kodhel) and different versions of it, this particular version of huli tastes so close to the traditional one I've grown up eating, that my dad, an avid huli lover and a good cook by himself, believed that I went through the laborious task of roasting and grinding all the spices, while mum and I chuckle on sheepishly. Devoid of all that hassle, hence quicker and easier too, it’s flavoursome and delicious served fresh with steaming hot rice.

Vegetable Huli


Mum’s Cheat Vegetable Huli

Recipe adapted by mum

INGREDIENTS

1 cup mixed vegetables (raw bananas, brinjals, pumpkin, mangalore cucumber)
½ cup split pigeon peas / tuvar dal ( togari bele as in kannada)
1 tsp. turmeric powder
Salt to taste

For the Huli arpa, grind to paste:

½ cup grated fresh coconut
½ cup tamarind pulp / lime sized tamarind ball
3 tbsp. sāmbhar powder (preferably Karnataka styled)
1 tbsp. jaggery

To temper:

1 tsp. mustard seeds
2-3 whole red chillies
1 tsp. asafoetida
1 sprig of curry leaves
1 tsp. coconut oil

DIRECTIONS

Wash thoroughly and pressure cook the split pigeon peas / togari bele along with turmeric and 2 cups of water on 4-5 whistles. For 1 measure of the dal I use approximately 3 measures of water. In a separate pan, cook the vegetables with 1 cup of water and salt to taste till they are cooked and just tender. While the vegetables are getting cooked and the pressure cooker is cooling down, prepare the masala paste (called as huli arpa in kannada) by grinding fresh grated coconut with tamarind pulp (lime sized tamarind kernel cleaned and soaked in ½ cup warm water for 10-15 minutes), sāmbhar powder and jaggery, adding water little by little, if required, till its smooth and comes to chutney consistency.

Using a wooden ladle, mash the cooked split pigeon peas / togari bele to a paste. To this add the ground masala paste / huli arpa along with vegetables, and their broth and bring it to a rolling boil. Add sufficient water to bring it to a consistency of your preference. Adjust salt to taste.

Temper by heating some oil in a small wok. As it heats up, add mustard seeds, followed by whole red chillies, torn curry leaves and asafoetida / hing. Fry for a minute, turn off the flame and quickly add it to the prepare huli while hot. Serve hot with steamed rice.

Notes:

Tempering with coconut oil is optional, but highly recommended as it gives an authentic and traditional taste to this dish. You may use vegetable oil instead of coconut oil. Alternatively, use clarified butter / ghee for a richer taste.

I’ve used mixed vegetables here. However you may use these vegetables individually. Traditionally, for weddings and festive meals, Mangalore cucumber is the most common vegetable used in this kind of kai huli.

Vegetables that go well with huli are raw bananas, brinjals, pumpkin, mangalore cucumber, yam, bottle gourd.

The color of this dish hugely depends on the kind of chillies being used in the sāmbhar powder. Typically, byaadgi chillies will give you deep reddish brown hints while guntur chillies render more spice and less colour.

While we call this as huli in Havyaka cuisine, it is also popular by the name of kodhel in some of the sects/communities of coastal Karnataka, especially among the Tulu speaking Brahmins.


Delhi was fun! A whole lot of fun! We are back after having a fabulous time there and it’s taken a week to unpack and settled down to routine like usual. I stayed away from blogging on Veg bowl for a while, didn’t blog hop either, nor did I check my mails. I did no business with my laptop, since I needed an intentional short break away from home chores and the daily grind at work, and this family function was just the perfect excuse. The engagement ceremonies went off smoothly and we had a real good time meeting family and friends, chatting, partying through nights, hitting the paranthewali gallis, shop-till-drop on Delhi streets, city sightseeing and needless to say, a hell lot of indulgence in food! We fit in a day’s trip to Agra and Fatehpur Sikri and loved going back to live history with the city. Beautiful indeed.

We came back with lovely memories and tons of photographs to be cherished. I am yet to sort them out, and while they run in thousands, I am clueless where to make a beginning!


Although being away was exciting to break the monotony of the day-to-day routine, it’s a warm, comforting feeling to be back home, and tuck ourselves into the bliss of home cooked food. We dined out mostly while in Delhi and Agra, on the oh-so-common butter parathas and cream laden heavy North Indian delicacies, that were delicious and sinfully good for our occasional indulgences, but far from the simple home cooked meals that we began craving at the end of our trip.

Back home this shavige uppittu was a humble, yet delightful breakfast dish we relished. Nothing fancy, but a simple upma that’s dotted with vegetables and flavoured with green chillies, lime and coriander herbs for the garnish. Served with milk and fruits by the side for the morning, this was the perfect way to revive the comfort of our home-made breakfast.

Well, this makes a great tea-time snack too.


Masala Shavige Uppittu / Masala Semiya Upma

INGREDIENTS

100 g rice semiya (called shavige, as in kannada)
2 tsp. oil
1 tsp. mustard seeds
5-6 curry leaves, torn
8-10 cashew halves (can also substitute peanuts)
1 onion, chopped
1 carrot, diced to small pieces
3-4 beans, finely sliced
2 green chillies, chopped
A pinch of turmeric
Juice from ½ lime
1 tsp. sugar (optional, but highly recommended)
Salt to taste
Coriander leaves to garnish

DIRECTIONS

Cook the rice shavige in plenty of boiling water. When it’s al dente, switch off the flame and drain off the water completely. Shock the cooked shavige by running it under cold/tap water for a few seconds. Drain the water off completely and add a tsp. of oil, salt to taste, sugar, turmeric powder to the prepared shavige, toss lightly and keep aside.

In a wok / kadhai, heat a tsp. of oil and add in the mustard seeds. As they begin to pop, add the cashew-nuts and fry them till they brown lightly. Next add the chopped onions and fry till they turn translucent. Add the chopped carrots and beans and fry till they are just done. Add in the green chillies and curry leaves and fry further for a minute. Toss in the cooked shavige to this and stir well. Cook further for another 4-5 minutes. Adjust salt to taste. Turn off the heat and add in a dash of lime juice. Garnish with coriander leaves and serve hot as is or with a chutney of your choice.


Couple of years ago I got an Aloe sapling handed over to me by my mom so that I could plant them in a lone pot that sat empty for a while in my backyard. My Aloe grew beautifully even with unattended attention. She stood strong in the worst of weather, rains, dust, pollution and draught, grew stout by days and bred couple of more saplings till the pot could hold it no longer. Later when we moved into our own little nest, one of the first things I had on my mind was to do a bit of kitchen gardening. For a long while I attempted to do some kitchen gardening, but all in vain. I hardly attended the Aloe, yet even today she adorns that pot I planted years ago. My kitchen gardening went for a toss as my coriander and fenugreek seeds never sprouted, the mint saplings I planted never took off, the leaves withered, the brahmi, sambharballi, amruthaballi and insulin plants went fungal till they broke down to die. It pained me as I saw their end. Every time I went to a nursery, I asked for tips and they would hand over some fertilizers that promised to help my plants grow, but they didn’t. Something went terribly wrong. I blamed the pot, the soil, the seeds, the vaastu and gave up on home gardening.


Things on gardening seemed brighter last month. The changes of water I use to wash the rice, the dal, the greens and other vegetables in are used efficiently to water my aloe and other pots. In quest to save water and not let go into drains, I drain them down to the aloe plants and the extra ones to the empty pots too so that they evaporate to the nature. A month ago though I was taken by surprise. A sapling that I thought to be weed sprout through my pot. I let it grow naturally till it shot up to 2 feet tall and flowered tiny white buds. I was elated but had less known it would fruit too. Last week, couple of the white flowers withered and beneath them shot tiny buds of green chillies. Somewhere in the process of draining the washed water into the pots, the green chilli seeds must have made their way and sprouted. Sometime ago, I had a tomato plant sprout the same way. It bore 3 cherry tomatoes that I used in my cooking, but later wilted away. This triggered my love for gardening all over again.


Last Sunday, we drove down to the nursery. I got a pot of basil and couple of seeds too. I almost went crazy and could have picked up the whole nursery, but I settled with basil, spinach, fenugreek, dill and parsley. I potted the fenugreek seeds again in a hope that they will sprout. I speak to them daily. I care for them just like my baby. I try to bond and hope they will reciprocate. I’m keeping my fingers crossed and hope they will shoot soon.

Meanwhile the budding green chilies have been making me happy. I watch them for hours. I tender them affectionately. Today morning, I couldn’t resist and plucked the longest one for this South Indian breakfast delicacy, Tomato Kharabath, which my husband loves for its tang and spices. The chilies rendered a fresh, bold and spicy taste to this dish. Beyond all, they were organically grown in my own garden. That’s the beauty.


Tomato Kharabath

INGREDIENTS

1 cup pre-roasted semolina / rava
1 onion, chopped
2 green chillies, finely chopped
2 large tomatoes, chopped
3 tbsp. ghee / clarified butter (use regular vegetable oil for a vegan version)
½ tsp. mustard seeds
½ tsp. cumin seeds
½ tsp. turmeric powder
1 tsp. sambhar powder
A sprig of curry leaves
Salt to taste
A dash of lime juice
Fresh coriander leaves to garnish

DIRECTIONS

Heat oil / ghee in a thick bottom pan. Add mustard seeds and allow them to splutter. As they splutter, add the curry leaves, chopped onions. Fry them till they golden brown. Next add the green chillies, the chopped tomatoes, turmeric powder, sambhar powder and salt and fry them for another 2-3 minutes. Now add the roasted semolina / rava and fry for few minutes. Pour 3 cups of hot water into the mixture and bring it to rolling boil on low heat for couple of minutes. The water should be absorbed by the semolina / rava and cooked. Turn off the heat and add a dash of lime juice. Garnish with coriander leaves. Serve hot.

Notes:

* Clarified butter / ghee makes this dish rich and delicious. However avoid it and replace with vegetable oil if you want a vegan option
* I've used only a tsp. of sambhar powder for a hint of added flavour. You may skip it altogether.


I eat bread with not much favor to it. It's something I like to reserve as a last option. It wasn't until I began baking some at home did I really take much liking to it. Even as a kid I did not enjoy it much. At home, Sundays meant the day to relax and unwind and that meant some time off from cooking for mom too and that's when bread for our breakfast was a usual affair. We had many Sundays with bread sandwich for our breakfast. Saying that I do not rule out that homemade bread is indeed fresh and tasty.


Although one of the ways I did enjoy bread was in form of this Masala Bread Upma that was spiced well and tasted delicious. I often frowned at the sight of bread loaves served with butter or jam, but the moment it was converted to this upma, I would relish bowls full of these and go for the second and third helpings too. The base of the kadhai had crumbs of crusty bread stuck to it and that tasted heavenly. I have memories of scraping it off, not sparing the spatula too, relishing every bit of the last spiced crumb! Well, I still do it till date. :) Hope you too love this recipe as much as I do.


Masala Bread Upma

INGREDIENTS

6 Bread slices
1 tbsp. vegetable oil
1 tsp. mustard seeds
1 tsp. red chilli powder
1 tsp. turmeric powder
1 onion, finely chopped
1 large tomato, diced
1 green chilli
2 tsp. peanuts
1 sprig of curry leaves
Coriander leaves to garnish, optional
Salt and lime to taste

DIRECTIONS

Stack the bread pieces on top of each other and dice them through using a knife. Tear them into 1 inch cubes. Else tear them roughly using your fingers, crumbling them through into uneven pieces.

Heat oil in a pan and fry the mustard seeds. Once they splutter, add in the curry leaves, the chopped onions and peanuts. Fry them on medium high flame till the onions turn slightly brown in colour. Add the chopped green chillies, turmeric powder, chilli powder and fry further for a minute. Add the diced bread pieces and stir them well gently. Fry for a couple of more minutes stirring till all the masala has coated the bread pieces well. Finally add in the diced tomatoes and season with salt to taste. Fry further more for 2 minutes. Remove from flame and add a dash of freshly squeezed lime juice to taste. Serve hot.