Showing posts with label Main course. Show all posts


I am not entirely a bread lover. Given an option I prefer Indian flat breads or rice on any given day. But considering the number of bread recipes I bake, I see myself being a convert, probably soon. Baking them is entirely fun. There's a profound joy in kneading, proofing, watching it rise, punching it down, rise again and bake to golden hues. There's immense satisfaction one gets out of home made bread, the joy only a home baker knows best.


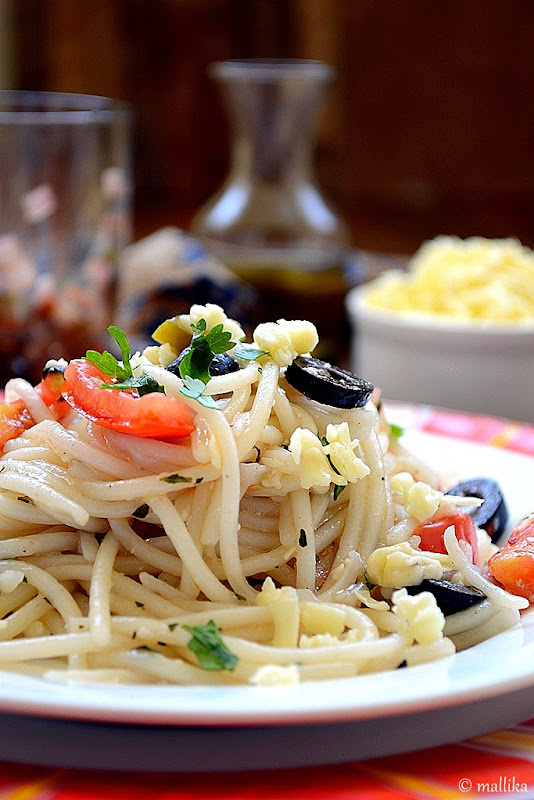
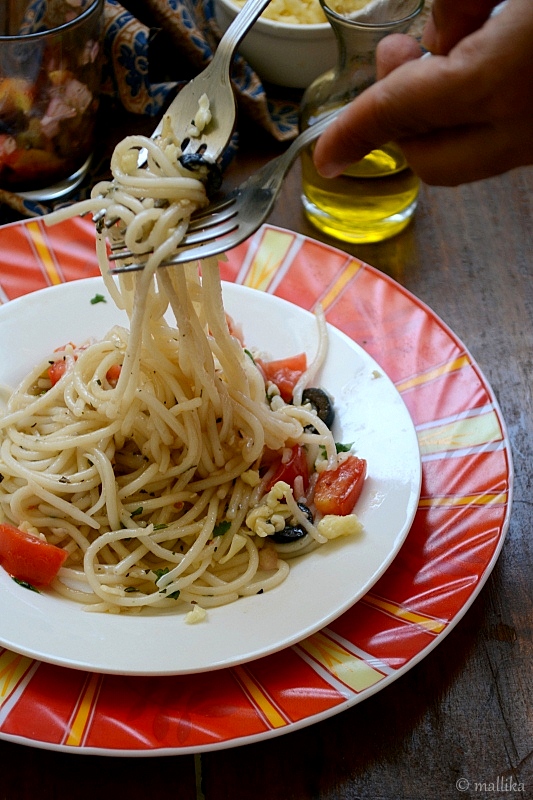
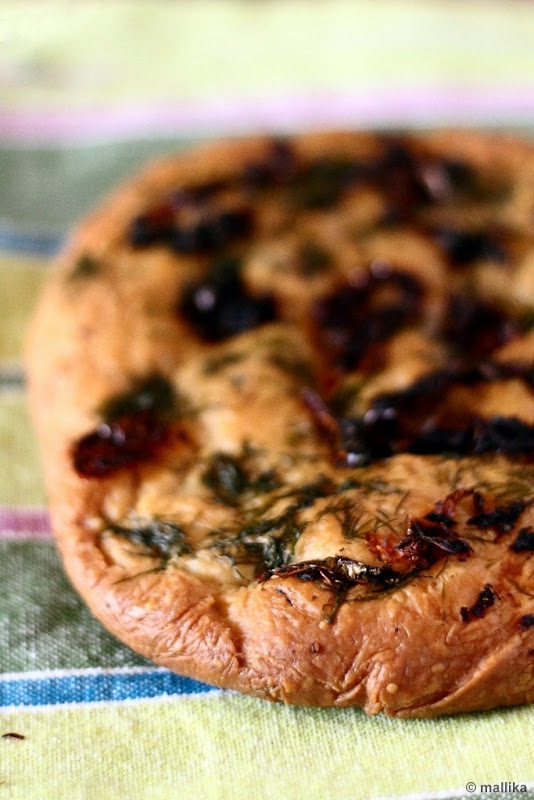
This recipe in particular comes from my drafts, long standing in nature that was baked late noon to satisfy the urge to bake bread couple of weeks ago. Clicked late in the evening and hence my dissatisfaction with its photography, it went into hiding for sometime into my drafts. But then that doesn't rule out the fact that this herbed bread is delicious and can jazz up any meal. This bread has a nice tang from homemade sun-dried tomatoes and herbed flavors from dill leaves. Pair it with soups, salads or pastas, they'll make a meal complete.


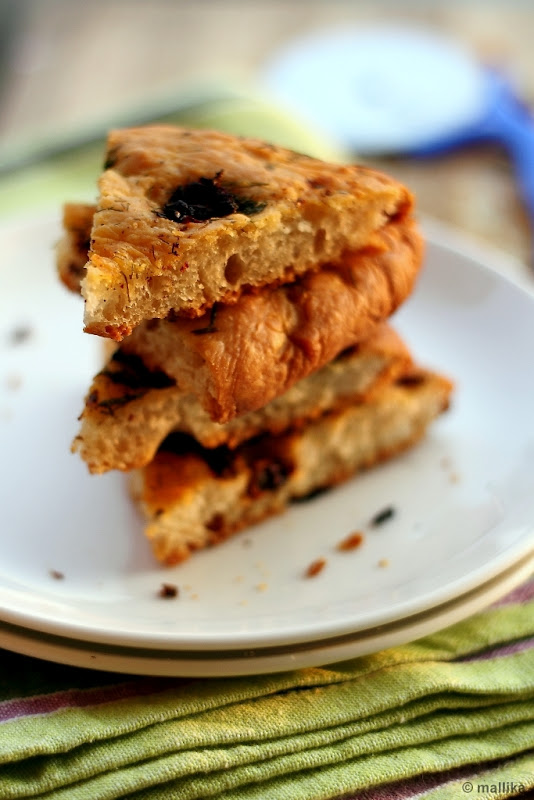
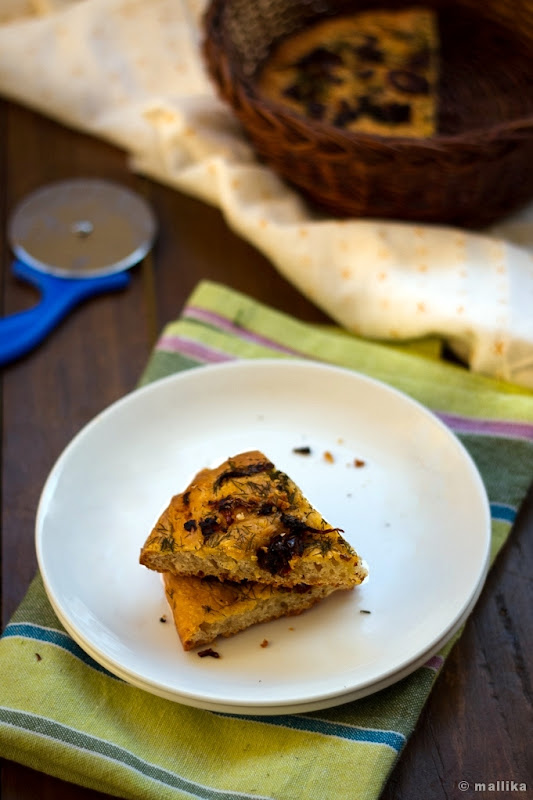
Sun-dried Tomatoes and Dill Focaccia

INGREDIENTS

250g plain flour
1 tsp. salt
1 tsp. dried yeast
1 tbsp. olive oil
Approx. 160 ml. warm water
1 tbsp. sun-dried tomatoes
1 tbsp. dill leaves, chopped
1 tsp. red chilli flakes

DIRECTIONS

Dissolve the yeast in half a cup of warm water and teaspoon of sugar. Stir well and allow it to sit for 10 minutes. By then the yeast will activate and bubble up. Place the flour and salt in a large bowl. Add in the yeast mixture and stir with a wooden spoon to form a dough. Gradually add the remaining water and bring the dough together. Knead it for a 4-5 minutes. Place it in an oiled bowl, cover with a tea towel and place it in a warm place to rise for a 3-4 hours. The dough will rise and double in size. Once risen, give the dough a punch, deflate it and knead it on an oiled surface for five minutes. Place the dough on a baking tray, shape it to your desire and press dimples on top of the bread dough. Mix a tbsp. of olive oil, sun-dried tomatoes, chopped dill leaves and red chilli flakes in a bowl. Top the dimpled bread with this topping, spread it gently and allow the bread dough to sit in a warm place for an hour to rise. Pre-heat the oven to 200 deg C. Bake the bread at 200 deg C for 30 minutes, or till the edges crisp and the bread is golden brown.


I called off a day yesterday, pushed aside several other routines and decided maybe I should neaten up my home a little. For a long while things have been messy, stuffs piling up, cobwebbed corners overlooked, clutter sidelined, wardrobes stuffy with my kiddos toys accumulating by numbers and I have just been ignoring them all. Then couple of days ago I walked into my kitchen in sleepy eyes to fetch some water and got alarmed seeing some creepy little creatures invading my kitchen. I spent that night attacking them and fighting through. So I spent an entire yesterday to rip my kitchen in fit of cleaning every bit of that mounting mess. Oh yes, I get such bouts of springing into a cleaning freak once a while and I do that job quite well!


I put an incredible amount of effort to wipe the dusty corners spic and clean, scrubbed the chimney vent to eternity, unsettled the jars and bottles, refilled and stacked them neatly and discarded all the expired stuff. Before I knew, it was noon already and I realized I hadn’t even got half way through. I started off with the kitchen and had plans to neaten my entire apartment before the evening, but I had spent more than half the day just settling the unsettled things in my kitchen. Then there was the refrigerator that needed a thorough scan. I pulled out several stuffs, of which came some cheeses, flours, yeast, left over baby corns from our last grocery shopping, bottle of black olives, few sachets of sauces, seasonings, etc., etc., etc… all perfect for a pizza I think. After a quick check for expiries, I put them to submission for a pizza I had on my mind for our late lunch. While the dough was left rising, the refrigerator was wiped clean and there was the happier me.


Thanks to that spring-cleaning, I have this skinny pizza for you today. Skinny, because its thin crust and par-baked on low heat on an Indian tava and then topped with homemade sauce, vegetables and cheese and baked to finish. It has good dose of vegetables with onions, baby corn and black olives, but is scanty on cheese (I told you right about the cleaning!), not really how a traditional pizza should be, but then who cares if it’s delicious and it’s healthy.


Skinny Olive and Baby corn Pizza

INGREDIENTS

For the dough base:

Follow the recipe here or use a store bought thin crust pizza base

For the homemade sauce:

Click on the recipe here or use a store bought pizza sauce

For the toppings:

4-6 baby corns vertically slit into quarters
½ cup black olives, chopped
1 onion, chopped
Salt and pepper to taste
Italian seasoning

DIRECTIONS

For a thin crust pizza, roll out the pizza dough as thin as possible, about ¼ - ½ inch thick. Allow it to sit on the counter for 10 mins. Heat up the tava / iron griddle on lowest flame. Cook the pizza on each side, flipping over to ensure the pizza is par cooked on both the sides. Remove and let it cool.

Place the pizza on the pizza tray. Top with homemade tomato sauce and slather it evenly. Top with diced onions, baby corn slices and black olives. Sprinkle generous amounts of cheese and bake in a pre-heated oven at 180 deg C for 15-20 minutes or till the cheese melts and the edges of pizza brown. Serve hot.


Somewhere in the beginning of this year I made a silent resolution to post more savories than desserts as my collection of desserts in my content repertoire had shamefully grown than any other category. Time and again I kept reminding myself about readers being aghast about the paramount number of desserts I had on my blog, as if I had convinced them to believe that this is all we had daily. I had many mailing for basic recipes, as basic as making butter and ghee at home, more savouries for breakfast and tea time snacks, etc., while I had desserts brimming to my blog, something which was unintentional, but in course just unpremeditated.


One of my colleague recently insisted I post recipe on basics of homemade curd, ghee and paneer when it came as a surprise to her on learning that we could make them all at home. From the time I can remember, I grew up seeing my mom skim off the cream from milk and freezing them for days to churn them into a good batch of butter or make ghee, ferment liters of milk overnight to make curd every single day without fail and weigh down blocks of paneer on those odd days when the milk separated temperamentally. I never considered them to be recipes in the first place, forget the thought of even considering worth posting, since it came to me quite inherently by instincts and not something I ever learnt to make. I mean, did someone give you lessons on how to boil milk? It was as synonymous to that.


I don’t think I can come to a phase soon where I can post such basics here. Instead I would love to bring some of my favorite dishes on this table, those much appreciated recipes that are hearty and simple, and are regular in my kitchen. One such being this Lasooni Dal aka Garlic Dal that’s been my long time favorite. I keep it simple because it reminds me of my collage days when I lived single in a rented accommodation and cooked basic meals with simple ingredients and modest flavors for my sustenance. I managed to pull it through quite easily. A simple garlic dal, a quick stir fry of veggies made an utmost delicious Sunday meal along with the humble rice.

An east Indian twist to the dal here is with the tadka or tempering of Bengali spices. Paanch phoran is a blend of five (paanch) spices that is a unique Bengali spice mix made by mixing equal quantities of mustard seeds, cumin seeds, fennel seeds, nigella seeds and fenugreek seeds and storing it in an air tight container. I generally keep a ready mix of these spices in a container for my use on demand. Its used to season many dishes and lends a lovely aroma to a dish when tempered. Do hope you love it too.


Lasooni Dal with Paanch Phoran

INGREDIENTS

1 cup masoor dal
1 tbsp. channa dal
1 tsp. turmeric powder
2 tomatoes, chopped

For Paanch Phoran tadka:

1 tsp. oil
5-6 garlic cloves, crushed using mortar pestle
1 tsp. paanch phoran (a tsp. each of mustard seeds, cumin seeds, fennel seeds, nigella seeds and fenugreek seeds)
1 tsp. asafoetida / hing
1 tsp. red chilli powder
2-3 whole red chillies

DIRECTIONS

Wash one cup of masoor dal along with the channa dal with couple of changes of water. Pressure cook the washed dal along with turmeric powder, chopped tomatoes and 2 ½ cups of water. Cook on 3-4 whistles till the dal is mushy and soft. Transfer the cooked dal to a wide mouthed utensil and add sufficient water to bring it to a soupy consistency. The consistency depends on how thick or thin you prefer. Keep it thick if you want to pair it with rotis and breads, and thinner if served with rice. Add salt to taste and bring the dal to a rolling boil. Turn off the flame and prepare the tempering.

To temper, heat a wok with a spoonful of oil. As the oil heats up, add the crushed garlic and fry for a couple of seconds. As they turn translucent and fragrant, add in the paanch phoran mix and allow it to splutter briefly. Quickly add in the whole red chillies and fry for seconds. Turn off the flame and add in the red chilli powder, followed by asafoetida to the tempering. Add this to prepare dal and cover. Serve hot with rice or rotis.

Notes:

* I’ve used masoor dal with channa dal here. Channa dal gives texture while masoor dal gives volume to this dish.
* You may use the same recipe with tuvar dal or moong dal instead.
* Skip the red chilli powder to reduce the heat.
* Asafoetida / hing aids in digestion and has a unique heady flavor, hence highly recommended.

Vegetable Huli

How to make Mum’s Cheat Vegetable Huli | Easy Vegetable Huli
In the small town where I grew up majorly, life was simple, time had a hold and things were slow. I had a blissful childhood in safe shelter of love, care and freedom. It was indeed the small town charm that made life simple and modest in a community replete of love and affection from all in the neighbourhood. Life there had an advantage and as kids, we enjoyed the proximity of our school to home, which brought us the perks of walking down home during the lunch time. As the clock stuck 12:30 PM, the school bells would ring for lunch break that spanned over an hour, which meant we had ample time to walk home, relish hot, home cooked meal, watch our favourite comedy series that we were hooked to (oh yes, we were hooked to Hum Paanch back then, to an extent that I could have given exams on it and topped them!) and get back to school on time for the noon classes.

Every afternoon as the school bell rang for lunch hour, we would walk back home midst the humid summer heat, soaking sweat in the navy blue pinafores that we wore for our uniform. Plonking ourselves under the comfort of fans and beating the blazing heat with tall glasses of chilled water, mum in all ears would serve us steaming hot rice, topped with either tove, saaru or huli and dollops of ghee on some days or tamblis with stir fried vegetables on other days. Happalas (paapads) and salivating homemade uppinakais (pickles) were a ritualistic part of our menu and always stayed on the table. I cannot ignore the joy of biting into crisp, fried, spicy sandiges served on days when tamblis showed up on the table. Mum was a strict believer in healthy, nutritious food and she ensured that the food she cooked with love balanced in taste, health and nutrition very well.

Vegetable Huli


Our meals always ended with fruits for desserts. She would coax us to eat lots of vegetables and fruits as she does even today. She had a reasoning for what was cooked and she believed in them firmly. Like when greens were cooked, she would top them with freshly squeezed lime, because the vitamin C in lime aids in the digestion of iron in greens. Similarly, if a gravy was cooked with red chillies for the heat, the stir fry would then be cooked with green chillies, or vice versa to kill the monotony of flavours. Fresh vegetables and greens were a part of our daily diet, either in form of stir fries, or in huli, else in tamblis. And her love for organic food ran in her genes. Rustic vegetables like banana stems and flowers, drumsticks, raw jackfruits, gujje, basale soppu and doddapatre (brahmi) leaves that grow abundantly in wild during monsoons, produces that do not require intensive care, manure or added pesticides made up her favourites. On several other days, she broke the regime of traditional South Indian cooking with her delightful North Indian delicacies. On odd occasions, dessert during mid-week was in treat for us too. I was fortunate to have enjoyed the liberty of coming home to relish fresh home cooked meals for my lunches. It meant a lot – fresh, healthy, clean and nutritious. That was probably why I enjoyed food thoroughly even as a child, because it was simple, fresh and tasty.

Vegetable Huli


With time as I grew up to being a mother myself, I realized that care and affection towards healthy food comes by instinct for your family. It means nurturing the tradition of cooking healthy, wholesome meals that can balance in taste and nutrition. Someone reading this blog may probably think that the recipes, mainly desserts shared here are all what we eat. But truth to be told, we do not eat banana breads every day, nor do we have tea cakes every evening. There’s a lot more healthier we eat than I can share here. But I don’t feature them here, least I dread this space would become tad boring.

Like I said, we grew up eating huli, that is quite traditional to our cuisine. I don’t make huli often because I never attempted to make a good one that tastes like what my mum or grandmom make. While in my teens, my mum would often chuckle saying “A good Havyaka bride is known by the Huli she makes!” If I had to go by that saying, I would never fit that bill! One of the reasons why I featured this recipe here is because the version I share today is much simpler, the cheat kinds as taught by my mum.

Huli is a traditional Havyaka dish from the famed Mangalore-Udupi region, made from lentils, cooked often with vegetables, roasted spices and ground liberally with coconut and tamarind, balancing off the tang with a hint of jaggery. It’s the balance of spices, coconut and tamarind that make up a good huli, an art that takes years to master. While there are several names (also called Kodhel) and different versions of it, this particular version of huli tastes so close to the traditional one I've grown up eating, that my dad, an avid huli lover and a good cook by himself, believed that I went through the laborious task of roasting and grinding all the spices, while mum and I chuckle on sheepishly. Devoid of all that hassle, hence quicker and easier too, it’s flavoursome and delicious served fresh with steaming hot rice.

Vegetable Huli


Mum’s Cheat Vegetable Huli

Recipe adapted by mum

INGREDIENTS

1 cup mixed vegetables (raw bananas, brinjals, pumpkin, mangalore cucumber)
½ cup split pigeon peas / tuvar dal ( togari bele as in kannada)
1 tsp. turmeric powder
Salt to taste

For the Huli arpa, grind to paste:

½ cup grated fresh coconut
½ cup tamarind pulp / lime sized tamarind ball
3 tbsp. sāmbhar powder (preferably Karnataka styled)
1 tbsp. jaggery

To temper:

1 tsp. mustard seeds
2-3 whole red chillies
1 tsp. asafoetida
1 sprig of curry leaves
1 tsp. coconut oil

DIRECTIONS

Wash thoroughly and pressure cook the split pigeon peas / togari bele along with turmeric and 2 cups of water on 4-5 whistles. For 1 measure of the dal I use approximately 3 measures of water. In a separate pan, cook the vegetables with 1 cup of water and salt to taste till they are cooked and just tender. While the vegetables are getting cooked and the pressure cooker is cooling down, prepare the masala paste (called as huli arpa in kannada) by grinding fresh grated coconut with tamarind pulp (lime sized tamarind kernel cleaned and soaked in ½ cup warm water for 10-15 minutes), sāmbhar powder and jaggery, adding water little by little, if required, till its smooth and comes to chutney consistency.

Using a wooden ladle, mash the cooked split pigeon peas / togari bele to a paste. To this add the ground masala paste / huli arpa along with vegetables, and their broth and bring it to a rolling boil. Add sufficient water to bring it to a consistency of your preference. Adjust salt to taste.

Temper by heating some oil in a small wok. As it heats up, add mustard seeds, followed by whole red chillies, torn curry leaves and asafoetida / hing. Fry for a minute, turn off the flame and quickly add it to the prepare huli while hot. Serve hot with steamed rice.

Notes:

Tempering with coconut oil is optional, but highly recommended as it gives an authentic and traditional taste to this dish. You may use vegetable oil instead of coconut oil. Alternatively, use clarified butter / ghee for a richer taste.

I’ve used mixed vegetables here. However you may use these vegetables individually. Traditionally, for weddings and festive meals, Mangalore cucumber is the most common vegetable used in this kind of kai huli.

Vegetables that go well with huli are raw bananas, brinjals, pumpkin, mangalore cucumber, yam, bottle gourd.

The color of this dish hugely depends on the kind of chillies being used in the sāmbhar powder. Typically, byaadgi chillies will give you deep reddish brown hints while guntur chillies render more spice and less colour.

While we call this as huli in Havyaka cuisine, it is also popular by the name of kodhel in some of the sects/communities of coastal Karnataka, especially among the Tulu speaking Brahmins.


I’ll be silent for a week or so. We are off to Delhi for a short vacation. My dear brother in law is soon getting hitched for a lifetime. He'll be getting engaged in a couple of days, so we’ll have big fat engagement ceremonies to be a part of, several families to meet and great, some partying, rasta shopping too and, of course lots of good food to relish.


We've been eagerly looking forward to the roka ceremony, followed by a series of colourful and interesting occasions like shagan and chunni chadhana, so you can imagine how excited the entire family is. After weeks of crazy wardrobe shopping, we have our bags ready, all filled to brim, begging space for more to accommodate. It’s been a crazy week as you can see!


But before I leave, I have this simple recipe for Spaghetti Aglio e Olio, aka Garlic Spaghetti along with a dozen photographs for you to feast. I'll have this auto-post while I'm away enjoying the ceremonies, so I hope that makes up for my absence.


The recipe is so simple that even a novice cook cannot go wrong with this one. I stirred in some homemade Basil Almond Pesto and these were delicious! My little one scraped the bowl clean, licking every bit of the pasta and the sauce. The husband loved the simple, yet fiercely spiced garlicky spaghetti and considered to be made too often. In all the recipe was a clean winner.


Garlic Spaghetti - Spaghetti Aglio e Olio

250 gms spaghetti
4-5 cloves chopped garlic
1-2 tsp. crushed red chilli flakes
1/4 cup olive oil
A bunch of freshly chopped basil
Grated parmesan cheese

In a large pot with boiling salted water cook the spaghetti pasta until al dente. Drain and drizzle a quick dash of olive oil. Meanwhile, place a large skillet over low heat and sauté chopped garlic, basil, and red chilli flakes with olive oil. I used dried whole red chillies and chopped them finely. Sauté till the garlic turns golden in colour. Toss pasta with garlic mixture and butter. Top it with a generous grating of parmesan cheese. Serve hot with a pesto of your choice.


The Garlic Spaghetti is delicious as is, but makes for a great meal if served with a salad and fresh pesto sauce of your choice. Simply toss the prepared Garlic Spaghetti in Basil Almond Pesto and serve warm or at room temperature.


Pesto, need I say what it means to me? Having been a lover for Italian food, I'm sure there should be no second thought that I love pesto. But strangely that wasn't how it started a few years ago when we first tasted it. Well, it was a love hate relationship that we started with. We did not really give into liking it till recently we acquired a taste for the famed pesto.


For a while we despised pesto or even the word of it. Probably, because I never made it the authentic way. My experiments with dill, coriander and other greens, except basil were not received well. I gave up for a while, feeling incredibly guilty about not tackling it and getting such a simple straight forward recipe right. So I stuck by other pasta recipes that were appealing our palate. Then recently we had it at our coveted Italian restaurant, Toscano and that's really when we took liking to it. The pesto sauce served with an assortment of breads had us a convert. It's chunky texture, mild flavour, fresh and oh-so-delicious when we smeared it on bread and even paired them with spaghetti had us love it thoroughly.


The core ingredients that make up a good pesto sauce are basil, pine nuts, garlic and olive oil. These days, getting basil in a supermarket here is not a worry, but then they are not always fresh. Hence the basil I used here are home grown in a pot, so that makes this recipe fresh and all the more appealing. Pine nuts are something I have never seen or tasted. A quick google search said walnuts or almonds make an equally good substitute. Far from fetching pine nuts here, I settled for almonds as an alternative, something that I always have a stock of. So, these were made, we relished it with simple garlic spaghetti and they tasted close to the original stuff we had the week earlier.


Basil Almond Pesto

Inspired by BBC GoodFood Magazine

INGREDIENTS

50g roasted almonds
A large bunch of basil
50g Parmesan (I used mozarella instead)
150 ml olive oil, plus extra if storing
2 garlic cloves

METHOD

Put all the above mentioned ingredients into a food processor and process until slightly chunky. Season liberally with salt and pepper. Pour the pesto into a jar and cover with a little extra oil, then seal and store in the fridge. It's known that the pesto will keep well in fridge for up to two weeks, although I recommend using them fresh.


Vegan version:

To make the recipe vegan, use vegan cheese or skip cheese altogether.


I studied much in an all girls’ high school, so I don’t remember knowing Valentine’s day then. There was no excitement but life as usual like any other day. College life although had a different story to say. Valentine day was about the excitement to dress smart, an anxiety to get sneaky looks from boys, may be a couple of roses, candies and teddies too. Red was a too bold colour to wear, so it stayed away for the day. All were dressed their best for the day, yet they made it look modest, atleast not to be dragged into peppy conversations by friends. There were hopes for those red roses, seeking male attention, for chits of proposals that came through those less known common friends, an ice-breaker conversation, probably a plea to join for a coffee in a coffee shop, and like I said it was an odd anxiety and hushed excitement. Those were the days in college.

Later, life at workplace was a much serious affair. There was a spirit to celebrate the love day, but in a festive way. The fun committee organized entertaining events to promote healthy relationship among peers. There were red roses on every bay, floating balloon hearts across cubicles and team building activities to build rapport. We were encouraged to dress in red, but essentially it did not really mean about love or being in love. It was about anyone whom you cared for and could be your Valentine. I loved that spirit. I respected it and enjoyed it through.


My husband and I hardly got time to celebrate the Valentine’s day ever. We never went out for candle lit dinners, throw parties or the big bashes. We dream about it, but then we are working couples with little time at hand. We exchange no gifts, just hugs and kisses. Instead we sit down and enjoy a home cooked meal together. He cares for me, so he lets me to dig into my favourite dessert for the dinner just that evening, and we relish it together. Over the years, my meaning for love and lust has changed by leaps. Today, it’s about trust and support, of care and affection, of expressing less by words and more in actions, of being faithful and sympathetic. My considerations have changed, because it’s about being selfless and sensitive. It’s a beautiful feeling, and is meaningful by nature. Love is magical. The greatest joy comes from our little daughter, who is a gift of God given to us by the virtue of that bonding and togetherness. She brings life into us, she paints it vivid, makes it worthy to live, and she ties our bonds for a lifetime. Life is short, I like to live it sweet. So why waste even a day that’s dedicated for a purpose?


My menu is sketched. I’ll have some Ginger Lime Pops for my daughter to bite into, that will keep her busy. These Pan Roasted Fiery Balsamic Carrots will make it quick and perfect for the weekday dinner table. And I’ll serve them with some fresh spaghettis and some homemade pesto. I am still dreaming of what dessert I can make. But certainly I would love to pair it with a dollop of Classic Vanilla Ice cream. I think this will make it perfect.

Lay your table, set your glasses, pour the wine, don your apron and get set to whirl up your kitchen this Valentine day. Have a fabulous day with your loved ones and don’t forget to express that you care for them.


Pan Roasted Fiery Balsamic Carrots

INGREDIENTS

3 Carrots, medium sized
1 tsp. Olive oil
2-3 cloves Garlic chopped
2 tbsp. Balsamic Vinegar
1 tsp. Brown Sugar
1 tsp. Red chilli flakes
Salt to taste

DIRECTIONS

Wash the carrots thoroughly and chop them to ½ inch fingers. Blanch them in boiling hot water for 2 minutes. Remove them and shock them in cold water.

Heat oil in a pan and sauté the chopped garlic till they sweat. Next add in the balsamic vinegar and sauté till it reduces to half. Add the blanched carrots, followed by the brown sugar and red chilli flakes. Stir fry for a couple of minutes on medium high flame till the balsamic sauce glazes all the carrots well. I like to smoke the carrots a bit by tilting the pan close to the fire and letting them burn tad bit. They almost taste like grilled. Finally season with salt and herbs, if preferred.


So what do you think is life like for a toddler mom food blogger? Fun, thrilling, stressful, exciting, uncertain, adventurous, tough, entertaining, or may be all of these??? Interesting! Let me give you a glimpse of me as a food blogger.

Just about 2 days ago I decided Sankranthi, the festival for harvest is here and I need to have a post signifying it for the 14th. I rustle up my calculations and cross upon Huggi, a traditional Havyaka household dish, and an apt one that can make it right for the day and the festival. Perfect, I think.

So to be able to post it a day in advance that will benefit my readers, I decide I will cook the recipe a day before, photograph them and publish here. I almost put things together, when I simply get a feeling that I am cheating. Would that justify me celebrating the festival? It made more sense to cook them the first thing in the morning of the festival while my family is around, finish the pooja, offer God and relish them fresh. So I push the entire thought of cooking Huggi for the day of Sankranthi, in a hope I will be able to quickly grab some clicks and post them here, hopefully the same morning. Hopelessly, that rarely happens!


The morning of Sankranthi dawns and the baths are over. I head over to the kitchen to make both versions of Huggi, the sweet and the spicy one, both equally delicious and my favourites too. My cooking is done on time, pooja is over, little one is to be fed and I am to decide if the oggarne/tadka needs to be added then or saved for the photographs. A tic-tac-toe and I add a part of the oggarne/tadka, saving some of it for the grace. I almost finish feeding my hungry toddler, put her to play in my kitchen and keep a keen check on her from the corner of my eye. Often she hangs around me for my attention, so a huge effort goes into distracting her with piles of kitchen utensils and cutleries to amuse her. By now my kitchen is in a huge mess with utensils, dolls and toys lying on the floor and on counters too. Adding to this, hazaar utensils lay around to be cleared and washed. I clear a part of these to make some space for the props to be fitted into the existing clutter, as obvious to make my dish look a little appealing. By now my little toddler begins to get anxious, seeking my consideration to play with her, so she's up on the kitchen counter, least I can keep her busy with my constant talks and her plays. I begin to place up my props, lay the dishes, top the garnishes, neat my background, foot the tripod and almost begin to shoot when a tiny hand hovers over to dish, pulling the props, the background and at times the camera lens too! Again, in an attempt to distract, I hand over unforeseen kitchen items for her to play. Her hands go deep into the jar of my precious ghee, the onion and garlics are off their peels, things helter-skelter and a glass or two ends up cracking on the floor. Though by now she is bored and there comes the shrill cry, more mess and my woe! Then there are agony moments when my garnish ends up in a mess, spoons are thrown into the dish, splattering on to the table cloth and I throw up my hands in anguish! Did I say life of a blogger mom was stressful? Phew!


I come back to square one of laying things on the dining table instead, let her on her foot to play, hand over a spoon and bag of chickpeas for her to fiddle with, foot the tripod and almost begin to shoot a photograph or two when my little one spills over all the chickpeas, gives up on them instantly and hovers over to tripod, attempts a climb, almost tumbling over it. I tip toe over the scattered chickpeas, just managing to balance the falling camera on a single foot and my toddler on another! Again, I give up, shove aside the tripod and shoot by hand with a few shaky shots and some good angles. Did I say life of a blogger mom was adventurous? True!

Okay, so by now I somehow manage a few shots here and there and then sit down to processing the files, generally when my baby is off to her sleep. And today she decides not to sleep. I sit her till the noon, simply hoping I can make through this post today! She's off to sleep and I sit to blog about it, my thoughts are totally empty. Heck! Where do I start? Every blogger's foe, that blogger's block! I try to start, then just let it go. Instead I manage to do my processing and editing. Of the hazaar photos I click randomly I short-list to the chosen few. By then my little one is awake. Here I go off again, almost being sure this will have to wait another day, may be next year too...??? Yeah, I did say life of a blogger mom was uncertain.

With all that said and done, I finally have my post here, though not exactly on time as I would have preferred it earlier in the day. I sat at a stretch, almost 3 hours and managed to crack a good long write up too! And as it gets published, its fun and exciting. As the comments pour in, it gets entertaining too :) That's life being a food blogger and toddler's mom too!


Sihi Huggi

INGREDIENTS

1/2 cup moong daal
1 cup rice
3 cups milk
1 cup water
2 tbsp. clarified butter / ghee
1 1/2 - 2 cups sugar or jaggery (adjust as per taste)
1-2 cardamom pods, crushed
A handful cashew nuts & raisins
A pinch of saffron

DIRECTIONS

Wash and clean the moong daal and rice and keep it aside for about 10 minutes. In a pressure cooker, add the moong daal, the washed rice. Cook them in 2 cups of milk and 1 cup of water to 3 whistles. If you do not have a pressure cooker at hand, use a regular cooking pan and cook the daal and rice till they turn soft and mushy. Once cooled, lightly mash them using the back of the ladle once cooked. Add the sugar to taste and adjust the thickness of the huggi by adding remaining milk, if necessary. Add in the saffron and stir well. Heat it till it comes to a boil. I've used sugar here since I ran out of jaggery, but I suggest you try the jaggery version as it tastes great too!

Next, heat three tbsp. of ghee in a wide mouthed pan. Add cashews and fry till they turn golden brown. Switch of the flame and quickly toss in the raisins and cardamoms. Allow them to plump in the heat. Garnish the prepared sihi huggi with the fried cashews and raisins and serve hot.


Khara Huggi

INGREDIENTS

1/2 cup moong daal
1 cup rice
2 tbsp. clarified butter / ghee
1 tsp. turmeric powder
1 tsp. cumin seeds
1 tsp. chopped ginger
2 chopped green chillies
1 tsp. whole & broken peppercorns
A sprig of curry leaves
Salt to taste
A handful cashew nuts

DIRECTIONS

Wash and clean the moong daal and rice and keep it aside for about 10 minutes. In a pressure cooker, add the moong daal, the washed rice along with chopped ginger and green chillies. Cook them in sufficient water (about twice to three times the quantity of rice and dal) to 3 whistles. If you do not have a pressure cooker at hand, use a regular cooking pan and cook the daal and rice till they turn soft and mushy. Once cooled, lightly mash them using the back of the ladle once cooked. Add turmeric and salt to taste. Adjust water to your desired thickness as necessary.

Next, for the oggarne, heat three tbsp. of ghee in a kadai. Add the cumin seeds. When the cumin seeds turn fragrant, add torn curry leaves, the whole and broken pepper and cashew in the ghee till the cashews turn golden brown. Garnish the prepared huggi with this oggarne and top with more roasted cashews before serving.

Wishing you all a Happy Sankranthi this season!


So we've stepped into the new year. Welcome 2013! With Newer hopes. Brighter dreams. Best of health & prosperity aplenty like never before, here’s Vegbowl giving a warm welcome to 2013 with hopes of bright future, a year full of good luck, surprises, love and prosperity. And I turned a year older as I celebrated my birthday yesterday in a discreet way. Wishes poured in, friends whom I don’t get to interact too often took time to wish, many messages on Facebook tipped in and all that made me smile. Yet somewhere deep within, there was nothing that made me feels fancy about celebrating as it reminded me that I was growing old. Yeah, I probably did enjoy all that stardom of congratulatory messages and gifts while in my teens or even early twenties. Not any more. As I cross a milestone, it feels deeply reflective and provokes thoughts about several things, which I simply wish to put aside.

While highs and lows are a part and parcel of everyone’s life, I wish to thank each and every one who directly or indirectly became a part of my life. For many who brought smile on my face, happiness in my life, for the ones who filled my life with countless moments of joy, fun and laughter making it memorable and worth living every minute, others who motivated and inspired me, who stood by rough waves, giving me strength, at all times. Thank you all for all making me feel so special and good about myself. I feel blissed and blessed!

After all that think-thanking done that I've been itching to type, I've been pondering over what recipe should be ideal as the first post for the year. The net has been hovering over with innumerable desserts and after the week long festivities and celebrations gone by, followed by New Year partying, I am sure you've had enough of food indulgence or more than what you had asked for. This perhaps is the right time to settle for this simple heart warming Khichdi that is basic, one-pot and delicious! It’s quick, light on tummy, healthy and delightful comfort food. With lentils, rice, vegetables and spices, it’s gluten-free, healthy and a complete meal in itself. The below recipe is one of my favourite where I like to use our traditional sambhar powder, however you can replace it with garam masala instead. Use ghee instead of oil for an extra flavour. A dash of lime will bring in that added kick to this Khichdi.


Moong Dal Khichdi

INGREDIENTS

1/2 cup rice
1 cup Moong dal
1 tbsp. ghee/vegetable oil
1 tsp. mustard seeds
6-8 cashewnuts
4-5 Garlic cloves
1 tsp. Grated ginger
1 large Onion, chopped
2 Tomatoes, chopped
1-2 Red chilli powder
1 tsp. sambhar powder
2-3 red chillies (optional)
1 cup Mixed vegetables (chopped beans, carrots, fresh peas)
Sprigs of Coriander leaves and dash of lime to garnish(optional)

DIRECTIONS

Wash rice and lentils together in couple of changes of water. Drain the water and set aside for 10 mins.

Meanwhile, in a pressure cooker, heat a tbsp. of oil. Fry the mustard seeds till they splutter. Follow it by adding crushed garlic cloves, grated ginger and onion. Fry them on medium high heat till the onions brown. Add whole red chillies if using. Next add the cashew nuts and fry for a couple of minutes. Then add the chopped tomatoes followed by vegetables, beans, carrots, fresh peas and fry for a couple of minutes. Add the rice and lentils and fry for a minute more. Season with salt, red chilli powder and sambhar powder. Add double the quantity of water and pressure cook for 3 whistles. For a mushy khichdi, add more water before pressure cooking the khichdi. Garnish with coriander leaves and serve hot. Top with a dash of lime before serving.


If you thought why there were no updates here or if I went missing, let me tell you I was in my hometown recently. A nice long weekend spilling over Monday ensured another trip down to Mangalore. Long weekend spent in Mangalore during the Independence day followed by Eid gave us a well deserved break and good respite from daily chores of work and home. Adding to it, the fantastic coastal weather in Monsoons added a feather in the cap. If you've been down South visiting the coastal parts of Kerala and Karnataka during the monsoon you'll be smitten by the beauty of nature and vast greenery the rains bring in.

While in Mangalore, we often binge on dishes made with coconuts. Coconuts form an integral part of coastal cuisine since they grow in plenty in this region. With no doubts you can be assured that the juiciest and sweetest coconuts can be fetched from these coastal regions of our country. I have often shared my love and immense fondness for Tamblis in the past on my blog. I don't think I need to even stress saying that this particular soup / Tambli does list as one of my favorites. Pair it with a generous helping of rice, a papad or pickle to go with and you have the most humble meal for a warm afternoon.


Tambli: Fire Roasted Tomato and Fenugreek South Indian Soup

INGREDIENTS

1 large tomato
1 tsp fenugreek seeds
1 tsp cumin seeds
1 tsp oil
1 tbsp fresh/frozen coconut
1 cup yogurt
3 red chillies
Salt to taste

For Tempering:

1 tsp. Oil
1 tsp. mustard seeds
1-2 whole red chillies
1 sprig of curry leaves

DIRECTIONS

Lightly oil the tomato and fire roast it on an open flame till the skin turns brown. Allow it to cool down. The skin will wilt as it cools, hence you should be able to peel them easily. Lightly roast the fenugreek seeds, cumin seeds and red chillies till you get the roasted aroma from them. Don't let them brown a lot as they will turn bitter and lose the taste. It takes about a min or two. Cool and grind them along with the roasted tomatoes and coconut. Lightly beat the yogurt and this paste to it. Tamblis are usually thin and a little runny in consistency. So adjust by adding extra water if required to bring it to thinner consistency. Add salt to taste.

Temper the Tambli by seasoning it well. Heat a tsp of oil in a kadai. Add mustard seeds. As they begin to pop, add in the red chillies and curry leaves. Let the curry leaves fry for half a minute or less. Pour this seasoning over the Tambli. Serve it cold over steaming hot rice.


I have always admitted my love for Italian food. And I will always. My love for pastas is profound. We make our way out to binge over them at least once a week. And that needs no excuse. And with my little one adding to that bandwagon of cheese and pasta lovers, I deliberate we are growing big as a group.

My little toddler exhibits her fondness for cheese and tang flavors and relishes them exceptionally well. Over the past few weeks, I have sworn by the arrabiata sauce recipe for most of my pastas so much that I safely hang on to it. We kind of ran over boredom with this however. I mean how much of same stuff can you eat over and over again? In a bid to experiment a little more than the usual, I played around with totally different flavors this time.

BTW, I got a pretty bottle of Balsamic Vinegar that looks nothing less than wine and tastes closely similar too. Sort of like vinegar in wine, I guess it’s that. Aged grapes were meant to be wines, weren’t they?


How much I love these BBC GoodFood magazines that I am a regular subscriber of them. As the month end draws closer, I eagerly wait for their monthly edition, couriered and hand delivered, saving me from the menacing task of hunting them down in supermarkets. The magazine is par excellence, with good write-ups, strikingly drool-worthy photographs and wide variety of tried and tested recipes to try out, I am totally convinced it will be my best bed side reading for several nights to come. For 75 odd tried and tested recipes in one book for 100 bucks a magazine, isn’t that cheap? Now that’s what I call a clean deal! All these years I was hooked to their website, now I am glad they are finally in India, I have them my hands on!

I worked with Balsamic flavors in savory for the first time, wondering really how much of body it would render to the vinaigrette, considering pasta itself is bland and void of any flavor. While I am quite confident with a tomato sauce or white sauce that’s thick enough to hold the pasta, I speculated if the pasta would go loose in this recipe. Boy! I was wrong. I’ve known what magic Balsamic does when roasted with strawberries, but to contemplate in dressings, they just make the dish exotic and top notch.

I toyed around the recipe for Spaghetti with Tomatoes and Mozzarella Sauce from the Pasta edition (March month) of the GoodFood magazine (I love owning my copy), making a few subtle changes to the original recipe. Instead of cherry tomatoes I chopped 1 plump tomato, used Balsamic instead of rice vinegar, jalapenos instead of capers, which I did not have at hand and worked with basil instead of mint it called for. Also added olives for more flavor. The outcome was fabulous with burst of fresh tongue tickling flavors from Balsamic, olives, tomatoes and herbs. The Vinaigrette itself was appetizing and delicious. Do anticipate them to be commendable in salads too.

Spaghetti with Honey Balsamic Tomatoes and Mozzarella

Inspired by BBC GoodFood Magazine

INGREDIENTS

A fist full of Spaghettis
2 tbsp. extra virgin olive oil (I used Colevita extra virgin olive oil)
1 Red onion, finely chopped
4-5 cherry tomatoes, chopped to two (I used 1 plump tomato chopped instead)
4-5 pitted black olives, halved
1 jalapenos, chopped
Juice and zest of 1 lemon
1 tbsp. Balsamic Vinegar (I used Colevita)
1 tsp. Honey / Sugar
Salt and Pepper to taste
1 tsp. Fresh/Dried Basil leaves
Generous sprinkle of mozzarella cheese


DIRECTIONS

Bring a large vessel of water to rolling boil along with a teaspoon of salt added. Add the pasta, taking care to handle them gently to avoid any breakage. Spaghettis have lovely noodle lengths and look pretty when swirled around and served. Boil the pasta till al dante. Drain the water completely, drizzle some olive oil over the pasta and toss gently. Set aside to cool.

In a separate bowl, soak the chopped red onions in a mixture of balsamic vinegar, lemon juice and honey. Season liberally with salt and pepper. Allow the onions to soak and soften for at least 5 minutes. Then add in the olives, jalapenos and chopped tomatoes. Season liberally with fresh/dried herbs (basil or mint) to taste.

Toss this vinaigrette to the cooked pasta. Throw in some mozzarella and toss well gently. To serve, swirl the pasta around the fork and using a second fork transfer it to the serving plate gently so that it holds up nicely. Scatter over the veggies and dressing and serve with fresh gratings of mozzarella cheese.


I don’t actually arm myself in measuring out and following a recipe to the tee where no baking is involved. It doesn’t matter much when you vary ingredients and mess around here and there, it actually brings out your signature taste. Unlike while baking desserts, for savory and spiced dishes I think it’s best to believe in your intuition rather than exactness of the recipe. If you still think exact measurements matter, you can find the recipe here. To make a vegan dish, substitute honey with sugar and skip mozzarella all together.

If sun shines high and you’re looking for a light summer dish that screams for some flavoursome summer time meal, you have to try this. Call it a salad, a main course or just a one pot dish, it’s fresh, light and refreshing with a summery feel.