Rava Idli with Vegetable Sagu

How to make Rava Idli with Vegetable Sagu | Vegetable Sagu Recipe
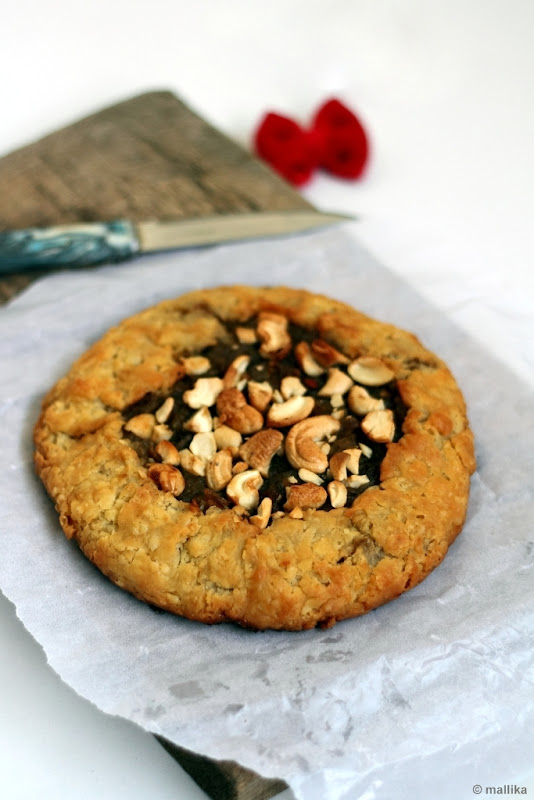
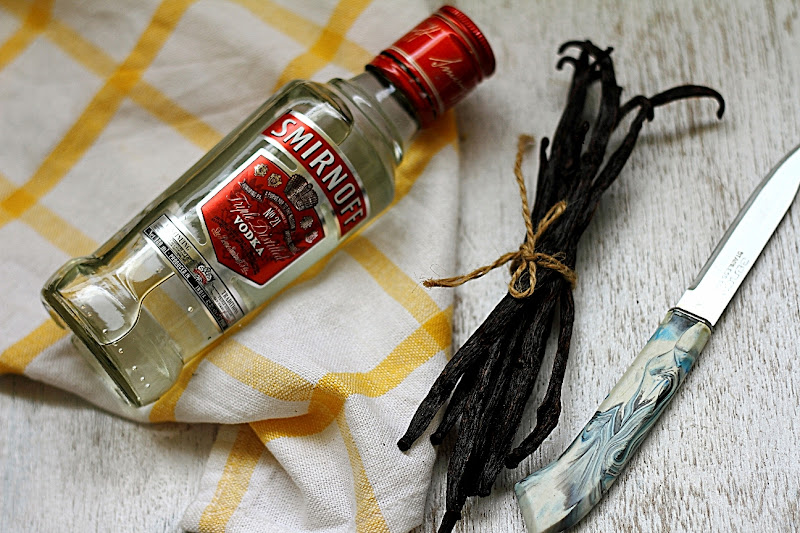
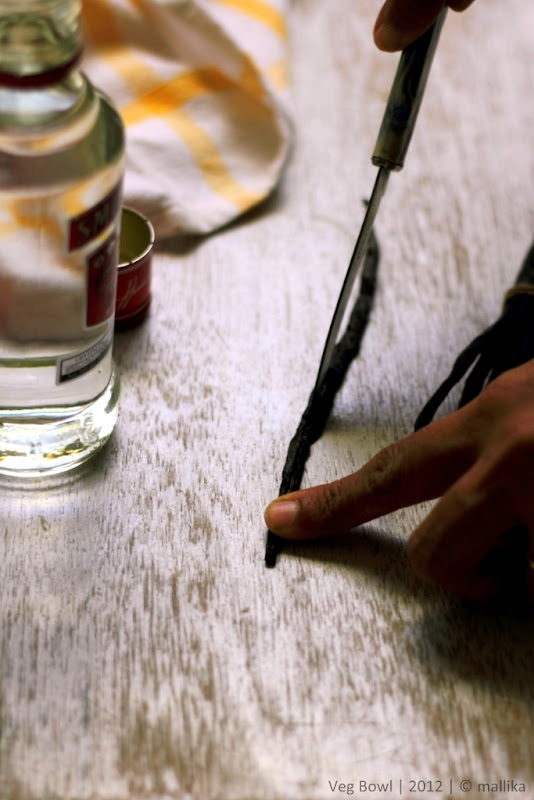
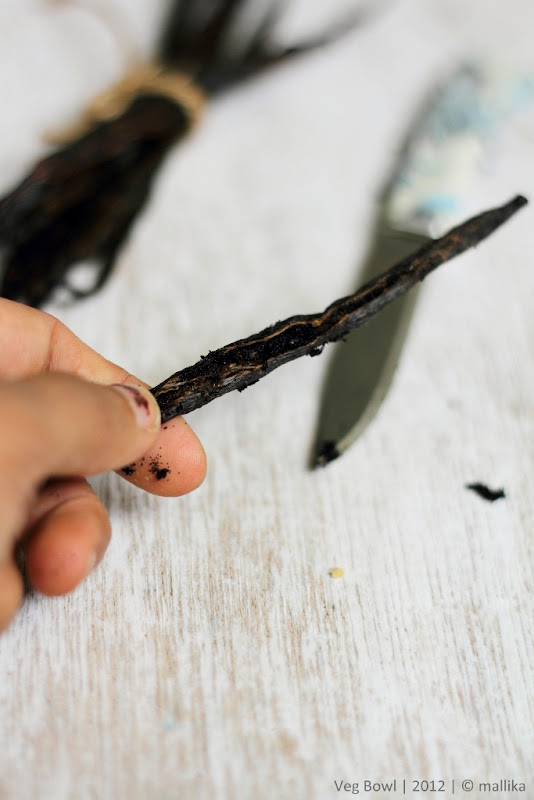
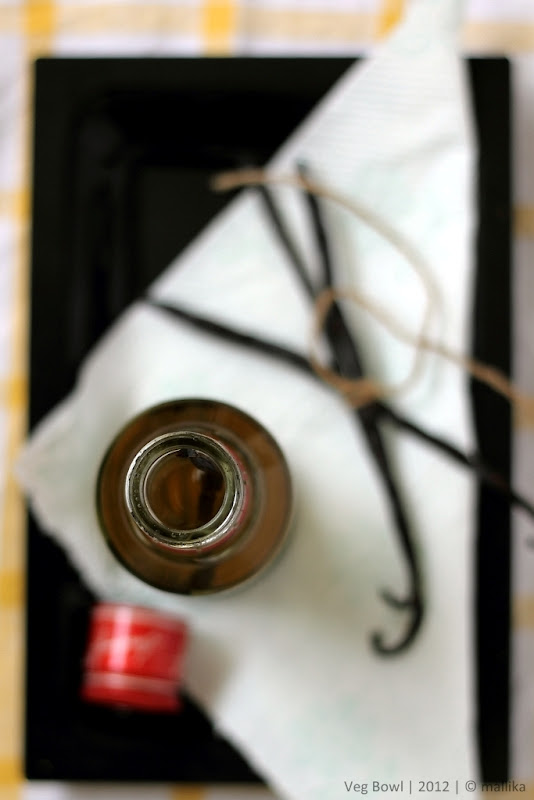
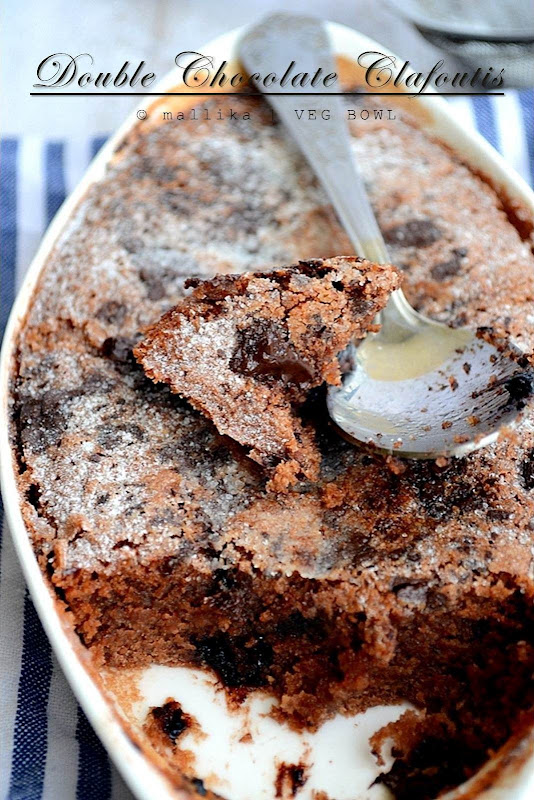
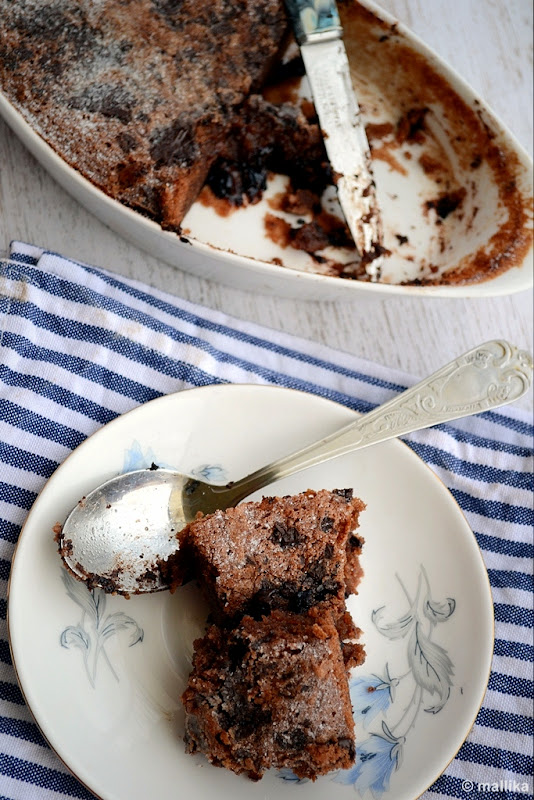
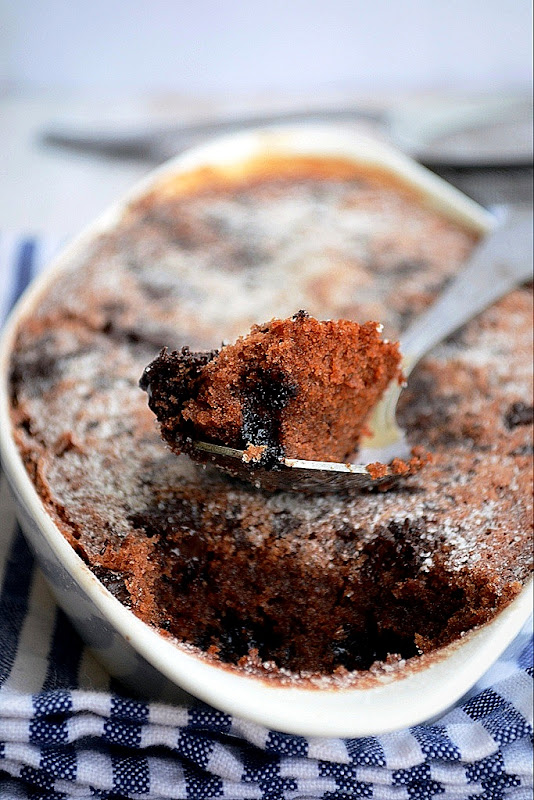
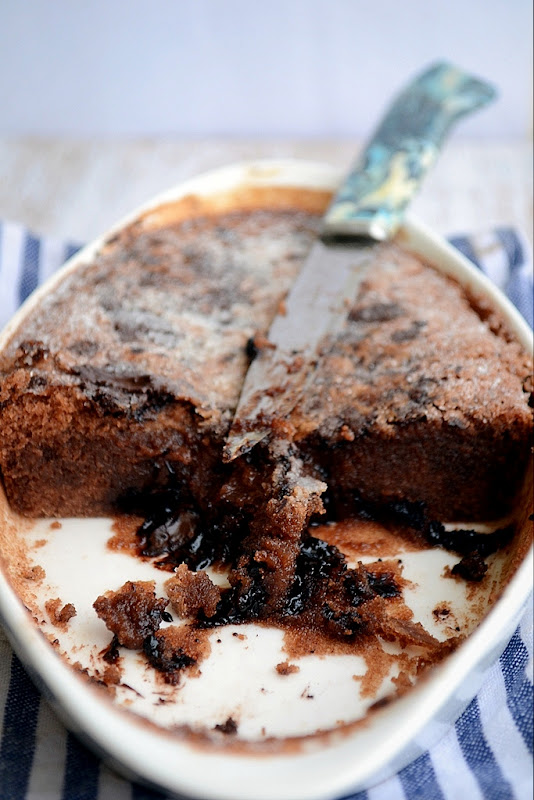
Traversing through my old posts recently, which in a way I don’t do too often, strangely it felt odd for me to read of what I had written. Some made me laugh, some made me travel down the memory lane, some errors I fixed, some I felt proud of, I suppose it’s an anomalous sensation to read your own stuff. Some photographs made me think I should change, like the Marshmallows and S’mores, especially the ones I shot at night. Then as I dug deeper to my old, unheeded posts of 2009s, I thought they needed a makeover. Maybe sometime in future, when I recreate the same recipe and shoot again, I shall update them here. Or probably I’ll leave them that way and they’ll remind me how much I have evolved over the years in blogging.

You know I should hold on to penning down too much. Over the past couple of weeks, my posts, the write ups, have been spanning too long. I promise it’s not intentional. I like to write, to put my thoughts in words and do hope you enjoy reading them as much I love sharing my thoughts on food and memories with you.

Rava Idli


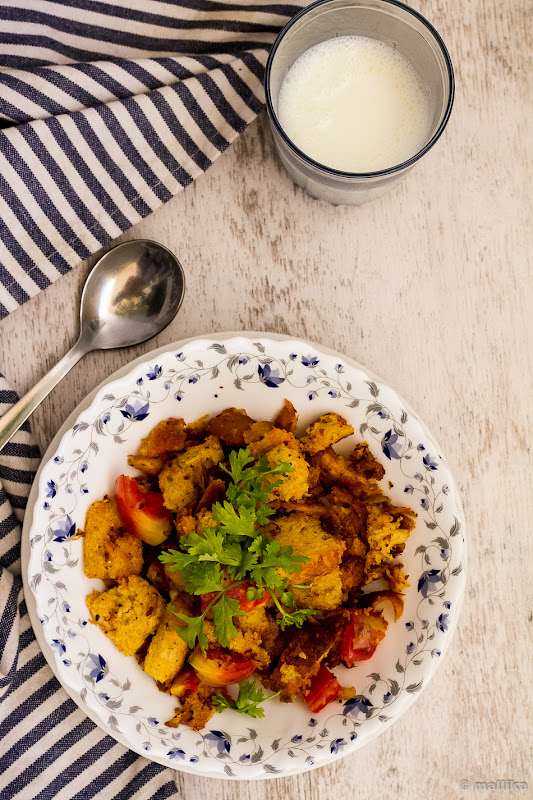
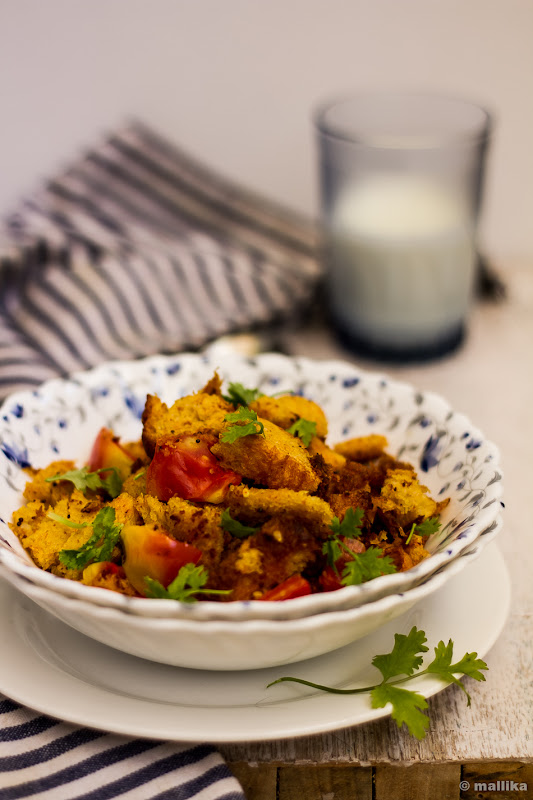
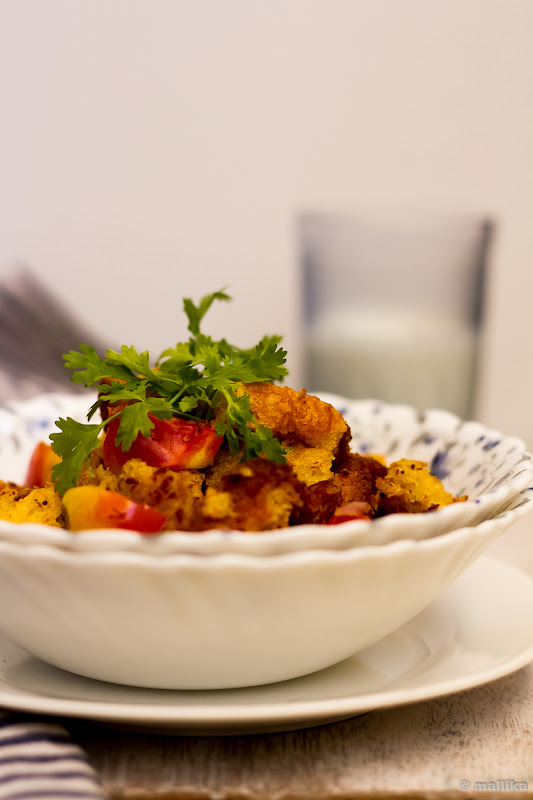
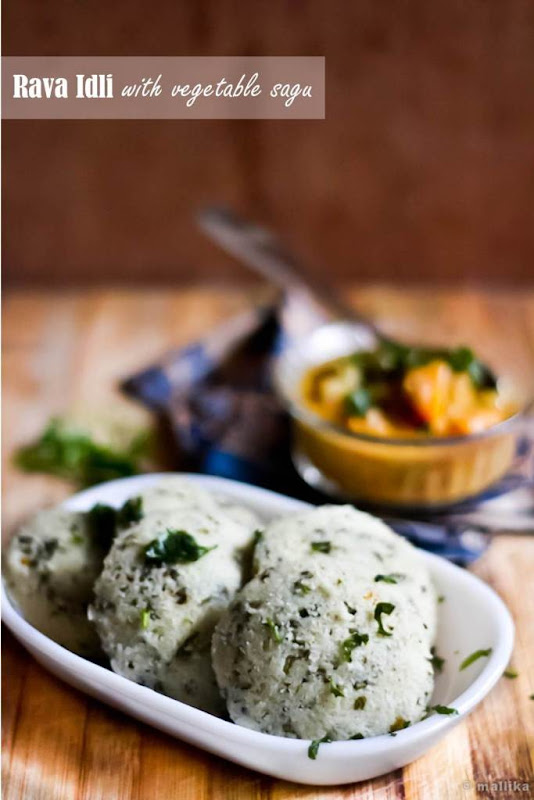
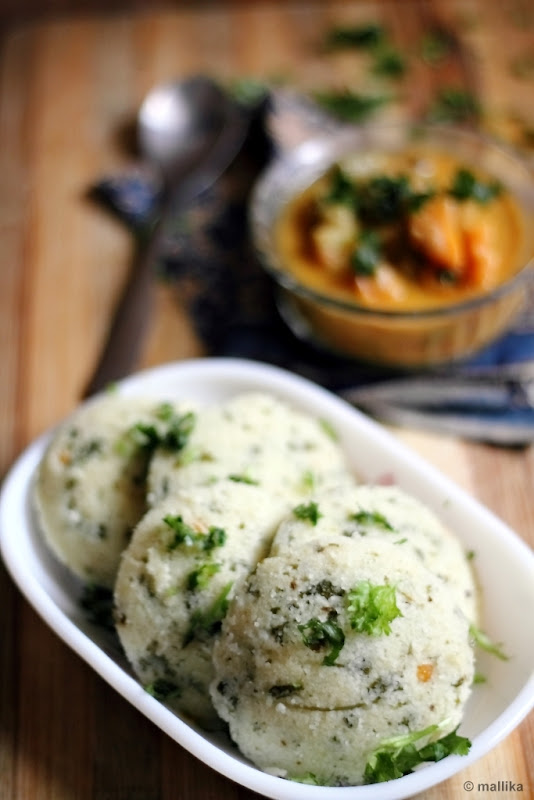
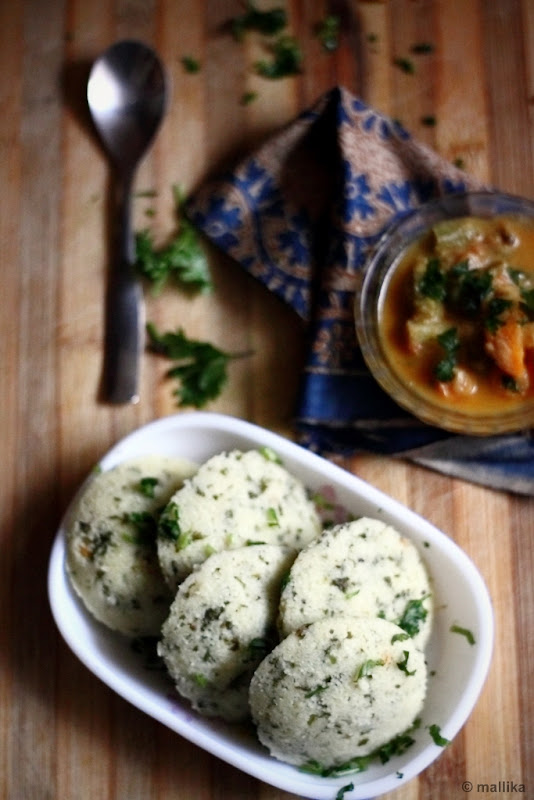
Having said that, I promise to keep this one short and savoury. Basically a spiced, savoury, breakfast semolina cake. This Rava Idli, is a common Karnataka breakfast dish and most loved by all of us at home. It repeats itself almost every week. Not the kinds we get at a restaurant, that’s dense, heavy and feels stodgy with one slice, but instant, light and the kinds you want to indulge in more than just one. Pair it with chutney or serve this with vegetable sagu like it’s done traditionally, this one will send you taste buds whirring for more. Whoosh, you can’t help but love it!


Rava Idli

1 cup regular yogurt (not thick, Greek yogurt kinds)
1 cup semolina (sooji rava)
2 tbsp. oil
1 tsp. mustard seeds
1-2 green chillies
1 sprig curry leaves
1 tsp. Channa dal
1 tbsp. broken cashew nuts
1 tsp. baking soda (or an unflavoured fruit salt, like Eno)
Salt to taste

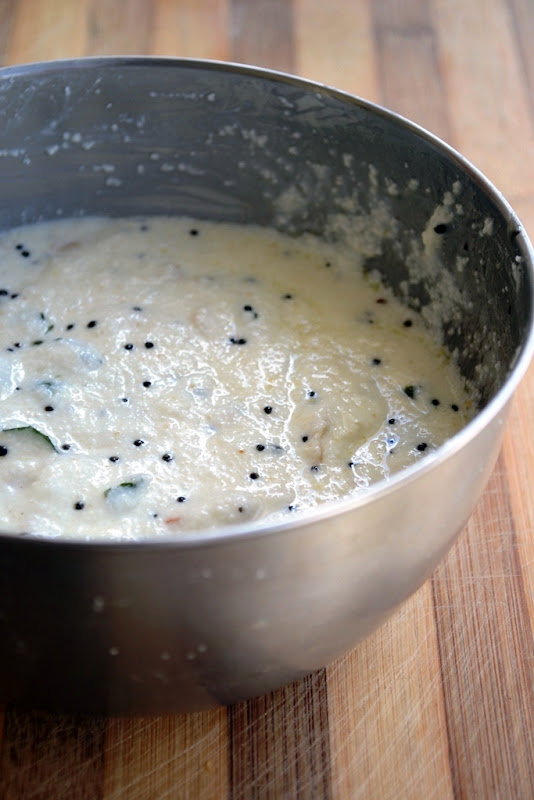
Mix a cup of semolina in cup yogurt and set aside for 10 minutes. If using thick store-bought yogurt, then thin it down by adding water. I've used regular skimmed milk homemade yogurt here. While the batter is resting, prepare the tadka. Heat the oil in a small frying pan. Add in the mustard seeds, channa dal, cashew nuts, curry leaves and heat till the mustard seeds begin to splutter. Turn off the flame and add this to the semolina, yogurt mixture. Whisk well. Add chopped green chillies and salt to taste. Finally add in the baking soda (or a sachet of fruit salt, if using), give the entire batter a quick, good whisk. The batter should be thick, similar to idli or cake batter. Transfer the batter to an oiled cake tin. If you have idli moulds, its best to use them. However you don’t own idli moulds, use regular cake tin for this purpose.

Heat a steamer / rice cooker. Place these moulds in the steamer and cook for 15-20 mins. Alternatively you can microwave it on high power for 4-5 minutes, till skewer inserted comes out clean. Slice and serve hot with any chutney of your choice or with vegetable sagu as available commonly in restaurants.


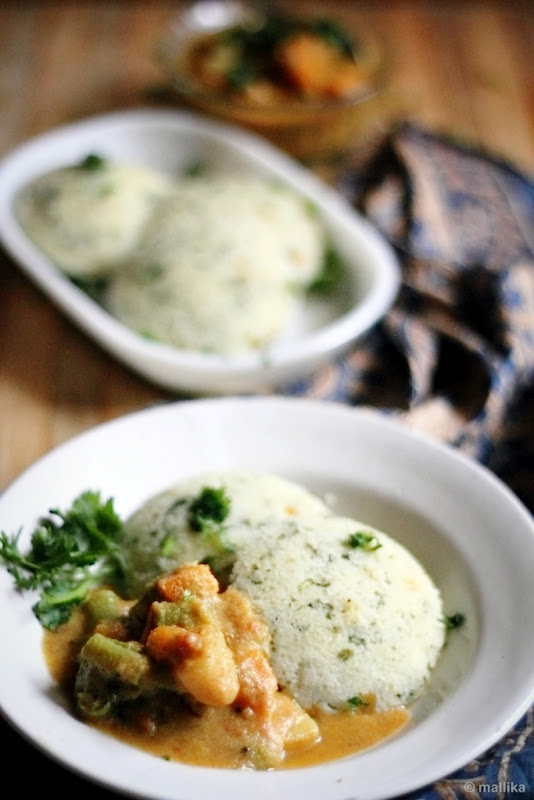
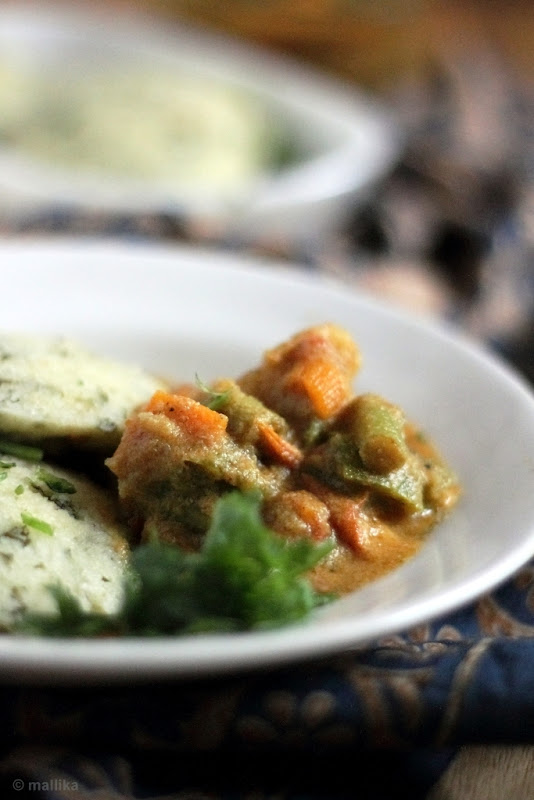
Mixed Vegetable Sagu

Mixed vegetable sagu is a popular Karnataka dish, typically served in Bangalore restaurants. It’s spicy and goes well with puris, dosas, aappam, and even rice. For best results, ensure that the vegetables are cooked just right – they should neither be crunchy nor too mushy, just the right bite.

INGREDIENTS

For The Masala Paste

2 to 3 green chillies, roughly chopped
4-5 peppercorns
2 tsp. coriander powder
1/2 tsp. cumin seeds
1/2” stick cinnamon
2 cloves
3-4 garlic cloves (optional)
4 tbsp. freshly grated coconut
1 handful of cilantro

Other Ingredients

1 tbsp. oil
1 tsp. mustard seeds
A pinch of asafoetida
A sprig of curry leaves
1 large onions, finely chopped
2 cups chopped mixed vegetables (potato, carrots, beans, capsicum, cauliflower green peas)
Salt to taste

DIRECTIONS

To make the masala paste, grind all the ingredients mentioned under masala, adding little water to a thick, fine paste. Keep aside.

Next, heat oil in a wide mouthed frying pan and add the mustard seeds. When the seeds begin to splutter, add asafoetida and torn curry leaves, and sauté well on a medium flame. Add the onions and sauté on a medium flame, while stirring continuously till they turn translucent. Add the mixed vegetables, salt and 1¼ cups of water, mix well and cover and cook on a medium flame for 12 to 15 minutes till the vegetables are tender, stirring in between. Add the prepared masala paste, mix gently and simmer for another 5 minutes. Serve hot with Rava Idli.


I eat bread with not much favor to it. It's something I like to reserve as a last option. It wasn't until I began baking some at home did I really take much liking to it. Even as a kid I did not enjoy it much. At home, Sundays meant the day to relax and unwind and that meant some time off from cooking for mom too and that's when bread for our breakfast was a usual affair. We had many Sundays with bread sandwich for our breakfast. Saying that I do not rule out that homemade bread is indeed fresh and tasty.


Although one of the ways I did enjoy bread was in form of this Masala Bread Upma that was spiced well and tasted delicious. I often frowned at the sight of bread loaves served with butter or jam, but the moment it was converted to this upma, I would relish bowls full of these and go for the second and third helpings too. The base of the kadhai had crumbs of crusty bread stuck to it and that tasted heavenly. I have memories of scraping it off, not sparing the spatula too, relishing every bit of the last spiced crumb! Well, I still do it till date. :) Hope you too love this recipe as much as I do.


Masala Bread Upma

INGREDIENTS

6 Bread slices
1 tbsp. vegetable oil
1 tsp. mustard seeds
1 tsp. red chilli powder
1 tsp. turmeric powder
1 onion, finely chopped
1 large tomato, diced
1 green chilli
2 tsp. peanuts
1 sprig of curry leaves
Coriander leaves to garnish, optional
Salt and lime to taste

DIRECTIONS

Stack the bread pieces on top of each other and dice them through using a knife. Tear them into 1 inch cubes. Else tear them roughly using your fingers, crumbling them through into uneven pieces.

Heat oil in a pan and fry the mustard seeds. Once they splutter, add in the curry leaves, the chopped onions and peanuts. Fry them on medium high flame till the onions turn slightly brown in colour. Add the chopped green chillies, turmeric powder, chilli powder and fry further for a minute. Add the diced bread pieces and stir them well gently. Fry for a couple of more minutes stirring till all the masala has coated the bread pieces well. Finally add in the diced tomatoes and season with salt to taste. Fry further more for 2 minutes. Remove from flame and add a dash of freshly squeezed lime juice to taste. Serve hot.


I made this quite a while ago but I don't know why I had been procrastinating on this one. It just sat in the corner of my drafts and though every time I thought of posting it other recipes caught my attention. I finally decided to put this recipe here, least I forget and it goes into hiding.

A while ago I had posted the recipe for a quick instant evening snack, Corn & Mint GuLiappa along with which I served this lip smacking peanut chutney powder. I promised then that I would share this recipe with you in the following post, but that didn't happen. So here it comes. This recipe is quite simple and comes from my mom and hope you too love it the way we do. It goes well with dosas, idlis and other breakfast dishes, as well pairs well with steaming hot rice and dollop of ghee.


Peanut Chutney Powder

INGREDIENTS

1 cup peanuts
2 tsp. red chilli powder
3-4 cloves of garlic
1 tiny piece of tamarind
Salt to taste

DIRECTIONS

Dry roast the peanuts along with cloves of garlic on a medium low flame till the skin turns to a darker color and the garlic is dry (has no moisture left). Let it to cool for a few minutes. Using the palms of your hand or placing peanuts between two towels, rub them to remove the skin. Grind the roasted peanuts, the roasted garlic along with chilli powder, tamarind and salt to taste till its powdered. You can leave tiny flecks of peanuts in there if you want a slight crunch. I prefer to grind it to a fine powder and serve it with a dollop of fresh ghee. Use as is or serve with ghee or dahi.


Just as I mentioned on my previous post on how life is like being a toddler's mom, I received an email from Sagarika, Madisons asking if I was open to do product reviews. Last year I was unable to be a part of some blogger events and give justice to product reviews that came into my mailbox since other priorities took up that space. However, this year began on a good note with a product review for newly launched Gone Mad – Choco Sticks that hit the market stands recently.

I received a pack of 24 Gone Mad Choco Sticks in a neatly wrapped card case promising the goodness of fudgy chocolate filling beneath a layer of thin wafer. The reason I took up to this review was because this wasn't the first time I had tasted Gone Mad Choco Sticks. My previous trip to my local supermarket saw me picking up this Cigar shaped choco stick, indeed to dress up a dessert and I loved it instantly. There are several brands and kinds of Choco sticks and wafer chocolates in the market, but this is one had me smitten. I do say that it's indeed the best I have had in recent times and if I had to really describe, it's sort of a crisp bite into a thin wafer that envelops a nice chocolatey-fudgy-brownie-kinda tasting filling. And that's delicious and addictive.


Garuda PolyFlex Foods Pvt Ltd has made a recent entrant into the wafer category with its Gone Mad Choco Sticks, and with the kind of catchy, chocolatey wrapping, a delicious piece of chocolate stick tagged at a decent price of Rs.5/- per piece it is sure to steal the show in chocolate segment of the market and make it popular especially among the kids. I handed a couple of these to my family and my friends and they surely enjoyed these bars.

On a flip side, I certainly think Garuda foods may need to work a bit on their individual packaging. These Choco Sticks are great no doubt, but if you go for their singles priced at Rs. 5/-, they crumble a lot and that too quite easily. The singles are quite fragile. If you buy the package of 24 sticks then you are saved, but if you go for their singles, you'll find most of the wafers crumbling and off the chocolate filling, mainly due to human touch and feel of the product before the purchase. And I saw that as problem even with the packaged ones.

Yet saying this I don't mean to demean these choco sticks. I do think the entire box of choco sticks can make up for a good picnic munching with your friends or a travel companion to beat those hunger pangs. They can be great birthday party treats or even a part of return gifts that most kids would love munching into. They can be used to dress a dessert which is quite what I did here. I made a quick Chunky Monkey Supreme Ice cream and topped it with Gone Mad Choco Sticks instead of chocolate chunks. They are delicious. There will be couple of more recipes that I intend to use these little addictive bars, but till then I do hope you enjoy these bars in this healthy, simple and delicious Quick Gone Mad Chunky Monkey Ice cream, a recreation of my Chunky Monkey Ice cream I made in the past.


Gone Mad Chunky Monkey Supreme

INGREDIENTS

2 bananas, peeled, chopped and frozen (I used yelakki bananas here)
1 Go Mad Choco Stick, crumbled
A tablespoon of honey (optional)
1 tsp. milk masala powder (make one at home with roughly powdered almonds, pistachios, saffron and cardamom)
Roasted and chopped nuts (almonds and pistachios)
1 Go Mad Choco Stick, broken to half, to garnish

DIRECTIONS

Place frozen bananas in your food processor. A tablespoon of honey is optional, you can add it if you like your ice cream sweet. Pulse until its mashed well and comes to consistency of ice cream. If you have difficulty while churning the frozen bananas, or if banana isn't binding, try adding 1-2 tbsp. non-dairy milk or wait for a minute or so to defrost slightly and then churn. Scoop out a ball of soft serve into a serving bowl. In a martini glass, crumble the go made choco sticks, top it with the banana ice cream and then spread generous pinches of milk masala powder, roasted and chopped nuts and garnish with more Go Mad Choco Sticks. Serve immediately.


So what do you think is life like for a toddler mom food blogger? Fun, thrilling, stressful, exciting, uncertain, adventurous, tough, entertaining, or may be all of these??? Interesting! Let me give you a glimpse of me as a food blogger.

Just about 2 days ago I decided Sankranthi, the festival for harvest is here and I need to have a post signifying it for the 14th. I rustle up my calculations and cross upon Huggi, a traditional Havyaka household dish, and an apt one that can make it right for the day and the festival. Perfect, I think.

So to be able to post it a day in advance that will benefit my readers, I decide I will cook the recipe a day before, photograph them and publish here. I almost put things together, when I simply get a feeling that I am cheating. Would that justify me celebrating the festival? It made more sense to cook them the first thing in the morning of the festival while my family is around, finish the pooja, offer God and relish them fresh. So I push the entire thought of cooking Huggi for the day of Sankranthi, in a hope I will be able to quickly grab some clicks and post them here, hopefully the same morning. Hopelessly, that rarely happens!


The morning of Sankranthi dawns and the baths are over. I head over to the kitchen to make both versions of Huggi, the sweet and the spicy one, both equally delicious and my favourites too. My cooking is done on time, pooja is over, little one is to be fed and I am to decide if the oggarne/tadka needs to be added then or saved for the photographs. A tic-tac-toe and I add a part of the oggarne/tadka, saving some of it for the grace. I almost finish feeding my hungry toddler, put her to play in my kitchen and keep a keen check on her from the corner of my eye. Often she hangs around me for my attention, so a huge effort goes into distracting her with piles of kitchen utensils and cutleries to amuse her. By now my kitchen is in a huge mess with utensils, dolls and toys lying on the floor and on counters too. Adding to this, hazaar utensils lay around to be cleared and washed. I clear a part of these to make some space for the props to be fitted into the existing clutter, as obvious to make my dish look a little appealing. By now my little toddler begins to get anxious, seeking my consideration to play with her, so she's up on the kitchen counter, least I can keep her busy with my constant talks and her plays. I begin to place up my props, lay the dishes, top the garnishes, neat my background, foot the tripod and almost begin to shoot when a tiny hand hovers over to dish, pulling the props, the background and at times the camera lens too! Again, in an attempt to distract, I hand over unforeseen kitchen items for her to play. Her hands go deep into the jar of my precious ghee, the onion and garlics are off their peels, things helter-skelter and a glass or two ends up cracking on the floor. Though by now she is bored and there comes the shrill cry, more mess and my woe! Then there are agony moments when my garnish ends up in a mess, spoons are thrown into the dish, splattering on to the table cloth and I throw up my hands in anguish! Did I say life of a blogger mom was stressful? Phew!


I come back to square one of laying things on the dining table instead, let her on her foot to play, hand over a spoon and bag of chickpeas for her to fiddle with, foot the tripod and almost begin to shoot a photograph or two when my little one spills over all the chickpeas, gives up on them instantly and hovers over to tripod, attempts a climb, almost tumbling over it. I tip toe over the scattered chickpeas, just managing to balance the falling camera on a single foot and my toddler on another! Again, I give up, shove aside the tripod and shoot by hand with a few shaky shots and some good angles. Did I say life of a blogger mom was adventurous? True!

Okay, so by now I somehow manage a few shots here and there and then sit down to processing the files, generally when my baby is off to her sleep. And today she decides not to sleep. I sit her till the noon, simply hoping I can make through this post today! She's off to sleep and I sit to blog about it, my thoughts are totally empty. Heck! Where do I start? Every blogger's foe, that blogger's block! I try to start, then just let it go. Instead I manage to do my processing and editing. Of the hazaar photos I click randomly I short-list to the chosen few. By then my little one is awake. Here I go off again, almost being sure this will have to wait another day, may be next year too...??? Yeah, I did say life of a blogger mom was uncertain.

With all that said and done, I finally have my post here, though not exactly on time as I would have preferred it earlier in the day. I sat at a stretch, almost 3 hours and managed to crack a good long write up too! And as it gets published, its fun and exciting. As the comments pour in, it gets entertaining too :) That's life being a food blogger and toddler's mom too!


Sihi Huggi

INGREDIENTS

1/2 cup moong daal
1 cup rice
3 cups milk
1 cup water
2 tbsp. clarified butter / ghee
1 1/2 - 2 cups sugar or jaggery (adjust as per taste)
1-2 cardamom pods, crushed
A handful cashew nuts & raisins
A pinch of saffron

DIRECTIONS

Wash and clean the moong daal and rice and keep it aside for about 10 minutes. In a pressure cooker, add the moong daal, the washed rice. Cook them in 2 cups of milk and 1 cup of water to 3 whistles. If you do not have a pressure cooker at hand, use a regular cooking pan and cook the daal and rice till they turn soft and mushy. Once cooled, lightly mash them using the back of the ladle once cooked. Add the sugar to taste and adjust the thickness of the huggi by adding remaining milk, if necessary. Add in the saffron and stir well. Heat it till it comes to a boil. I've used sugar here since I ran out of jaggery, but I suggest you try the jaggery version as it tastes great too!

Next, heat three tbsp. of ghee in a wide mouthed pan. Add cashews and fry till they turn golden brown. Switch of the flame and quickly toss in the raisins and cardamoms. Allow them to plump in the heat. Garnish the prepared sihi huggi with the fried cashews and raisins and serve hot.


Khara Huggi

INGREDIENTS

1/2 cup moong daal
1 cup rice
2 tbsp. clarified butter / ghee
1 tsp. turmeric powder
1 tsp. cumin seeds
1 tsp. chopped ginger
2 chopped green chillies
1 tsp. whole & broken peppercorns
A sprig of curry leaves
Salt to taste
A handful cashew nuts

DIRECTIONS

Wash and clean the moong daal and rice and keep it aside for about 10 minutes. In a pressure cooker, add the moong daal, the washed rice along with chopped ginger and green chillies. Cook them in sufficient water (about twice to three times the quantity of rice and dal) to 3 whistles. If you do not have a pressure cooker at hand, use a regular cooking pan and cook the daal and rice till they turn soft and mushy. Once cooled, lightly mash them using the back of the ladle once cooked. Add turmeric and salt to taste. Adjust water to your desired thickness as necessary.

Next, for the oggarne, heat three tbsp. of ghee in a kadai. Add the cumin seeds. When the cumin seeds turn fragrant, add torn curry leaves, the whole and broken pepper and cashew in the ghee till the cashews turn golden brown. Garnish the prepared huggi with this oggarne and top with more roasted cashews before serving.

Wishing you all a Happy Sankranthi this season!


I have never been fond of pies or tarts. In my humble opinion, pies are too much of a work that I can easily do without. Though I admit after that pastry dough attempt, I should call this hardly any effort. Pies are great no doubts, but I assume they can do more good to parties and big gatherings. As for a family of 2.5 (that .5 credit goes to my toddler, ahem ;)), I think it’s a lot too much than we can eat.

Not long ago, when I started out my culinary expedition paired with blogging and photography, out of sheer craze for collecting baking gears, I bought a couple of tart cases and pie tins to flaunt them in my ever growing collectibles. They sat, sat and sat in my ever brimming cabinet, weighed down by new objects of desire that piled up on them. I did not quite put them to use and they were soon forgotten. It was only until last week that I noticed a thick blanket of dust resting peacefully on them, growing at a steady pace, plump and nice, making a brand new piece of hardly used stuff look like an antique artefact dusted off from a granny’s attic. I seriously urge to curb my impulsive shopping flair. Some tips are most welcome please!


Amazingly, that’s not a case with my cookbooks. My study area has been stacked with cookbooks and magazines neatly, adding and multiplying by leaps and bounds by every passing month, wailing for space beyond what it can accommodate. A few purchased, a couple borrowed, some cut-outs, handy snippets, few subscriptions … and even as new cookbooks and magazines have added to my collection, the old books still hold a special place in my heart. You’ll find them scattered everywhere, some at my bedside table, here and there at the coffee tables, a couple on the kitchen counter, a few on the center table, handouts on my microwave, some under my pillows too… Phew!

Yet with so many cook books around I like to go back to my old one with classic recipes. I've admitted in the past, I totally love the Big Book of Baking for its classic collection of recipes. I've made several from them, never had them fail, blogged some here and continue to do so. As I dusted my pie pan, my thoughts quickly raced back to the recipe I had seen for tarts and pies in the Big Book of Baking. The perfect time I need to put my pans to use, before they can make up for a good sale in an antique store!

But when I set out to put the recipe together, lethargy kicked in and what was meant to be a neat fluted tart, ended up being a free form one, but of course baked on my fluted tart tin! Galetté, a notably French recipe, is a free form tart that can be either sweet or savoury and here’s one for Apple Cashew Galetté, made from locally fetched apples.


Apple Cashew Galette

INGREDIENTS

For the Pastry

90 gm plain flour
85 gm cold salted butter, grated or cut to small pieces
1-2 tsp. cold water

For the Filling

350 gm cooking apples, peeled, cored and sliced
62 gm soft light brown sugar
1 tsp. ground cinnamon
100 gm cashewnut halves

DIRECTIONS

To make the pastry, sift the flour into a mixing bowl. Rub butter into the flour using your fingertips. Add just enough ice cold water to bind and form a firm dough. Bring the dough together, knead very lightly and wrap in a cling film. Refrigerator for about 20 minutes.

Pre-heat the oven to 220 deg C. Toss the apples with the all of the sugar and add ground cinnamon. On a floured surface, roll out the dough to a 8-inch round. Transfer to a baking tray. Spread the pie filling over the dough, leaving an inch on the borders. Roughly fold the border over the filling, to ensure the filling is well cased, while leaving the center open. Top well with the cashew halves and bake for 45 minutes or until golden. Serve warm with whipped cream or custard or as is.


So we've stepped into the new year. Welcome 2013! With Newer hopes. Brighter dreams. Best of health & prosperity aplenty like never before, here’s Vegbowl giving a warm welcome to 2013 with hopes of bright future, a year full of good luck, surprises, love and prosperity. And I turned a year older as I celebrated my birthday yesterday in a discreet way. Wishes poured in, friends whom I don’t get to interact too often took time to wish, many messages on Facebook tipped in and all that made me smile. Yet somewhere deep within, there was nothing that made me feels fancy about celebrating as it reminded me that I was growing old. Yeah, I probably did enjoy all that stardom of congratulatory messages and gifts while in my teens or even early twenties. Not any more. As I cross a milestone, it feels deeply reflective and provokes thoughts about several things, which I simply wish to put aside.

While highs and lows are a part and parcel of everyone’s life, I wish to thank each and every one who directly or indirectly became a part of my life. For many who brought smile on my face, happiness in my life, for the ones who filled my life with countless moments of joy, fun and laughter making it memorable and worth living every minute, others who motivated and inspired me, who stood by rough waves, giving me strength, at all times. Thank you all for all making me feel so special and good about myself. I feel blissed and blessed!

After all that think-thanking done that I've been itching to type, I've been pondering over what recipe should be ideal as the first post for the year. The net has been hovering over with innumerable desserts and after the week long festivities and celebrations gone by, followed by New Year partying, I am sure you've had enough of food indulgence or more than what you had asked for. This perhaps is the right time to settle for this simple heart warming Khichdi that is basic, one-pot and delicious! It’s quick, light on tummy, healthy and delightful comfort food. With lentils, rice, vegetables and spices, it’s gluten-free, healthy and a complete meal in itself. The below recipe is one of my favourite where I like to use our traditional sambhar powder, however you can replace it with garam masala instead. Use ghee instead of oil for an extra flavour. A dash of lime will bring in that added kick to this Khichdi.


Moong Dal Khichdi

INGREDIENTS

1/2 cup rice
1 cup Moong dal
1 tbsp. ghee/vegetable oil
1 tsp. mustard seeds
6-8 cashewnuts
4-5 Garlic cloves
1 tsp. Grated ginger
1 large Onion, chopped
2 Tomatoes, chopped
1-2 Red chilli powder
1 tsp. sambhar powder
2-3 red chillies (optional)
1 cup Mixed vegetables (chopped beans, carrots, fresh peas)
Sprigs of Coriander leaves and dash of lime to garnish(optional)

DIRECTIONS

Wash rice and lentils together in couple of changes of water. Drain the water and set aside for 10 mins.

Meanwhile, in a pressure cooker, heat a tbsp. of oil. Fry the mustard seeds till they splutter. Follow it by adding crushed garlic cloves, grated ginger and onion. Fry them on medium high heat till the onions brown. Add whole red chillies if using. Next add the cashew nuts and fry for a couple of minutes. Then add the chopped tomatoes followed by vegetables, beans, carrots, fresh peas and fry for a couple of minutes. Add the rice and lentils and fry for a minute more. Season with salt, red chilli powder and sambhar powder. Add double the quantity of water and pressure cook for 3 whistles. For a mushy khichdi, add more water before pressure cooking the khichdi. Garnish with coriander leaves and serve hot. Top with a dash of lime before serving.


It may sound clichéd, I really hate stating the obvious, but it is insane how quickly a year can fly by. I can’t believe that it’s time an entire year has gone by and we are close to its end. With hardly two days to go we will soon bid a bye to it. I hope you had a great time holidaying this Christmas with your family and friends. In a retrospect to the year 2012, it has been a fantastic one in all aspects that it pains parting away from it. It seems soon, too soon and I can’t come to terms in accepting that we are close to its finale. On a positive note, I am looking forward to the brighter prospects of 2013. My daughter is growing bigger and niftier with every passing day. The coming year she will turn 2 and may be step her first foot into schooling. She’s a quick learner and I am sure she will make waves in years to come.


To retrospect the year, the earlier part of the year has been quite eventful on personal and professional front. Firstly, I switched my job from what was right next door to travelling for hours in distance, yet I am in a sense of great satisfaction, getting what I expected out of my job. Then, as my daughter turned one this March, she moved out from her infant phase to being a high energy, active toddler which has been quite a welcome progress. That reasons why I have been quite lenient in blogging this year, despite taking time off in late evenings to keep my blog going. Strangely, I realized that I have been better than the last year where I had just about 37 posts and this year I crossed 40+ posts. Somewhere in February, I took a huge step when I moved out of blogspot to my own domain, but that was a wise decision, because I still love cooking, sharing, writing, clicking and blogging and all that’s associated with it! Sadly I missed out on many invites to media and blogger events that kept flooding my mailbox. But I realize I cannot stuff myself more than what I can take. So that’s okay.

This time of the year is when most people take a sabbatical, planning week long holidays or partying. What are your plans? The spirits are high, mood is warm and light and one inevitably tunes to being merry as the magical charm of New year steeps in. Hope you too enjoy these festive days with your families and friends and welcome the New Year with new hopes, dreams and loads of prosperity. In absolute desire to bid adieu to this year, here’s a quick pasta dish, Fusilli in Cheese Sauce I’m sharing with you. It’s nothing different than the traditional mac and cheese we’ve grown up eating. But yet, I would never want to replace the macaroni with any other kinds of pasta if I am making these. I always stock macaroni, but on odd days like this one, I ran out of macaroni and went ahead with fusilli. Here I did use fusilli, so I call it as Fusilli in Cheese Sauce, since Mac and Cheese, is Mac and Cheese and nothing else!


Fusilli in Cheese Sauce

INGREDIENTS

500 ml regular milk
1 onion, peeled and quartered
1 garlic clove
1 bay leaf
200 g macaroni (1 pack)
1 tbsp. butter
4 tbsp. plain flour (30gm)
125 g cheddar cheese, grated

DIRECTIONS

Cook the fusilli pasta in rolling boiling water with salt till its al dente. This will take about 10 mins or so. Drain out the water and then run the pasta under cold water to stop the pasta from cooking further. This also helps in keeping the pasta separate. Add a dash of olive oil, toss well and set aside.

Cut onion into quarters. In a milk pan, heat the milk along with onion, garlic and bay leaf until almost boiling. Remove from the heat, leave covered to infuse for 10 mins, then strain. Reserve the onion and garlic and use them as paste in other gravy dishes.

In a wide mouthed pan, melt butter. Add flour and cook stirring constantly for about a min on medium low heat. This is called as roux and is the base for thickeners. Pour the warm infused milk into the roux until smooth. Simmer for few mins, stirring often, until the sauce has thickened. The sauce is done when its thick enough to coat the back of a wooden spoon. Check by running your finger through the sauce on a spoon and it should leave a trail. Remove the pan from the heat, then add the cheddar cheese. Then stir until the cheese has melted. Season well with salt and pepper. Serve hot.


Last week I baked my Christmas Fruit cake inspired from the English traditions of Nigella’s book How to be a Domestic Goddess. They turned out to be phenomenally good that they did not survive till the Christmas eve. Barely had I baked the cake and done with shooting them in a hurry, they were sliced while still warm and sent off to my family and friends. While a part of the cake went along with my hubby dear on an extended work related trip, other quarters were packed off and gifted to my family to be relished during the holiday season. The remains of the cake that stayed with me did not last longer either as I sought an instant gratification in the mere few slices I relished for my supper.


I did intend to post that recipe here today. Hardly had I seen off my husband, an urgency brought me the woes of travel with my little one and I was left in the dark to post no Fruit cake for Christmas here. The camera and the card which hosted all those treasured photographs of my cake stayed back home, miles away from where I am currently. But then lady luck played the Santa’s charm when I discovered that my post for homemade vanilla extract would be apt as Christmas gifts for your family and friends. Oh yes, for sure I made some gorgeous vanilla extract last month, scraping off all those seeds and freshness off the vanilla pods, dunked them into a bottle of vodka to permeate and mature into that million buck extract.

A couple of years ago, on our getaway trips to Munnar and Kodai, I had seen vanilla pods on sale at dirt cheap prices of Rs. 10 a pod. I hadn’t bothered stocking them then, because the vanilla essence at 20 bucks lasted for years and seemed worthy. It’s only after I got a few bottles of pure vanilla extract from Munnar, did I sense the bliss of using pure, fresh and natural extract. Making mine at home is not just easy, but indeed satisfying.


Homemade Vanilla Extract

INGREDIENTS:

5-6 Vanilla Beans
1 Bottle of Vodka, but you can also use Rum or Brandy too

DIRECTIONS:

Using a knife, split the bean into half. Scrape the vanilla beans into the bottle of vodka. Alternatively, use them into desserts, like puddings, custards and ice creams. Scrape off as much flesh as you can from the bean. Don't discard the skin. Instead place the entire bean into the bottle. Place about 4-5 vanilla beans pieces in each bottle for an intense flavoured vanilla extract. Close bottle and store in a cool, dry place for at least 2 months. Give the bottle a vigorous shake every week or so.


Now that’s what I call a realm of goodness in a bottle! Bottle them, label them and they'll make good for gifting this season!


I have great memories of playing wonderful set of indoor games with my long lost girlfriend A at her place. My sister and I would spend hours at her place frisking her most coveted collection of Barbies, boards and darts. Apart from being my dad’s boss’ only daughter she had an envious collection of indoor games and dolls to her kitty. Our office bungalows, where we lived then, lined adjacent and we would catch up either at her place or ours, our cartons laden with games of Scrabble, Ludo, Cards, Brainvita, Business and loads more.

We played endlessly in her company, often changing our games to bring around till boredom. In between these games, her mom, Mrs. B, stylish and chic, would elegantly bring in supplies of food and drink from her indulgent kitchen. It was a wonderfully evocative scene that blended food with imagination and made playing indoor games fun and inspiring, something that I foresee for my daughter too in future.


The moment we stepped in, her home wafted strong aromas sarson ka tel (mustard oil) which was traditional to their cuisine. Even today when I cook in Kachchi Ghani I am taken back to those luxurious evenings we spent at her place playing games in her bedroom, while blends of mystic aromas wafted through their kitchen enveloping the entire house with its essence till they pecked our nostrils and let our taste buds salivating. The Bengalis that they were, she often dished out hot pakoras, Beguni, Jhal Muri and more cooked in mustard oil, much to kids delight. She was an admirable cook exposed well to world cuisine and made various other non traditional dishes, many which inspired my mom too.

And like every Bengali, they too had huge fetish for fish and Mishţi (sweets). She doled out sweets and snacks effortlessly. Potlucks and birthday parties vouched these for proofs. Her puddings held a testimony to that. Not surprising we had never heard of clafoutis before, but strangely when I made this (inspired by Nigella's book, How to be a Domestic Goddess gifted by my hubby on Mother's Day!) and took a bite into this, it reminded me of puds Mrs. B used to dish out. Quite similar, just that they had no fancy names, but plain pudding. Dense, fudgy, not so cakelike, just a simple pudding. A cake sans the rising power from baking powder or soda. Call it a Clafoutis or whatever you like, this deep, dark chocolaty, intensely pudding kinds, is just right for the merry season of Christmas.


Double Chocolate Clafoutis

Inspired by Nigella's book, How to be a Domestic Goddess

INGREDIENTS

1/2 cup all-purpose flour
1 tbsp. cocoa powder
2 eggs
4 tbsp. granulated white sugar
1 cup heavy cream
1/2 tsp. vanilla extract
Handful of dark chocolate chunks

DIRECTIONS

Whisk together the cream, eggs and vanilla extract. Sift all of the dry ingredients together and and add this the wet ingredients. Whisk well to make a smooth batter. Pour the batter into ramekins or ceramic dishes and throw couple of chocolate chunks into the batter. Bake at 180 deg C for 20 minutes or until the clafoutis is golden brown around the edges. Serve hot with a dusting of powdered sugar.