Avocado Brownie

How to make Avocado Brownies | Recipe for Healthy Brownies | No Butter Brownies
My weakness for brownies is not quite known to many. I love this sense of being discreet, like an affair that's quite so sincere. It first began years ago, when I joined the corporate industry to begin my career and I lived by myself for those couple of years. During those days, many weekends were spent hanging out at Corner House ice cream parlors in the heart of South Bangalore. Among the wide variety of ice creams in all permutations and combinations they had on menu or the life sized colorful posters of sugar-cherry topped neat ice cream scoops that adorned their walls, Brownie Fudge Sundaes it mostly was. It won my heart like none other could. I would go there nearly every weekend till I had had enough of it to overcome my cravings. At times I got them packed in disposable containers and took them back home. On most occasions, I would sit by the glass window and let the world pass by unnoticed as I indulged slowly scooping out the layers of nuts, chocolate fudge and vanilla ice cream that sat over the fudge soaked warm brownies. As the cold ice cream melted over the warm brownies and hot chocolate sauce, it created a pool of molten sweet puddle, soaking the brownie in it and making every bite of it gratifying and soothing to the fourth sense. It's what I call chocolate nirvana, bringing joy that makes life worth every bit.

I revive those days, much in reverence of being ignorant about what it meant to count calories or care for the waistline. More so because I cooked and ate mostly at home, so this was a sweet deal I sought comfort in for the week long slog at work and to beat the boredom of cooking and eating at home.

Avocado Brownie Prep

Avocado Brownies


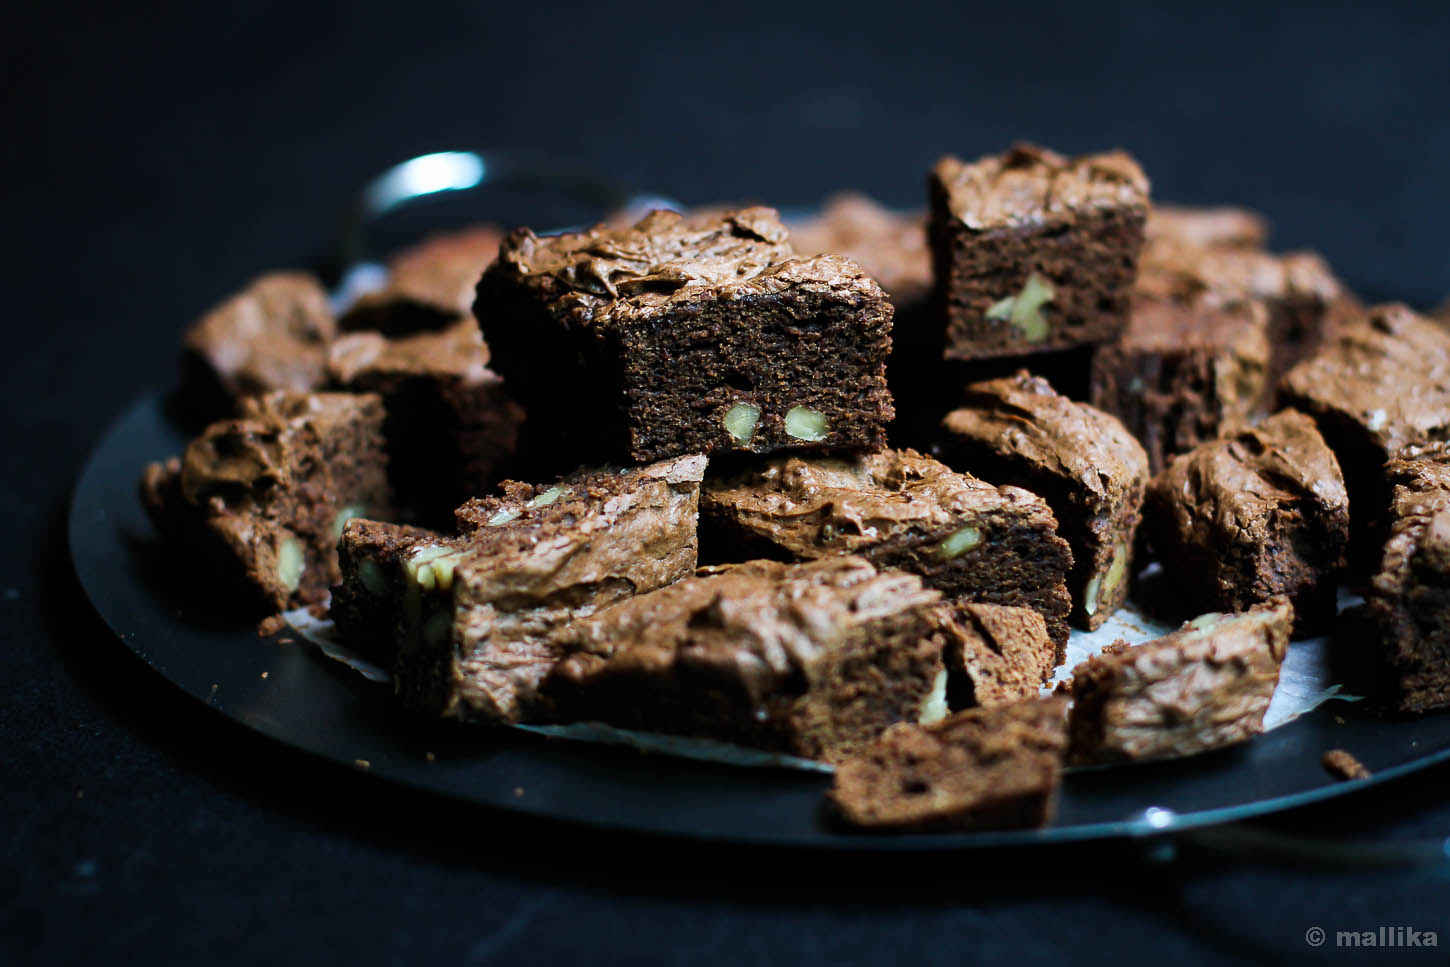
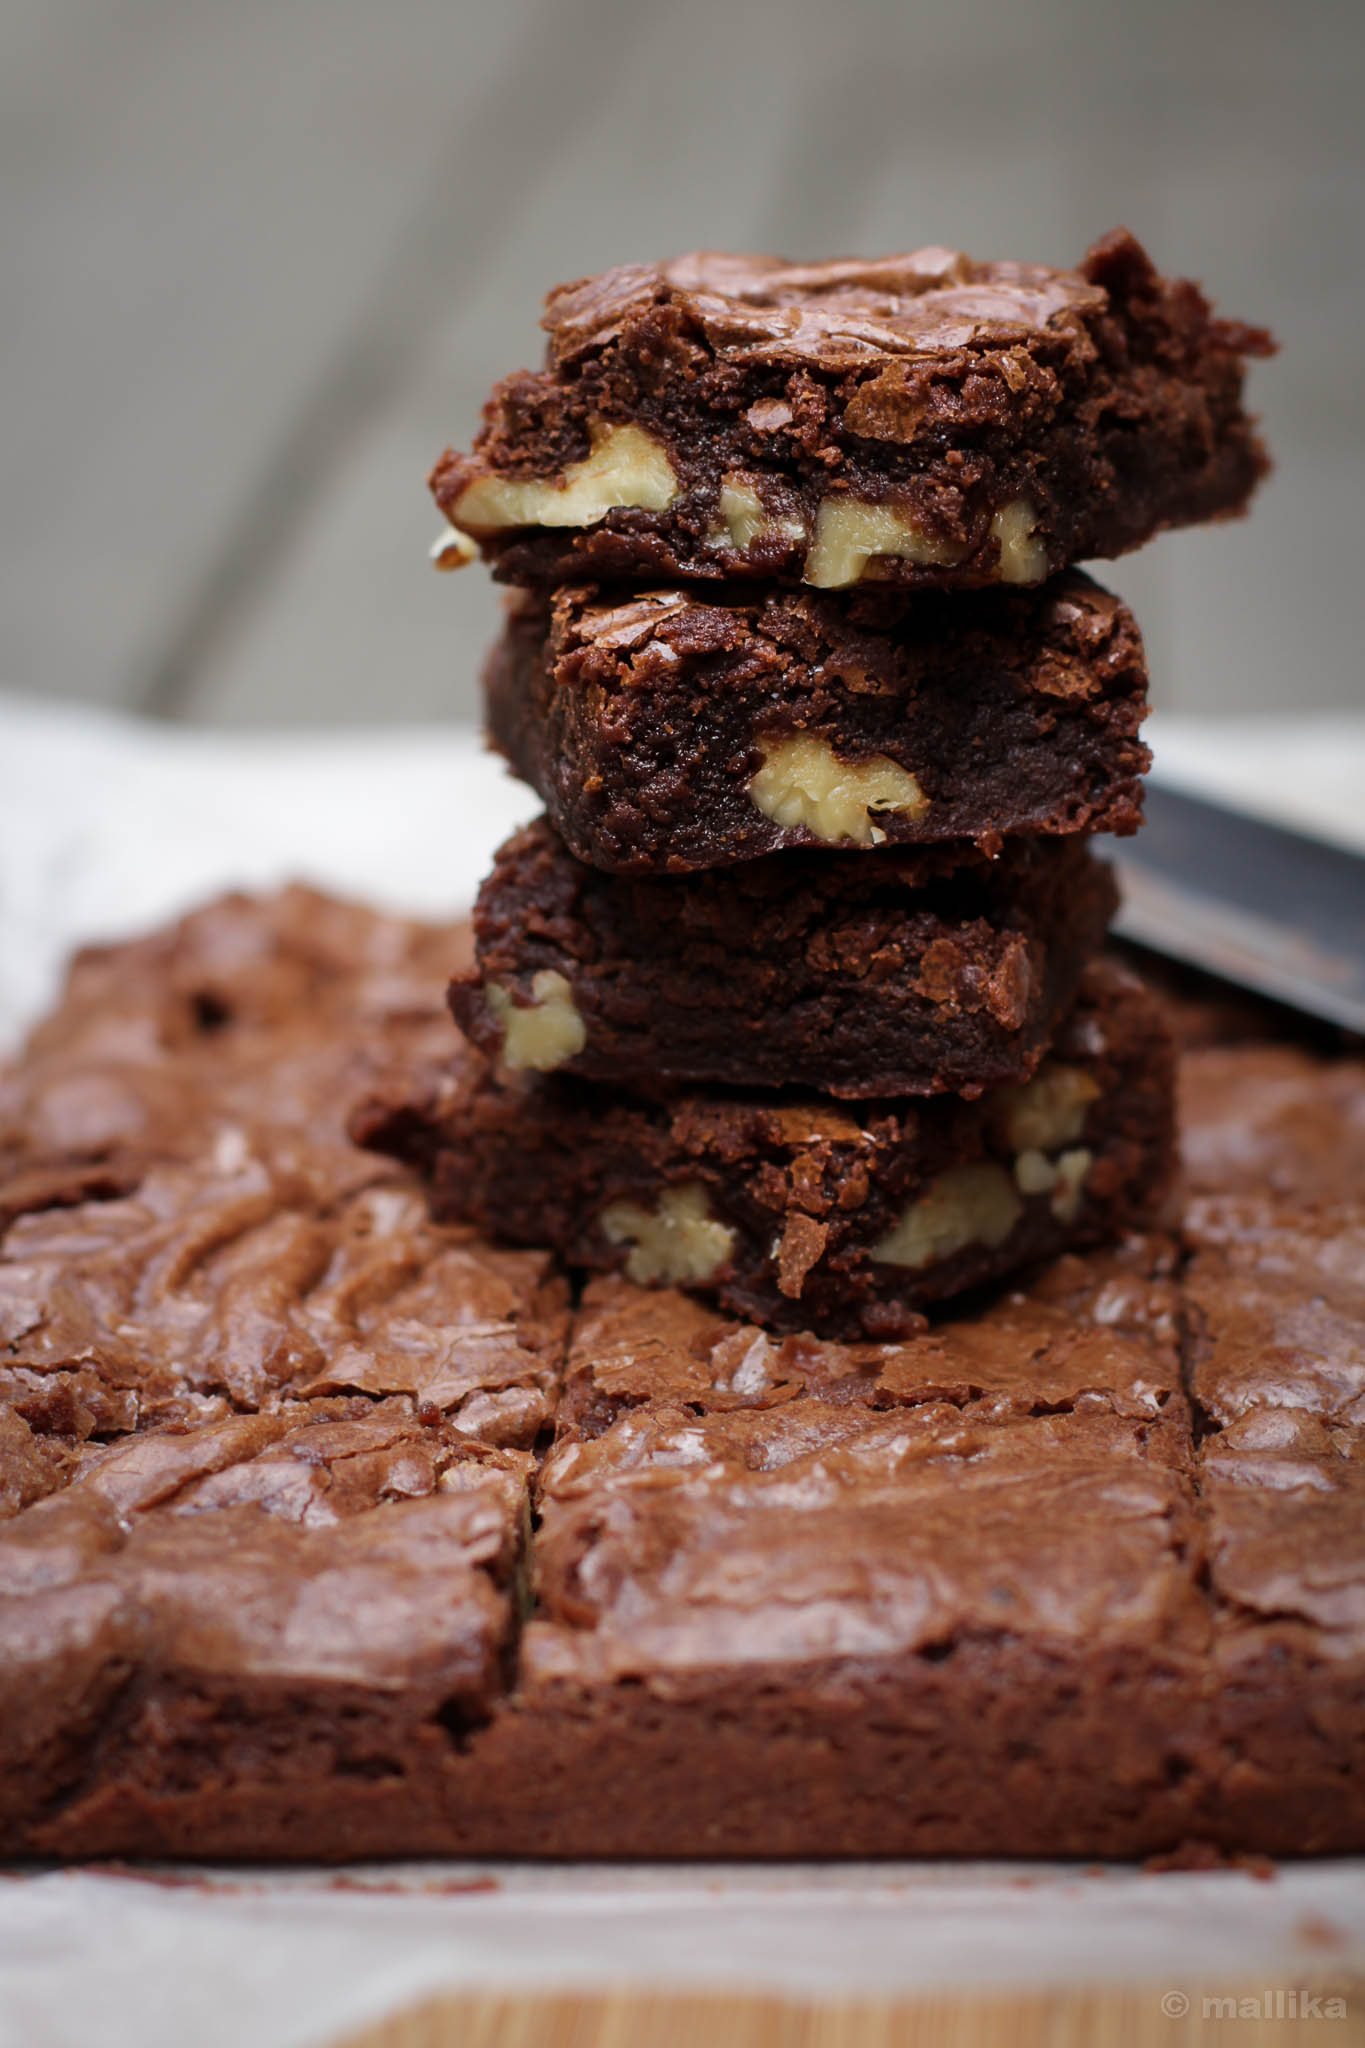
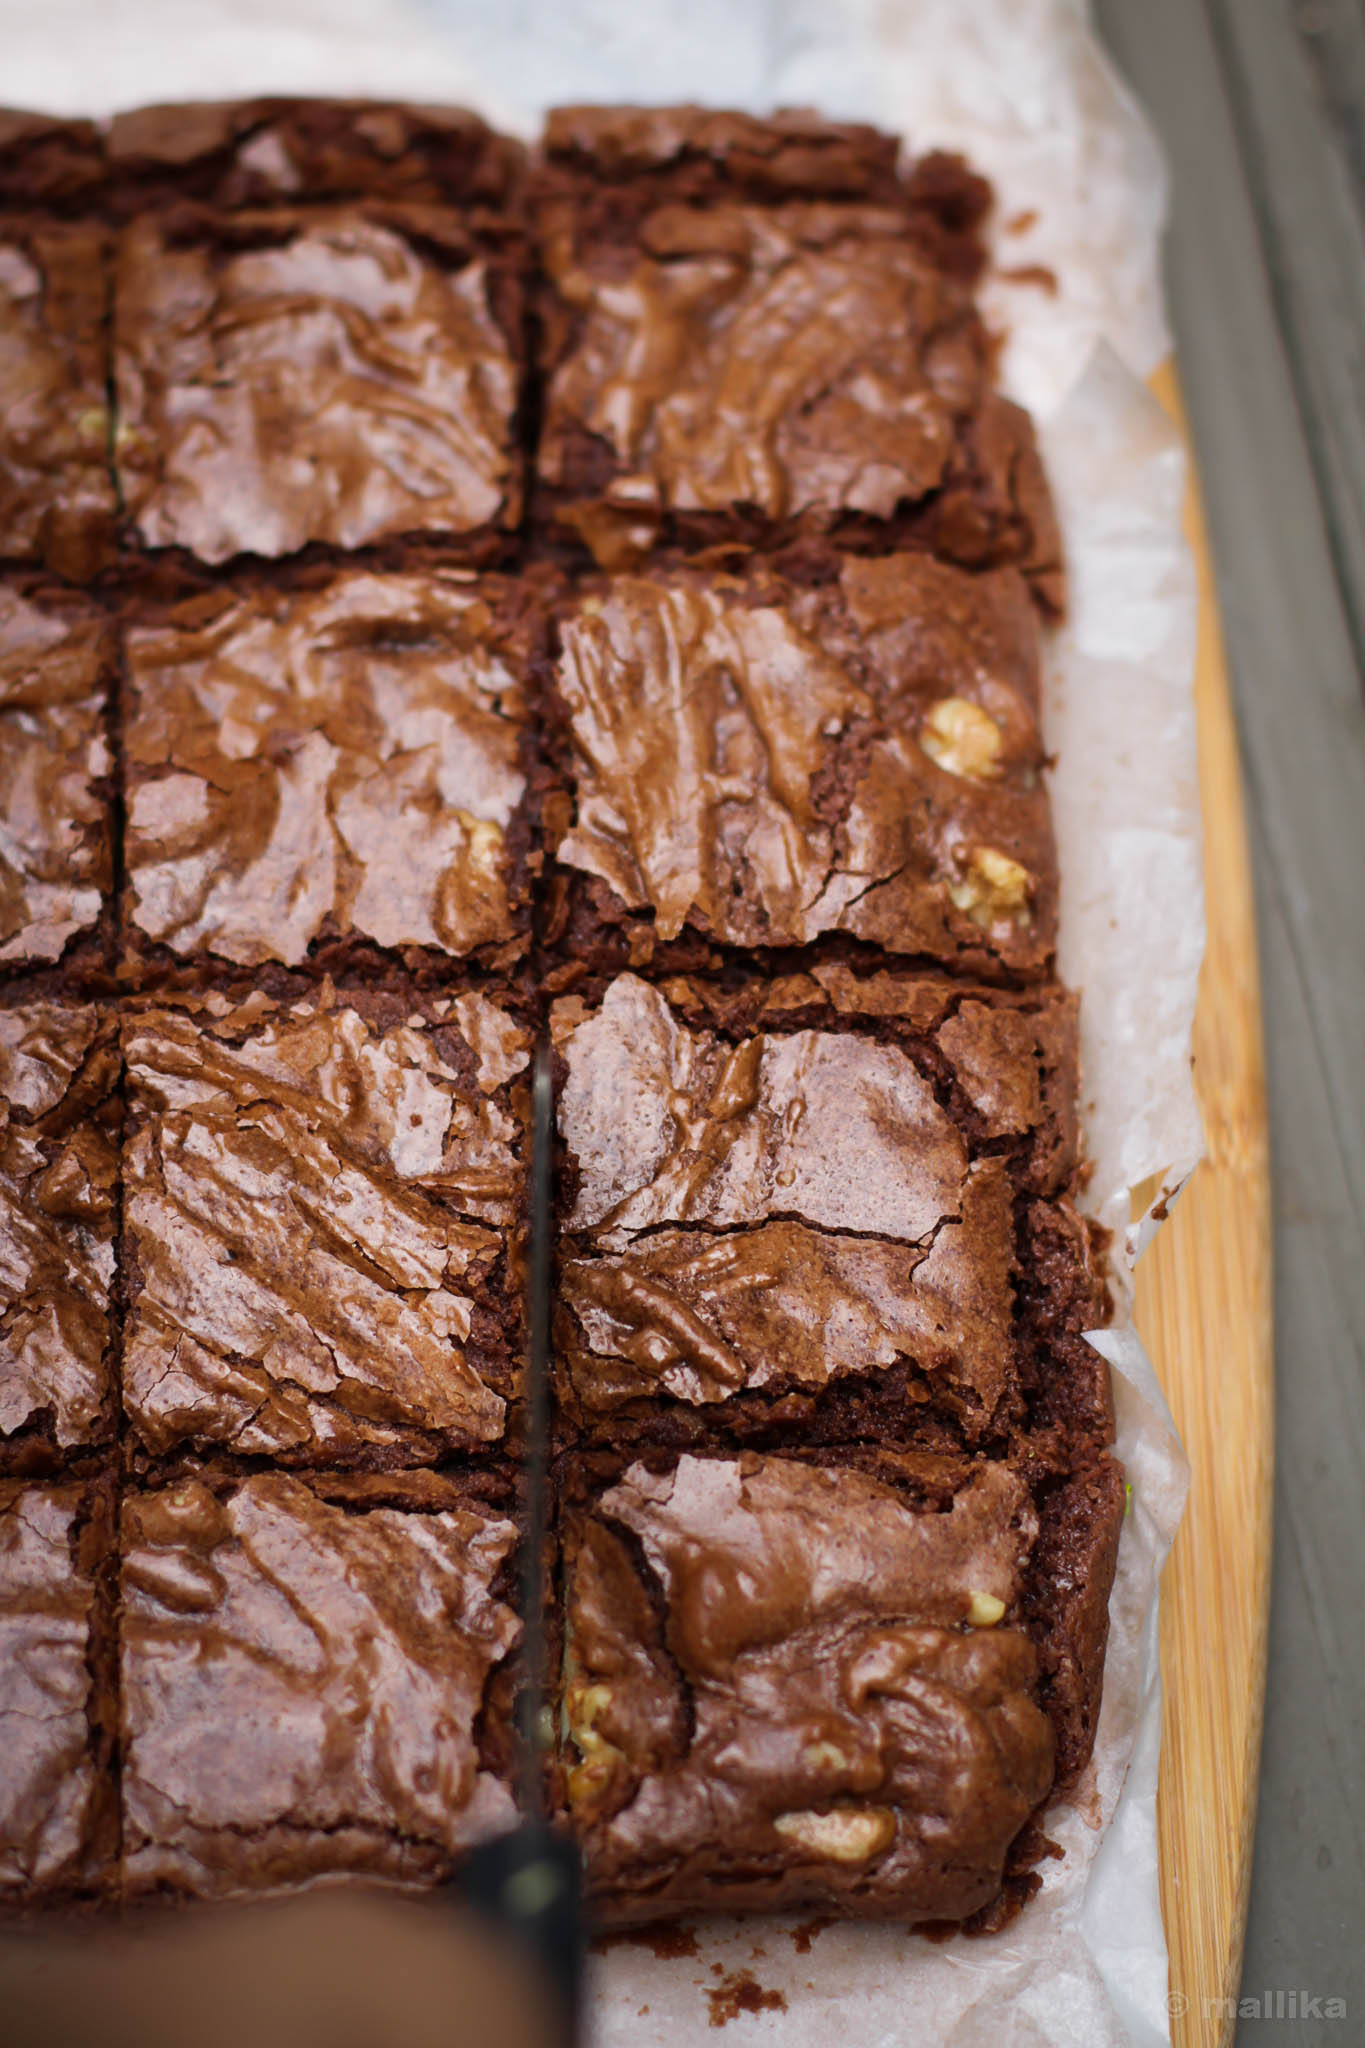
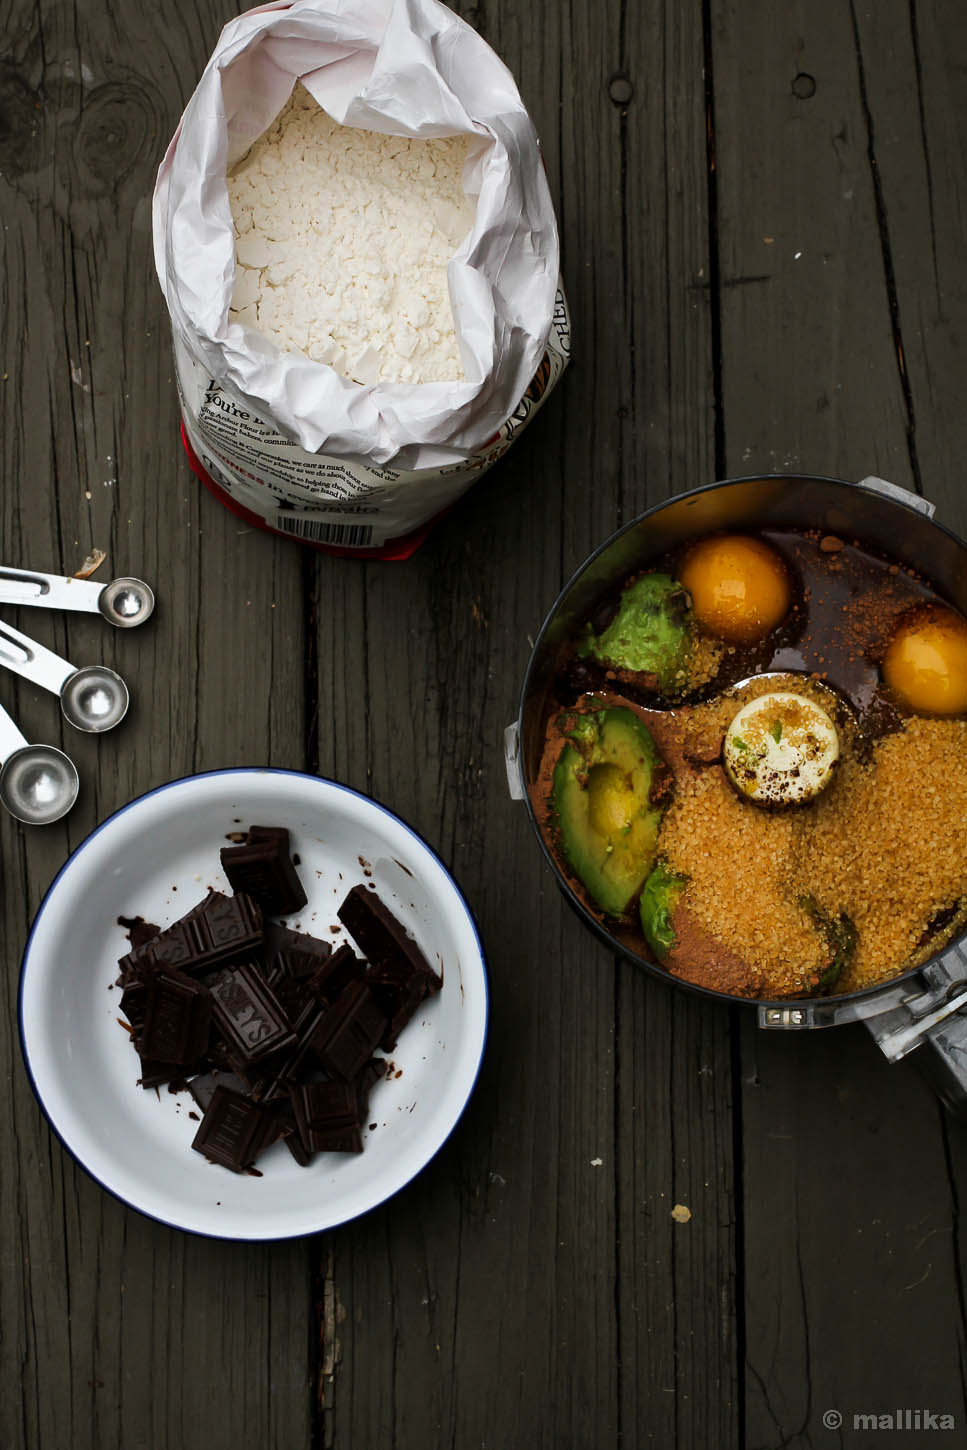
The harsher side is that brownies have never known to be healthy. You and I know that a good brownie needs a great deal of butter, ton of delicious sweet dark chocolate and a couple of eggs in varying degrees, depending upon how fudgy or cake-like you love your brownie to be. In sum, its pretty calorie laden that makes it so sinfully decadent.

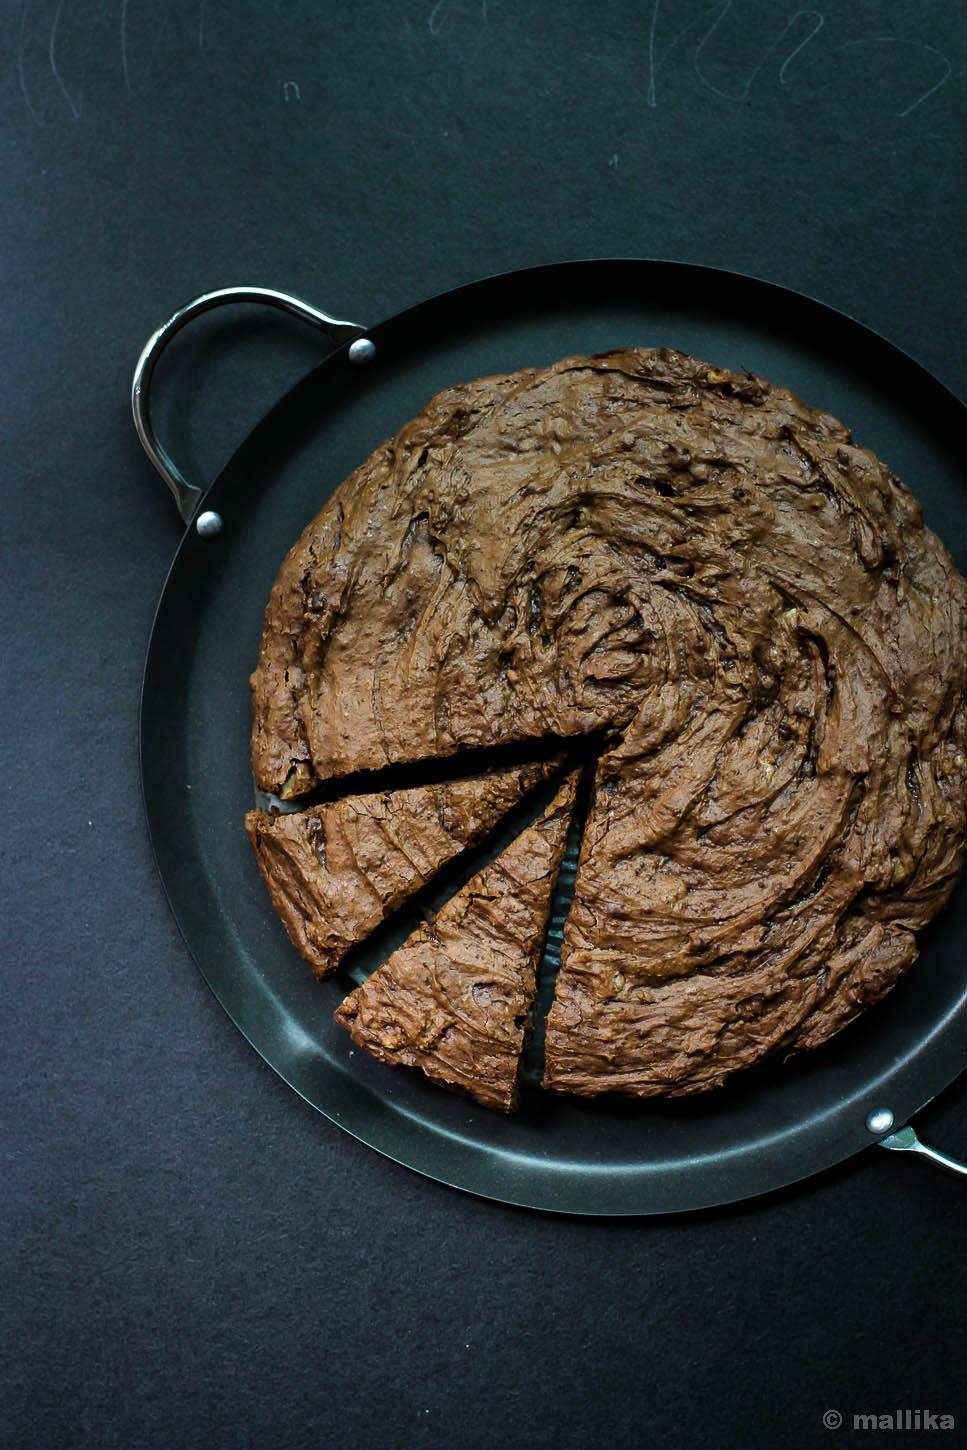
It may sound like I am deceiving you a bit here, trying to sell you my brownies by calling them waistline-conscious, healthy and diet-friendly; yet with all the same decadence as what the classic brownies are. Believe me they are incredibly good!

Avocado Brownie Sliced Avocado Brownie


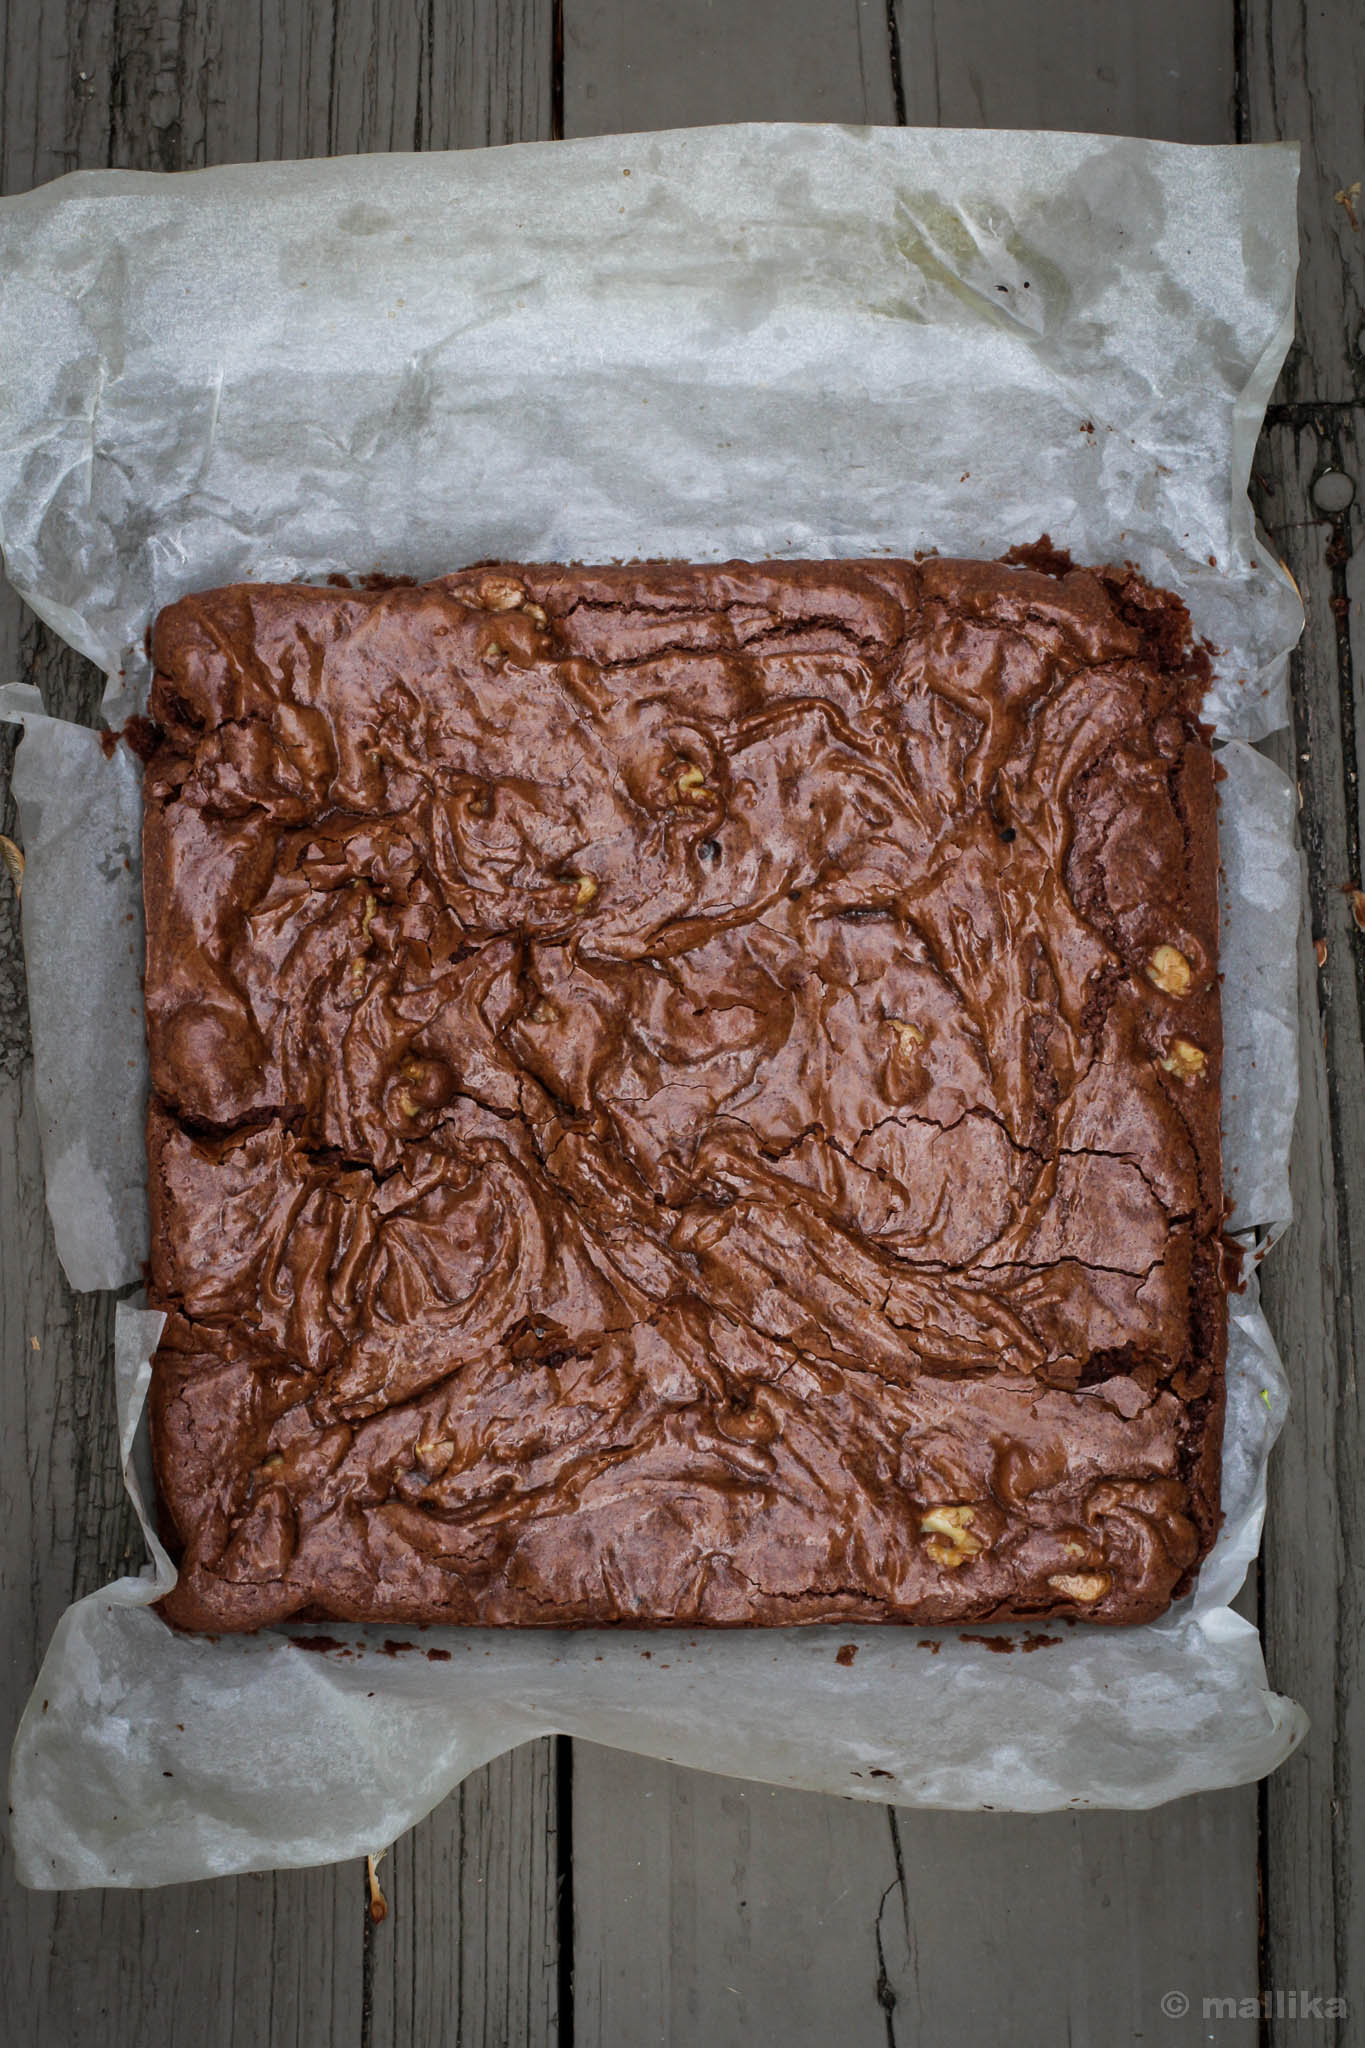
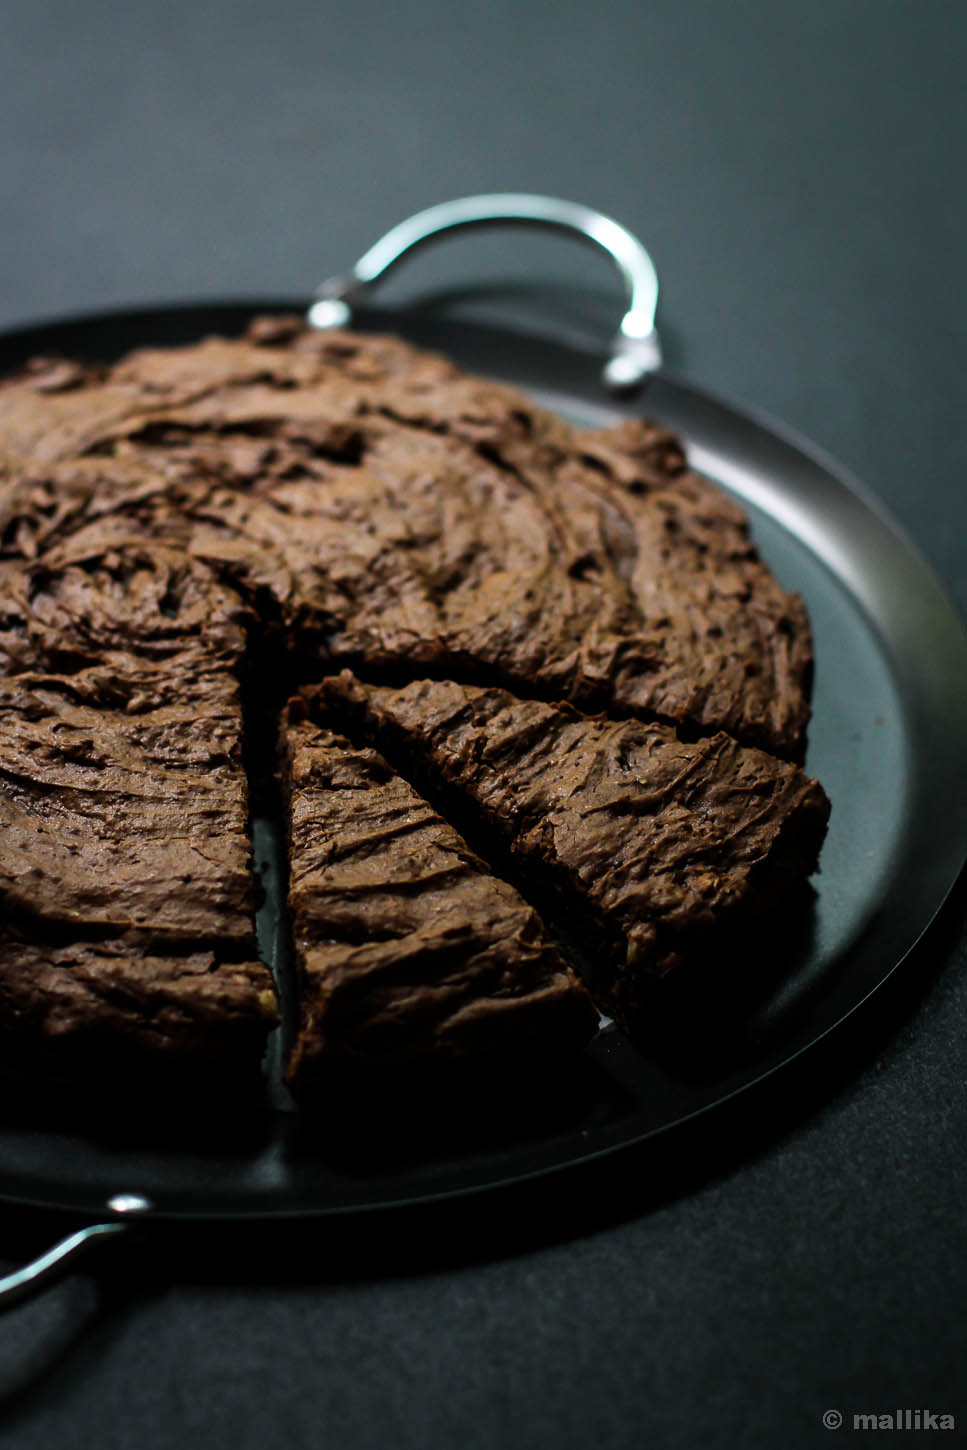
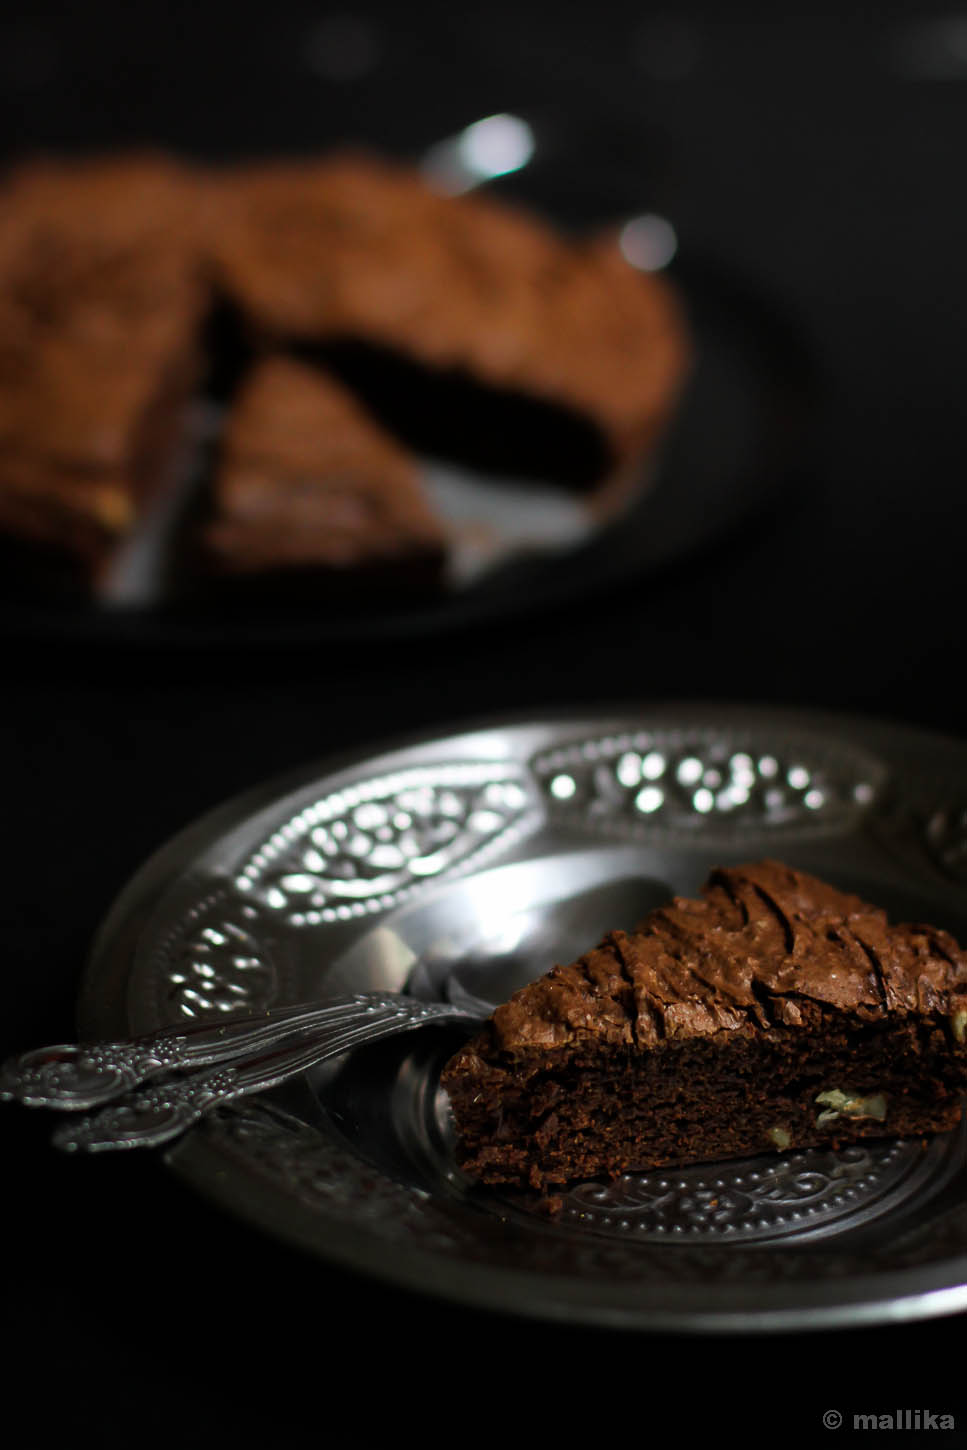
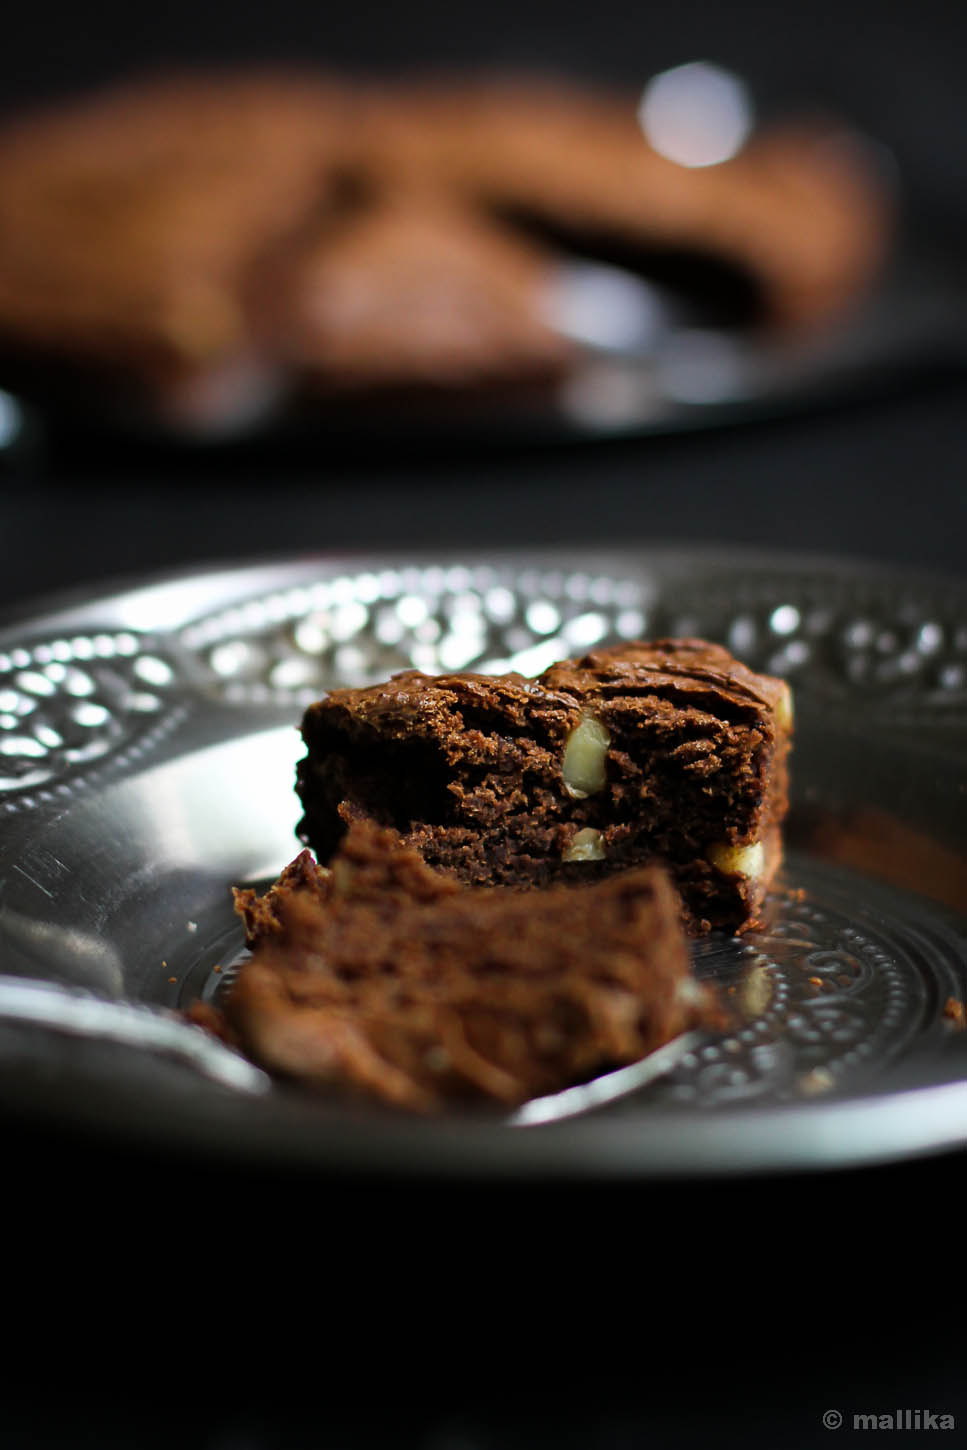
If you have excess avocados lying around like I had in plenty, you've got to make these. Let loose your fears and whip together all good ingredients to make these brownies. What makes them different is that there is absolutely no butter used in them. They are nearly fat free with the avocados lending all buttery sheen and fat. And I promise, you don't entirely taste the avocados, unless you have a strong nose and taste buds that poke through it sensitively.

Although I chose to go with all purpose flour in this recipe, quite so in fear of not turning this into an inedible disastrous recipe, I feel certain that wheat flour or a combination of wheat and all purpose flour should easily substitute with no compromise to taste.

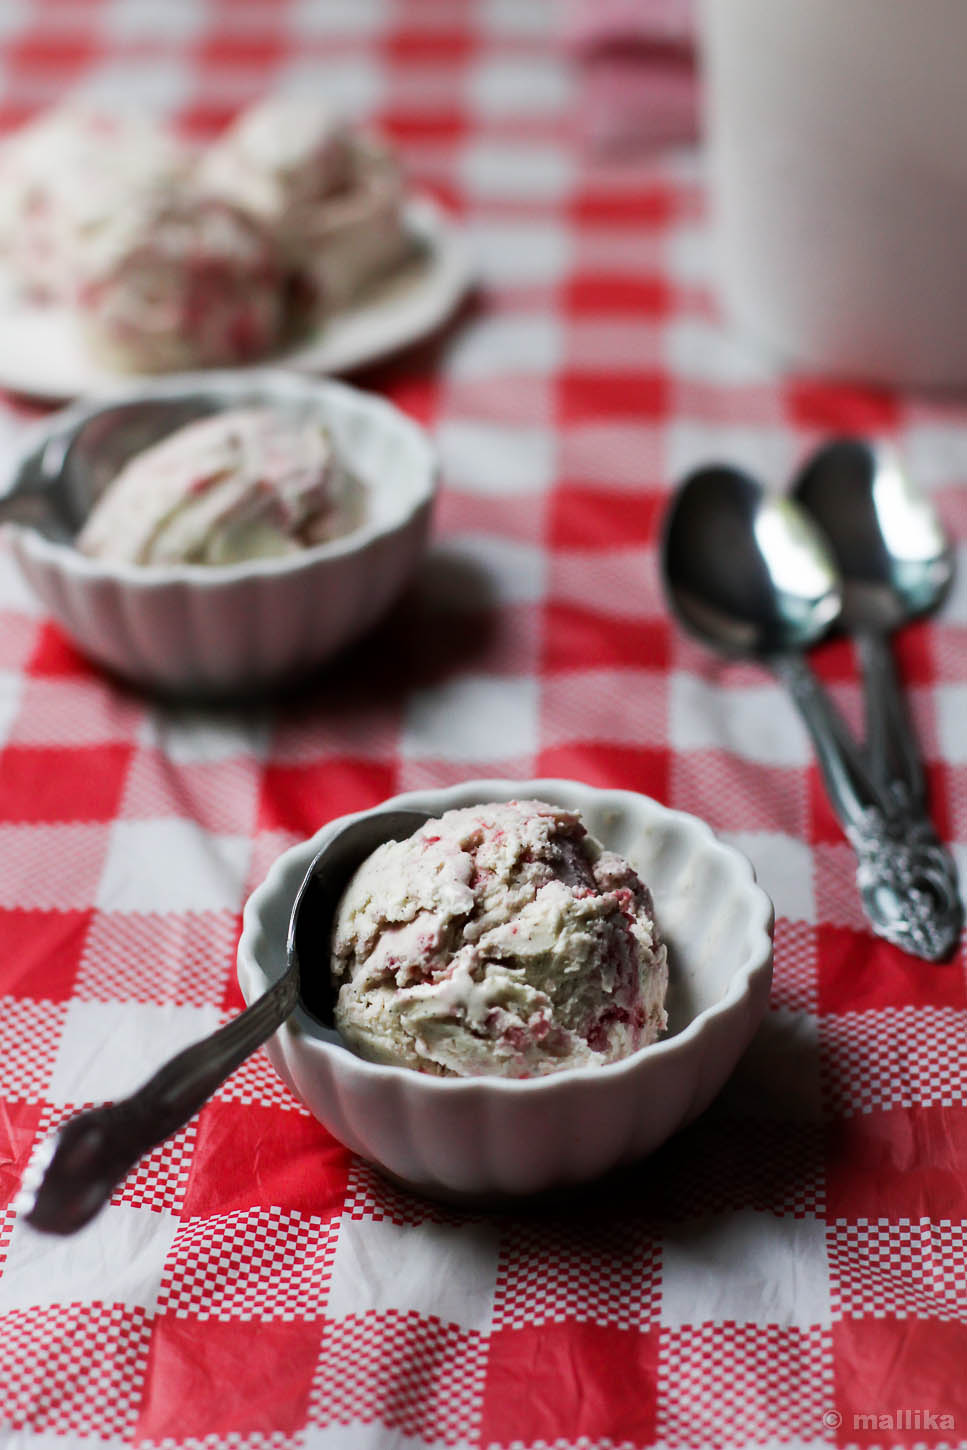
This recipe comes as a blessing for not just being healthy, but they make a great base in recipes that call for chocolate cakes and brownies. I made some brownie ice cream with these and that brushed off some guilt of being calorie conscious. They are great crumbled in trifles too, pairing beautifully in a good amount of fruity elixir. And ofcourse, if you've made these, then do not certainly forget to make some delicious Brownie Fudge Sundaes to share with your friends over a dinner party.

Avocado Brownie


"Healthy" Avocado Brownies

Inspired from here

INGREDIENTS

1/2 cup mashed avocado (about 1 medium avocado)
4 oz chocolate, chopped & melted (I used 1 bar of Hershey's dark chocolate)
3/4 cup organic raw cane sugar
2 large eggs
1 tbsp. pure maple syrup
1/2 cup unbleached all purpose flour
2 tbsp. cacao powder
1/2 tsp. sea salt
1/4 tsp. baking soda
1/4 cup chopped walnuts

DIRECTIONS

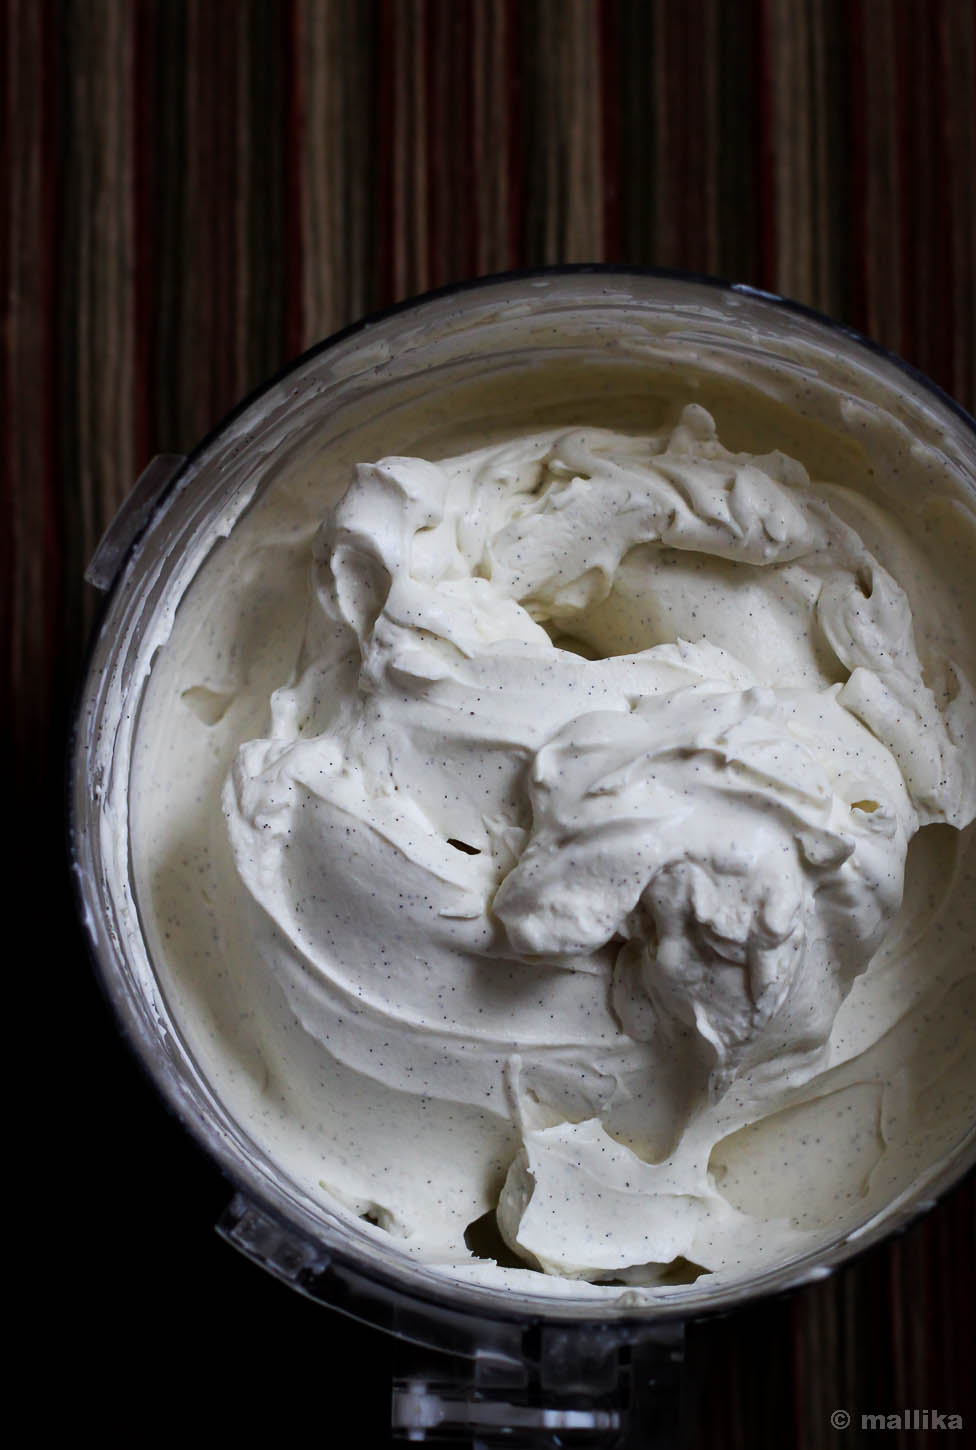
Preheat oven to 350 degrees Fahrenheit. Grease and line an 8x8 baking dish (either square or round) with parchment paper. Chop and melt the dark chocolate in a microwave for 30 seconds or on a double boiler till its just melted. In a food processor, whip up all the ingredients except the flour, baking soda and walnuts till they are homogeneous. Sift the flour and baking soda into a food processor bowl and pulse until well combined. The resulting batter will be very thick. Pour this batter into the prepared baking dish and level it with the back of a knife. Bake for 30-40 minutes, or till a skewer inserted in the center comes out nearly clean. Let it rest in baking dish for 5 minutes and cool further on a cooling rack.

Avocado Brownie Cubed


I often get invites for food reviews, but haven't actively participated in many. In a city that's ruled by heavy traffic and long travel hours, going out for food reviews after a long day at work doesn't thrill me much. But when the team at Sheraton send their invite, I do not think twice. It's a joy being there, each time and every time. As much the long travel stresses me, being at Feast, their signature multi-cuisine restaurant has always been a fantastic experience and eases me out. Their ambiance is warm and inviting, and their staff amicable and friendly as always.


Feast is out to host the much famed Chettinad food festival through this week. If you are from Bangalore, this ubiquitous cuisine needs no introduction to most of you. As often acclaimed to be a spice lover and non-vegetarian's delight, this food festival left me with deep impressions of unique flavors, spices and aromas of this region, demystifying all myths associated with typical South Indian cuisine of rice-rasam or idli-dosa. Quite surprisingly, the spread was elaborate with variety of options for vegetarians like me, which I had quite unexpected, so much that my non-vegetarian counterparts spreed themselves in vegetarian dishes with great delight.

As we sipped the jaggery based orange drink, which tasted quite like a subtle, Westernized version of our Paanaka, Chef Marty and Chef Sabari gave us a round of introduction to the Chettinad cuisine, walking us through their journey in exploring this cuisine by travelling down South to rural villages of Tamil Nadu, visiting homes there to understand the culinary traits of the Chettinad region and tap its roots. What came as an outcome from this food excursion, was a revelation that most homes around this region use minimal spices and oil, yet they rank high on flavor, as opposed to the way Chettinad cuisine is often acclaimed in restaurants. Ofcourse, it doesn't come as a surprise that this cuisine has always known to be high on heat, owing to the liberal use of peppers and chillies, that's traditional to their cooking.


The menu at Feast was quite expansive, ranging from live cooking stations for idiyappams, appams and paniyarams to starters with likes of mushroom pepper fry, a vegetarian twin of pepper chicken and banana blossom vadai, both of which were peppery and delectable. An island counter that hosted a spread of malagapudis and a variety of chutneys and pickles did leave our taste buds watering. It's hard to scoop out each of it and give a try, yet harder to resist. Nevertheless, we did give a try. While I do not have a big appetite for sundals, their baby corn sundal salad was quite a modish twist to the traditional version.

Conforming to traditional home styled way of cooking with spices used in moderation, Feast excels in bringing the best of this cuisine in terms of flavors, style, aromas and variety. Much of Chettinad menu sounds like a tongue twister to me, but that did not deter me from trying Mor Kuzhambu, Kathirikai Sadham, Kaikari Biriyani, Kathirikai Kuzhambu, Beetroot Kola Urundai and many others that I could barely pronounce, each of which were high on taste and flavor. The Beetroot Kola Urundai was rich and stood out from the rest, nearly resembling in flavor to the North Indian Kofta curry. The Pachadis served alongside the course acted like coolants and helped soothe the spice in the curries.

By the time we were done with the main course, we had stuffed ourselves to the brim, barely being able to move after such heavy indulgence. Yet, I always make some room for desserts. I forced myself to taste all of the four desserts on menu. Of all, Elaneer Payasam was fresh and subtle with hint of sweetness from tender coconut, while Asoka Halwa, that seemed quite close to the North Indian Moong Dal Halwa wins hands down! It was rich, full-bodied and flavorsome till the last bite. Had I not stuffed myself so full, I was sure to take couple of more helpings of this.


If you love hot, spicy food and swear by love for fiery taste buds, then you just have the right cuisine for you. Visit Sheraton and be a part of the grandeur of Chettinad. Indulge in the aromas and variety of spices that invite a mouthwatering prospect for every foodie!

August 25 - September 6 between 11:00am to 11:00pm

Feast, Sheraton Bangalore Hotel at Brigade Gateway,
Dr. Rajkumar Road, Bengaluru, Karnataka
Ph. No.: 08042521000 / +91-9880699111

Poha Chiwda

How to make Poha Chiwda | Avalakki Chiwda | Namkeen | Indian Snacks
With a vacation gone by, now that I am back in India, kind of jostled into a routine, placed our daughter in school and have resumed work full time, you would probably expect this to be sort of a travelogue post walking you though dozens of photographs from places far known and unknown, painting a picturesque comprehension for each. Let me put all guesses to rest. I may have been back here, but my mind is still in the roving. It wanders back and forth to the good time we spent with D. I would love to do a short walk through of the places we visited, which was in plenty. We spent good moments doing things together in threesome, but I feel simply unwilling to dig into those photographs and bring those moments into words here. Some things are best left that way. Imprinted in memories. When mere words cannot do justice.

Poha Chiwda


So as it goes, this is no travelogue kind-a post, but a recipe for an Indian savory snack I made in huge batches during our time in the US. We savored it by bowls on several evenings sitting by the wooden porch that overlooked the thick woods in our backyard. The moments slipped away without notice as we sipped into hot chocolate and tea, scooping spoonfuls of chivda into our palms, slowly savoring its crunch, while we tended to the young tomato plants that bloomed tender yellow buds in our garden.

On weekdays when D was away at work, the chivda became my sole savior as I flipped through light reads under the wraps of summer and streaks of golden sunlight. As the afternoons tranced into early evenings, there were days when our little girl kept herself busy dressing up her dolls, setting up the table and putting up a pretend birthday party for them. I would briefly give her company in the initial part of the play, pretending to be her helper, then, slowly whisk away to make time for myself, to play with real pots and pans in my kitchen that belonged to me.

Then, there were other days when she would get busy soaking up her fingers and clothes in spectrum of colors as Elsa and Sofia got painted in colorful attire in a way only she would fantasize. Their frills and veils were painted in reds, greens, blues, browns and whatnot, smudged in uneven tones and stressed outside the lines meant to define these beautiful damsels. That's the time I borrowed for myself in the kitchen, to dish out some delectable savory snacks that made us through those evenings till we waited for D to return from work.

Poha Chiwda


This Poha Chivda may remind you of your childhood spent visiting your relatives or friends, or of festivals like Diwali and Navrathri, when aunts brought in bowls of savory snacks served along with piping hot tea. Poha Chivda was and probably is still a common tea time savory dish in many Indian homes, served mid-noon along with tea or coffee, often store-bought and rampantly available in transparent polythene packets in every bakery and grocery store possible. Almost every house probably has had some version of it. At home, we call them all just 'chivda', which simply means an assortment of fried and seasoned ingredients usually with a base of flattened rice or cornflakes. Chivdas come in varieties, but there is no hard and fast rule on how you wish to make and what you wish to season them with. The store-bought ones are usually heavily seasoned and spicy, but I like to break rules and keep it simple, light and flavorsome.

My version here is quick with minimal ingredients. Its quite common to use fried cashews, raisins and sesame seeds for a more assorted rich taste. It takes about 15-20 minutes to put all of this together from start to finish. You could use fried whole red chillies instead of red chilli powder to reduce heat further. If you wish to try a low fat version and bake the poha, let me know how it works for you. For once, when I tried a baking attempt at this, it failed miserably. Try this and let me know how you like it.

Poha Chiwda


Poha Chivda | Namkeen Chivda | Avalakki Chiwda | Seasoned Flattened Rice

INGREDIENTS

3 cups poha / flattened rice (use thick variety)
1/2 cup peanuts
1/2 cup roasted gram bengal dal / channa dal / huri kadale
2 sprig curry leaves
1 tsp. oil for tempering
1 tsp mustard seeds
1/4 tsp red chili powder
1 tbsp. sugar or as required
Salt to taste
Oil for deep frying

DIRECTIONS

Heat enough oil for deep frying in a wide mouth pan or kadai or wok. Using a wide mouth strainer or a slotted spoon, deep fry the poha in hot oil. Do this in batches so that you fry them evenly till they swell up and become crisp. Remove and drain over a plate lined with kitchen paper. Fry all of the poha and set aside. Into the same oil, fry the roasted bengal gram dal till its golden brown. Remove and drain again on a kitchen paper. Next, fry the peanuts in this oil till reddish brown in color and drain on a kitchen paper. Fry the curry leaves till they crisp up. Drain and set aside.

Heat a teaspoon of oil in a separate pan. Fry mustard seeds till they pop. Add the red chili powder and mix in all the fried ingredients. Sprinkle sugar and salt to taste. Roast this for 2-3 minutes on a low flame to ensure all the spice, salt and sugar is well combined into the poha mixture. Adjust the spice according to your taste by adding more red chili powder if required.

Allow the chivda mixture cool completely. You can store this in an air-tight container at room temperature for couple of weeks.

Poha Chiwda

Oakleaf Greens Salad

How to make Oakleaf Lettuce with Strawberry Balsamic Salad Dressing
“Dusk is just an illusion because the sun is either above the horizon or below it. And that means that day and night are linked in a way that few things are. There cannot be one without the other yet they cannot exist at the same time. How would it feel I remember wondering to be always together yet far apart?” ― Nicholas Sparks, The Notebook

Nearly a week ago we drove 100 miles away from home and made our way mid-morning through the sultry heat and thick NYC traffic. We reached airport just in time, trying to save every bit of it for the last minute togetherness. We hugged D for one last time, in much of an emotional goodbye this time over the last year. Our little girl is now big enough to understand what separation in true sense means and what it is like being away from her dad for couple of several months, much of which she hadn't known all this while.

We left our soul back at home that served us for these 3 worthy months of time off and family time with D. Filled with beautiful memories of home and travel, spurred with endearing moments of togetherness, we left for our home back in India with a heavy heart. Across we flew passing by oceans, green pastures of Europe, desserts of Middle East, traversing continents and surging ahead of the horizon, witnessing the dawn and dusk twice in 24 hours. As much my eyes were filled with marvel at the world below, my mind was filled with anxiety of the long parting we have far borne as a family for so long. All of this comes with some hope that we will soon be together for good. A hope that is positive and stronger than any other besiege.

Oakleaf Greens with Strawberry Balsamic Dressing


We are living through jet lag and zonal differences at the moment. It may take a while, though not too long as we set back into a wonted rhythm. As the sun shines high up in D's land and brings glory of summer and sunshine, so comes this recipe from me to you for greens that were not so familiar to me, atleast not until D introduced me to a land where salad greens make a prominent presence on their aisle in almost every supermarket. I had little known Oakleaf greens, till D randomly picked a pack of salad greens on our regular grocery shopping one day and I instantly fell in love with them there on. They are wonderfully tasty and versatile with cheese and salad dressing of your choice, if paired. The Strawberry Balsamic Dressing gives a kick of tang against the sweet fruity jam, spiced up with liberal doses of fresh cracked pepper. I suggest you taste the sauce for yourself and adjust the ratio of sweet and tang to your liking. It flaunts well dribbled on crisp lettuce leaves, (either Oakleaf or Romaine would do) and saltiness from fresh feta, adorned with some berries and walnuts. Additionally, I love to serve this salad with cheese sandwiched artisan bread; which obviously does not make it gluten-free, if you abide by it. Choice is really yours.

Oakleaf Lettuce with Strawberry Balsamic Dressing

INGREDIENTS

5 cups Oakleaf Lettuce, red and green
2 tablespoons Feta cheese
2 tablespoons mix of berries like Cranberries and Goji berries
8-20 Walnuts

For the Strawberry Balsamic Salad Dressing

1 tablespoon strawberry jam, preferable homemade or low sugar
2 tablespoons balsamic vinegar
2 tablespoons extra-virgin olive oil
Salt and pepper, to taste

DIRECTIONS

Heat the balsamic vinegar in a small saucepan and bring to a rolling boil. Reduce the heat and simmer till the vinegar reduces to half and becomes thick. Turn off the heat and whisk in the strawberry jam and the extra-virgin olive oil. Season it liberally with salt and pepper.

Place the Oakleaf greens along with mix of berries and walnuts in a wide salad bowl. Drizzle the salad dressing and toss it well to coat evenly in dressing. Serve.

Oakleaf Greens Salad-1

Peach_Puff_Pastry_Tart_1

How to make Peach Puff Pastry Tart | Easy Peach Puff Pastry Tart Recipe
July has been a wonderful month bringing bounty produce and tons of inspiration to my kitchen. Its a month when all things living bud and bloom to glory. Foliage brim to lush greenness, healthy and flourishing. Weeds crawl themselves on to every inch of wilderness. Flowers burst into frenetic bloom. Markets bustle with vegetable produce in vividness and abundance. Fruits and berries make their way into our lives beyond what we could ask for. There's burst of color and splash of summer everywhere. July pampers you. It makes you feel luxuriant.

Summers here have been all high and at times 94 deg F (34 deg C) feels like 105 F (40 deg C). Yet, I am so much a tropical girl that I make best friends with summer and its givings. There is no moment left to slip away in rambling about heat. Instead we go farm-foraging for fruits with bags and baskets. At nearly the end of berry season, peaches and melons are here to replace them on stands.

Peach_Puff_Pastry_Tart_2


In less than a week, the daughter and I are heading back home, to India. Over two weeks ago, our little girl stopped her school here to resume the one she goes back home. She gets a small break before she gets back to track on another routine in India. As we've just begun bag packing, I shudder to think how quickly these three months have flown by, insanely quick, like a flash of lightening. While I'm thankfully lucky to be on a break from work and make a trip here the second time, it feels so unreal that its time to leave D's nest and fly back to another nest far away in another continent. Again, we leave in hopes and prayers for sooner family union.

These three months of vacation time have been wonderful. We witnessed the onset of spring and the way they silently slipped into summers, bringing with them the best of everything we love - the sunshine, the beaches, the road trips, the camping, the late evening partying, the farm foraging, berry picking, the evening walks at parks, the book hunting at the library, the lazying by the porch, the summer cooking, and lots more we did together. Instead of rumbling how much we will miss D and the moments we spent here with him, I leave you with this simple peach puff pastry tart that speaks bounty of summer - golden summery ochre with velvety skin and a delicate sweet aroma. Its so easy that you would be ashamed as put them together and shove them to the oven. Ofcourse that doesn't account for making puff pasty at home. But if you have them handy, you get away with assembling this in under 10 mins and another 20 min to bake, which is the oven's job!

Peach_Puff_Pastry_Tart_3


Simple Peach Puff Pastry Tart

INGREDIENTS

1 sheet homemade / frozen puff pastry
2 medium peaches
1 tbsp. of brown sugar (adjust according to the sweetness of your peaches)
2-3 tbsp. milk, to brush
1 tablespoon granulated sugar
Few pecans and mini chocolate chips to scatter

DIRECTIONS

Preheat the oven to 420 degrees F. Carefully roll / cut the puff pastry into strip of 4" x 8" inch. Cut the peaches in half and remove the pit. Slice peaches carefully into 1/4 inch. Arrange the peaches on the puff pastry overlapping each other. Sprinkle the peaches with brown sugar, pecans and mini chocolate chips. Brush the edges of the puff pastry with milk (alternative to egg) and sprinkle with sugar. Bake for 18-20 minutes or until the edges are a deep golden brown. Serve warm, preferably with a dollop of whipped cream or ice cream.

Peach_Puff_Pastry_Tart_4

Raspberry_Ice_cream7

How to make 'No Churn' Vanilla Bean Raspberry Ripple Ice cream
At this very moment, our home is raining stone fruits and berries. Cherries precisely. Followed by peaches. Early last week when we went berry picking to a local farm, I went totally ravenous just at the sight of beautiful sapphires and rubies dangling off the bushes and trees. We went picking as many fruits as we could, quite greedily, like there would be no another day for them; from tree to tree, bushes to bushes, buckets after buckets till the scorching summer heat tired us out. With trunk full of cherries and peaches, came along blueberries and raspberries too.

I love how much my fridge is brimming with these fruits in every corner of the space it can accommodate. Every morning, before I reach out to the can of milk to make tea for my family, my hands are drawn to these fruits quite instinctively. Usually a long gaze and in reverence, I pop in a couple of them to start the day with. Some are then packed off into snack boxes for my husband for his mid day snacking. Our mid-mornings and afternoons are usually spent either snacking on them or pitting them to be frozen for a good part of the year when all these little gems will be gone. I wonder if I would let them stay there for so long.

Quite often when I am at farmer's market to pick up fruits, my head bubbles up several ideas of turning them into more delicious treats. My shopping cart is always loaded with more than what we need. Rationally greedy at the fear of season's fag end. But more often I find myself being reluctant to rive and macerate them into any other form. We are a family who adores fruits. Fruit, in its true form.

Vanilla_Bean_Ice_cream Raspberry_swirl
Raspberry_Ice_cream_2


When we came home with pints of ripe raspberries hand picked from the farm last week, I made this easy Warm Spiced Raspberry Jam leaving out the Strawberries. They went into almost everything - our bread, the daughter's milk, drizzled on yogurt, including accompanying as sides for parathas. I saved a few raspberries for this rippled ice cream that had been playing up on my mind for long. A rippled ice cream, where the layers of contrasting colors and flavors, each complementing other beautifully, create beautiful swirls when scooped to serve. And what can be better than having luscious baby pink ripples between speckled vanilla bean deliciousness.

This ice cream is very simple, quick and easy to put together as it does not require any ice cream maker. Two basic ingredients, heavy cream and condensed milk go into making the base for this ice cream. It takes less than 10 mins from counter to freezer and you have one of the most easiest, creamy and delicious ice cream ever.

IMG_3023


'No Churn' Raspberry Ripple Ice cream (Vanilla Bean Ice cream with Raspberry Swirl) - Without Ice Cream Maker

INGREDIENTS

For the Vanilla Bean Ice cream:

400 ml heavy cream, cold
200 grams condensed milk, preferably cold
1 tbsp. good vanilla bean, seeds scraped
1 tbsp. vanilla essence

For the Raspberry Ripple:

1/2 pint Raspberries
2 tbsp. caster sugar

Place the raspberries along with sugar in a blender and blend them to fine puree. Pass this through a sieve to separate seeds. Cook this puree on medium heat for 10 mins or until slightly thickened. You don't need the consistency of a jam, however too thin puree may affect the texture of the ice cream.

To prepare the vanilla bean ice cream, whip the heavy cream till it holds soft peaks. Then add the condensed milk, vanilla extract and vanilla seeds from a pod of vanilla. Continue to whip until the mixture is smooth and fluffy and holds soft peaks. Transfer 1/3 of the ice cream mixture to a loaf tin or your ice cream container of your choice. Drizzle 1/3 of the raspberry syrup on top. Repeat another two times so you have three layers of each. Using a fork, gently swirl the ice cream mixture to create a rippled look. Cover with a lid or plastic wrap and allow the ice cream to set in the freezer for at least 4-6 hours.

Raspberry_Ice_cream_4

Cheese Swirl Brown Bread

How to make Cheese Swirl Brown Bread | Easy Cheese Brown Bread Recipe
What is it like to experience an earthquake under your feet? Feeling of tremors, panic attacks, the aftermath, heart beat thumping harder than anything else you have heard, home crumbling down to rubble, a piece of land that breaches to shatters, where uncertainly prevails, and much more??? I went through nearly the same plight the night day before.

It happens quite often that I drift away from my system unlocked while I attend to other household demands. This night too, like usual, I was part way through my blog when the clock announced it was time for dinner and hence I headed over to the kitchen to prep the table. Little had I known that I would soon be called for a shock. My little girl saw this as an apt moment of play to wiggle around the mouse and hover over a couple of blogger tabs. It threw me in jolts when I realized that a couple of playful clicks had led my painstakingly customized blog interface revert to plain ol' default layout. It may have been a matter of plain fortuity, but it costed me huge heart aches and couple of sleepless nights in return to see my space, my web home collapse to wreck, much like an earthquake. Or a web-quake?

More than a year ago, I completely revamped the look of my blog and customized it to my preference. It was an interface I loved thoroughly - a simple, 2 columned no frill plain Jane look. I worked through days and nights of editing CSS coding to get its final look. When I wished to go back to the backup file, a lot had been added and modified from my original layout. Over time, social icons and new widgets were added manually, which I had now lost them all.

Anyway, all of this comes as a blessing in disguise. I assume, this space needed a new look to kill that long held monotony. After hours of research and relearning CSS coding, I finally have just the right design and I like it every bit. I am still working through those petty modifications, but I am almost there. I hallowed through the past 48 hours untiringly to reconstruct this new look. Let me know, how you like it? Are you facing any issues? Drop your comments. Constructive, critical, whatever; I welcome them all.

Brown Bread Prep Work Brown Bread Prep Work - Cheese SpreadCheese Swirl Bread IMG_3472IMG_3479 Cheese Swirl Brown Bread_2


Beyond relearning the bits and pieces of long forgotten CSS coding that has kept me busy these couple of days, our summers have been good for now. Weather is warm and sun shines high up on almost every single day. One of the my favorite pastime this summer has been to rent books from the nearby library and read them by the porch. Apart from the usual splurge of novels, I have dug myself into couple of good cookbooks that have been quite instrumental in my kitchen during this vacation. One such inspirational cookbook that has kept me quite on my toes has been 'The King Arthur Flour Baker's Companion'. A book that I have come to adore so much. Of the several recipes that I tried, tested and succeeded, this Cheese Bread has been my current favorite. Ofcourse with some minor changes to the basic recipe, here's my version of the same - cheese swirled into basic bread recipe. They are wonderful as sandwiches or open faced toasts with avocados, cucumbers, onions and lettuce.

IMG_3553


Cheese Swirl Brown Bread

Inspired by 'The King Arthur Flour Baker's Companion'

INGREDIENTS

2 1/4 tsp. instant yeast
1/4 cup lukewarm water
1 cup lukewarm milk
1 1/4 tsp. salt
1 tbsp. sugar
2 tbsp. butter or vegetable oil
2 cups whole wheat flour
1 1/2 cups unbleached all purpose flour
2 tsp. Italian herbs
1 cup finely grated cheddar cheese
1/2 cup Parmesan cheese

DIRECTIONS

Combine all the ingredients except cheese and knead them together to form a smooth, pliable dough. Adjust the dough consistency with additional flour or water as needed. Cover and let it rise for atleast an hour or two, or till nearly doubled.

Transfer the dough to a well greased work surface and pat it into a 8"x 5" inch long rectangle. Combine both the cheeses in a separate bowl and spread it over the bread dough. Beginning from the closer end, roll the dough along with the cheese to form a tight roll. Pinch the seams together. Place the dough roll into a 9"x 5" inch baking pan, the seam side facing down. Allow to rise again for another 45 mins to an hour. Bake in the preheated oven at 350 deg F for 35 - 40 mins. Should the top brown too quickly, cover the top with aluminium foil and bake till the center sounds hollow. Allow to cool completely and then slice to serve.

Cheese Swirl Brown Bread Sandwich

Blueberry Muffins


It takes me a while usually to compose myself a good deal of writing here, that's if I have stayed too long away from thinking or haven't perched my fingers on the keyboard for a while. Although this not being the case always, I still feel like a sophomoric with words, for today. Where do I begin? What do I tell you?

We are past a week since the 4th of July and I hope you had a wonderful one like we did. Usually, for us, the 4th of July passes by without notice. That's if we were in India, it would have been just another day. Just like how the 3rd of July rolls up on the calendar, follows into the 4th and then into the 5th. But here in the US, it means more than just that.

I did not grow up learning a lot on American history. I don't remember a streak of it either. 4th of July passed as just another date on the calendar. Many years later when I started working, as part of the corporate curriculum, we were trained on the nuances of American lifestyle, their culture, and in general, their ways of life. We were taught, that while dealing with American clients, how one had to roll their tongue to get the 'R's right; a lesson or two that might impress an American and make us sound like one among them. It also preceded into understanding their holidays - the most essential and beneficial part of the training which came with some promises that every offshore engineer had an obligation to know. A promise of leaner workloads on those holidays, one that each of us looked forward to, a promise that one could possibly take a day off and travel far off place to meet their loved ones and share an extra day for the weekend. A promise that we could catch up some extra hours of lunch and coffee breaks that day. There were just a handful few to remember. Those handful that could be counted on fingertips, all defined well by dates and not by planetary movements like ours did. What thrilled us beyond all was the fact that most of these Federal public holidays were observed on the day preceding or succeeding weekend, irrespective of the day of week or weekend it falls in the year.

It intrigues me often why American Independence Day is always greeted with 'Happy 4th of July'. It could well be wished as Happy Independence Day! But like how most cultures are woven through customs and long time traditions, this one still remains to be called Happy 4th of July. So, I ask I hope you had a good one! And, if you know better, let me know why its a 'Happy 4th of July' and not 'Happy Independence Day'!

While the blog-sphere has vast variety of recipes flooding most spaces with the symbolic red and blue colors of the American national flag, I set out to bake some red and blue berry dotted muffins as a tribute to this tradition. My plans to bake Blueberry Raspberry Muffins toppled when I realized I was out of stock on Raspberries and was in no mood to rush out early in the morning. Nevertheless, these Blueberry Muffins were made and devoured for our breakfast, just the American way.

Blueberries


Blueberry Muffins

INGREDIENTS

3/4 cup all purpose flour + 1 tbsp to toss blueberries into
1/2 tsp. baking soda
1 tsp. baking powder
1/8 tsp. salt
1/2 cup sugar
1/4 cup vegetable oil
1 small egg (If using a large egg, suggest to use 1/2 an egg)
1/2 cup yogurt
3/4 cup fresh blueberries

DIRECTIONS

Preheat oven to 380 degrees F.

In a large bowl sift together the flour, baking soda, baking powder, and salt and set aside. Separately toss the blueberries with a tbsp of all purpose flour and set aside.

In another large bowl, whisk together the sugar, oil, egg and yogurt. Add the dry ingredients into the wet and stir the mixture gently using a wooden spoon in figure 8 motion. Add the blueberries to mixture, stir them in, reserving a handful of blueberries to be topped on the muffins.

Scoop the mixture to muffin cups and fill up to three quarters. Sprinkle the remaining berries on top of muffins and poke down lightly. Bake for 20 to 25 minutes, rotating pan halfway through. Remove from oven and turn out, and allow to cool completely. Serve warm or store in airtight container for 2 to 3 days.

Blueberry Muffins_2

Chewy Fudge Brownies


Life beats a charming rhythm when you uncork it from its mundanes. It sings a different chime when you whisk away from the regular. Our weekend went by, but it was nothing like the usual. Before it flipped over to Saturday, we headed out of city for three solid days of fun and adventure to a place we had little known or expected it to be. Well, two and half, if I have to be precise. North Conway it is known, a lovely little destination for home-lost adventurers like us. There's so much around there for every season that a couple of excuses to go back there again may not seem enough. Tucked in sheer wilderness under the bellies of New Hampshire, here's where every vacation can be an inspiration to another one.

As the roads wind up to the city of North Conway, the scenes change. Its urban at the face of it, yet cleverly rural. There are malls, restaurants and ad banners everywhere. Yet, as you drive up the northern hemisphere, the mountain peaks play a peek a boo at every tide of the road. There's a cast of green spell in all shades, a submission to nature, with breath taking views that make you wanderlust. It makes you twisted in tongue and in loss of words.

Chewy Fudge Brownies Prep


We went camping in a group of ten, living life in tents and sleeping bags, holding lanterns to cook food on the grill, sitting by the fire and toasting up s'mores, curling up the feet to bare the chilly nights and seeing starry constellations in inky-black skies. And that makes you forget the clock and the cameras too! For the first time ever, we took our SLR out on a trip and came home without shooting any on it. Its hard for me to swallow that.

New Hampshire does that to you. You get to live what you don't see everyday. Many choose to stretch their lazy bones on the sand, either batting their eyelids and soaking up some sun or, flipping a book. But, we went tubing along the river shores where the loons nest. We let the sun shine on our backs. We wallowed and waded through knee deep waters, where the sand and stones make you wiggle your toes and the sun seeps skin deep to stimulate melanin. We ventured into woods and echoed tweets of finches too.

Its the kind of place that makes you want to wake up early to chirping birds and stay up late to the sounds of cicadas. It doesn't matter what hour of the day you are stepping into. There always seems a pause. Where the only other sounds are either the ripples of the meandering Saco river, the sway of tall ferns and chirping of finches. That was our home for those two odd days, all well lived.

Chewy Fudge Brownies Cut


When the sun went down to take its customary daily dip, we warmed ourselves by the fire, lit up the grill and ate Quesadillas, Corn on the Cob and drank Sparkling Fruit Mocktails. Brownies followed for the dessert. I baked these Brownies in the morning we left out and took them along for those camping dinner treats. They are wonderful to share in a group where splurging on good food can never seem enough, more so when you are in a gang of ten odd folks who enjoy good food and hearty laughs!

These Brownies are one bowl and simple to make. They are a cross between fudgy and cake-like. While they don't slop, they are intensely chocolaty and rich, much fudge like. They have crackling tops which make them look beautiful. And, no Brownie is good without generous scatter of walnuts. I promise you will love them, as much we all did.

Chewy Fudge Brownies Bites


Chewy Fudge Brownies

INGREDIENTS

1/2 cup of unsalted butter, softened at room temperature
1 1/4 cup of bittersweet chocolate
1 cups of granulated sugar
1/4 tsp of salt
2 eggs
1 cup of plain flour
1 tbsp of cacao powder
1/2 tsp of instant espresso coffee powder
1/2 cup of broken walnuts

DIRECTIONS

Preheat the oven to 350 degrees. Prepare a 9x9” square baking pan by lining it with parchment paper. I like to let the edges of the paper hang up a bit on the sides to make it easy for the removal.

In a large saucepan, melt the butter. Add the chocolate chips and melt them over medium low heat. Once melted remove from heat. Alternatively, you can microwave the butter and chocolate chip on high heat for 1 min. Allow it to rest for 2 mins, then add the sugar, eggs, flour, cacao powder, espresso powder, salt and broken walnuts into the melted chocolate butter mixture. Whisk well together. Spread the batter evenly in the prepared pan, leveling the tops. Bake them for 35-40 minutes. Test by inserting a skewer at the center. The skewer will have flecks, however there should be no wet batter coming out of the baked brownies. Allow them to cool completely and then slice into squares before serving.

Chewy Fudge Brownies Stacked


Notes:

I've used cacao powder here. However, you may use cocoa powder and up the quantity to 2 tbsp. Cacao is stronger than cocoa powder, hence you will require more cocoa powder, if being used.